
Ever notice how bathroom ceiling paint always starts peeling right above the shower, in those weird bubble patterns that spread like a slow leak you can’t find? That’s moisture working under your paint film, and it won’t stop until you fix what’s causing it and seal the surface properly. Most quick patch jobs fail because they skip the root cause, whether that’s bad ventilation, hidden leaks, or just using the wrong paint for a steamy room. This guide walks you through diagnosing the real problem, removing damaged paint the right way, and repairing it so it actually lasts.
Why Moisture Causes Your Bathroom Ceiling Paint to Peel
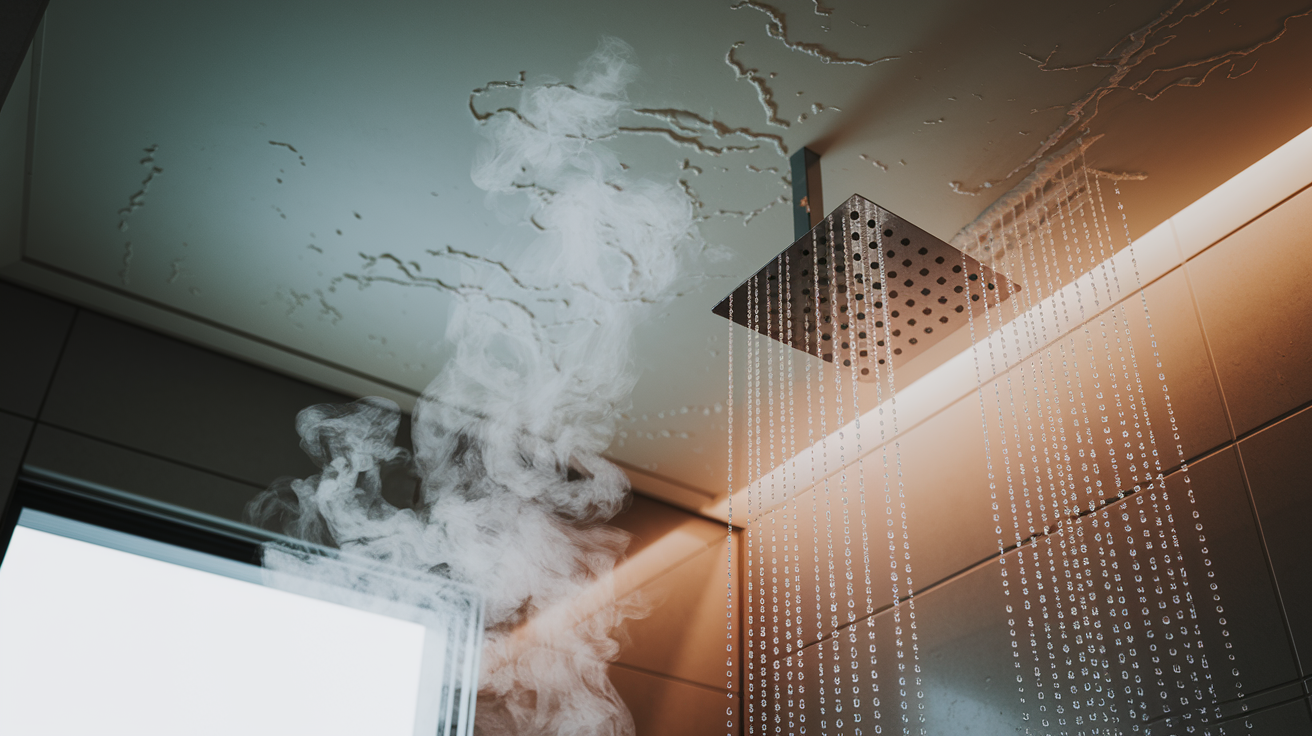
Bathroom ceiling paint peeling moisture happens when shower steam and condensation seep under your paint film and push it away from the plaster or drywall beneath. Hot showers create water vapor that rises to the ceiling, cools down, and turns back into liquid water droplets. Those droplets work their way under the paint edges, breaking the bond between paint and substrate. Think of it like how a sticker lifts off when water gets underneath it.
Poor ventilation creates the perfect environment for paint failure. When humid air can’t escape, moisture sits on ceiling surfaces for hours instead of minutes. This constant dampness prevents the ceiling from ever truly drying out between showers. Over weeks and months, that sustained exposure weakens paint adhesion until bubbling and peeling start. Using the wrong paint makes it worse. Non moisture resistant paints absorb water like a sponge, which speeds up the separation process and creates those soft, bubbled areas you can push with your finger.
Here are the most common specific causes:
Excess steam and condensation buildup from hot showers without adequate air circulation, creating water droplets that pool on ceiling surfaces
Inadequate bathroom ventilation due to missing exhaust fans, undersized fans, or fans that vent into attics instead of outside
Hidden water leaks from upstairs plumbing, roof penetrations, or condensation in uninsulated ceiling cavities
Improper surface preparation including painting over soap scum, old glossy paint, or dirty surfaces that prevent proper adhesion
Non moisture resistant paint selection such as standard interior flat paint that wasn’t formulated to handle bathroom humidity levels
Start by watching where the peeling happens. Damage near the shower that spreads across the ceiling usually points to condensation and ventilation problems. Isolated spots that keep getting worse even when you’re not showering often indicate a hidden leak. Run your shower and watch for new moisture patterns on the ceiling within 30 minutes. If you see condensation forming, poor ventilation is your culprit.
Inspecting Your Ceiling to Diagnose the Moisture Problem
Figuring out what’s actually causing the peeling saves you from fixing the wrong thing. A repair that ignores the root cause will fail again in a few months, so spend 15 minutes with a flashlight before you buy anything.
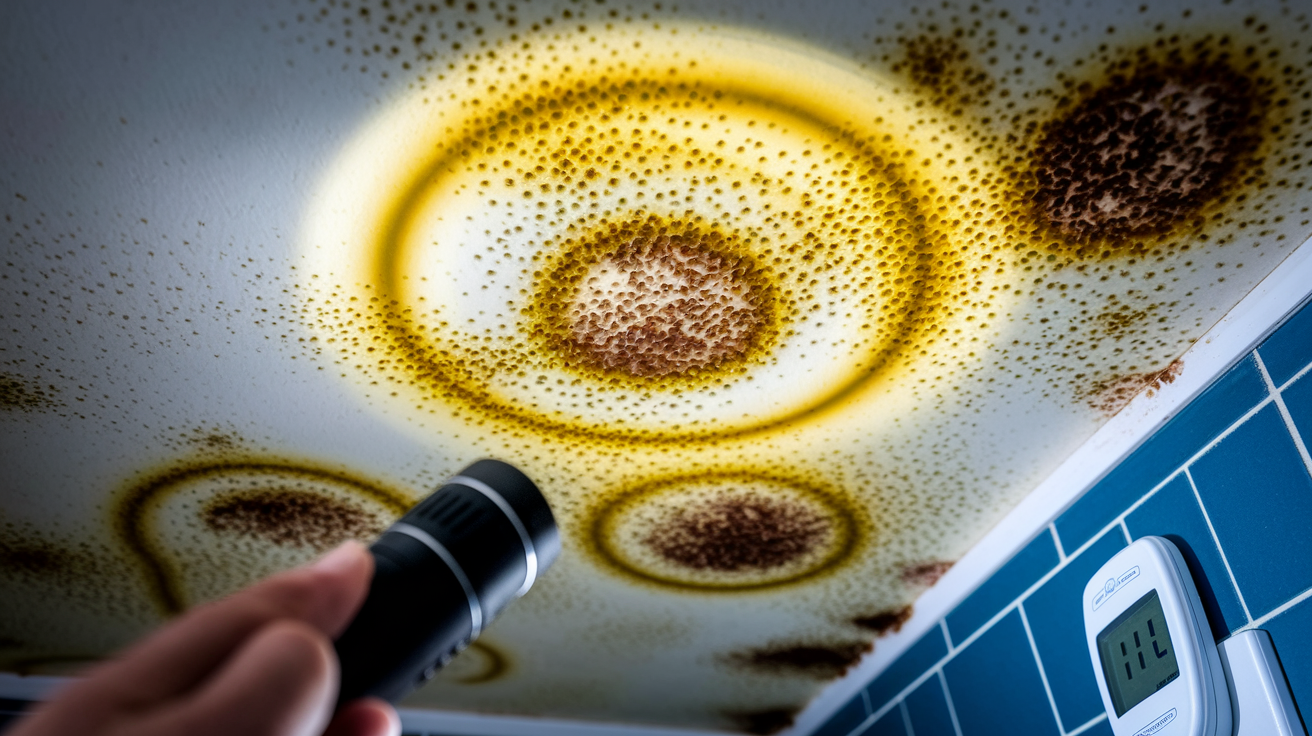
Look for water stains, which appear as yellow, brown, or rust colored rings or patches. Check the texture of damaged areas by gently pressing on them. Soft or spongy drywall means water has soaked into the substrate. Mold appears as black, gray, or greenish spots, usually in corners or near the shower. If paint feels sticky or you can push it around with your finger, moisture is still present.
Test for active leaks during and after water use. Run the shower at full hot for 10 minutes, then check upstairs plumbing if you have a second floor. Look in the attic or crawl space above the bathroom during and 30 minutes after the shower. Visible drips, damp insulation, or wet framing indicate plumbing or roof leaks that need fixing before any paint work starts.
Condensation damage spreads gradually across the ceiling in a pattern that follows air movement, while leak damage stays localized around the source and often gets worse over time regardless of shower use. Condensation peeling usually happens within 6 feet of the shower. Leak related peeling shows water staining that darkens after rain or during specific water use upstairs.
Essential Tools and Materials for Ceiling Paint Repair
Bathroom ceiling repair requires moisture specific products that standard interior paint can’t provide. Regular wall paint and primer will fail in high humidity environments because they aren’t formulated to handle constant steam exposure or resist mold growth.
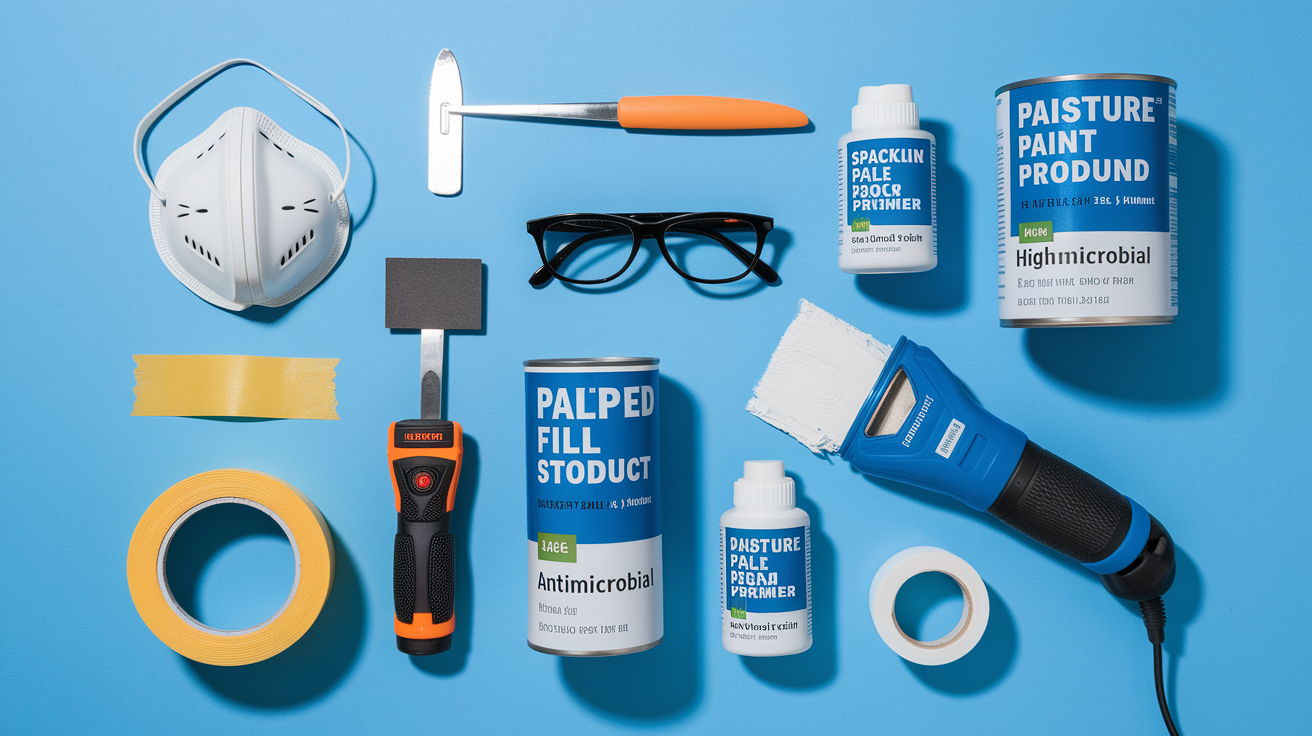
You need proper safety equipment for overhead work. A dust mask rated N95 or better to avoid breathing paint dust and old mold spores, and protective glasses to keep debris out of your eyes during scraping and sanding. Drop cloths protect your floor and fixtures. Tape off the drain before scraping so paint chips don’t clog your plumbing.
| Tool/Material | Specific Purpose | Recommended Type |
|---|---|---|
| Paint Scraper | Remove loose and peeling paint | 3 inch putty knife or dedicated scraper with comfortable grip |
| Palm Sander | Smooth ceiling and feather paint edges | Lightweight model with dust collection for overhead use |
| Sandpaper | Two stage smoothing process | Medium grit (80 to 120) then fine grit (180 to 220) |
| Deep Hole Filler | Fill gouges and significant damage | Spackling paste or deep fill compound that doesn’t shrink |
| Finishing Skim Compound | Level surface and smooth transitions | Watery leveling compound applied with brush and scraper |
| Peel Stop Primer | Bond old paint edges and seal cracks | Clear acrylic bridging sealer that stays flexible and allows moisture vapor to escape while preventing water penetration |
| Stain Blocking Primer | Seal water stains and prevent bleed through | Water based shellac primer with 45 minute recoat time, low VOC, acts as sealer and odor blocker |
| Antimicrobial Primer | Prevent mold regrowth on ceiling | Primer containing mold inhibiting additives or biocides |
| Bathroom Ceiling Paint | Final moisture resistant topcoat | Mold resistant paint with biocide protection, won’t soften when wet, 7 year durability rating |
| Cleaning Supplies | Remove dust and surface contamination | TSP substitute or sugar soap, sponges, clean water for rinsing |
| Safety Equipment | Protect lungs and eyes during work | N95 dust mask, safety glasses, drop cloths, painter’s tape |
Step by Step Process to Remove Damaged Paint from Ceiling

Removing damaged paint correctly prevents the new coating from peeling again in six months. Rushing through prep work is the main reason bathroom ceiling repairs fail.
Protecting the Bathroom and Yourself
Cover the floor with drop cloths or plastic sheeting, taping edges so they don’t shift while you work overhead. Remove light fixtures if possible, or wrap them carefully with plastic and tape. Tape over the shower or tub drain before you start scraping. Paint chips that go down the drain can cause clogs, and fishing them out later is miserable.
Put on your N95 rated dust mask and safety glasses before touching the ceiling. Old bathroom paint often contains mold spores, and scraping sends them into the air. Open the bathroom door and window if you have one. If the bathroom has an exhaust fan, run it during the entire scraping and sanding process.
Scraping Away Loose and Peeling Paint
Start at the most damaged area and work outward. Hold your scraper at a low angle, around 30 degrees to the ceiling, and push gently to lift loose paint. You’re looking for paint that comes away easily. When you hit paint that’s still firmly attached, stop scraping that spot. Don’t dig into the plaster or drywall trying to remove every speck of old paint.
Work in 2 foot sections so you can see your progress. Loose paint will feel soft or hollow when you tap it lightly with the scraper handle. Firmly attached paint sounds solid. Catch falling debris with your free hand when possible, then drop it into a trash bag. Take breaks every 15 minutes when working overhead to avoid neck strain.
Sanding and Cleaning the Surface
Sand the entire ceiling with medium grit paper (80 to 120 grit) using your palm sander. Focus on feathering the edges where old paint meets bare substrate. Feathering means gradually tapering the paint edge so there’s no visible step or ridge. This creates a smooth transition that won’t show through your new paint.
After sanding, vacuum the ceiling with a brush attachment, then wipe it down with a slightly damp cloth to grab remaining dust. Let it dry for 30 minutes. Then wash the entire ceiling with TSP substitute or sugar soap mixed according to package directions. This removes any grease, soap residue, or remaining dust that could prevent primer adhesion. Rinse with clean water and let the ceiling dry completely, which takes 2 to 4 hours depending on ventilation. Touch the ceiling in several spots. It should feel completely dry, not cool or slightly damp.
Treating Mold Growth Before Repairing Ceiling Paint
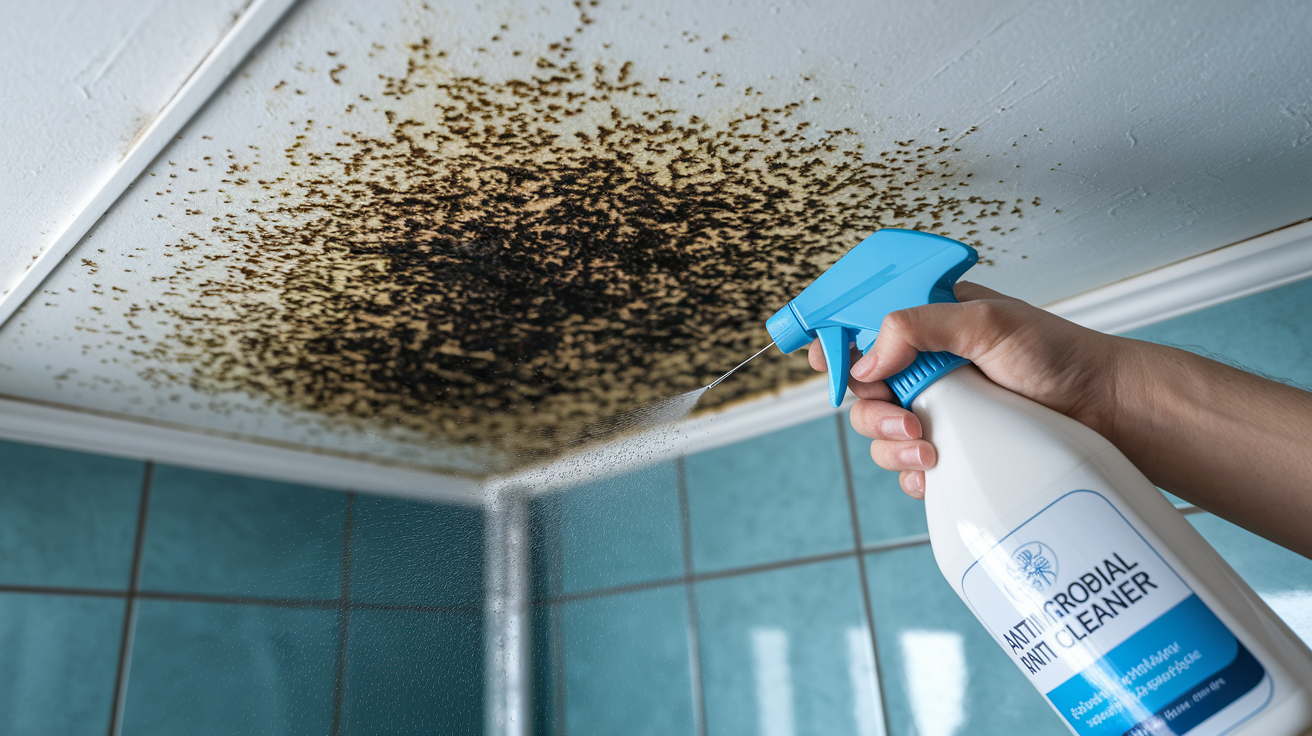
Painting over mold traps moisture underneath and creates a perfect environment for continued growth beneath your fresh paint. The mold will keep spreading, often faster than before, because the new paint layer seals in humidity. You’ll see dark shadows bleeding through within weeks.
Commercial mold killers work fastest and require the least scrubbing. Spray the product directly on visible mold and anywhere the ceiling looks discolored. Most formulas don’t require rinsing. If you’re using a bleach solution, mix one cup of bleach per gallon of water. Don’t use straight bleach, it’s too harsh and can damage drywall. Spray or wipe the solution on moldy areas, let it sit for 10 minutes, then wipe with clean water. Vinegar is a gentler alternative. Spray undiluted white vinegar on mold, let it sit for an hour, then wipe clean.
The ceiling needs 24 to 48 hours to dry completely after mold treatment. Humidity in the room slows drying. Run a fan or dehumidifier to speed the process. Check that mold is actually dead before you proceed. Dead mold looks lighter in color and stays put when you wipe it with a dry cloth. Active mold smears or feels slightly damp.
If you’re seeing mold across more than 10 square feet of ceiling, or if it keeps coming back after cleaning, the moisture problem is bigger than a DIY repair can fix. That usually means hidden water intrusion in the ceiling cavity that requires professional assessment and possibly opening up the ceiling to dry out framing and insulation.
Patching and Filling Damaged Ceiling Areas

Deep holes and gouges need a thick filler that won’t shrink as it dries. Lightweight spackling paste works for small dents. For anything deeper than 1/4 inch, use a deep fill compound or joint compound. Scoop filler onto your putty knife and press it firmly into the damaged area, slightly overfilling so it sits just above the surrounding surface.
Let deep fills dry according to package directions, usually 2 to 4 hours for small repairs. Sand them flush with the ceiling using medium grit paper once they’re completely hard. If the filled area still shows a depression, add a second layer after sanding the first.
Finishing skim is a watery leveling compound that smooths the entire repaired area and blends patches into surrounding ceiling texture. It goes on thin, more like thick paint than traditional filler. Pour some into a small container. Load a 2 inch paintbrush with compound and brush it onto the ceiling in random directions, covering patched areas and extending about 6 inches past them in all directions. Immediately follow with a plastic scraper or wide putty knife, holding it nearly flat against the ceiling and dragging it lightly across the wet compound to smooth it out.
Let the finishing skim dry overnight. It’ll look slightly darker when wet and lighten as it dries. Once it’s completely dry (usually 8 to 12 hours), sand the entire area with fine grit paper (180 to 220) using light pressure. You’re smoothing out brush marks and scraper lines, not removing the skim layer. Vacuum and wipe down the ceiling again before priming.
Applying Specialized Primers and Sealers for Moisture Protection
Bathroom ceilings need primers that create a moisture barrier while still allowing water vapor to escape through the paint film. Regular primer seals too tightly and traps moisture in the substrate, which causes new peeling from behind. Specialized bathroom primers bond to old paint edges, seal stains, and contain additives that prevent mold growth.
Here’s how to apply primer correctly:
-
Verify surface readiness. Touch the ceiling in multiple spots to confirm it’s completely dry and dust free. Wipe with your hand. If you see any white dust residue on your palm, clean the ceiling again.
-
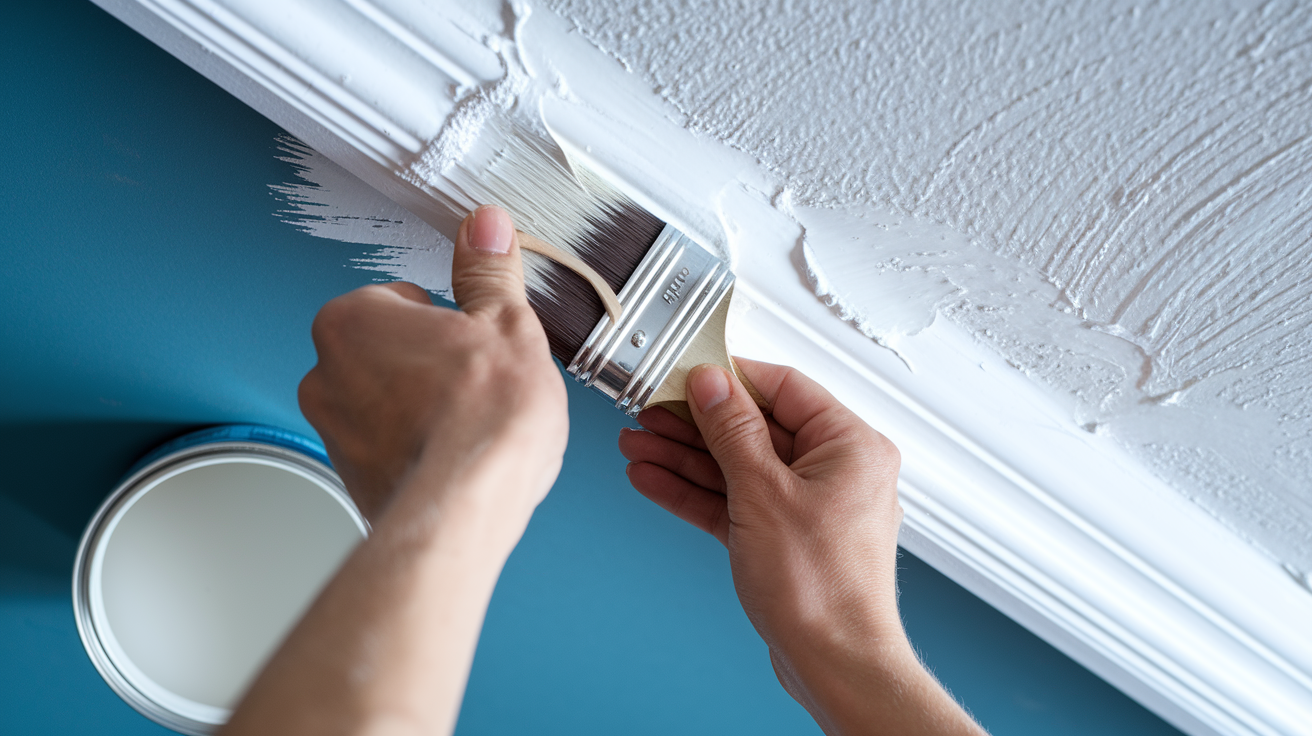
Cut in edges and corners first. Use a 2 inch angled brush to apply primer around the ceiling perimeter, in corners, and around light fixtures. This gives you a clean edge before rolling.
-
Roll the main ceiling area. Load your roller with primer but don’t oversaturate it. Roll in 3 foot sections using a W pattern, then fill in the W without lifting the roller. Work primer into any remaining texture. Don’t go back over areas that are starting to dry, you’ll create roller marks.
-
Apply generous coverage. A “generous” coat means you can’t see the old ceiling color through the primer. If you see patches of old paint showing through, add more primer to those spots immediately while everything is still wet.
Peel stop primers need overnight drying before you can paint over them. Stain blocking primers dry faster, usually 45 minutes to 2 hours, but check the can for exact recoat times. The ceiling should feel dry to the touch and look uniform in color before you apply paint. If any areas still look darker or feel cool, give them more time.
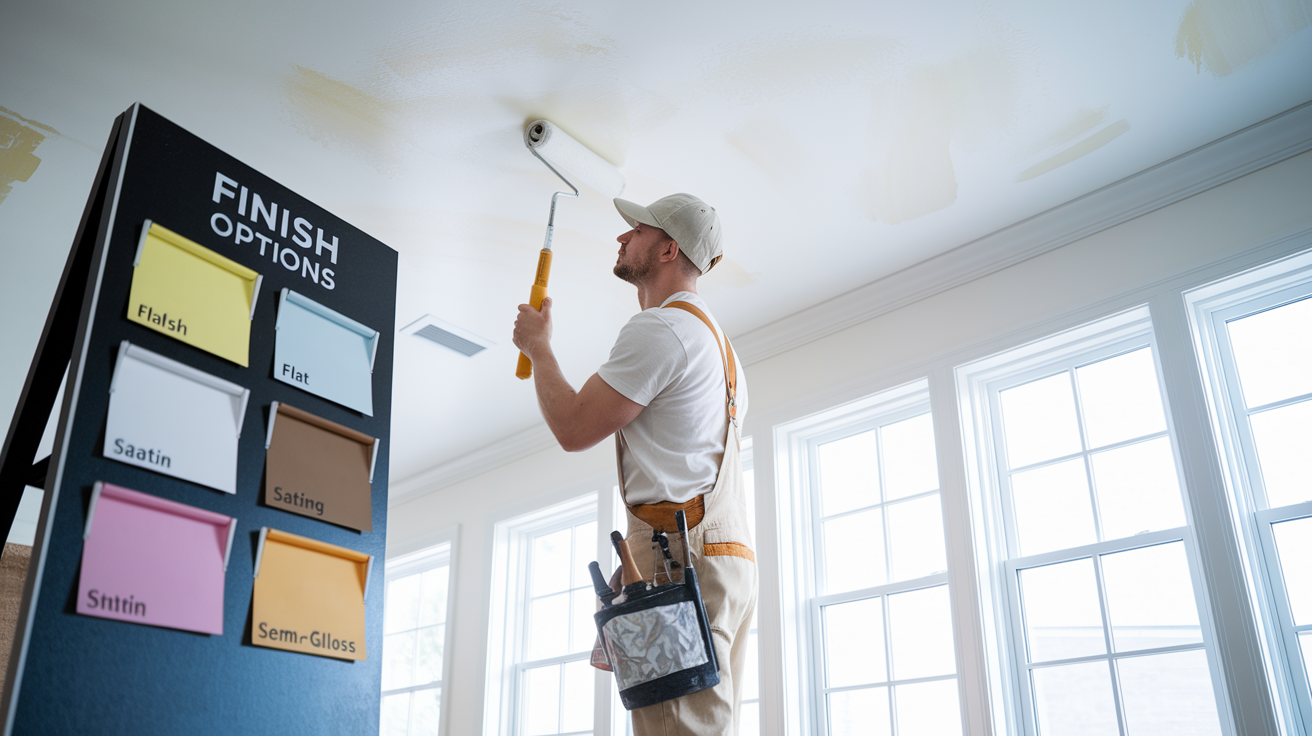
Choosing and Applying Moisture Resistant Ceiling Paint
Moisture resistant bathroom paint contains mildew inhibitors and creates a tougher film that won’t soften when exposed to steam. Standard wall paint absorbs moisture and breaks down in high humidity environments, which is why patch jobs with regular paint fail quickly.
Paint finish affects moisture performance:
Flat or matte finish absorbs water and shows every imperfection, not recommended for bathroom ceilings even if labeled “washable”
Eggshell finish offers slight moisture resistance but still absorbs some humidity, acceptable for powder rooms with no shower
Satin finish provides good moisture resistance and durability for most bathrooms, hides minor ceiling texture imperfections
Semi gloss finish offers maximum moisture protection and easiest cleaning, but shows every surface flaw and may look too shiny overhead
Specialized anti mold formulas contain biocides that actively prevent fungal growth, stay flexible when wet, designed for extreme humidity like swimming pools and hospital showers
Cut in ceiling edges with a brush, then roll the main area using the same W pattern technique you used for primer. Keep a wet edge by working continuously without breaks. If you stop mid ceiling and let an edge dry, you’ll see a line where old and new sections meet.
Apply three coats for maximum durability, letting each coat dry according to the paint can’s recoat time. Most bathroom paints dry to touch in 1 to 2 hours but need 4 to 6 hours between coats. The first coat seals the primer. The second coat provides moisture protection. The third coat ensures even coverage and maximum film thickness for long term durability.
Wait at least 24 hours before showering after your final coat. Paint feels dry to touch within hours, but full curing takes days. Using the shower too soon exposes uncured paint to steam and moisture, which can cause softening, sagging, or poor adhesion.
Preventing Future Peeling Through Moisture Control

Moisture control improvements are not optional add ons, they’re the reason your repair will last. You can execute perfect paint application, but without fixing the humidity problem, you’ll be repainting again in a year.
Exhaust Fan Installation and Upgrades
Calculate required fan capacity by multiplying your bathroom square footage by 1.1 if you have an 8 foot ceiling. A 50 square foot bathroom needs a 55 CFM (cubic feet per minute) fan minimum. Most building codes require bathroom exhaust fans to vent directly outside, not into an attic or crawl space. Attic venting just moves the moisture problem somewhere else where it damages insulation and framing.
If you have an existing fan that seems weak, check that the duct actually goes outside and isn’t crushed or disconnected in the attic. A timer switch prevents forgetting to turn the fan off. It’ll automatically run for 20 to 30 minutes after you flip the switch, which removes lingering humidity after you leave the bathroom.
Upgrade your fan if it’s more than 10 years old or if your bathroom stays foggy for more than 10 minutes after a shower with the fan running. Modern fans move more air while running quieter than older models.
Creating Cross Ventilation and Air Movement
Open the bathroom window during showers if you have one, even just 2 to 3 inches. This creates an escape path for humid air and brings in drier outside air. If you don’t have a window, crack the bathroom door and open a nearby window or exterior door to create airflow through the house.
A small circulation fan placed outside the bathroom and pointed away from the door pulls humid air out into the rest of the house where it disperses. Don’t point the fan into the bathroom, that just recirculates moist air.
Operational Habits That Reduce Condensation
Turn the exhaust fan on before you start the shower, not after. This establishes airflow before humidity spikes. Keep it running for 20 to 30 minutes after you finish showering. The ceiling and walls are still releasing moisture after you turn off the water.
If you have a window, crack it during your shower and leave it open for 30 minutes afterward. Cooler outside air mixing with warm bathroom air speeds up moisture removal.
Lower your water temperature slightly if you create a steam cloud that fogs the mirror immediately. Extremely hot showers generate far more water vapor than necessary for comfort. After showering, squeegee or wipe down tile walls and the tub. This removes water before it can evaporate into the air.
Target a bathroom humidity level below 50 to 60% to prevent condensation and mold growth. A simple hygrometer (humidity meter) costs under $15 and shows you when humidity is too high. If humidity stays above 60% even with the exhaust fan running, add a small portable dehumidifier in the bathroom or hallway nearby during humid seasons.
Additional prevention measures:
Use a bathroom dehumidifier during humid seasons when outdoor moisture levels are high and exhaust fans struggle to lower indoor humidity effectively
Monitor humidity with a hygrometer placed on a bathroom shelf or counter, keeping readings below 50 to 60% to prevent moisture damage and mold growth
Improve ceiling insulation to prevent condensation by adding insulation above the ceiling drywall, which keeps the ceiling surface warmer so moisture doesn’t condense on cold spots
Install or repair vapor barriers in ceiling cavity by placing plastic sheeting between insulation and drywall to block moisture from entering the ceiling structure
Inadequate ceiling insulation creates cold spots where warm, moist bathroom air hits the cooler ceiling surface and immediately condenses into water. This happens even with good ventilation. If your bathroom is on the top floor and the attic above feels significantly colder than the bathroom, poor insulation is contributing to your paint peeling. Simple prevention habits help too. Keep your shower curtain or door positioned to contain steam inside the shower area, not letting it flow freely across the bathroom. Hang wet towels outside the bathroom to dry. Wipe obvious water drips or puddles on the vanity and floor so they don’t evaporate and add to humidity levels.
Cost and Time Estimates for Bathroom Ceiling Paint Repair
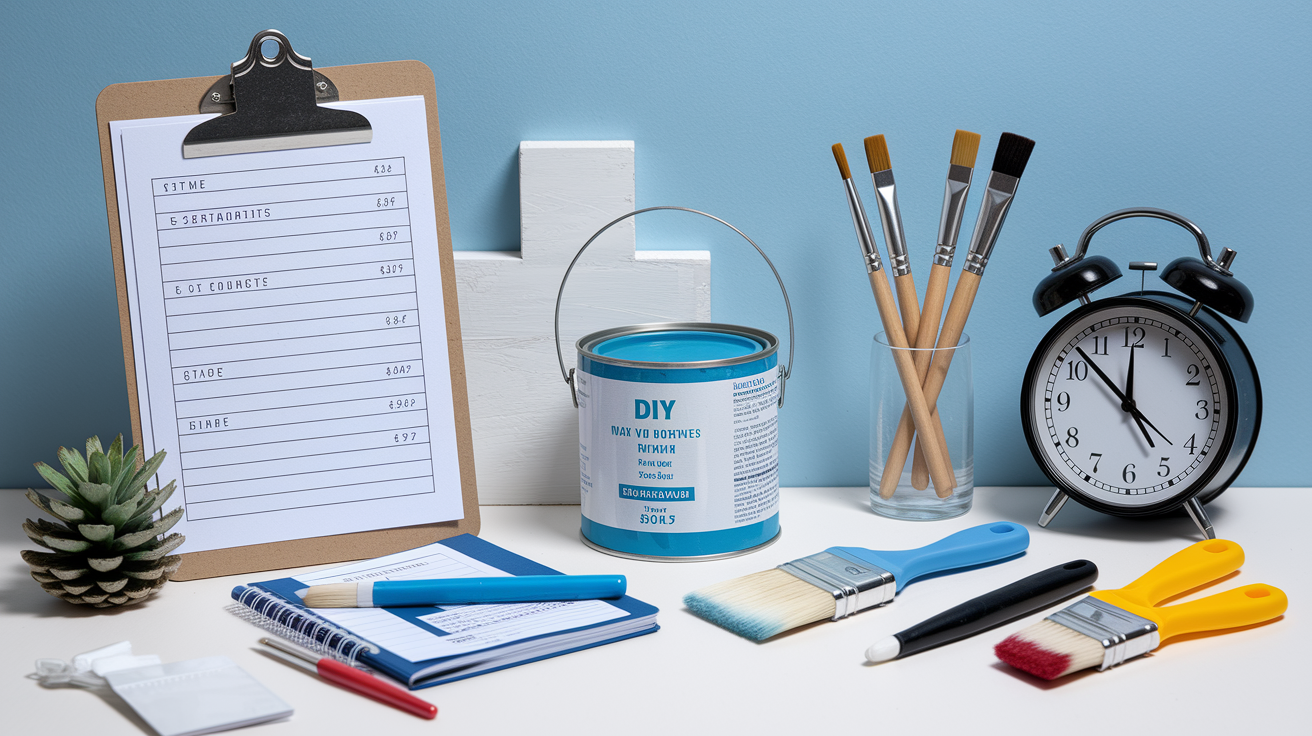
A complete DIY bathroom ceiling moisture repair typically costs $100 to $180 in materials. You’ll spend $15 to $40 on scrapers and a palm sander if you don’t own them already. Fillers and patching compounds run $10 to $25. Specialized primers cost $25 to $45 per quart, which covers most bathroom ceilings. Moisture resistant ceiling paint runs $30 to $60 per gallon. Safety equipment including masks, glasses, and drop cloths adds $15 to $30 if you’re starting from nothing.
Time breaks down across several days because of drying requirements. Prep work and scraping takes 2 to 4 hours depending on damage extent. Patching and filling takes 1 to 2 hours of active work, then overnight drying. Priming requires 2 to 3 hours including cutting in and rolling, plus 12 to 24 hours drying time. Three coats of paint take 4 to 6 hours total spread across two days with drying time between coats.
| Approach | Material Cost | Time Investment | Best For |
|---|---|---|---|
| DIY Basic Repair | $75 to $120 | 3 to 4 days (12 to 15 hours active work) | Small to moderate peeling, accessible ceiling, confirmed condensation cause |
| DIY Complete Restoration | $150 to $200 | 4 to 5 days (18 to 22 hours active work) | Extensive damage, multiple ceiling repairs, adding ventilation improvements |
| Professional Service | $400 to $900 | 2 to 3 days (1 to 2 hours of your time) | Hidden leaks, structural concerns, mold over 10 sq ft, recurring problems, time constraints |
When to Call a Professional for Ceiling Paint Problems
Some bathroom ceiling issues look like simple paint problems but actually signal bigger moisture or structural damage that DIY repairs can’t fix. Attempting repairs without addressing underlying causes wastes time and money on cosmetic fixes that fail again quickly.
Call a professional when you encounter these situations:
-
Recurring peeling after proper repair. If you’ve already completed a full repair with appropriate products and technique, but peeling returns within 6 to 12 months, hidden moisture sources require professional leak detection and building cavity investigation.
-
Suspected roof or plumbing leaks. Water stains that darken after rain, dripping sounds in walls or ceiling, or peeling that worsens regardless of bathroom use indicate active leaks requiring plumber or roofer diagnosis before any paint work starts.
-
Extensive mold coverage over 10 square feet. Large mold growth often indicates moisture problems in the ceiling cavity requiring removal of drywall, treatment of framing, and proper drying before reconstruction.
-
Sagging or soft drywall or plaster. Ceilings that feel spongy when pressed or show visible sagging indicate water saturated substrate and possible structural damage requiring professional assessment of framing and replacement of damaged materials.
-
Visible water staining that spreads over time. Growing water stains signal active moisture intrusion that must be traced to its source and eliminated before any repair attempt.
-
Musty odors indicating hidden moisture. Persistent damp smell even after visible mold cleaning suggests moisture and mold growth behind drywall that requires opening the ceiling to dry out and treat the cavity.
Professional diagnosis typically costs $100 to $250 for most moisture assessments and catches problems before they become expensive structural repairs. What looks like a $150 paint job sometimes reveals a $2,000 plumbing leak or roof problem, and finding that early prevents more damage.
Common Mistakes That Lead to Paint Peeling Again
Most bathroom ceiling repairs fail because of shortcuts and impatience, not bad luck. Patch up jobs using regular interior paint over quick surface prep work look fine for a few weeks, then start peeling again because the underlying problems weren’t addressed.
Here are the execution mistakes that cause repairs to fail:
Skipping primer application. Painting directly over patched areas without primer creates adhesion problems because paint can’t bond properly to filler, old paint, and bare drywall simultaneously.
Insufficient drying time between coats. Applying second coats before the first fully dries traps solvents and moisture in the paint film, creating soft spots that peel when exposed to bathroom humidity.
Painting over moisture or active mold. Sealing damp substrate or visible mold under new paint traps moisture and allows continued mold growth beneath the paint film.
Inadequate surface cleaning before painting. Dust, soap residue, or grease contamination prevents proper paint adhesion and creates weak points where moisture penetrates and lifts the paint.
Rushing through preparation steps. Quick sanding that doesn’t feather paint edges or incomplete scraping that leaves loose paint creates visible ridges and weak adhesion points.
Ignoring ventilation issues while repairing cosmetic damage. Perfect paint application over a properly prepped ceiling still fails if moisture continues accumulating because exhaust ventilation wasn’t improved.
The biggest mistake is treating ceiling paint peeling as just a cosmetic problem instead of a moisture management issue. You’re not repainting a ceiling, you’re solving a humidity control problem that happens to require new paint as the final step. Address what’s causing moisture accumulation first through ventilation improvements, then execute the repair with appropriate moisture resistant products. That sequence prevents you from doing this job again next year.
Final Words
Bathroom ceiling paint peeling moisture damage won’t fix itself, but now you’ve got the full repair path.
Scrape the loose stuff, treat any mold, seal with the right primer, and finish with paint that’s actually built for steam and humidity.
If you skip the ventilation upgrades, you’re just buying time until it peels again. Run that fan, crack a window, and keep the moisture moving.
Most of this is totally doable in a weekend. You’ll spend less than hiring it out, and you’ll know it was done right.
FAQ
Why is the paint in my bathroom ceiling peeling?
Paint in your bathroom ceiling is peeling because moisture from shower steam and condensation seeps under the paint and pushes it away from the surface. Poor ventilation, hidden water leaks, using non-moisture-resistant paint, or improper surface preparation during previous painting can also cause bathroom ceiling paint to peel and bubble.
Why is there moisture on my bathroom ceiling?
Moisture appears on your bathroom ceiling because steam from hot showers rises and condenses when it hits the cooler ceiling surface. Poor ventilation prevents this humid air from escaping, creating sustained condensation buildup. Hidden plumbing or roof leaks, inadequate insulation, and temperature differences between the bathroom air and ceiling can also create moisture problems.
How do you fix peeling paint from moisture?
You fix peeling paint from moisture by scraping away all loose paint, sanding smooth, treating any mold, filling damaged areas, and applying moisture-blocking primer before repainting with mildew-resistant bathroom paint. Installing or upgrading exhaust fans and running them during showers and for 20-30 minutes afterward prevents moisture from causing peeling again.
Does peeling paint mean damp?
Peeling paint does mean dampness or moisture is present, either from condensation, hidden leaks, or trapped water behind the paint surface. Paint bubbling and peeling indicates water has gotten between the paint and the ceiling substrate, compromising adhesion. Identifying whether the moisture comes from steam condensation or an active leak is essential before repairing the paint.