
You just spent thousands on radiant heated floors, and now tiles are popping loose. The culprit? Most tile installers use products designed for standard floors, not ones that cycle through daily temperature swings. When floor temps shift 15°F or more as your heating system runs, rigid thinset can’t flex with the expansion and contraction happening beneath. This guide walks you through diagnosing loose tiles without damaging buried heating cables, deciding when it’s safe to DIY, and using flexible products that actually hold up to the heat cycles your floor was built to handle.
Diagnosing Loose Tile Problems in Radiant Heated Floors

The fastest way to check for loose tiles is the tapping test. Use something solid like a screwdriver handle and tap across the floor. Tiles with good adhesion sound solid and dull. Loose tiles produce a hollow, drum-like sound that tells you there’s a void beneath. Work systematically across the floor and mark hollow spots with painter’s tape. If you’re hearing hollow sounds over more than a few scattered tiles, you’re likely dealing with bigger adhesive failure.
Visual inspection catches problems the tapping test might miss. Walk slowly across the floor and feel for tiles that rock or shift under your weight. Look closely at grout lines for cracks, separation, or crumbling sections. Check for lippage, where one tile sits higher than its neighbor. Fresh cracks radiating from tile corners often mean the tile’s moving. Grout that’s powdery or loose indicates the tile’s been flexing for a while.
Before you start any repair work on electric radiant systems, test the heating elements. Use a multimeter to check resistance and continuity according to the manufacturer’s specs. Document these readings. If resistance has changed significantly from the original installation values, or if continuity’s broken, you’ve got wire damage that needs professional attention before you touch anything else.
A systematic inspection covers:
- Identify heated zones by locating thermostats and reviewing any available installation plans to know where heating elements are located
- Document affected areas by photographing and measuring the extent of loose tiles, noting whether they’re clustered in one zone or scattered
- Check substrate condition by examining exposed edges near walls or transitions for cracking, delamination, or moisture damage
- Test heating system function by running the system and confirming it heats evenly without dead spots that might indicate prior damage
- Assess grout condition throughout the floor, not just around loose tiles, since widespread grout failure often signals bigger problems
- Determine repair scope by deciding whether you’re dealing with isolated failures or system-wide adhesion issues that need comprehensive fixes
Repair Decision Framework: When to DIY vs. Hire a Professional

The complexity and risk level of your repair depends on three factors. How many tiles are affected, whether you know exactly where the heating elements are, and whether the heating system’s still working correctly. Small, straightforward repairs fall within DIY capability. Larger or uncertain situations require professional help.
DIY repair makes sense when you’re dealing with one to three tiles in an accessible area, you’ve got the original heating system layout showing wire or tube locations, and your resistance or pressure tests confirm the heating system’s intact and undamaged.
Professional help’s recommended when:
- Damage affects more than three tiles or covers multiple separate areas across the floor
- Heating element locations are unknown because installation documentation’s missing or the system predates your ownership
- Electric system repairs require code compliance since any wire splicing or electrical connections must meet local electrical code
- Warranty preservation matters and DIY work would void manufacturer coverage on a relatively new system
- Substrate shows structural problems like cracks, significant deflection, or moisture damage that needs expert diagnosis
- Commercial installations are involved where building codes require licensed contractors for liability reasons
- You lack specialized tools like resistance testers, infrared cameras for wire location, or experience working around embedded heating elements
| Repair Scope | DIY Cost Range | Professional Cost Range |
|---|---|---|
| 1-3 tiles repair | $50-$150 | $200-$500 |
| 4-10 tiles repair | $150-$400 | $500-$1,200 |
| Extensive multi-area repair | $400-$800 | $1,200-$3,000 |
| Full reinstallation | Not recommended | $3,000-$8,000+ |
When selecting a contractor, look for documented experience with radiant floor tile work specifically, not just general tile installation. Verify they carry liability insurance that covers damage to heating systems. Ask whether they’re certified by the heating system manufacturer or have completed training for the specific brand installed in your floor. Request references from jobs involving heated floor repairs. Common DIY mistakes that lead to system damage or repeat failures include cutting too deep and nicking heating wires, using standard thinset instead of flexible adhesive, skipping the gradual temperature increase protocol after repairs, failing to achieve full thinset coverage that leaves voids, and reactivating the heating system before the adhesive has fully cured.
Step-by-Step Repair Methods for Loose Tiles

Tile repair over radiant heating breaks into three phases. Removing the damaged tile without harming what’s below, preparing a clean surface, and reinstalling with proper technique. Work slowly and carefully. Rushing increases the risk of damaging heating elements buried in the mortar layer.
Removing Loose Tiles Without Heating System Damage
Start by removing all grout around the affected tile. A grout saw works for hand removal, pulling the carbide blade along the joint repeatedly until you’ve cleared the full depth. An oscillating multi-tool with a grout blade speeds up the process but requires a light touch. Keep the blade centered in the joint, and don’t let it wander into the tile or the substrate. Removing grout first means you can break the tile with less force, which protects the layer beneath.
Once the grout’s out, break the tile starting from the center. Use a small cold chisel and a lightweight hammer. Tap gently at the tile’s center until it cracks, then work outward toward the edges in small sections. Pry up pieces carefully, keeping your tools shallow. The heating cables or mats sit in the thinset layer directly beneath the tile, usually within 3mm to 6mm of the tile’s underside. If you feel resistance that seems like more than just dried adhesive, stop and reassess. In electric mat systems, the membrane channels that hold the wires provide some protection and show you exactly where the cables run.
Preparing the Surface for Rebonding
Clean off old adhesive residue using a scraper or chisel held nearly flat against the substrate. Work gently to avoid gouging. If you’re down to the heating membrane or can see cable outlines, you’re at the right depth. Don’t try to remove every trace of old thinset, just the high spots and loose material. A shop vacuum removes dust and small debris better than sweeping.
Check for exposed heating cables or mat edges. If you see any, make sure they’re undamaged and still firmly embedded. For electric systems, run another resistance test. If the reading matches your pre-work test, you’re good. If not, stop and call someone qualified to repair heating system damage. The surface should be level with surrounding tiles, dry, and free of dust or oils. Some flexible adhesives require primer on dense substrates, so check the product instructions.
Installing Replacement Tiles with Proper Coverage
Back-butter the replacement tile by spreading a thin layer of flexible thinset on its back surface using the flat side of your trowel. Then apply thinset to the floor using the notched side, holding the trowel at a 45-degree angle. Proper coverage means the ridges from your trowel are uniform and cover the entire area without gaps. Press the tile into place with a slight twisting motion to collapse the ridges and spread the adhesive.
Full coverage eliminates voids that create weak spots and hollow sounds. Aim for 95% contact between tile and substrate, which you can verify by pulling up a tile during a test installation. Check that the tile sits level with its neighbors using a straight edge. Spacers keep grout joints consistent. After the thinset cures for the time specified on the bag, usually 24 to 48 hours, mix flexible grout according to instructions and fill the joints, working it in with a rubber float held at an angle.
Let the tile repair cure completely before reactivating the radiant heat. Most flexible thinset products need at least 7 days to develop full strength. When you do turn the heat back on, increase temperature gradually at no more than 5°C per day until you reach normal operating levels. Sudden temperature spikes can cause the repair to fail before the bond has fully matured.
Why Tiles Become Loose Over Radiant Heated Floors
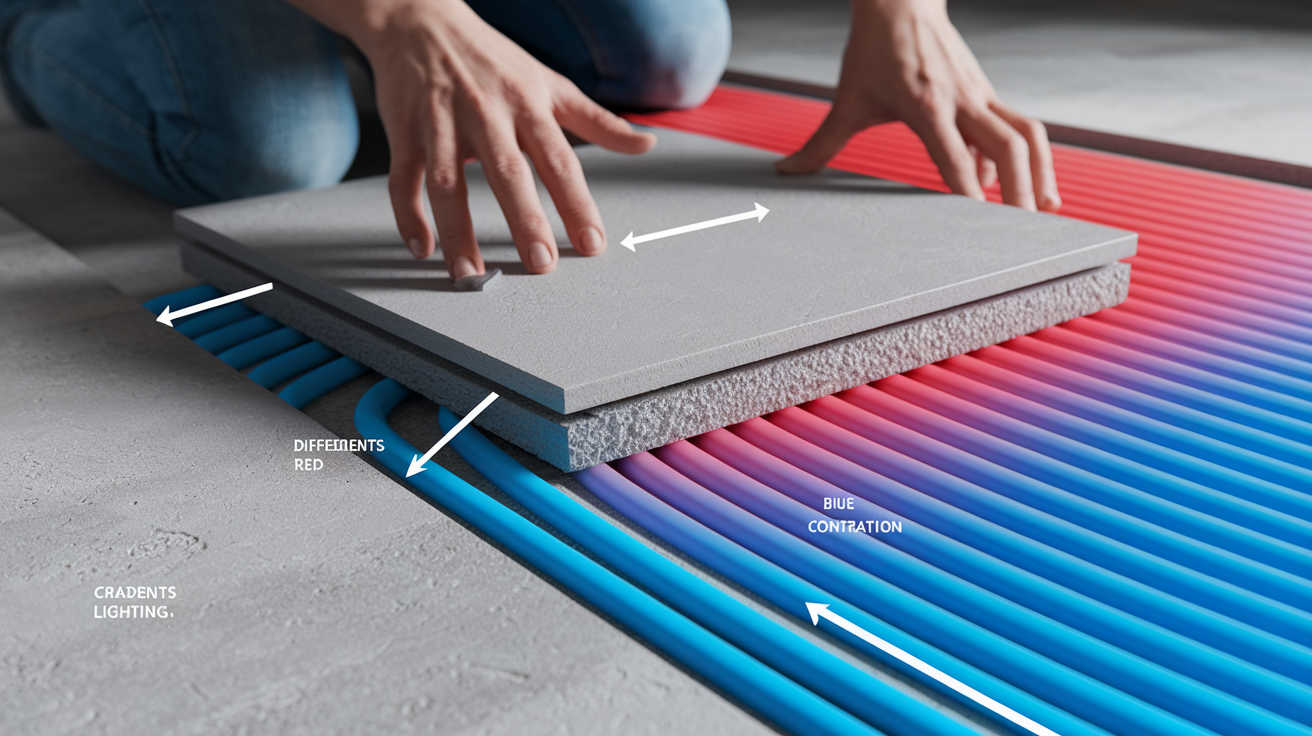
Radiant floor heating creates conditions that standard tile installations never experience. The substrate temperature swings as the system cycles on and off. In cold weather with high heat demand, the floor surface can run 15°F hotter than the room temperature. On mild days, the difference might be just a few degrees. These temperature swings happen daily throughout the heating season, and every cycle puts stress on the bond between tile and substrate.
Tiles, adhesive, and substrate materials expand at different rates when heated. This is measured as the coefficient of thermal expansion. Tiles, especially porcelain, have a low expansion rate. Thinset mortar and the screed or substrate beneath expand more. When the floor heats up, the substrate and adhesive grow slightly while the tile resists that movement. This creates shear stress right at the tile-adhesive interface. Cool the floor down, and everything contracts again, but not at the same rate. The tile wants to stay put while the substrate pulls away.
Temperature cycling makes it worse over time. Each heating and cooling cycle’s like flexing the bond line. Standard thinset mortar’s rigid and can’t accommodate that repetitive stress. It develops microcracks that grow with each cycle until the bond fails and the tile comes loose. Flexible, polymer-modified adhesives stay somewhat elastic and absorb small movements, but even they have limits. If the system wasn’t designed for thermal movement from the start, the adhesive eventually gives up.
Poor workmanship accelerates the problem. Thinset applied too thin or with incomplete coverage leaves voids where the tile isn’t supported. The unsupported areas flex more under foot traffic, which combines with thermal stress to break the bond. Subfloors that deflect excessively add mechanical stress on top of thermal stress. Installing tile when the substrate was too cold, too hot, or not fully cured means the adhesive never developed proper strength. And if someone used standard thinset instead of flexible adhesive rated for radiant heat, failure was inevitable.
Protecting Heating Elements During Tile Repair

Electric radiant systems typically have heating cables or mats embedded in the thinset layer directly beneath the tile. Hydronic systems use flexible tubing filled with hot water, which sits deeper in the floor assembly, often in a thicker mortar bed or within channels in specialized radiant board. The depth varies, but in most electric installations the heating element’s within 3mm to 6mm below the tile surface. That’s not much room for error when you’re chiseling out a broken tile.
Damaging a heating cable costs serious money to fix. You can’t just patch it with electrical tape. Repair requires specialized splice kits with heat-shrink insulation and watertight seals, and the work must be done by a qualified electrician to meet code. Puncturing a hydronic tube’s even messier since you’ll have water or glycol solution leaking into the floor structure.
Before you cut or chisel anything, figure out where the heating elements are. Original installation plans show wire spacing and layout patterns. If you don’t have plans, look for visual clues. Electric mat systems often use an uncoupling membrane with raised channels that hold the cables in a visible pattern. You can see and feel the cable locations through thin mortar. Loose-cable systems without membrane backing are harder to map. An infrared camera can sometimes locate active cables when the system’s running, showing heat signatures in a grid pattern. Mark cable locations on the tile surface with tape or chalk before you start removal work.
Keep hydronic systems under pressure during tile work. Before starting, note the system pressure on the gauge. If pressure drops while you’re working, stop immediately. You’ve hit a tube. For electric systems, check resistance before you begin, and test again periodically as you work, especially after removing each tile. Consistent readings mean the system’s intact. A sudden resistance change or loss of continuity means you’ve damaged a wire and need to stop for repairs before continuing.
Essential Materials and Product Selection for Radiant Heat Repairs

Standard materials fail over radiant heat because they can’t handle the movement. Rigid thinset cracks. Non-flexible grout crumbles. The repeated expansion and contraction cycles beat up materials that weren’t designed for thermal stress.
Flexible, polymer-modified products stay slightly elastic even after curing. The polymers let the material stretch and compress just enough to accommodate thermal movement without cracking. Products specifically rated for radiant floor use have been tested under temperature cycling conditions.
| Material Type | Specific Product Requirements | Purpose |
|---|---|---|
| Modified thinset | Polymer-modified, rated for radiant heat applications | Bonds tile to substrate with flexibility for thermal movement |
| Crack isolation membrane | Uncoupling membrane or anti-fracture sheet rated for thermal applications | Absorbs substrate movement and isolates tile from thermal stress |
| Flexible grout | Polymer-modified sanded or unsanded grout for radiant floors | Fills joints without cracking under temperature cycling |
| Primer/sealer | Compatible with thinset and membrane systems per manufacturer specs | Ensures adhesion on dense or questionable substrates |
| Replacement tiles | Match original tile type, size, and thickness for consistent heating | Maintains even heat distribution and appearance |
Buy products from the same manufacturer’s system whenever possible. Thinset, membrane, and grout from compatible product lines are engineered to work together. Mixing brands can create chemical incompatibilities that weaken bonds. Read technical data sheets for temperature ratings, coverage rates, and cure times. Some flexible adhesives require longer cure periods than standard thinset, which affects your project timeline but results in stronger bonds. Don’t try to save money on materials for a heated floor repair. The cost difference between standard and flexible products is minimal compared to redoing failed work.
| Material | Thermal Performance | Recommended For Radiant Heat |
|---|---|---|
| Porcelain tile | Very low expansion rate, excellent heat conductor | Yes, best choice for thermal stability |
| Ceramic tile | Low expansion rate, good heat conductor | Yes, works well with proper installation |
| Natural stone | Varies by stone type, some expand significantly | Select carefully, test compatibility, avoid soft stones |
| Large format tile | More thermal movement due to size | Yes, requires back-buttering and premium flexible adhesive |
Mix grout correctly by adding grout powder to clean water, not the other way around. Dumping water into powder creates lumps you can’t eliminate. After initial mixing, let the grout stand undisturbed for 2 to 3 minutes. This slake time lets the polymers fully hydrate. Re-mix for 30 seconds before application. The grout should be thick but spreadable, like damp sand you can pack into a ball. Use minimum 3mm spacers when setting tiles, even though you might be tempted to match narrower joints in the existing floor. Narrow joints crack more easily. Place expansion joints wherever different heating zones meet, around the floor perimeter, at door thresholds, and in any floor section over 15 feet in either direction. These joints handle concentrated movement that grout can’t absorb.
Proper Installation Techniques and Temperature Management for Prevention

Prevention through correct installation and careful temperature control avoids the entire problem. It’s cheaper and less frustrating than repairs.
Substrate Preparation Requirements
The substrate must be ready before any heating system or tile goes down. Moisture in concrete or cement screeds interferes with adhesive curing and creates weak bonds. Test concrete slabs and screeds with a moisture meter. Readings should be 75% relative humidity or less. For calcium sulphate screeds, the same 75% RH limit applies. Rushed installations over wet substrate almost always fail within the first year.
Cement-based screeds need time to cure before you introduce heat. Wait at least 21 days after pouring before switching on the heating system for the first time. Cementitious backer board installed over radiant board should be bedded in modified thinset and mechanically fastened with screws at recommended spacing. The radiant board itself gets secured to the subfloor with low VOC construction adhesive plus screws or cross-staples at eight points. Cross-stapling means placing two staples at opposing 45-degree angles close together, which resists pull-out better than single staples. Check that the subfloor’s flat to within 3mm over a 3-meter span. High spots cause tiles to rock. Low spots create unsupported areas that crack.
Uncoupling Membrane Installation
An uncoupling membrane’s a sheet layer that sits between the substrate and tile, isolating the tile from substrate movement and thermal stress. The membrane locks into the thinset below and provides a new bonding surface for the tile thinset above. Products like Schluter Ditra use a polyethylene sheet with a grid of square cavities that get filled with thinset from both sides. The mechanical anchoring in those cavities lets the membrane accommodate differential movement between substrate and tile without breaking the bond.
Install the membrane by troweling modified thinset onto the prepared substrate using the notch size specified by the membrane manufacturer. Press the membrane into the wet thinset, working from one end toward the other to prevent trapping air. Overlap seams according to instructions. Once the first thinset layer cures, trowel thinset over the membrane and set tiles. Back-butter each tile by spreading a thin layer of thinset on the tile’s back before placing it. This back-buttering, combined with proper troweling, achieves the 95%+ coverage that eliminates voids and prevents hollow spots.
Temperature Control Protocols
Before tile installation begins, the radiant heating system needs a full commissioning cycle. For hydronic systems, that’s a 7-day process of gradually heating the system to full operating temperature, running it for a period, then cooling it back down. This cycle lets the screed finish curing and reveals any leaks or system problems before tile goes down. Electric systems follow a similar process. Skipping commissioning means you’re installing tile over a substrate that’s still adjusting.
Temperature during tile work matters as much as preparation. The floor temperature should be no higher than 15°C (about 59°F) when you’re applying adhesive and setting tile. Higher temperatures cause the adhesive to dry too fast. Fast drying prevents proper chemical curing, leaving you with a weak bond that looks fine initially but fails under stress. If it’s cold weather and the building needs heat, run the system until the space is warm, then shut it down and let the floor cool to 15°C before you start tiling. Work in sections if needed to maintain temperature control.
After tile installation, hold the temperature steady. Don’t adjust the thermostat. Don’t turn the system off and on. Maintain that same low, constant temperature for a minimum of 7 days after grouting. The adhesive and grout need this stable environment to cure properly and develop full strength. Temperature swings during cure stress the immature bond and lead to early failures.
Post-Installation Temperature Increase
Once the cure period’s complete, bring the system up to operating temperature slowly using this protocol:
- Maintain constant low temperature for the specified cure period after grouting (7 days minimum for hydronic systems, 14 days for electric systems)
- Wait for the full cure time based on your system type before making any temperature adjustments
- Increase temperature gradually by maximum 5°C (9°F) per day, adjusting the thermostat setting once daily at the same time
- Monitor the floor carefully during temperature ramp-up for any tile movement, hollow sounds, or grout cracking that indicates problems
- Document the final operating temperature settings and use them as your baseline for future seasonal startups
These protocols prevent the bond failures that cause tiles to loosen. The extra days waiting for cure and the slow temperature ramp-up make the difference between an installation that lasts decades and one that needs repairs in the first year.
Troubleshooting Ongoing Tile Movement Issues

When tiles keep coming loose after you’ve repaired them correctly, something deeper’s wrong. Surface-level fixes won’t solve problems rooted in the structure or the system design.
Subfloor deflection’s the most common hidden culprit. Building codes specify that floors supporting tile should deflect no more than L/360 under load, where L is the span length. In plain terms, a floor spanning 12 feet should flex less than 0.4 inches under a concentrated load. Excessive deflection flexes the tile assembly with every footstep, constantly stressing the adhesive bond. Even flexible thinset can’t compensate for a subfloor that bounces. Walk slowly across the floor and feel for soft spots or spring. If you notice movement, or if dishes in a cabinet rattle when someone walks by, deflection’s likely your problem. Fixing this means reinforcing the subfloor structure with additional support, thicker sheathing, or a floating uncoupling membrane system that bridges movement.
Moisture cycling and thermal movement that wasn’t accommodated in the original design creates repeat failures. Concrete slabs expand and contract with seasonal moisture changes. In summer, slabs absorb moisture and expand. In winter, they dry out and contract. If the tile installation doesn’t include proper expansion joints at perimeters and between sections, that movement has nowhere to go except into the tile bond. Heating system temperature settings matter too. Running the system hotter than design specifications increases thermal stress beyond what the materials can handle. If your floor temperature regularly exceeds 27°C (about 80°F), you’re pushing the limits of most tile adhesive systems.
Fixing ongoing movement requires addressing the root cause, not just replacing tiles. Structural deflection needs subfloor reinforcement or a decoupling system engineered for movement. Missing expansion joints need to be cut in and filled with flexible sealant. Improper temperature control requires adjusting thermostat settings to manufacturer specifications. These are comprehensive solutions that involve more work and cost than repairing individual tiles, but they actually solve the problem instead of setting you up for another failure next year.
Maintenance Practices to Preserve Heated Floor Tiles
Proper maintenance protects your investment and extends system life. Radiant heated floors represent a significant expense in materials and installation labor.
Correctly installed and maintained radiant floor tile systems last decades. The heating elements themselves often carry 25-year warranties, and quality tile installations over stable substrates can outlast the building.
Regular maintenance includes:
- Gradual heating system startup each season by increasing temperature 5°C per day rather than jumping to full heat overnight
- Avoiding rapid temperature changes by setting the thermostat to a steady temperature instead of turning the system on and off frequently
- Regular grout inspection and resealing at least annually to check for cracks, crumbling, or separation that indicates movement
- Gentle cleaning methods using pH-neutral tile cleaners and soft mops that don’t stress grout joints with harsh chemicals or abrasive scrubbing
- Prompt repair of small cracks before they spread, since a single cracked grout joint can let moisture reach the adhesive and substrate
- Annual system performance testing to verify even heating across all zones and identify potential element degradation early
- Maintaining recommended temperature limits specified by the tile, adhesive, and heating system manufacturers, typically 27°C maximum floor surface temperature
- Documentation of repairs and system modifications including dates, materials used, and areas affected for future reference
Keep installation records accessible, including heating system layout plans, resistance or pressure test results, product specifications for adhesives and membranes, and installer contact information. When small problems show up, a cracked grout joint or a single hollow-sounding tile, address them right away. A crack that goes unrepaired for months turns into water damage and adhesive breakdown affecting multiple tiles. Following manufacturer maintenance schedules for your specific heating system ensures you catch developing issues before they become expensive problems requiring extensive tear-out and reinstallation.
Final Words
Loose tile over radiant heat isn’t just annoying. It’s a sign that thermal stress, adhesive mismatch, or substrate movement is working against your floor.
The good news? You now know how to diagnose it, decide whether to tackle it yourself or call in help, and choose the right flexible materials for a lasting fix.
If you’re repairing just a few tiles and your heating system checks out, this is very doable. Take your time with the cure period before you flip the heat back on.
And remember, gradual temperature changes and proper expansion joints prevent most of these problems from coming back.
FAQ
Can you tile over radiant heat?
You can tile over radiant heat when you use flexible, polymer-modified thinset and proper uncoupling membranes that absorb the differential movement between layers. Standard rigid adhesives will fail due to thermal expansion differences.
Can you retile over underfloor heating?
You can retile over underfloor heating by carefully removing failed tiles without damaging embedded heating elements, preparing the surface, and using flexible adhesives rated for radiant systems. Professional help is recommended when wire locations are uncertain.
What flooring can you put over radiant heat?
Flooring you can put over radiant heat includes porcelain tile, ceramic tile, natural stone, and engineered wood when installed with flexible adhesives and uncoupling membranes. Porcelain and ceramic offer the best heat transfer and dimensional stability.
How to remove tile over radiant heat?
To remove tile over radiant heat, first remove grout with a grout saw, then break the tile from the center outward using a small cold chisel without penetrating the mortar bed where heating elements are embedded. Keep all blade depths and chisel angles shallow.
How do you know if tiles are loose over radiant heat?
Tiles are loose over radiant heat when they sound hollow during a tapping test, move slightly when walked on, or show cracked and separated grout lines. Visual inspection and gentle pressure testing reveal poor adhesion before complete failure.
What causes tiles to debond from heated floors?
Tiles debond from heated floors because of thermal expansion differences between tile, adhesive, and substrate materials during heating and cooling cycles. Standard non-flexible thinset creates shear stress at bonding interfaces that weakens over time.
When should you call a professional for loose tile repairs?
You should call a professional for loose tile repairs when damage affects multiple tiles, heating element locations are unknown, or electric system repairs require code compliance. Extensive substrate issues and warranty preservation also require professional expertise.
What type of thinset works for radiant floor tile?
The type of thinset that works for radiant floor tile is flexible, polymer-modified thinset specifically rated for heated floors. Products like BAL Rapid Flex Fibre accommodate thermal expansion and contraction without bond failure.
How long before you can turn on heat after tiling?
You can turn on heat after tiling once the adhesive and grout fully cure, which is seven days minimum for hydronic systems and fourteen days for electric systems. Temperature must then increase gradually at 5°C per day maximum.
Do you need special grout for radiant heated floors?
You need special grout for radiant heated floors, specifically flexible grout like BAL Micromax3 that accommodates thermal movement without cracking. Standard rigid grout will crack at heating zone boundaries and tile edges during temperature cycling.
What is an uncoupling membrane for tile?
An uncoupling membrane for tile is a thin barrier layer like Schluter Ditra installed between substrate and tile that absorbs differential movement and thermal stress. It prevents substrate cracks from transferring to tile and isolates thermal expansion forces.
How much does it cost to repair loose tiles over radiant heat?
It costs between DIY material expenses of $50 to $150 for small repairs (one to three tiles) and professional services ranging $300 to $800 for similar work. Extensive multi-area repairs or full reinstallation can exceed $2,000 depending on floor size.