
You just scraped off a chunk of bubbling paint and spotted dark streaks underneath. That’s probably mold, and it changes your entire approach. Water damaged paint isn’t just ugly, it’s often covering active fungal growth that’ll wreck your repair if you seal it in with fresh coats. This guide walks you through the full sequence: stopping the leak, drying completely, killing mold, patching structural damage, blocking stains, and choosing moisture resistant paint that actually lasts. Skip a step and you’re repainting the same spot next year.
Step-by-Step Overview: Repairing Paint Peeling From Water Damage

Fixing peeling paint from water damage follows a specific sequence that decides whether your repair lasts six months or six years. You start by finding and stopping the moisture source, then move through complete drying and surface prep, then progress to structural patching, stain blocking primer, and finally moisture resistant topcoat painting. Skip steps or work in the wrong order and you’ll be back here in a few months staring at the same bubbling paint.
Most water damage paint repairs take 2 to 7 days depending on how bad the damage is and how long drying takes. A straightforward ceiling patch might cost $50 to $80 in materials. Extensive multi-room repairs with waterproofing can hit $200. The timeline breaks down roughly like this: 1 to 3 days for complete drying, 1 day for scraping and patching, 1 day for priming, and 1 to 2 days for painting with proper cure time between coats. The sections ahead walk through each phase with specific product names, technique details, and the exact sequence that prevents common failures.
Essential Tools and Materials Checklist
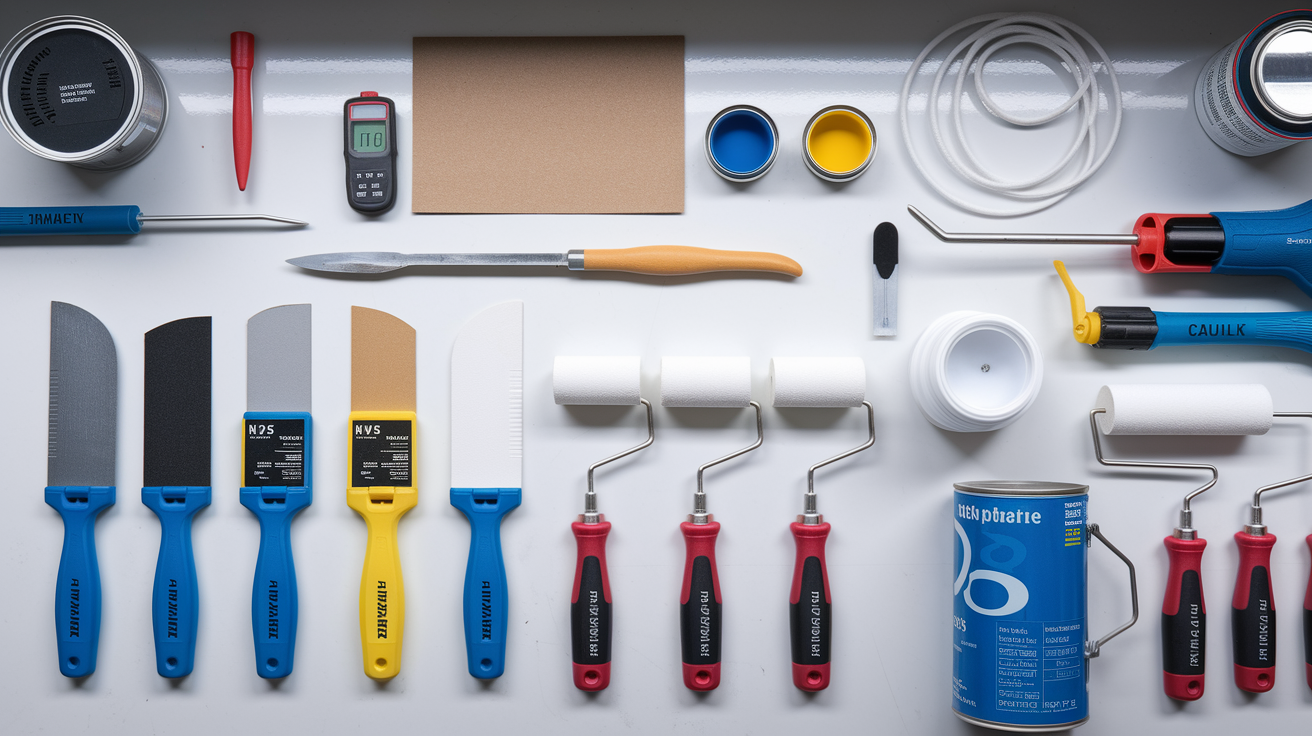
Having everything ready before you start prevents the frustrating mid-project trip to the hardware store when your patch is half dry and the store closes in 20 minutes. Gathering supplies upfront also lets you match materials to your specific substrate type, whether you’re working with drywall, plaster, concrete, or masonry surfaces.
| Tool/Material | Purpose | Approximate Cost |
|---|---|---|
| Moisture meter | Verify surfaces below 15% moisture before painting | $25-$50 |
| 4-inch putty knife | Scrape peeling paint at controlled angle | $8-$12 |
| Joint compound knife (6-inch) | Spread patching compound smooth and level | $10-$15 |
| Sanding blocks (80-grit and 120-grit) | Feather edges and smooth patched areas | $6-$10 |
| N95 respirator masks | Protect from dust and mold spores during scraping | $12-$18 (pack of 10) |
| Nitrile gloves | Protect hands from chemicals and prevent skin contact with mold | $8-$12 (pack of 50) |
| Drop cloths (canvas or plastic) | Protect floors from debris and spills | $15-$25 |
| Patching compound (powdered) | Fill holes and level damaged areas | $12-$18 |
| Stain-blocking primer (oil-based) | Seal water stains and prevent bleed-through | $25-$35 per quart |
| 100% acrylic latex paint (semi-gloss or satin) | Moisture-resistant topcoat with mildew resistance | $35-$60 per gallon |
| DAP Dynaflex 230 caulk | Seal gaps and joints to prevent future moisture intrusion | $6-$9 per tube |
| 50-pint dehumidifier | Remove moisture from air to accelerate wall drying | $180-$250 |
For primers, KILZ Original works well for general water stain blocking and costs around $25 per quart. Zinsser Perma-White Mold & Mildew-Proof runs slightly higher at $30 to $35 per quart but includes antimicrobial protection that makes sense for bathrooms or basements with recurring moisture issues. Both are oil based formulas that seal tannins and mineral staining better than latex primers. Benjamin Moore Aura Bath & Spa paint is the go-to topcoat for high moisture areas, priced around $60 per gallon but with superior mildew resistance and moisture deflection compared to standard interior paint.
The Klein Tools IR1 thermal leak detector costs about $10 and spots temperature differences that indicate moisture behind walls without cutting exploratory holes. Moisture meters in the $25 to $50 range give you actual moisture content readings, which removes the guesswork about whether a wall is dry enough to paint. A 50-pint dehumidifier handles rooms up to 3,000 square feet and typically costs $180 to $250, but it’s worth buying instead of renting if you’re dealing with basement moisture or live in a humid climate where you’ll use it regularly.
Safety equipment matters more than people think when dealing with water damage. N95 masks filter mold spores and drywall dust that you don’t want in your lungs. Nitrile gloves protect against both chemical exposure from cleaners and primers, plus direct contact with potential mold on damaged surfaces. If you’re working in a pre-1978 home, assume lead paint is present and upgrade to a P100 respirator with proper lead rated cartridges, plus disposable coveralls to prevent tracking contaminated dust through your house.
Identifying Water Damage Sources Before Paint Repair
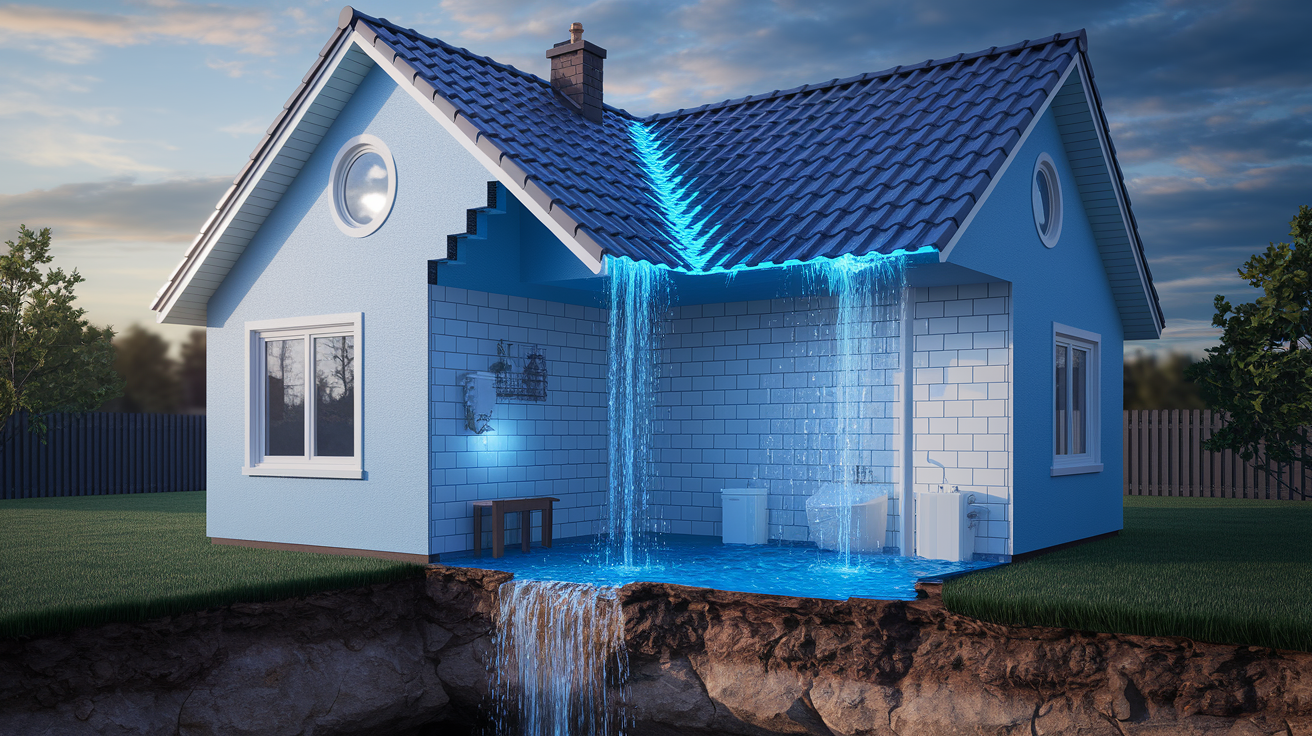
Fixing peeling paint without stopping the moisture source is like bailing water from a boat with the drain plug still out. Your repair might look fine for a few weeks, but moisture will creep back and lift the new paint just like it did the old stuff. According to EPA data, over 40% of home moisture issues trace back to hidden leaks that aren’t obvious from a quick visual inspection.
| Moisture Source | Signs to Look For | Common Locations |
|---|---|---|
| Roof leaks | Water stains shaped like drips, damage near ceiling edges, wet spots after rain | Under roof valleys, around chimneys, near skylights, at flashing joints |
| Plumbing leaks | Damage below bathrooms, near pipes, rust stains, sound of running water when fixtures are off | Under sinks, behind toilets, at supply line connections, inside walls near showers |
| Groundwater seepage | Damage on lower walls or floor level, white mineral deposits, musty basement smell | Basement walls, foundation cracks, floor/wall joints, window wells |
| Condensation buildup | Droplets on windows, mold in corners, damage in cold months, improved ventilation helps | Bathrooms without exhaust fans, poorly insulated exterior walls, cold water pipes |
| Structural cracks | Visible cracks in walls or foundation, damage patterns following crack lines, seasonal worsening | Foundation walls, around windows and doors, at corner joints, settlement cracks |
The Klein Tools IR1 thermal leak detector costs around $10 and works by showing temperature differences on surfaces. Wet areas appear cooler than dry areas, so you’ll spot moisture intrusion even when the surface looks and feels dry. Point it at walls and ceilings near damage zones, and watch for temperature drops that indicate hidden moisture. Moisture meters in the $25 to $50 range give you actual percentage readings. Wood and drywall should measure below 15% moisture content before you start repairs. Anything above that means more drying time is needed, even if the surface feels dry to your hand.
Sometimes you’ll find old water damage that’s completely dry now. The leak got fixed months ago, but the stained, peeling paint remains as evidence. That’s fine for DIY repair as long as your moisture meter confirms the area is truly dry and you’ve verified the original source is resolved. The trickier situation is damage in random spots where no obvious moisture source exists, like paint peeling on the bottom third of a wall with no plumbing above it and no exterior water issues. That usually points to condensation problems, inadequate vapor barriers, or moisture wicking up through the foundation. If you can’t identify a clear cause after checking roof, plumbing, grading, and condensation patterns, that’s when professional assessment makes sense before you spend money on repairs that might fail.
Drying and Mold Prevention Steps for Water Damage
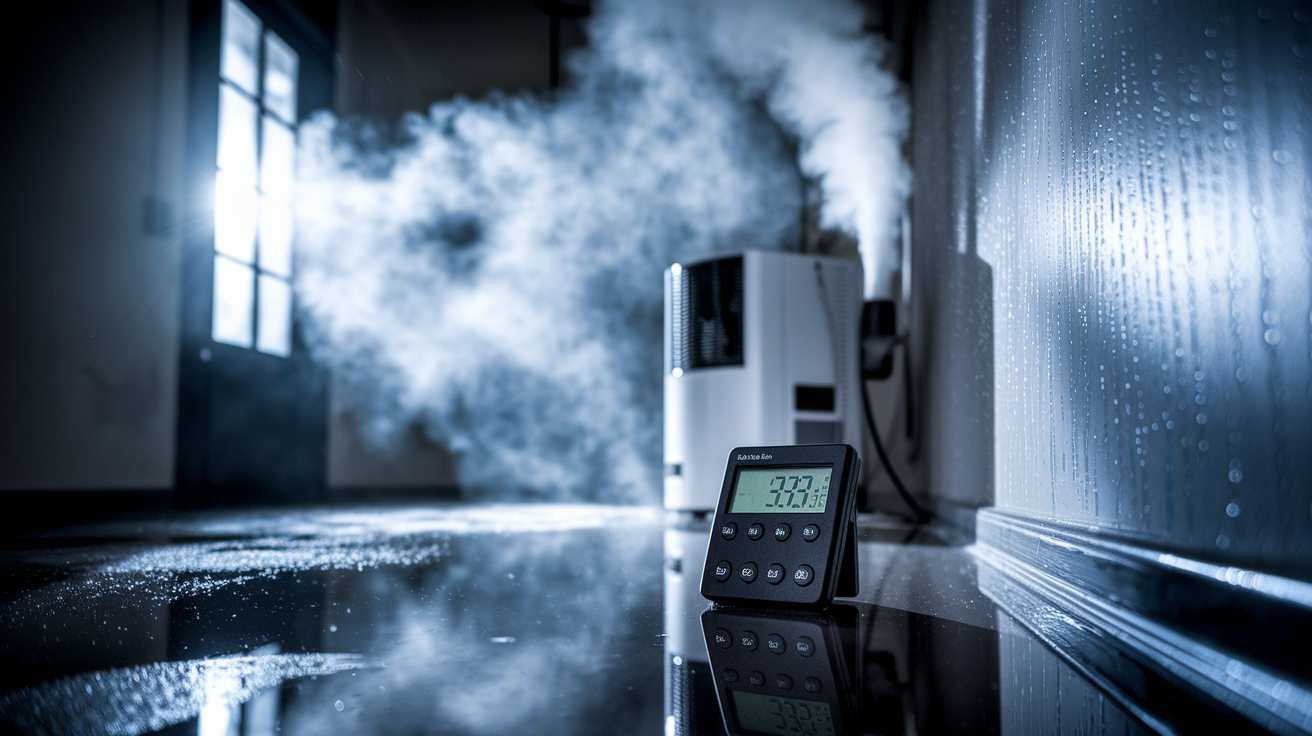
Your moisture meter should read below 15% moisture content before you apply any primer or paint. That’s not a suggestion, it’s the threshold where adhesion failures and recurring mold problems typically start. Paint applied over damp surfaces acts like a moisture trap. Water gets sealed behind the coating where it can’t escape, which creates the perfect environment for mold growth and causes the new paint to bubble and peel within weeks or months.
Equipment and methods for proper drying:
Industrial fans positioned for cross ventilation, creating airflow across wet surfaces rather than just blowing at one spot. 50-pint capacity dehumidifiers for rooms up to 3,000 square feet, emptying reservoirs or running drain hoses as needed. Open windows when outdoor humidity is lower than indoor levels, checking weather conditions before opening. Bathroom exhaust fans running for 20 minutes after every shower or bath to remove moisture at the source. Space heaters for accelerated drying in cold weather, maintaining 70°F room temperature to speed evaporation. Moisture meter verification at multiple spots within the damaged area, testing both surface and slightly deeper.
Typical drying time ranges from 24 hours for minor surface moisture to 3 or 4 days for saturated drywall. Concrete and masonry hold moisture longer, sometimes needing a full week of active drying before reaching acceptable levels. You’ll know you’re making progress when moisture meter readings drop consistently day over day. If readings stay flat or rise slightly, you’ve probably got an active leak that needs fixing before drying efforts will succeed.
Mold inspection comes after initial drying but before any patching work starts. Look for dark spots, fuzzy growth, or discoloration that wasn’t there before the water damage happened. Small surface mold on painted surfaces can be treated with Concrobium Mold Control, which you spray directly on affected areas. Let it sit for 24 hours, then HEPA vacuum the dried residue. The product doesn’t use bleach, so it won’t damage paint or create harsh fumes, but it still requires proper ventilation and N95 mask use during application.
Bleach solution, mixed as 1 cup bleach per gallon of water, works on non-porous surfaces like tile or sealed concrete. It kills surface mold but doesn’t penetrate porous materials like drywall or wood, where mold roots dig deeper than bleach can reach. Never mix bleach with any other cleaning product, especially ammonia based cleaners, which creates toxic fumes. Wear nitrile gloves and N95 masks when using bleach, keep windows open, and avoid skin contact with the solution.
If you’re seeing mold growth that covers more than about 10 square feet, or if it’s growing inside wall cavities where you’d have to open walls to reach it, that crosses into professional remediation territory. Same goes for situations where you smell persistent musty odors even after cleaning visible mold and drying the space completely. That smell means hidden growth you haven’t found yet. Professionals use containment barriers, HEPA filtration equipment, and antimicrobial treatments that DIY methods can’t match for extensive infestations.
Surface Preparation and Loose Paint Removal Techniques

Surface prep determines whether your patch blends invisibly or sticks out like a Band-Aid on a forehead. The goal is removing every bit of loose, cracked, or bubbled paint while creating smooth transition zones where new material meets old.
Hold your 4-inch putty knife at a 30 degree angle to the wall surface, not straight perpendicular. That angle gives you control and prevents gouging the substrate underneath. Start at the edge of damaged paint and scrape toward the center of the peeling area, using steady pressure. You’ll hear and feel when you reach firmly adhered paint because the scraping sound changes and the knife stops catching edges. Work outward in all directions from the damaged spot until you’ve removed everything that’s loose, cracked, or lifting at the edges. Some paint might look okay but still flake off easily under the knife. That needs to go too. Better to remove an extra inch of questionable paint now than have it fail after you’ve primed and painted over it.
After scraping, you’re left with rough edges where old paint layers create steps down to bare substrate. Sanding smooths those transitions. Start with 80-grit sandpaper or sanding blocks for the initial work. Focus on the edges of remaining paint, feathering them outward so there’s no defined line where old paint stops. You’re creating a gradual slope rather than a cliff edge. Sand with circular motions, applying moderate pressure but not pressing so hard you create divots or scratches. Wipe dust away periodically so you can see your progress. Once the rough edges are knocked down, switch to 120-grit sandpaper for final smoothing. This finer grit creates a surface that accepts primer and paint without visible scratches showing through.
Safety setup matters more than most DIY guides admit. Lay drop cloths on floors extending at least 3 feet beyond your work area in all directions. Canvas drop cloths absorb moisture better than plastic, but plastic works fine if you tape edges down so you don’t slip. Wear N95 masks during all scraping and sanding work. The dust cloud you’re creating contains old paint particles, drywall gypsum, and potentially mold spores from the water damage. If you’re working in a home built before 1978, assume lead paint is present until proven otherwise. Lead testing kits cost about $10 and take 10 minutes to use. If lead is present, upgrade to P100 respirator masks, disposable coveralls, and follow EPA lead safe work practices including wet sanding to control dust.
Open windows and run fans during prep work, but point fans to blow air out rather than circulating dust around the room. Close doors to other rooms to prevent dust migration. Some people tape plastic sheeting over doorways when dealing with heavy dust, which makes sense for larger repairs. After finishing scraping and sanding for the day, HEPA vacuum the work area and wipe surfaces with damp rags before removing your mask. Standard shop vacs blow fine dust particles right back into the air, so either rent a HEPA rated vacuum or use damp cleaning methods instead.
Repairing Drywall and Plaster Damage From Water
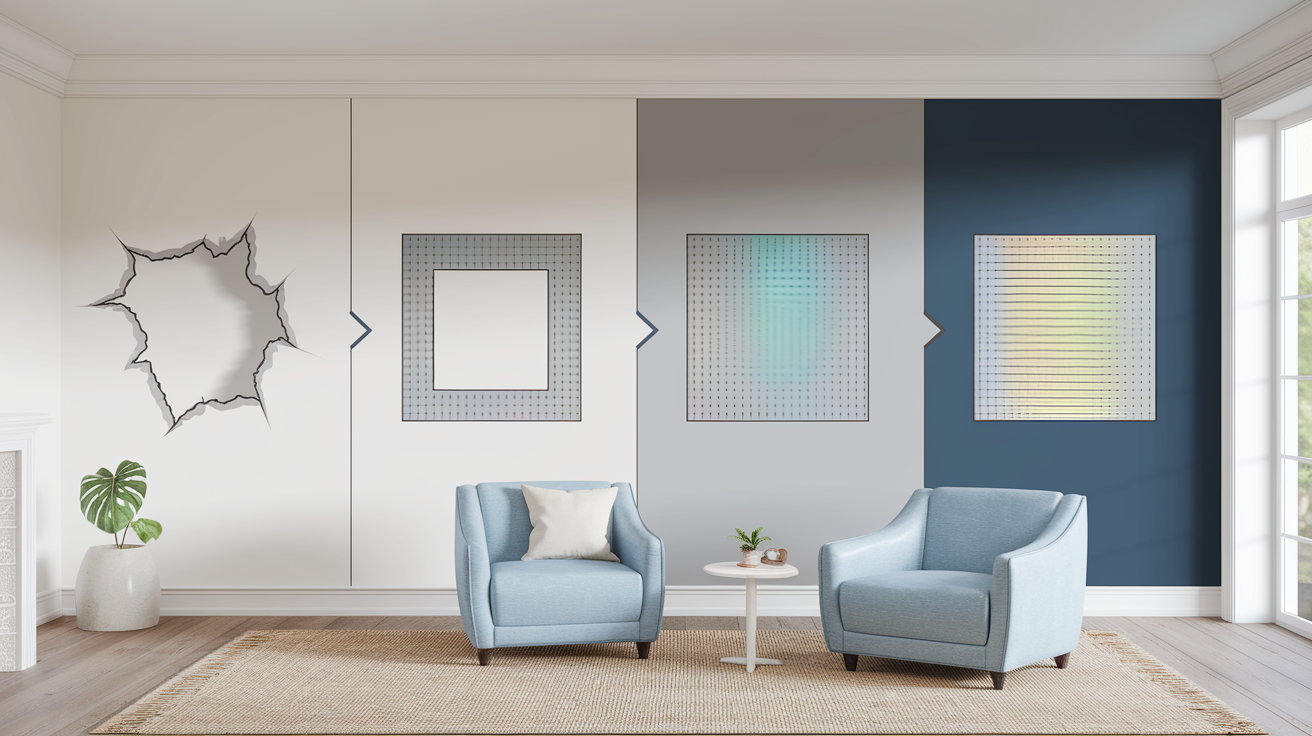
Structural repairs come before cosmetic fixes. If water damaged the substrate underneath the paint, no amount of spackle and paint will hide the problem or hold up long term. Push gently on damaged areas. Soft, spongy drywall means the gypsum core got saturated and the paper facing delaminated. That section needs replacement, not patching.
Drywall Repair Method
Cut out the damaged section using a drywall saw or utility knife, creating a square or rectangular shape with edges that fall on solid, dry drywall. Your moisture meter should confirm the surrounding material is below 15% before proceeding. Cutting square shapes instead of irregular holes makes fitting patch pieces easier and creates cleaner joints that disappear better after taping and mudding.
For holes smaller than about 4 inches across, you can use a self-adhesive mesh patch. Center it over the hole, press the edges firmly to the surrounding drywall, then apply joint compound directly over the mesh. For larger damage, cut a new piece of drywall to fit the opening with about 1/8 inch gap around all edges. That small gap accommodates expansion and prevents the patch from buckling. If there’s no backing material behind the hole edges, install wooden cleats or backing strips that span the opening edges, screwing them to the existing drywall. Then screw your patch piece to those cleats.
Apply self-adhesive fiberglass mesh tape over all joints where patch edges meet existing drywall. This tape doesn’t need a bedding coat of compound underneath like traditional paper tape. Press it down firmly so it’s flat and wrinkle free. Now comes the three coat joint compound sequence. First coat embeds the tape and fills the majority of the gap. Spread setting type compound with your 6-inch joint compound knife, pressing firmly to work material into the mesh and gap. Setting type compound hardens through chemical reaction rather than just drying, so it doesn’t shrink as much as standard compound. Let this coat harden completely, usually 60 to 90 minutes.
Second coat goes on wider, extending about 2 inches beyond the first coat edges on all sides. This widens the repair zone and starts leveling the surface. Feather the outer edges thin so there’s no defined ridge. Let this dry overnight. Third coat feathers even wider, maybe 2 to 3 inches beyond the second coat, creating an invisible blend into the surrounding wall. Each coat should be thinner than the previous one. You’re building a gradual ramp rather than stacking layers straight up. Let the final coat dry completely, then sand smooth with 120-grit sandpaper, feathering edges until you can’t feel any transition when you run your hand across the repair.
Plaster and Masonry Repair Approach
Plaster repair starts by chipping away all loose material using a cold chisel and hammer. Tap gently to avoid cracking sound plaster around the damaged area. Plaster is harder and more brittle than drywall, so aggressive hammering can propagate cracks outward. Remove loose material until you reach solid, well adhered plaster all around. Undercut the edges slightly so the patch has a mechanical key to lock into. Brush out all dust and debris from the cavity.
Apply bonding liquid to the exposed lath or plaster edges before patching. This improves adhesion between old plaster and new repair material. Some people use straight PVA primer, others use products specifically marketed as plaster bonding agents. Either works if you follow the product’s specified dry time before applying patch material. Mix plaster patching compound according to package directions, usually to a thick peanut butter consistency.
Press the patch material firmly into the cavity, working it into all corners and voids. Fill slightly proud of the surrounding surface, then scrape level once the patch reaches initial set. Matching texture on plaster repairs takes practice. If the surrounding wall has texture, wait until the patch is firm but not fully hardened, then texture it with a wet sponge, brush, or trowel depending on the existing pattern. Let plaster patches cure for at least 24 hours before sanding or priming.
For concrete and brick repairs from moisture damage, chip loose material with a cold chisel until you reach sound substrate. Concrete that sounds hollow when tapped or crumbles under moderate pressure needs removal. Clean the cavity thoroughly, removing all dust and loose particles. Wet the cavity with clean water before applying hydraulic cement. The moisture helps the cement cure properly and prevents the dry substrate from sucking moisture out of the fresh cement too quickly.
Mix hydraulic cement with a margin trowel to a thick consistency. Press it firmly into the cavity with the trowel, compacting it to eliminate air pockets. Fill slightly proud, then strike off level with the trowel blade. Hydraulic cement sets fast, usually within 10 to 15 minutes, so mix only as much as you can apply in that window. Texture the surface while it’s still workable by dabbing with a damp sponge if you’re trying to match surrounding concrete texture. Let it cure according to package directions before priming or painting, usually 24 to 48 hours.
Spackle mixing for smaller cosmetic repairs starts with powdered compound in a clean container. Add water gradually, mixing to a smooth consistency similar to hummus, not runny like tahini or soup. The mixture should hold its shape when scooped but spread smoothly without dragging or pulling. Use your joint compound knife to apply spackle, holding the knife at a low angle and spreading in smooth, even strokes. Apply pressure on the leading edge of the knife to force material into voids while wiping excess away. The goal is filling the damaged area flush with the surrounding surface in as few passes as possible. Let spackle dry completely, usually 2 to 4 hours depending on thickness, then sand smooth with 120-grit paper.
Stain Blocking Primer Application for Water Damage

Water damaged surfaces develop staining that bleeds through standard paint. Tannins from wood, rust from nails, mineral deposits from concrete, and residual discoloration from the water itself will all telegraph through regular primer and paint, showing up as brown, yellow, or gray shadows no matter how many coats you apply. Stain blocking primer seals these stains and creates a barrier that prevents bleed through while providing a proper foundation for topcoat adhesion.
Oil based stain blockers like KILZ Original and Zinsser Cover Stain handle the heaviest staining situations better than water based primers. They seal aggressively, dry fast, and create a hard surface that resists moisture penetration. Shellac based primers like Zinsser B-I-N seal even more aggressively and dry faster, typically in 15 to 30 minutes, but they’re harder to clean up and have stronger odor. For most water damage repairs, oil based is the sweet spot between performance and manageability.
Surface must be clean before primer goes on. Wipe the entire repair area with a damp cloth to remove sanding dust. For areas with previous mold growth, wash with TSP solution mixed as 1/4 cup TSP per gallon of warm water. Scrub with a sponge or brush, then rinse thoroughly with clean water and let dry completely. TSP removes oils, soap residue, and mineral deposits that interfere with primer adhesion. Wear gloves when handling TSP because it’s caustic and will dry out your skin quickly.
Primer application steps:
Stir primer thoroughly before use, don’t shake oil based products because it creates bubbles. Pour working amount into separate container rather than working from the original can. Apply KILZ Original or Zinsser Perma-White with brush or roller depending on area size. Use brush for edges, corners, and detailed areas where roller won’t reach. Use 3/8 inch nap roller for flat surfaces, working in small sections. Maintain 70°F room temperature during application and drying for proper cure. Allow full cure time, typically 1 to 2 hours for oil based primers, before topcoat. Ventilate space continuously, opening windows and running fans to exhaust fumes.
KILZ Original costs around $25 per quart and works well for general water stain situations including ceiling stains, isolated wall damage, and repairs in living spaces. It seals tannins from wood, light rust staining, and general water discoloration. One quart covers approximately 75 to 100 square feet, so it’s usually enough for typical water damage patches unless you’re dealing with multiple rooms.
Zinsser Perma-White costs $30 to $35 per quart but includes antimicrobial additives that prevent mold growth on the primer film itself. This makes sense for bathrooms, basements, laundry rooms, and anywhere with ongoing humidity exposure where mold might grow even after you’ve fixed the leak. The mold prevention is worth the extra cost in high risk areas because it’s one more layer of protection against recurrence. Perma-White also resists mildew staining better than standard KILZ when moisture levels fluctuate seasonally.
Coverage rates drop when you’re priming heavily stained surfaces because porous, damaged substrates soak up more primer than sealed surfaces. Plan on 50 to 60 square feet per quart when priming water damaged drywall or plaster. Apply primer generously enough to create an opaque film that completely hides staining, but don’t slop it on so thick it runs or sags. One even coat should suffice for most situations. If staining still shows faintly through dried primer, apply a second primer coat rather than hoping paint will cover it. Stains that show through primer will definitely show through paint.
Selecting and Applying Moisture-Resistant Paint

Paint chemistry makes the difference between repairs that hold up and ones that fail within a year. Water damaged areas need paint formulated to resist moisture intrusion and mold growth, not just any interior paint that matches your color. The sheen level matters too because higher gloss finishes deflect moisture better than flat paint while showing surface imperfections more clearly.
One hundred percent acrylic latex paint provides the flexibility and mold resistance needed for moisture prone areas. Vinyl-acrylic blends cost less but don’t perform as well in humid conditions. Check the label for “100% acrylic” or “all-acrylic” in the binder description. These formulas expand and contract with temperature and humidity changes without cracking, and they resist mildew growth better than other latex types. Semi-gloss and satin sheens reflect 35% more moisture than flat paint according to paint manufacturer testing. That reflection prevents water from soaking into the paint film. Semi-gloss works best in bathrooms and other high moisture areas. Satin offers a middle ground with better moisture resistance than eggshell or flat while showing fewer surface imperfections than full gloss.
Benjamin Moore Aura Bath & Spa is specifically formulated for high moisture environments. It costs around $60 per gallon, which is premium pricing, but it includes mildew resistant additives and performs significantly better than standard interior paint in humid conditions. The formula self primes on properly prepared surfaces, though you should still use stain blocking primer over water damage rather than relying on the paint’s priming ability. Coverage is excellent at around 400 square feet per gallon, and the finish cures to a durable surface that cleans easily without losing its moisture resistance.
For areas with moderate moisture exposure, standard 100% acrylic interior paint with mildew resistant additives works fine and costs $35 to $45 per gallon. Look for products specifically labeled as mold and mildew resistant or bath and kitchen formulas. Sherwin-Williams Duration Home Interior and Behr Premium Plus with Mildewcide both perform well at mid range pricing.
Application technique affects durability and finish quality. Load your microfiber roller cover moderately, not dripping but with even coating. Start each section with a W pattern rather than straight up-down strokes. Roll the first stroke diagonally up and left, second stroke diagonally up and right, third stroke diagonally down and left, forming a W shape. Then fill in the W with horizontal strokes, blending the paint evenly without leaving roller marks or thin spots. The W pattern distributes paint better and minimizes the visible overlap lines that happen when you roll straight lines next to each other.
Maintain 70°F room temperature for 48 hours during the curing period. Temperature below 60°F slows curing and can prevent the paint from developing proper hardness and moisture resistance. Above 85°F accelerates drying too quickly, which can cause lap marks and adhesion problems. If you’re painting in winter, use a space heater to maintain temperature. In summer heat, paint early morning or evening when temperatures are moderate, and avoid painting in direct sunlight hitting the wall.
Apply two to three coats for proper coverage and moisture protection. First coat might look uneven or show substrate variations. That’s normal. Let it dry according to package directions, usually 2 to 4 hours for recoat time though full cure takes longer. Second coat should provide uniform coverage and color. Check for thin spots, missed areas, or places where the primer shows through, then apply third coat if needed for complete coverage.
Color matching for repairs requires bringing a paint chip or piece of the existing paint to the paint store. Colors shift slightly as paint ages, especially in rooms with sunlight exposure. The paint that matched perfectly when originally applied might be a shade lighter now. Paint stores can scan your sample and adjust the formula to match aged paint. Test your matched paint in an inconspicuous area first, letting it dry completely because wet paint looks darker than dry. Expect slight variation even with computer matching because aged paint has texture and sheen changes that new paint can’t replicate perfectly.
Long-Term Prevention: Waterproofing and Maintenance Strategies

Prevention costs less than repair, both in money and hassle. According to insurance industry data, 80% of basement water intrusion comes from clogged gutters that overflow and dump water against the foundation. That’s a $15 maintenance task that prevents thousands in water damage and paint repairs. Adding waterproofing measures in vulnerable areas stops moisture before it reaches the paint layer.
RedGard waterproofing membrane creates a flexible moisture barrier on surfaces prone to water exposure. It’s commonly used behind tile in showers but works equally well on basement walls, exterior facing walls, and areas with previous water damage history. Apply it with a 3/8 inch nap roller after priming but before painting. The membrane goes on pink and dries red, making it easy to see you’ve achieved even coverage. Two coats provide waterproof protection. Let the first coat dry 1 to 2 hours, apply the second coat, then let it cure for 8 to 24 hours before painting over it. One gallon covers roughly 50 to 60 square feet with two coats, costing about $45 per gallon.
Eight prevention measures that stop water damage before it starts:
RedGard waterproofing membrane for shower walls, tub surrounds, and basement walls below grade, applied with 3/8 inch nap roller in two coats. DAP Dynaflex 230 flexible caulk for sealing joints where walls meet tubs, sinks, countertops, and anywhere two surfaces meet with potential water exposure. Epoxy grout sealer for tile surrounds and floors in bathrooms and kitchens, applied annually with foam brush to create moisture barrier in grout lines. Run bathroom exhaust fans 20 minutes after every shower or bath to remove moisture at the source before it condenses on surfaces. Clean gutters twice yearly in spring and fall, removing leaves, pine needles, and debris that block water flow and cause overflow. Verify foundation grading slopes 6 inches downward per 10 feet away from house, adding soil near foundation if needed to improve drainage. Monthly plumbing shut-off valve inspection for condensation drops indicating cold water causing moisture buildup on valve bodies. Maintain proper indoor humidity between 30% and 50% range using dehumidifiers in basements and damp areas.
Waterproofing membrane application timing depends on whether you’re treating new repairs or protecting previously painted surfaces. For new repairs, apply waterproofing after stain blocking primer dries but before topcoat paint. The membrane bonds to primer and provides a substrate for paint to grip. For existing painted walls where you want to add waterproofing without repainting, rough up the paint surface with 120-grit sandpaper to create tooth for membrane adhesion. The textured RedGard surface telegraphs through paint slightly, creating subtle texture, so it works best under semi-gloss or satin finishes that hide the texture better than flat paint.
Maintenance schedules for sealants run annually for high exposure areas and every two to three years for moderate exposure. Epoxy grout sealer in shower surrounds should be reapplied yearly because hot water and cleaning products gradually degrade the protective barrier. Caulk around tubs and sinks typically lasts 2 to 4 years before it shrinks, cracks, or pulls away from surfaces. Check caulk lines during regular cleaning. If you see gaps, cracks, or separation, cut out the old caulk completely with a utility knife, clean the joint thoroughly, and apply fresh caulk. Never caulk over old caulk because the new material won’t bond properly and will fail quickly.
Seasonal inspection routines catch problems before they cause damage. In spring, walk the perimeter of your home after a heavy rain, looking for water pooling near the foundation or gutters overflowing. Check basement walls and ceiling corners for new moisture staining. In summer, verify your air conditioning condensate drain line flows freely and doesn’t leak around the air handler. In fall, clean gutters before leaves pile up and block drainage. In winter, check for ice dams on the roof edge and condensation on cold weather windows, both indicators of insulation or ventilation problems that can lead to water damage.
The relationship between ventilation and moisture control goes beyond just running exhaust fans. Bathrooms need exhaust fans that actually move air outside, not into attic spaces where moisture can condense on cold surfaces. The fan should move at least 50 cubic feet per minute for bathrooms under 100 square feet, 80 CFM for larger bathrooms. Kitchens need range hoods that exhaust outside rather than recirculating filtered air. Basements benefit from continuous low level ventilation or dehumidifiers that maintain 30% to 50% humidity. Laundry rooms need dryer vents that exhaust outside without kinks or excessive length that reduce airflow. Each of these ventilation improvements reduces the moisture load that paint and building materials must handle, extending the life of repairs and preventing future damage.
Common Paint Repair Mistakes and Troubleshooting Tips

Repairs fail when shortcuts get taken or when the process gets rushed because someone wants the wall to look normal again by the weekend. Moisture is patient. It will wait weeks or months, then lift your new paint just like it did the old stuff if the underlying cause wasn’t properly addressed. The time you save by skipping steps gets lost when you’re back at the hardware store buying supplies to fix the same spot again.
Eight mistakes that cause repair failure:
Starting repairs before stopping the moisture source, which guarantees the problem returns and wastes all repair effort. Painting before moisture level drops below 15%, trapping moisture behind paint
Final Words
Water damage doesn’t have to mean a full-scale renovation.
Most peeling paint water damage fix projects just need patience, the right sequence, and materials that match the job. Stop the moisture first, dry completely, prep thoroughly, seal with stain-blocking primer, and finish with moisture-resistant paint.
If you work methodically and give each layer time to cure, your repair will hold. And you’ll spot the early warning signs faster next time.
FAQ
How do you fix peeling paint from water damage?
To fix peeling paint from water damage, first stop the moisture source and let the surface dry completely to below 15% moisture content. Then scrape off all loose paint with a putty knife, sand the edges smooth, apply stain-blocking primer, patch any damage, and repaint with acrylic latex paint.
Can you fix peeling paint yourself?
You can fix peeling paint yourself if the damage is limited to surface paint failure, the moisture source is identified and stopped, and you follow proper drying, scraping, priming, and repainting steps. DIY repairs work well for minor condensation bubbling or small leak repairs after the source is fixed.
What are the common mistakes when fixing peeling paint?
The most common mistakes when fixing peeling paint include starting repairs before stopping the moisture source, painting over damp surfaces before moisture drops below 15%, skipping stain-blocking primer, not removing all loose paint edges, and applying paint too thick in a single coat instead of multiple thin layers.
Can you paint over peeling paint?
You cannot paint over peeling paint successfully. All loose, cracked, and bubbling paint must be scraped away first, edges sanded smooth, and stain-blocking primer applied before new paint. Painting over peeling sections causes the new paint to fail quickly because it cannot bond to unstable surfaces underneath.