
You just squeezed the trigger five times and got a dribble instead of a bead. If your caulk gun seal is cracked, leaking, or letting air escape from the barrel front, you don’t need a new gun yet. Most seal failures take 15 to 30 minutes to fix with basic tools and a $5 replacement kit. This guide walks you through diagnosis, seal replacement in the correct order, and the one tightening mistake that ruins an otherwise perfect repair.
Diagnosing Your Caulk Gun Seal Problem
Before you start tearing things apart, take five minutes to figure out what’s actually wrong. A bent trigger tab can look like a seal issue until you realize the plunger’s just stuck. Skip this step and you’ll waste time and money on parts you don’t need.
8 diagnostic points to identify the real problem:
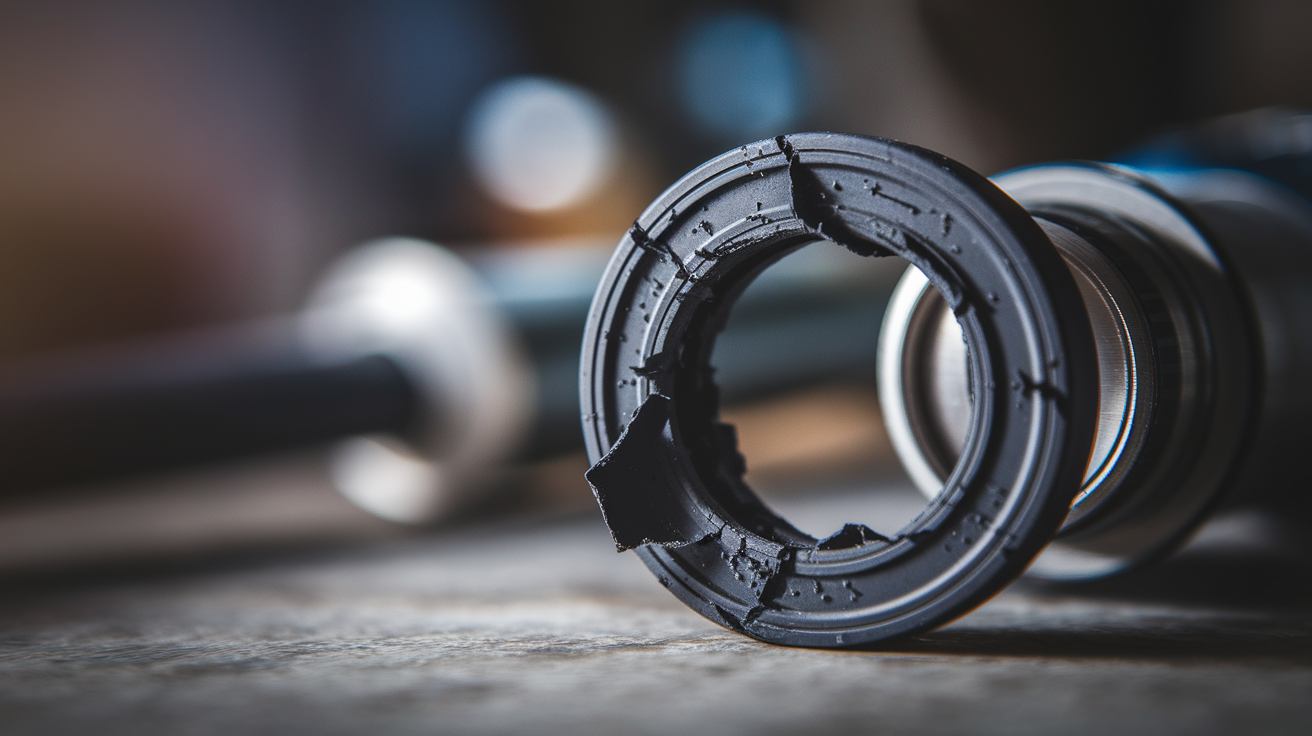
- Visible seal cracks or tears – Check the front barrel area where the cartridge sits. Split rubber, cracked leather, or missing chunks on the O-ring means seal failure.
- Sealant leaking from barrel front – Material oozing from around the cartridge tip (not the tip itself) means the seal isn’t holding pressure against the cartridge base.
- Air pressure loss during operation – You pump the trigger but nothing comes out, or flow starts then stops. The gun hisses or you feel air escaping near the front cap.
- Material flow inconsistency – Caulk comes out in spurts instead of steady beads, or you’re pumping five times for what used to take one squeeze.
- Dried internal caulk presence – Pull the cartridge out and look inside the barrel. Crusty dried material coating the walls? That’s not a seal issue. That’s a cleaning issue.
- Stuck plunger symptoms – The plunger rod won’t retract when you remove the cartridge. Try the release bar above the handle. If pulling it back frees the plunger, your seal is fine.
- Bent release tab identification – Look at the large trigger mechanism. If the metal tab that controls plunger movement is visibly bent or doesn’t spring back, that’s a trigger problem, not a seal problem.
- Weak spring indicators – The trigger feels mushy or the plunger barely moves when you squeeze. If the spring has lost tension, no amount of seal work will fix it.
Test your seal using the T-Pull draw method. Lock the recoil mechanism, place something sturdy between your feet (doesn’t have to be an actual T-Pull, a short piece of pipe works), hook the gun onto it, and pull straight up. A good seal creates resistance and draws smoothly. A bad seal either draws with no resistance or won’t draw at all. You’ll know immediately.
Seal problems show progressive wear patterns before total failure. Early stage looks like slight material seepage around the cartridge base. Wipe it and it comes back after a few pumps. Mid-stage shows inconsistent pressure and visible cracks forming in the seal material. Late stage means constant leaking and complete loss of draw pressure. If you’re at early or mid-stage, repair works. Late stage with chunks missing usually means the barrel threads or plunger rod are also damaged from running dry.
Weak spring failure is different. Springs control how the plunger retracts and resets after each trigger pull. When the spring goes loose or breaks, the entire gun is done. There’s no repair option for springs in standard caulking guns. If you’ve confirmed weak spring through testing (the trigger barely moves the plunger, or the plunger won’t retract even with the release bar pulled), stop diagnosing. That gun needs full replacement. For a basic $12 gun, buying replacement seals and spending an hour on repairs makes no sense when the spring will fail completely next week anyway.
Complete Seal Repair Instructions
A broken seal means leaking sealant, air pressure issues, or visible O-ring damage. Most seals can be repaired in 15 to 30 minutes for $3 to $15.
Step by step seal replacement process:
-
Gather required tools – You need a 7/16 inch wrench or nut driver, needle nose pliers, barrel brush (part 800-G01 or 800-G02), cleaning solvent appropriate for your sealant type, replacement seals and washers from a hardware store, and a utility knife for trimming if needed.
-
Remove plunger rod – Find the release bar above the handle and pull it back to release tension. While holding the release bar, unscrew the nut that holds the plunger plate to the rod using your wrench. Slide the entire plunger rod assembly out through the back of the gun.
-
Remove front cap and conical ejector – At the front of the barrel where the cartridge tip goes, use the 7/16 inch wrench to unscrew the front cap. Behind it you’ll find the conical ejector (part 29-G28). Remove that too.
-
Remove lock nut – With the front components off, you’ll see the lock nut inside the barrel. Use the wrench to remove it. This nut holds the seal assembly in place.
-
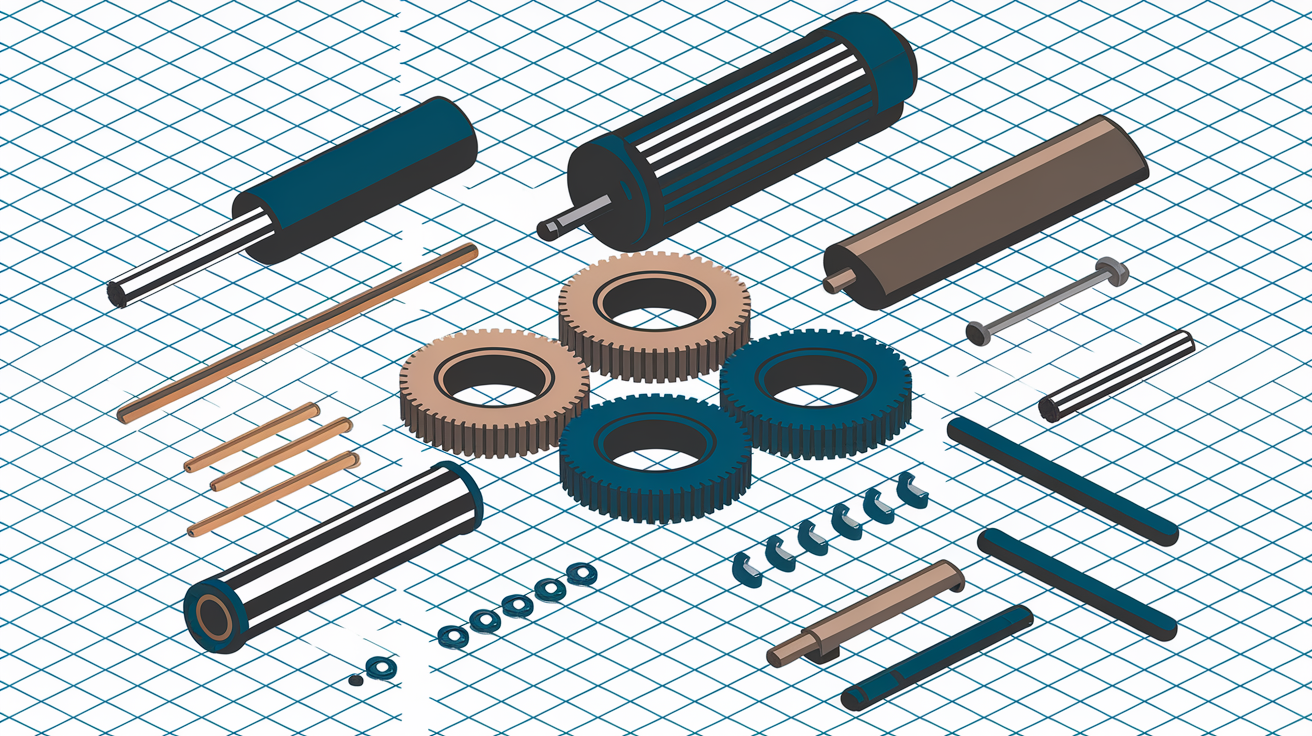
Extract old seals and washers – Pull out the seal stack carefully. Note the exact order. There’s a small washer, then an inverted seal cup, then a large washer, then a bowl shaped seal, then another small washer. Take a photo with your phone if you’re not sure you’ll remember.
-
Clean barrel interior – Insert the barrel brush and turn it clockwise while pushing forward. This scrubs dried material off the walls. Apply your chosen solvent to the interior surfaces and wipe clean. Counterclockwise turning just compresses the bristles and doesn’t clean anything.
-
Install new seals in correct sequence – Start with the small washer against the lock nut. Add the first seal cup inverted (open side facing out). Add the large washer. Add the second seal shaped like a bowl (open side facing in). Finish with the small washer.
-
Thread lock nut and hand tighten only – Screw the lock nut back on. Tighten it by hand until snug. Stop. Do not use the wrench for final tightening. You want firm contact, not gorilla tight.
-
Reinstall conical ejector and front cap – Thread the conical ejector back into position. It acts as a jam nut to keep things from loosening when the gun swivels during use. Add the front cap and tighten with the wrench.
-
Test the repair – Lock the recoil, place something sturdy under the gun, and perform a draw test by pulling upward. The plunger should move smoothly with consistent resistance. Load a cartridge and pump a few test beads. If material flows evenly without leaking from the barrel front, you’re done.
Here’s why Step 8 matters more than any other step. Over tightening the lock nut sandwiches the seal material flat against the barrel wall. When that happens, the seal can’t flex and form a proper pressure chamber around the cartridge base. You’ll have perfect components installed in perfect order, but the gun won’t draw and material won’t flow. It feels wrong to leave something hand tight in a mechanical repair, but that’s correct here. Snug means you can’t turn it easily with fingers alone, but you’re not straining. If you have to grunt or use two hands, you’ve gone too far.
Quick note on gun type variations. Manual skeleton frame guns follow this exact procedure. Pneumatic models require one extra step before Step 2: release air pressure at the valve and disconnect the air line. Battery powered units need the motor housing protected with plastic wrap during barrel cleaning in Step 6 to keep solvent out of electronics.
Leather seals (part 21-1) have a bonus option. If they’re worn and stiff but not cracked or torn, soak them overnight in 10 weight motor oil. Lay them in a small container, pour in enough oil to cover, and leave for 8 to 12 hours. The oil reconditions the leather and restores flexibility. Wipe off excess and install while still slightly oily. That extra lubrication helps performance. Severely damaged O-rings with cracks, tears, or missing sections need full replacement. No amount of soaking fixes broken material.
Estimated repair time runs 15 to 30 minutes if you’ve done this before and everything comes apart smoothly. First timers should budget 30 to 45 minutes, especially for barrel cleaning and figuring out seal orientation. Basic replacement seal kits cost $3 to $8 at hardware stores like Home Depot or Lowe’s. Premium kits with extra washers and upgraded seal materials run $10 to $15.
Cleaning and Preparing Components for Seal Installation

Thorough cleaning matters more than most people think. Residual dried caulk creates high spots and pressure points inside the barrel. When you install new seals over those rough patches, the material tears during the first few pumps. You think you got a bad seal, but really you just installed a good seal into a dirty gun. Ten minutes of cleaning prevents having to redo the entire job next week.
5 step cleaning procedure for all components:
-
Scrub barrel interior – Insert your barrel brush (part 800-G01 or 800-G02) and turn clockwise while pushing forward into the barrel. Make three or four complete passes. You’re scrubbing off the film that builds up from hundreds of cartridges.
-
Apply appropriate solvent – For silicone sealant residue, use mineral spirits or commercial silicone remover. For acrylic latex, warm water with dish soap works. For polyurethane and construction adhesive, use acetone or MEK. Squirt it in, let it sit for two minutes, then scrub again with the brush.
-
Dislodge stubborn dried material – If you hit a chunk that won’t come off with the brush, grab a long screwdriver. Stick it into the barrel, press against the dried material, and rotate slowly. The turning motion breaks the bond without scratching the barrel walls. Pull the screwdriver out and the chunk usually comes with it.
-
Clean and inspect plunger rod – Wipe the rod down with a solvent dampened rag. Look for gouges, notches, or bent sections. If you find a notch worn into the rod from thousands of trigger pulls, rotate it a quarter turn before reinstalling. You’ll access a fresh surface and extend the rod’s life without buying a replacement.
-
Dry and inspect everything – Wipe all components completely dry. Do a final visual check inside the barrel looking for any residue you missed. Shine a flashlight in there if you have one. The surface should look uniform, not spotty or crusty.
Solvent selection matters because wrong chemistry makes things worse. Silicone bonds to itself, so only mineral spirits or specialty silicone dissolvers break it down. Water or soap just smears it around. Acrylic latex is water based, so warm soapy water works great and won’t damage gun components. Polyurethane and construction adhesive need aggressive solvents like acetone because they cure into near permanent bonds. When cleaning leather seals specifically, stick with manufacturer recommended solvents or mild soap and water. Acetone degrades leather, making it brittle.
Drying is non-negotiable. Any moisture left inside the barrel mixes with your new sealant on first use and creates bubbles, weak spots, or adhesion failure. If you used water based solvents, let everything air dry for 30 minutes or wipe thoroughly with clean, dry rags until you stop seeing any dampness transfer. If you used petroleum based solvents like mineral spirits, they evaporate fast. Five minutes is usually enough.
Reconditioning Leather Seals and Preventive Maintenance

Regular post use care extends seal life from months to years and returns your gun to factory specifications. A $12 gun that dies after six cartridges becomes a $12 gun that handles sixty cartridges with simple five minute cleaning routines. Prevention is always faster than repair.
7 maintenance practices that maximize seal lifespan:
- Immediate post use cleaning – Don’t store the gun with material residue on the plunger rod or around the seal area. Wipe it down before putting it away. Dried buildup acts like sandpaper on your next use.
- Leather seal conditioning – Every 20 to 30 cartridges, remove leather cup seals and soak them overnight in 10 weight or motor oil. This restores flexibility and prevents cracking.
- Store gun horizontally – Storing vertically with the barrel pointing down compresses the seal constantly. Lay it flat or hang it horizontally. Seals keep their shape better.
- Quarterly inspection for wear patterns – Every few months, pull the seal assembly and look for early wear signs. Surface cracks forming, edges getting thin, compression marks that don’t bounce back.
- Rotate square plunger rods – If your gun has a square rod, turn it a quarter turn when you notice a groove forming. You’ll access fresh surface area and double the rod’s useful life.
- Don’t store loaded – Don’t leave cartridges sitting in the gun for weeks. Constant pressure on the seal, even without use, degrades the material.
- Keep away from temperature extremes – Below 40°F, rubber and leather get brittle. Above 90°F, they soften and deform. Store in a garage or shed, not outside, not in direct sun.
The overnight oil soaking method brings dead feeling leather seals back to life. Pull your clean leather cup seals (part 21-1) and place them in a small plastic container. Pour in enough 10 weight motor oil to completely submerge them. Doesn’t take much, maybe two ounces. Cover the container and leave it for 8 to 12 hours. Next morning, pull the seals out and wipe off excess oil with a paper towel. They should feel softer and more pliable. Reinstall them while they’re still slightly oily. That oil coating provides lubrication during the first few uses and protects against drying out again so quickly.
Post use care routine (takes 5 minutes):
-
Purge remaining material – After finishing your project, run the plunger all the way forward to push out leftover sealant from the barrel.
-
Wipe plunger rod and seal area – Use a damp rag to clean the rod and the front seal area where material might have oozed back.
-
Inspect seal for damage – Quick visual check for any new cracks or wear that appeared during this session.
-
Apply light oil coating – For leather seals, wipe a thin coat of oil on the seal surfaces before storing. Prevents drying and cracking between uses.
-
Store horizontally in climate controlled location – Lay the gun flat in your shop or garage. Not in the truck bed overnight, not in the outdoor shed where it hits freezing.
Usage habits accelerate seal wear faster than age or frequency. Excessive trigger pressure (yanking hard because the sealant’s cold and thick) crushes seals prematurely. Switching between incompatible materials without cleaning (running silicone then switching straight to acrylic without wiping the barrel) contaminates seals and causes swelling. Prolonged loaded storage where a cartridge sits under plunger pressure for weeks keeps the seal compressed into a permanent deformed shape. Inadequate cleaning between material types leaves chemical residues that attack seal materials. A gun used twice a week with good habits outlasts a gun used twice a year with bad habits.
Temporary Fixes vs Permanent Seal Repairs
Temporary fixes make sense in specific situations. When you’re mid project at 8 PM and the hardware store closed two hours ago. When you’re on a job site and replacement parts won’t arrive until tomorrow’s delivery. Or when you’re testing whether the seal is actually the problem before buying replacement parts. Outside those scenarios, temporary fixes usually make problems bigger.
| Repair Type | Time Required | Cost | Durability | Best Use Case |
|---|---|---|---|---|
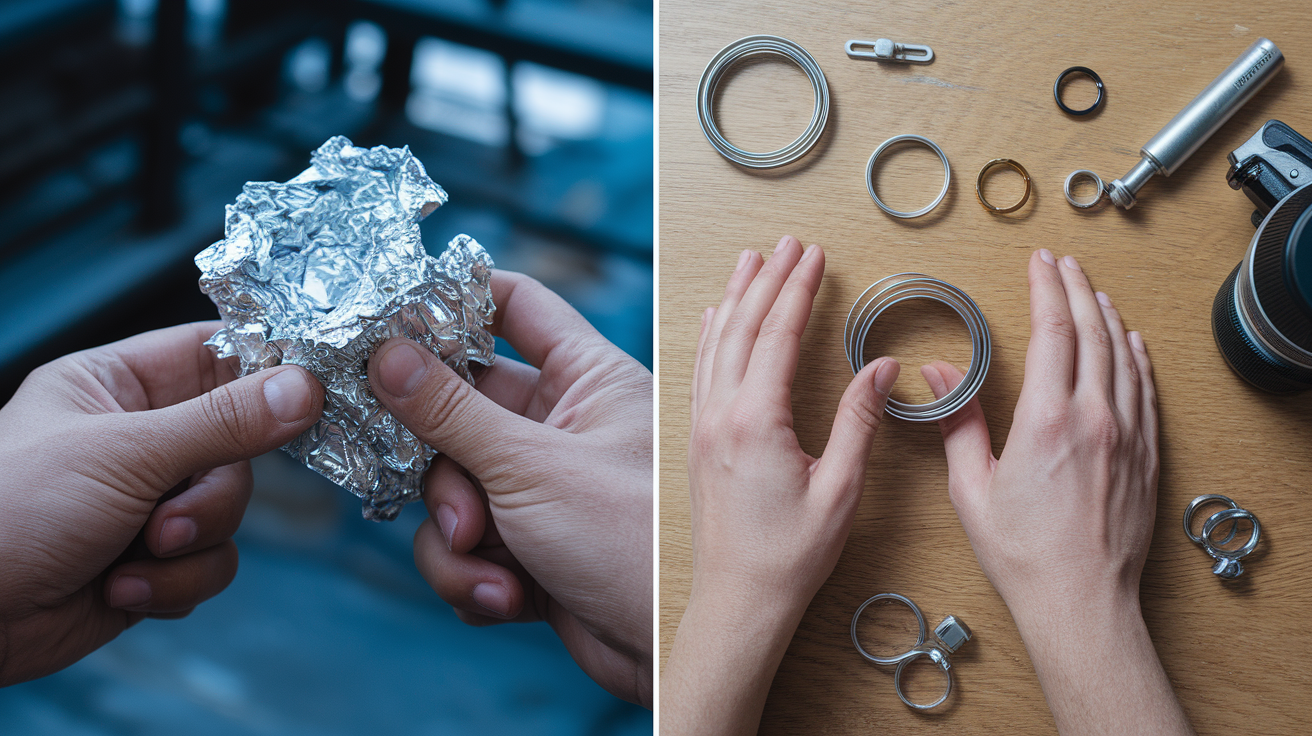
| Aluminum foil seal | 2 to 3 minutes | $0 (use household foil) | 15 to 30 minutes of inconsistent use | Emergency finish for current bead only |
| Release bar reset | 30 seconds | $0 | One plunger cycle | Testing whether plunger is stuck or seal is failed |
| Full seal replacement | 15 to 45 minutes | $3 to $15 | Months to years depending on maintenance | Any gun worth more than $15 with isolated seal damage |
| Complete gun replacement | 0 minutes (just buy new) | $8 to $80 depending on quality | New gun lifespan | Budget guns under $12, multiple component failures, weak spring |
The aluminum foil puncture seal technique works as a field expedient when you absolutely must finish the current bead and nothing else matters. Grab a piece of heavy duty aluminum foil and fold it into roughly a 3 inch square. Puncture your cartridge tip through the center of the foil. Press the foil square against the front of the gun barrel where the seal normally sits, holding it in place with your palm. Load the cartridge and carefully pump the trigger. The foil creates a makeshift pressure barrier. You’ll get 15 to 30 minutes of sloppy, inconsistent flow. Enough to finish caulking three window corners or one bathtub edge. Then the foil tears or shifts and you’re done.
Temporary solutions often create bigger problems by letting damage spread. When you know the seal is failing but you keep using the gun with a foil patch, the plunger rod runs partially dry and scores the barrel interior. Those fresh scratches become leak paths that make the eventual proper seal repair harder. When you reset a stuck plunger using the release bar but don’t address why it stuck (dried material buildup, damaged seal, worn trigger mechanism), the root cause gets worse and you’re resetting it every three pumps. The release bar reset works as a diagnostic test to determine whether the plunger is mechanically stuck or whether the seal has failed completely. It’s not a repair.
Use temporary fixes only when you’re completing the current project today and doing the proper repair tomorrow. If you’ll need the gun again within a week, skip straight to permanent seal replacement. If you try a temporary fix and find yourself fighting the gun (constant pressure loss, material leaking everywhere, having to reset the plunger every five seconds), stop. You’re making the repair job bigger and possibly damaging components that were still good.
When to Replace Your Entire Caulk Gun Instead of Repairing Seals
Think about total cost of ownership, not just immediate repair cost. A budget gun that cost $9 at the big box store doesn’t justify spending $7 on replacement seals plus an hour of your time. That math works for a $35 professional gun you’ve used for three years. It doesn’t work for disposable tools.
| Gun Type | Seal Repair Cost | Replacement Cost | Repairability | Recommendation |
|---|---|---|---|---|
| Budget manual gun ($8 to $12) | $5 to $8 parts + 30 to 45 min labor | $8 to $12 for new identical gun | Standard parts available but low quality threads strip easily | Replace unless seal failure happened within first week |
| Mid range manual gun ($18 to $28) | $5 to $10 parts + 20 to 30 min labor | $18 to $28 for new gun | Better threads and repairability, standard seal sizes | Repair if gun is otherwise functional |
| Professional grade gun ($40 to $80) | $8 to $15 parts + 15 to 25 min labor | $40 to $80 for new gun | Excellent repairability, manufacturer replacement parts available, quality construction | Always repair first, replace only after multiple repairs or frame damage |
Certain failure modes mean replacement is the only real option. Weak or loose spring failure is non-repairable. Springs can’t be replaced in standard caulking gun designs. When the spring goes, the gun is done. Multiple simultaneous component failures point the same direction. If your gun has a bad seal plus a bent trigger tab plus a cracked frame, you’re looking at three separate repairs. At that point, even a mid range gun isn’t worth fixing. Obsolete gun models where replacement seals aren’t available anymore obviously can’t be repaired. Bent or cracked frame body damage means the barrel won’t align properly, making seal repair pointless. Stripped threads on the barrel or lock nut assembly (usually from over tightening during previous repairs) prevent secure seal installation.
When you do replace, consider upgrades that prevent future seal problems and make the tool more versatile. Rotating barrels let you work at angles without fighting the cartridge orientation, which reduces stress on seal assemblies during awkward overhead work. Quick release cartridge mechanisms mean less wear and tear from loading and unloading. Adjustable thrust ratios let you dial in the right pressure for thick construction adhesive versus thin acrylic caulk. Less likely to blow seals from excessive force. Sealed plunger housings keep dust and contamination away from seal surfaces, extending life significantly. Professional contractors who use caulking guns weekly should budget $40 to $80 for guns with these features. Occasional DIY users doing two or three projects a year should target the $15 to $25 mid range models with basic sealed housing and decent build quality.
Final Words
A broken seal doesn’t mean your caulk gun is done. Most seal failures can be fixed in under 30 minutes with basic tools and a replacement seal kit under $10.
The key is proper diagnosis first. Make sure you’re actually dealing with seal damage and not a weak spring or bent release tab.
Hand-tighten that lock nut. Over-tightening is the top reason repairs fail within a week.
Clean thoroughly, install seals in the right sequence, and test with a draw check before loading material. Once you know how to fix broken caulk gun seal issues, you’ll save money and keep your projects moving.
FAQ
How do I fix my caulk gun?
To fix a caulk gun, you first diagnose whether the problem is a broken seal, stuck plunger, or weak spring, then follow the appropriate repair steps. For seal issues, remove the plunger rod, disassemble the front cap and lock nut with a 7/16 inch wrench, replace worn seals in the correct sequence (small washer, inverted seal cup, large washer, bowl-shaped seal, small washer), and hand-tighten the lock nut without using excessive force.
Can you patch repair silicone?
You cannot effectively patch repair a silicone caulk gun seal because degraded rubber and O-rings lose structural integrity and must be replaced entirely. However, leather seals (part 21-1) can be reconditioned by soaking overnight in 10-weight motor oil to restore flexibility if they’re worn but not cracked.
How do I reseal a caulking gun?
To reseal a caulking gun, you remove the old seal by disassembling the front cap with a 7/16 inch wrench, extract the damaged seal and washers, clean the barrel interior with a brush turned clockwise, then install new seals in proper order and hand-tighten the lock nut. The complete process takes 15-30 minutes for experienced users and requires keeping components clean and dry during reassembly.
Why is my caulk gun rod not advancing?
Your caulk gun rod is not advancing because either the release tab is bent and preventing proper trigger function, the plunger is stuck and needs the release bar reset, or the spring has weakened to the point where it no longer provides adequate tension. Pull back the release bar above the handle to reset a stuck plunger, but if the spring feels loose or weak, the gun has reached end of lifespan and requires full replacement.