
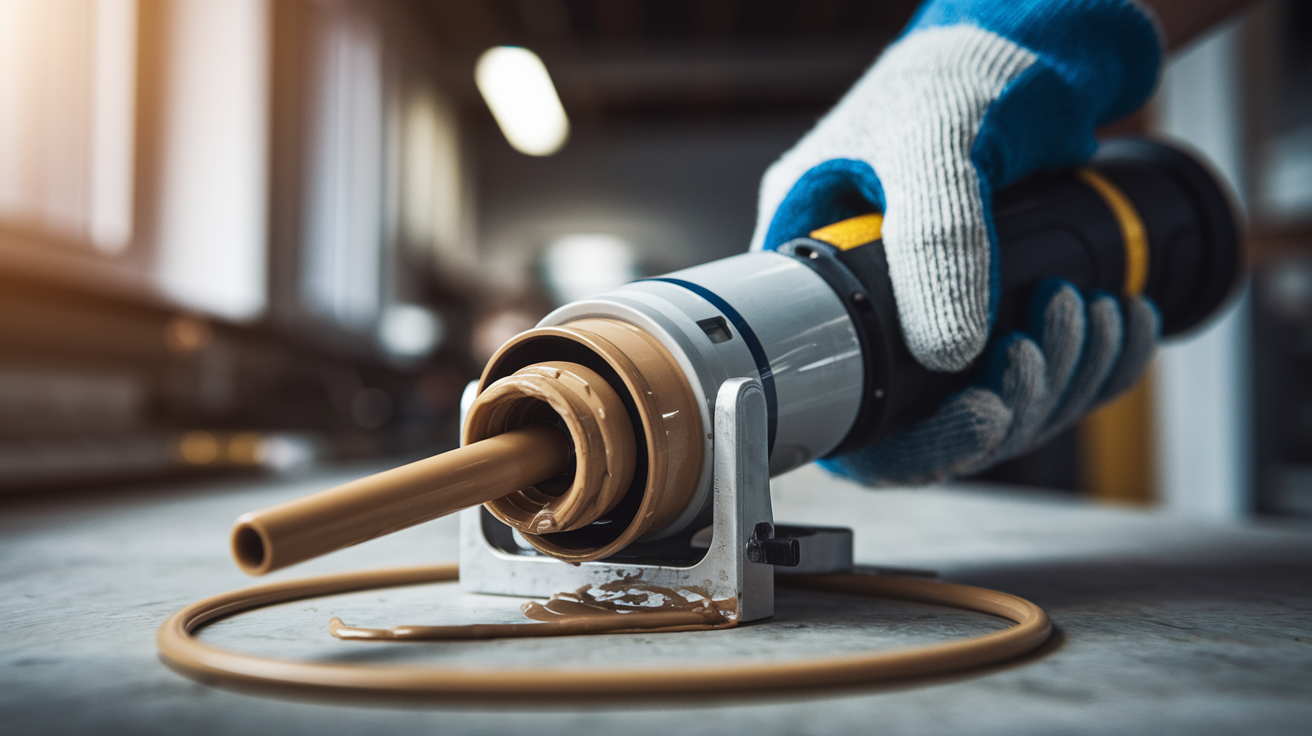
You ever squeeze the trigger to stop caulking, only to watch that bead keep oozing out like it has a mind of its own? That’s your pressure release failing, and it turns a quick sealing job into a messy cleanup situation. Most pressure release problems come from dried caulk gunk, wonky technique, or a mechanism that just needs a reset. The good news: you can usually fix this in under 10 minutes with stuff you already have, no trip to the hardware store required.
Quick Fixes for Non-Functioning Pressure Release Mechanisms
The pressure release mechanism on your caulking gun stops caulk flow by pulling back the push rod when you press the thumb lever on the side. When it fails, you’ll see the most obvious symptom: the rod won’t retract when you press the release, and sealant keeps dripping or oozing from the nozzle even after you’ve stopped squeezing the trigger. Most pressure release failures come from dried caulk buildup, wonky technique, or just needing to reset the plunger.
Before you decide your mechanism is toast, check your technique. Angle the caulking gun downward at about 45 degrees, press the thumb release lever firmly with your thumb, and grip only the back handle. Not the barrel or front section. A lot of people try pulling the rod back while holding the front of the gun, which actually stops the release from working properly. The downward angle helps gravity do some of the work, and gripping the back handle keeps your other hand clear of the mechanism.
Here’s the reset and cleaning process that fixes most pressure release problems:
- Remove the cartridge tube and pull the release bar above the handle all the way back to reset the plunger, making sure it clicks into the fully retracted position
- Fully retract the rod and look closely at the cradle mechanism where the rod sits for any dried caulk buildup, silicone residue, or debris
- Clean the push rod and cradle with warm soapy water and a clean cloth, scrubbing off all the gunk you can see and feel
- Apply a few drops of light machine oil to the smooth rod surface and work it back and forth a few times, then test the release function by pressing the thumb lever
After cleaning, do a quick visual check. Look at the release tab for any visible bending or deformation. Press the thumb lever a few times to make sure it moves freely without sticking or grinding. Run your hand along the rod to check for bends, kinks, or rough spots that would prevent smooth movement.
If these quick fixes don’t get your pressure release working again, you’re probably dealing with mechanical damage, worn out components, or a bent part that needs more involved repair or replacement.
Root Causes of Pressure Release Mechanism Failure
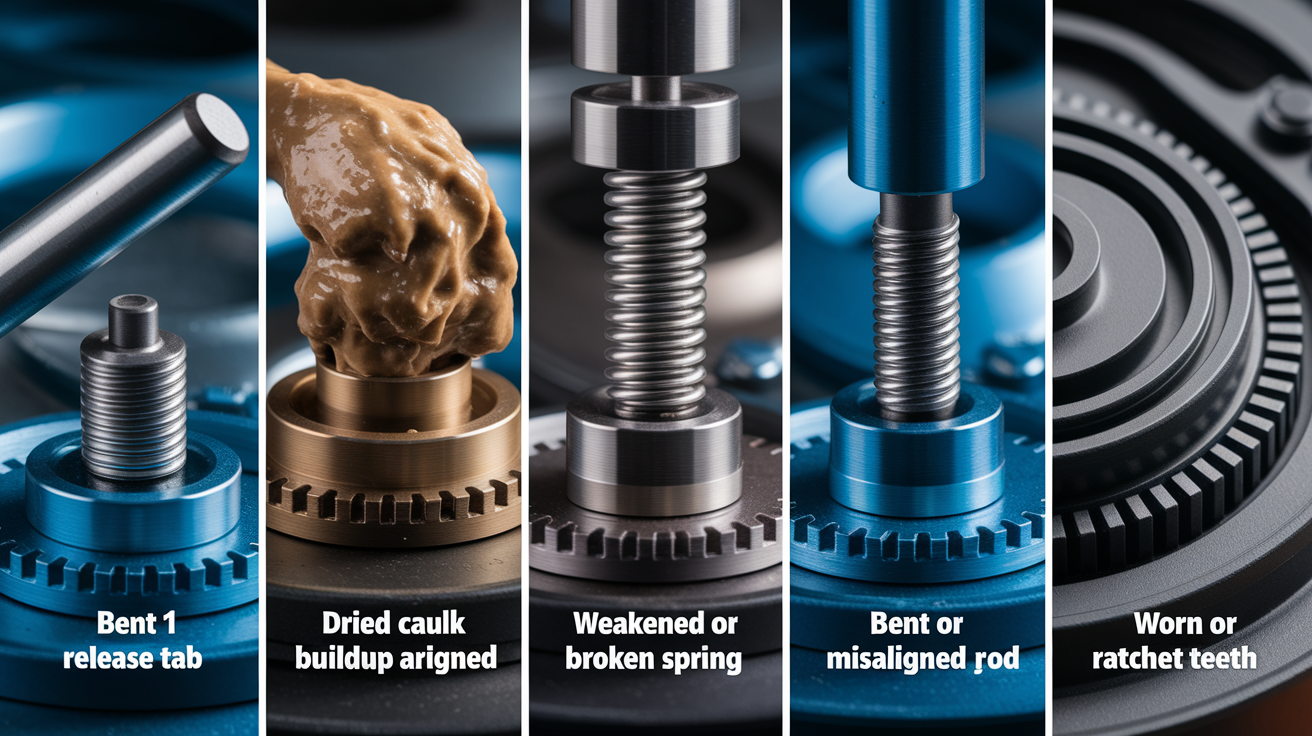
Pressure release mechanisms fail for five main reasons, and knowing which one you’re dealing with helps you fix it right the first time instead of just guessing.
Bent or Damaged Release Tab
The release tab, that metal piece that engages when you press the thumb lever, bends from overtightening the plunger rod nut, dropping the tool on a hard surface, or applying too much force when trying to make the release work. Once it’s bent, it won’t line up properly with the push rod hole. Pressing the lever doesn’t actually disengage the ratchet system. You might hear a click, but nothing moves.
Dried Caulk and Silicone Buildup
Residue creeps into places you can’t easily see. It piles up around the push rod where it enters the cradle, inside the release lever pivot points, and along the ratchet teeth that control rod movement. This buildup creates friction that turns what should be a smooth, easy release into a sticky, resistant mess. The mechanism tries to work, but dried caulk acts like glue holding everything in place.
Weakened or Broken Spring
The spring that controls automatic pressure release in dripless caulk guns loses tension over time, especially with heavy use. When spring tension drops below a certain point, it can’t pull the rod back those crucial few millimeters needed to stop flow. A weak spring means your gun is reaching the end of its functional life. There’s no quick fix. You can’t just tighten a spring back to full tension.
Bent or Misaligned Push Rod
A bent rod prevents full retraction even when the release mechanism activates correctly. The rod might pull back partway, but the bend catches on the cradle or frame, leaving residual pressure on the tube. You’ll notice the rod won’t move forward smoothly during use, or sealant continues flowing in a slow drip after you’ve released the trigger because pressure isn’t fully relieved.
Worn Ratchet System Components
The ratchet teeth that control incremental rod advancement and release wear down gradually. Each time you squeeze the trigger, metal slides against metal. Eventually, the teeth become rounded instead of sharp, the release pawl doesn’t catch cleanly, and the mechanism slips instead of engaging. This wear happens faster in cheaper caulk guns where softer metals and looser tolerances mean components bend, jam, or wear out within a few months of regular use.
Complete Pressure Release Repair and Maintenance Guide
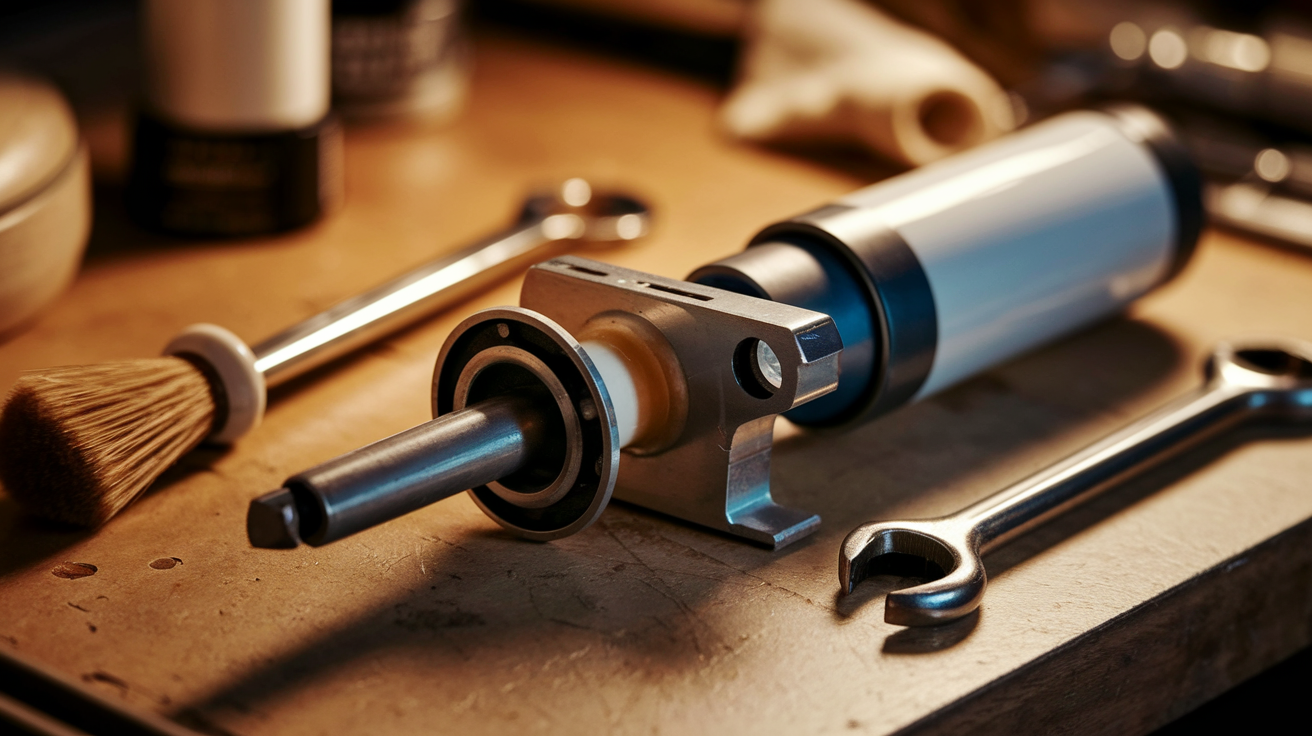
Fixing a pressure release mechanism and keeping it working requires some basic tools: a wrench or adjustable spanner, warm soapy water, clean cloth or rag, light machine oil or silicone lubricant, small wire brush, and a pair of safety gloves.
Before starting any repair, remove the cartridge tube from the gun and release all remaining pressure by pressing the trigger until no more resistance is felt. Wear gloves when handling the metal components. Edges on the rod, release tab, and frame can be surprisingly sharp, especially on older tools that have developed burrs or rough spots from use.
If you’ve determined the release tab is bent, here’s how to fix it:
- Remove the plunger rod nut with your wrench while holding the release tab firmly to control spring tension and prevent it from snapping back when the nut comes off
- Flip the bent release tab over so it’s oriented correctly, then check carefully that the hole in the tab aligns perfectly with the hole in the plunger rod
- Reinsert the plunger rod with the hook end pointing toward the top of the gun while holding both the release tab and spring steady so they don’t shift position
- Reattach the nut to the plunger plate, tighten it snugly but not gorilla tight, and test the trigger function by pressing the release lever several times
For deep cleaning that addresses dried caulk and silicone buildup, soak only the front barrel section and trigger assembly in warm soapy water for 20 to 30 minutes. Never submerge the handle, which often contains components that shouldn’t get waterlogged. Use the wire brush to scrub away silicone buildup from the rod and the cradle where the rod sits. Scrub the dried caulk from trigger pivot points and ratchet teeth, getting into the small gaps where residue hides. Rinse everything thoroughly under warm running water and dry completely with a clean cloth before moving to lubrication.
After cleaning and drying, apply light machine oil to the push rod surface, wiping it along the full length. Put a drop or two on the release lever pivot points where metal moves against metal. Work a small amount into the trigger mechanism and the ratchet system teeth. Proper lubrication cuts down friction that causes stiff triggers and prevents the smooth pressure release you need for clean caulk lines.
Keep your caulking gun working longer with these ongoing maintenance practices:
- Wipe excess caulk from the rod and barrel immediately after each use, before it has a chance to harden
- Store the caulking gun upright to prevent sealant from leaking backward into the mechanism
- Apply light machine oil to trigger pivots and the rod every 5 to 10 uses, or monthly during heavy project periods
- Inspect the release tab and spring for wear, cracks, or deformation monthly if you use the tool regularly
- Use good quality sealant that’s less likely to harden prematurely in the tube and create buildup
- Keep the tool in a dry location. Not in damp basements or unheated garages where rust forms on metal parts
After completing repairs and cleaning, test the mechanism before loading a new cartridge. Press the release lever and watch the rod retract smoothly. Load an empty tube and go through a few trigger cycles to verify everything moves freely. Regular tool inspection catches small problems like minor buildup or early spring wear before they turn into complete mechanism failure that leaves you mid project with a gun that won’t stop dripping.
When to Replace Parts vs. Buy a New Caulking Gun
Whether to repair or replace depends heavily on caulking gun quality and what’s actually broken. Professional grade models often have replacement springs, rods, and release mechanisms available through the manufacturer or specialty tool suppliers. Budget models typically cost less to replace entirely than to track down parts and spend time on repairs.
| Issue | Repair Cost Estimate | Replacement Recommended |
|---|---|---|
| Bent release tab | $0-5 (wrench only) | No, fixable with basic tools |
| Weak or broken spring | $5-15 if part available | Often yes, parts hard to find |
| Bent push rod | $8-20 for replacement rod | Depends on gun value |
| Complete mechanism failure | Varies widely | Yes for budget models |
| Worn ratchet system | $15-30 or full replacement | Yes unless professional model |
Replacement makes more sense than repair when you’re working with a budget model you picked up for under $15, when multiple components are failing at the same time (like a bent rod and weak spring together), when replacement parts simply aren’t available for your specific model, or when the tool is over 5 years old with heavy use and you’re seeing signs of metal fatigue or cracks in plastic components. At that point, you’re just chasing problems.
Quality models offer real advantages beyond just lasting longer. Precision engineered drive systems move smoothly with consistent pressure. Smooth rods create less drag, which means less strain on your hand and the release mechanism. Better pressure control translates to cleaner bead application and less frustration. Many quality manufacturers back their tools with 1 to 3 year warranties, and they stock replacement parts that can extend the tool’s working life past 10 years of regular use.
Home improvement projects, especially if you’re tackling bathroom resealing, window installation, or any job requiring multiple tubes of caulk, benefit from investing in a quality dispensing tool with a reliable automatic pressure release system that actually works when you need it.
Preventing Future Pressure Release Problems

Proper usage technique prevents most pressure release failures before they start. Don’t press too hard on the trigger and force things. Let the ratchet system advance the rod at its own pace. Don’t grab the rod and try to shove it forward manually, which bends components and throws alignment off. Release pressure immediately after finishing each bead by pressing the thumb lever. Not 30 seconds later after sealant has already started dripping. Match the sealant viscosity to your gun’s capacity. Ultra thick sealants designed for commercial applicators will overwhelm a standard homeowner grade caulking gun and stress the trigger mechanism.
Storage matters more than most people realize. Store the caulking gun upright in a dry location away from temperature extremes like unheated sheds in winter or hot attics in summer. Remove cartridge tubes between projects instead of leaving them installed for weeks. Dried caulk travels backward from the nozzle into the barrel and eventually reaches the mechanism. Keep the tool in a toolbox or mounted on wall hooks rather than tossed loose in work buckets where it gets knocked around, dropped, and damaged. One good drop onto concrete can bend the release tab or rod.
Material compatibility extends tool life significantly. Use neutral cure sealants that won’t corrode metal components over time. Acidic silicones eat away at steel and aluminum parts. Avoid ultra thick formulas or fast setting products that create excessive pressure inside the tube before you can finish the application. Select good quality caulk that flows consistently without air pockets that cause pressure spikes and sudden surges that stress the trigger mechanism and release system.
Proper technique combined with regular maintenance prevents about 90% of pressure release failures. The few minutes spent wiping down the tool after use and applying a drop of oil every few weeks saves you from dealing with a stuck mechanism in the middle of sealing a bathtub or window frame.
Upgraded Caulking Gun Features That Improve Pressure Control
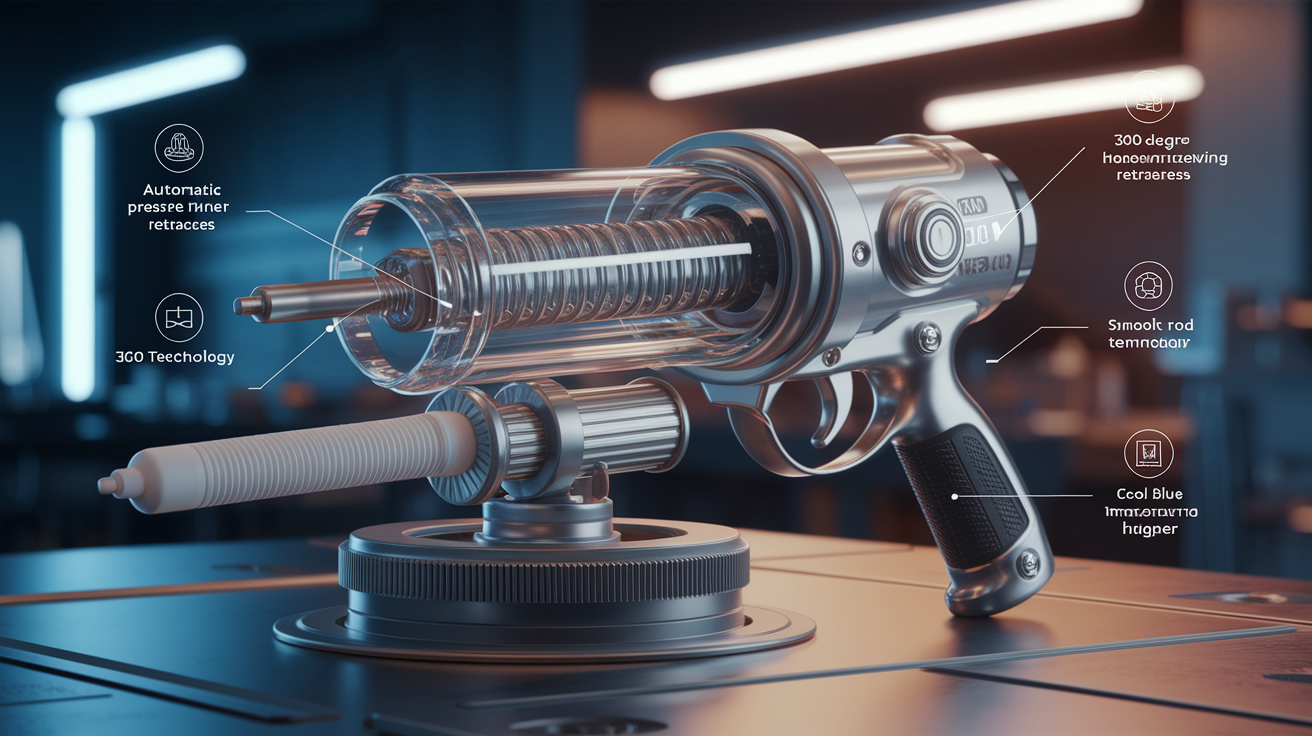
Newer caulking gun designs address the weaknesses that cause traditional pressure release mechanisms to fail, and understanding these features helps you choose better tools for future projects.
Automatic pressure retraction systems represent the biggest improvement in dispensing tool technology. True dripless caulk guns use spring loaded mechanisms that instantly retract the push rod about 1/4 inch the moment you release the trigger. This eliminates post application dripping without you needing to remember to press a separate release lever, and it reduces wear on manual release mechanisms because the system handles pressure relief automatically. The spring does the work instead of relying on a manual lever that can bend or stick.
360 degree revolving barrel designs solve a problem most people don’t realize causes half their rod and release tab damage. When you’re working overhead, in tight corners, or at awkward angles, a fixed barrel forces you to twist your wrist and apply uneven pressure that bends the rod or stresses the release mechanism. Rotating barrels let you adjust the gun orientation to whatever position keeps your hand and wrist comfortable, maintaining consistent pressure control regardless of where you’re applying the seal.
Smooth rod technology uses polished or specially coated thrust rods that glide through the cradle mechanism with minimal friction. Less friction means you don’t have to squeeze the trigger as hard, which reduces force on all components and creates more reliable pressure release with dramatically less wear. The difference in trigger effort between a rough steel rod and a polished one is substantial. After using a smooth rod gun, going back to a rough one feels like trying to push through thick mud.
Ergonomic trigger designs distribute hand pressure evenly across your palm instead of concentrating force on a few fingers. Comfort grip systems, especially those with wider trigger surfaces and contoured shapes that match your hand, reduce the tendency to over squeeze the trigger when you’re trying to get thick caulk flowing. Over squeezing damages release mechanisms and creates excessive tube pressure that overwhelms the relief system.
Integrated tools like built in spout cutters, tube puncture tools, and caulk plugs improve overall functionality and reduce the number of times you need to set the gun down during application. Every time you put the tool down on a work surface or toss it in a bucket, you risk impact damage to the release tab, rod alignment, or trigger assembly. Keeping everything you need attached to the gun means fewer chances to damage those precision components.
Final Words
A caulk gun pressure release not working usually comes down to dried buildup, a bent tab, or poor technique.
The reset-and-clean routine fixes most issues in under ten minutes. If your rod still won’t retract after that, check for bent components or weak springs.
Budget guns wear out fast. Quality models with smooth rods and automatic pressure release systems last years longer and save you repeat frustration.
Wipe the rod after each use, store upright, and lubricate occasionally. Those three habits prevent 90% of future pressure release problems and keep your next seal application smooth.
FAQ
Why is my caulking gun not pushing caulk out?
A caulking gun won’t push caulk out when the rod is bent, jammed with dried caulk buildup, or the release mechanism isn’t fully engaging. Pull the rod all the way back, clean the cradle thoroughly, and check that the trigger and plunger move freely.
How to release pressure on caulking gun?
To release pressure on a caulking gun, angle the tool downward at 45 degrees, press the thumb release lever firmly while gripping only the back handle, and pull the rod back. This retracts the plunger and stops caulk flow immediately.
How to release caulk gun plunger?
The caulk gun plunger releases by pressing the thumb lever above the trigger and pulling the rod backward until it fully retracts. If it’s stuck, pull the release bar above the handle all the way back to reset the mechanism.
How to unblock silicone gun nozzle?
To unblock a silicone gun nozzle, remove the cartridge, use a small wire or nail to clear hardened sealant from the tip opening, then cut a fresh angle if needed. Clean dried silicone from the nozzle threads before reattaching.
What causes a caulk gun pressure release to fail?
Caulk gun pressure release fails from bent release tabs, dried caulk buildup around the rod and cradle, weakened springs, bent push rods, or worn ratchet teeth. Most failures stem from lack of cleaning and lubrication after each use.
How do you fix a stuck caulk gun plunger?
Fix a stuck caulk gun plunger by removing the cartridge, pulling the release bar back to reset, then retracting the rod fully and cleaning dried caulk from the cradle with warm soapy water. Apply light machine oil before testing.
How often should you clean a caulking gun?
Clean a caulking gun after each use by wiping excess caulk from the rod and barrel. Deep clean the trigger assembly and cradle mechanism every 5-10 uses, and apply light machine oil to moving parts to prevent buildup and sticking.
Can you repair a bent caulk gun rod?
You can repair a bent caulk gun rod by gently applying even pressure against a flat solid surface to straighten it, avoiding excessive force that could crack the metal. Replacement rods for quality models typically cost $8-20.
When should you replace a caulking gun instead of repairing it?
Replace a caulking gun when the spring is weak with no replacement available, multiple components fail simultaneously, the tool is a budget model under $15, or it’s over 5 years old with visible metal fatigue or cracked plastic parts.
What features prevent caulk gun pressure release problems?
Features preventing pressure release problems include automatic pressure retraction systems that instantly pull the rod back, 360-degree revolving barrels that prevent awkward angles, smooth polished rods reducing friction, and ergonomic triggers distributing hand pressure evenly.