
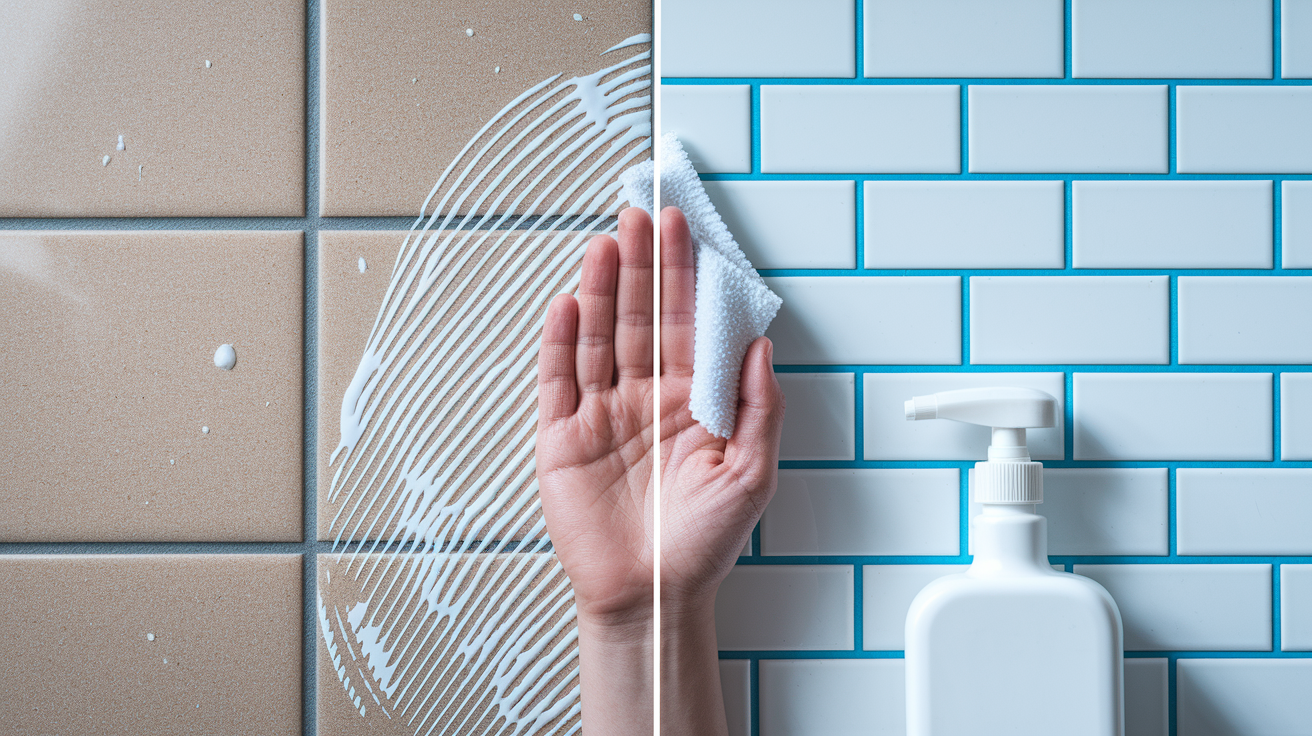
Old caulk around your tile doesn’t just look bad. It can trap moisture, grow mold, and make the whole shower or backsplash feel sketchy. But ripping it out wrong chips glazes, scratches surfaces, or cracks grout. The good news? With the right blade angle, a little chemical help, and patience in short sections, you can pull off clean caulk without wrecking your tile. This guide walks you through scoring, softening, scraping, and cleaning so you end up with smooth joints ready for fresh, watertight caulk.
Complete Caulk Removal Process for Tile Protection
Getting caulk off without wrecking your tile comes down to the right tools, smart technique, and knowing when to back off.
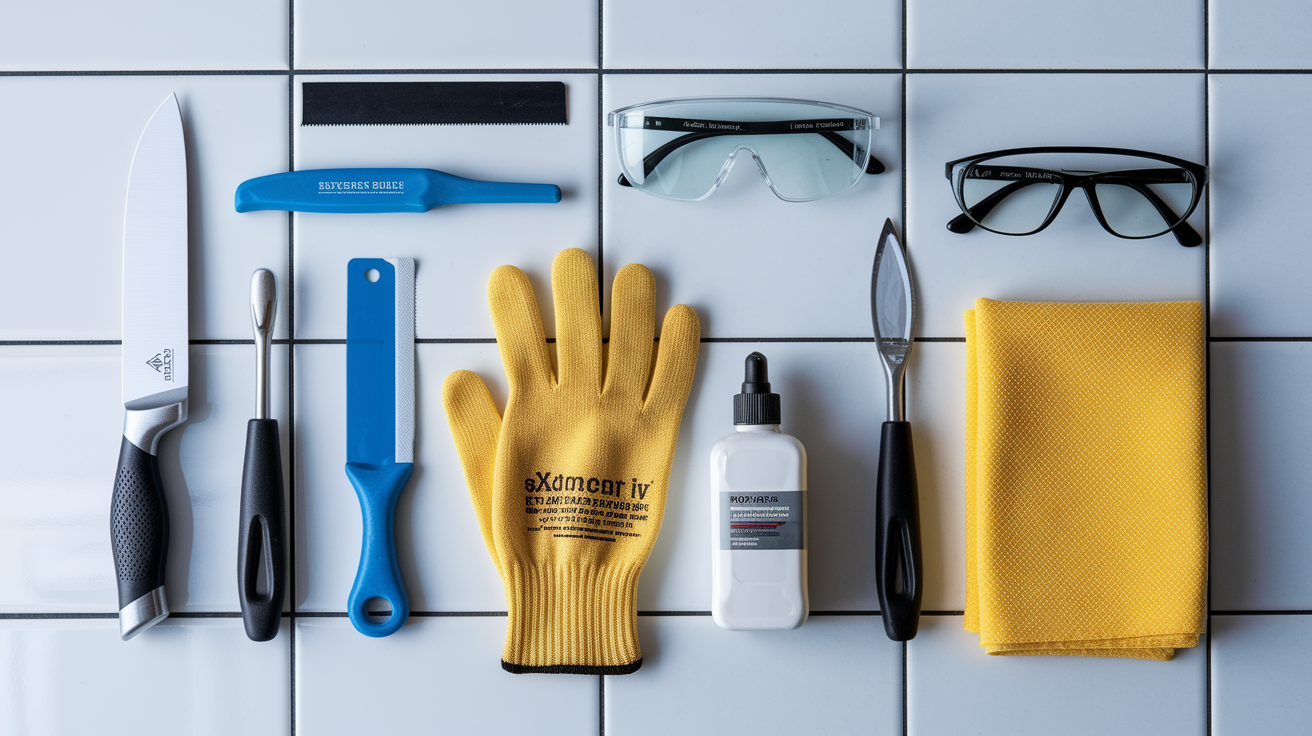
What you’ll need:
- Sharp utility knife for scoring edges
- Razor blade scraper with a handle (gives you control)
- Plastic scraper for anything delicate
- Caulk softener or remover (Goof-Off works, acetone too)
- Chemical-resistant gloves
- Safety glasses
- Clean lint-free cloths
- Rubbing alcohol or mineral spirits
How to do it:
- Gloves and glasses on before you start
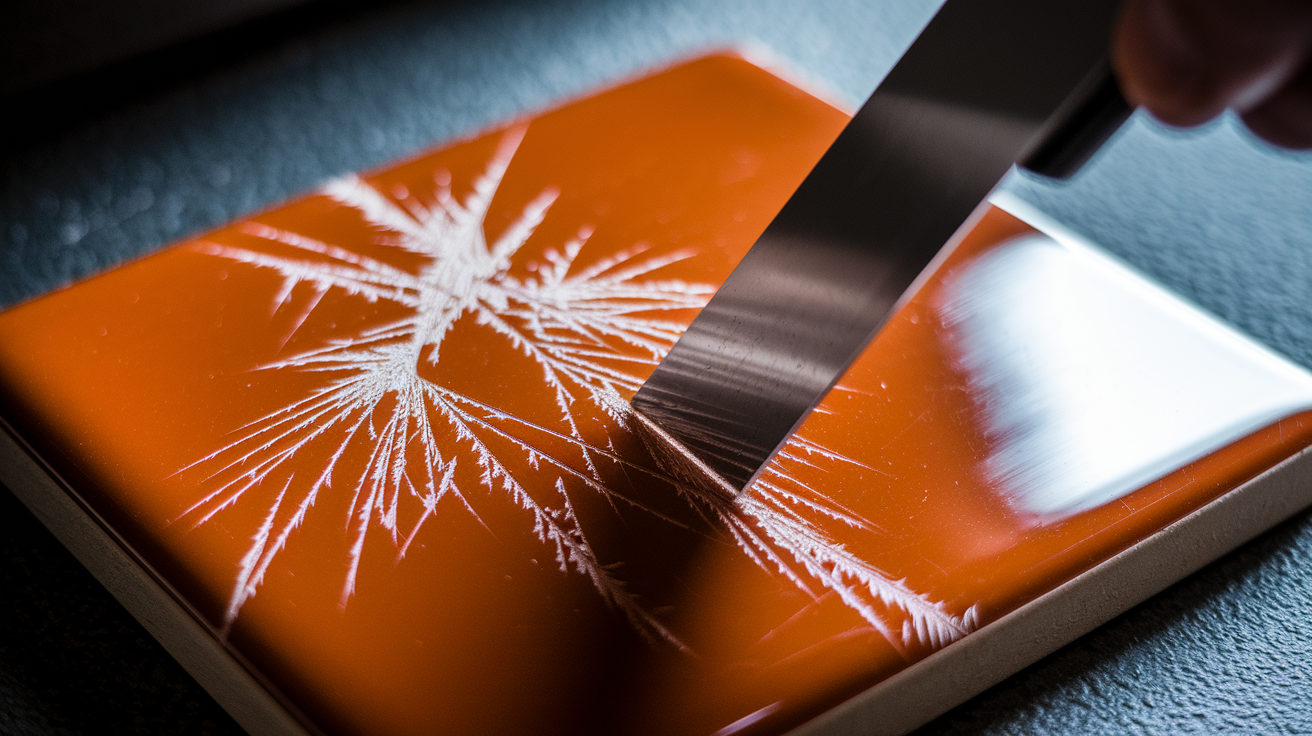
- Score both edges of the caulk bead at a 45-degree angle with your utility knife, making shallow cuts along each side of the seam
- If you’re dealing with stubborn silicone, apply caulk softener with a lint-free cloth and wait however long the label says
- Gently lift the edge of the caulk with the knife tip, keeping it at about 10-15 degrees to the tile
- Use the razor scraper to remove softened caulk with controlled pressure, blade held nearly flat
- Pull away bigger sections slowly (needle-nose pliers help with grip if you need it)
- Work in 6-inch sections, especially around corners and vertical seams where you’re most likely to cause damage
- Scrape leftover residue with the plastic scraper on delicate tiles, or keep using the razor blade on tough glazed ceramic
- Wipe residue away right away with a cloth dampened in rubbing alcohol
- Test your technique somewhere hidden first (behind the toilet, under the sink edge, a corner spot) before you tackle visible areas
Make sure you’ve got good airflow when using chemical solvents. Keep sharp blades angled away from your body. Wipe chemicals off quickly so they don’t dull the tile. And read the warning labels. Some solvents irritate skin or create fumes in tight bathroom spaces without proper ventilation.
Protect your tile by keeping that blade at 10-15 degrees so you don’t scratch the glaze. Don’t force it. Never pry between tiles. If you see stress marks or surface scratching, stop immediately and switch to something gentler. Glazed ceramic and porcelain resist damage better than natural stone, and patience prevents most problems. If you notice white stress lines showing up on the tile or hear cracking sounds, you’re pushing too hard.
Understanding Your Caulk Type Before Removal

Different caulks need different approaches, and knowing what you’re working with saves you from wasted effort and potential tile damage.
The three main types are silicone, acrylic/latex, and polyurethane. Silicone feels rubbery and flexible, stretches when you pull it, and has a bit of a shiny finish. Acrylic and latex feel firmer, might crack when you bend them, and usually look matte. Polyurethane falls somewhere in between.
You can figure out which type you have by how it behaves when you start removing it. Silicone typically peels away in thick, continuous strips once you get under the edge. Acrylic tends to crumble or break into smaller pieces. If the caulk feels sticky or tacky when you scrape it, it’s probably silicone. If it feels brittle or powdery, you’re likely dealing with acrylic or latex. Some silicones have oils that can seep into natural stones and leave permanent stains if you don’t remove them carefully.
Silicone needs more aggressive methods than acrylic because it bonds stronger and resists most solvents. Acrylic and latex often soften with water-based solutions or simple heat, while silicone needs specialized chemical softeners or extended mechanical scraping. Knowing your caulk type helps you pick the right solvents and tools without risking tile damage. You won’t waste time applying a chemical that doesn’t work on your specific caulk, and you won’t use too much force trying to remove something that could come off easier with the right product.
Essential Tools and Materials for Tile-Safe Caulk Removal
Tool selection depends on your tile material and finish, and matching the right tool to your specific tile prevents most damage.
Using the wrong tool causes most DIY tile damage. A metal scraper that works perfectly on porcelain can scratch delicate glass tile in seconds. A plastic scraper that’s safe on natural stone might not have enough edge to remove tough silicone from ceramic.
| Tool | Best For | Tile Types | Usage Notes |
|---|---|---|---|
| Utility knife | Scoring caulk edges, cutting thick beads | All glazed ceramic, porcelain | Retractable blade for safety, replace when dull |
| Razor blade scraper | Removing bulk caulk, detailed work | Glazed ceramic, porcelain, some glass | Hold nearly flat (10-15 degrees) to tile surface |
| Plastic scraper | Gentle removal, residue cleanup | Natural stone, glass tile, vintage finishes | Less effective on thick silicone, good for final cleanup |
| Putty knife | Prying up lifted caulk sections | Durable glazed surfaces only | Avoid edges and corners where pressure can chip |
| Needle-nose pliers | Gripping and pulling loosened caulk | All types when caulk is already lifted | Prevents hand fatigue during long pulls |
| Caulk softener tools | Applying chemicals to joints | All types | Clean lint-free cloths work best for even application |
Go with metal scrapers like razor blades and utility knives for glazed ceramic and porcelain because these surfaces have hard, durable finishes that resist scratching. Switch to plastic scrapers for natural stone (marble, travertine, limestone), glass tile, or vintage tiles with delicate glazed finishes that can scratch or dull with metal contact. Single-edge razor blades work best for detail work around fixtures and corners. Retractable utility knives are ideal for scoring long seams because you can adjust blade depth and lock it securely. Blade sharpness matters more than you’d think. A dull blade requires too much pressure, which increases your chance of slipping and gouging the tile. Replace blades as soon as you feel resistance or see the edge rolling over instead of cutting cleanly.
Chemical Caulk Softeners and Removers for Tile Applications
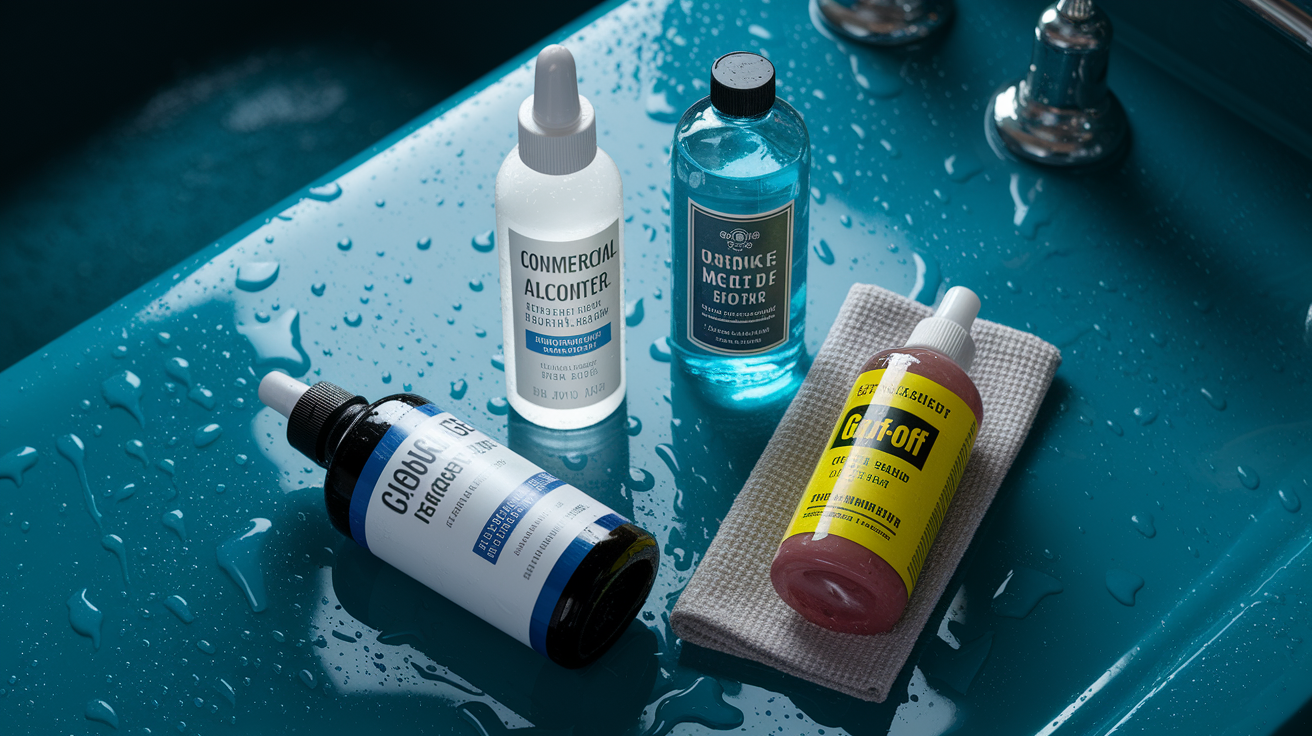
Chemical softeners work well on stubborn or thick caulk beads that won’t budge with scraping alone.
Picking tile-safe products prevents dulling, discoloration, or damage to both the tile surface and any existing sealers on grout or stone.
| Chemical Product | Best For | Tile Safety Notes | Dwell Time |
|---|---|---|---|
| Commercial gel remover | Silicone on all tile types | Test first; most are safe on glazed surfaces | 30 minutes to 2 hours per label |
| Rubbing alcohol (isopropyl) | Light residue, final cleanup | Safe on all tile types | 1-2 minutes, then wipe |
| Mineral spirits | Silicone residue, oily film | Avoid on unsealed stone; may dull finish | 5-10 minutes maximum |
| Goof-Off | Multiple adhesive types, stubborn spots | Safe on glazed ceramic/porcelain; test on stone | 2-5 minutes, wipe promptly |
| Vinegar solution | Acrylic/latex caulk only | Never use on natural stone or grout | 10-15 minutes |
Apply chemicals by dampening a clean lint-free cloth with the product, pressing it against the caulk bead, and waiting the manufacturer’s recommended time. For thick beads, you can lay the dampened cloth directly on the caulk line and let it sit. Always wipe promptly after the time’s up. Leaving solvents too long can dull tile glazes, especially on older or lower-quality ceramic tiles.
Different tile finishes react differently to solvents. Glazed ceramic and porcelain handle most chemicals well because the glaze creates a non-porous barrier. Natural stone like marble or travertine can absorb solvents, which may darken the stone or leave residue that’s harder to remove than the original caulk. Mineral spirits work well on silicone residue but should be used sparingly on stone. Goof-Off is a user-friendly alternative that works well on various adhesives without the harsh smell of acetone, though it still needs good ventilation.
Acetone dissolves silicone effectively but can dull certain tile glazes, particularly on hand-painted or artisan tiles. When using acetone on sealed terrazzo or natural stone surfaces, you might need to reseal afterward because acetone strips some protective sealers. Test every chemical in a hidden spot (like behind a toilet or under a vanity overhang) and wait 24 hours to check for discoloration, dulling, or other reactions before treating visible areas.
Heat Method for Softening Caulk on Tile
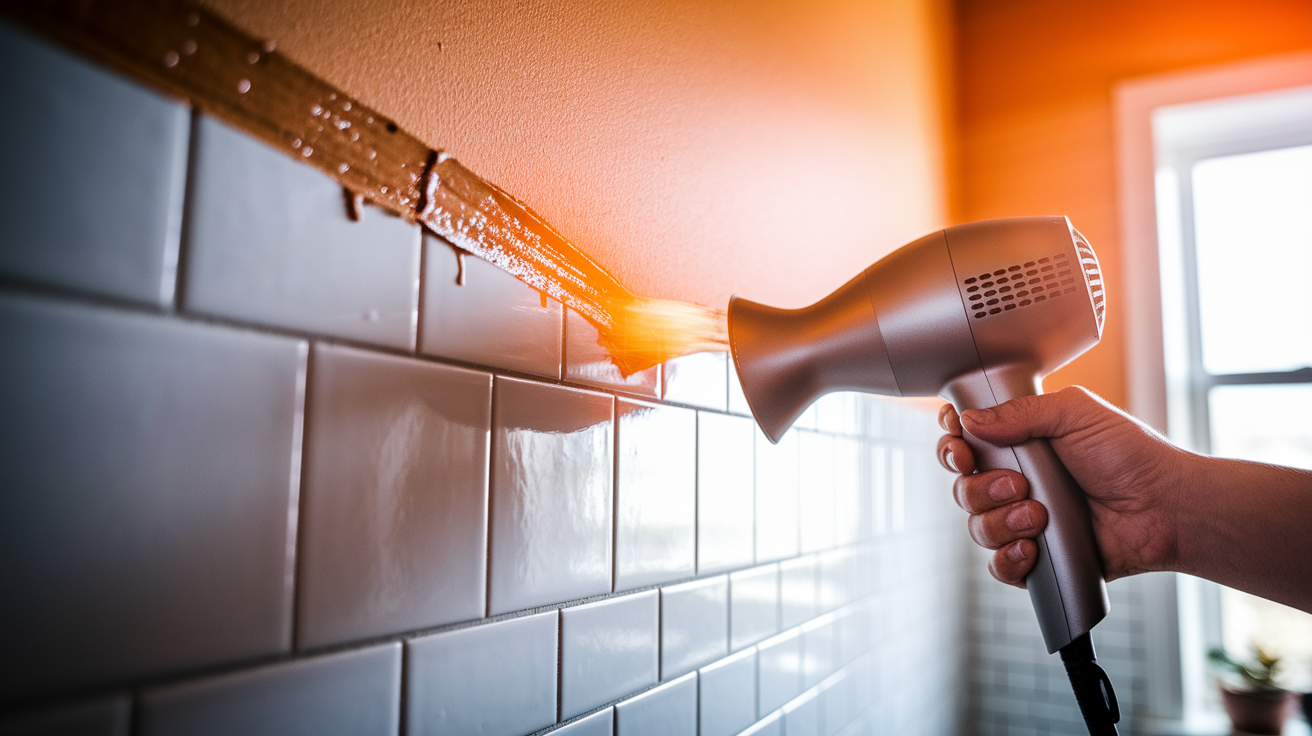
Controlled heat softens silicone and makes it more pliable, which means you need less force during scraping and lower your risk of tile damage.
Use a hair dryer on low to medium setting, holding it 6-8 inches from the tile surface. Too close or too hot can crack tile, especially if there’s moisture trapped beneath the surface or if you’re working with natural stone that expands unevenly when heated. Glass tiles are particularly vulnerable to thermal stress and can shatter with direct high heat.
Here’s the sequence that works: warm a 6-inch section for 30-60 seconds, then scrape immediately while the caulk’s still warm and soft. Work quickly because silicone re-hardens as it cools, usually within 60-90 seconds. Move to the next section and repeat rather than trying to heat large areas at once. The goal is to make the silicone rubbery and stretchy, not melted or scorched. If you see discoloration or smell burning, you’re using too much heat.
Don’t use heat on certain tile types at all. Natural stone like marble and granite can develop micro-cracks from rapid temperature changes. Crackle-glaze ceramic tiles have intentional surface cracks in the glaze that can expand with heat. Vintage tiles, particularly those installed before the 1970s, may have adhesion issues that heat can worsen, causing tiles to loosen from the wall. When in doubt, test heat application on a small corner section first.
Heat works best as a combination method rather than standalone. After softening the caulk with a hair dryer, use your razor blade scraper at a shallow angle to lift and peel the warmed silicone. The heat reduces the bond strength temporarily, so you need less scraping force and create less stress on the tile surface. If the caulk re-hardens before you finish a section, reheat briefly and continue.
Removing Adhesive Residue from Tile After Caulk Extraction
Residue removal matters for proper adhesion of new caulk and for getting a clean, professional look.
Residue removal methods (gentlest to most aggressive):
- Pencil eraser for light haze on delicate surfaces like glass tile
- Magic Eraser sponge dampened slightly with water
- Rubbing alcohol applied with lint-free cloth
- Mineral spirits on cloth for oily residue
- Baking soda paste scrubbed in gentle circles
- Fine abrasive pad with tile cleaner for stubborn film
Start with the gentlest method that matches your residue type. A pencil eraser works surprisingly well on light silicone haze because the rubber grabs the residue without scratching. Magic Eraser sponges (melamine foam) remove silicone film through micro-abrasion, but use light pressure because they can dull some tile finishes if you scrub too hard. Rubbing alcohol dissolves many adhesive residues and evaporates quickly without leaving its own film behind.
Create a baking soda paste by mixing three parts baking soda with one part water until you get a thick, spreadable consistency. Apply a thin layer over the residue, let it sit for 5-10 minutes to absorb oils and loosen the bond, then scrub gently in small circular motions with a damp cloth or soft brush. The mild scrubbing action combined with baking soda’s degreasing properties tackles stubborn spots without scratching glazed surfaces. Rinse thoroughly afterward because baking soda can leave a white film if not fully removed.
Test each method on a small area first, starting with the gentlest option and moving to stronger methods only if needed. Apply the product, wait the recommended time, wipe clean, and check under angled light to make sure it’s completely gone. Side lighting reveals residue that looks clean under direct overhead light. If you still see a hazy film, rainbow sheen, or sticky feeling when you run your finger across the surface, residue remains and will mess with new caulk adhesion.
Protecting Grout Lines During Caulk Removal
Grout’s more vulnerable than tile during caulk removal because it’s porous, softer, and can crumble or gouge easily with aggressive scraping.
The scoring technique creates a clean separation between caulk and grout. Make your initial utility knife cuts right along the edge where caulk meets the tile surface, not where caulk meets grout. This focuses the cutting force on the tile (which can handle it) rather than on the grout (which can’t). Score both sides of the caulk bead in one smooth pass rather than multiple shallow passes that can wander into the grout.
Position your blade parallel to grout lines, never perpendicular. A perpendicular blade angle drives the tip into the grout when you apply pressure, while a parallel angle slides along the surface. Think of it like cutting along a ruler edge rather than chopping across it. When you scrape away loosened caulk near a grout line, keep the blade flat against the tile and pull away from the grout rather than toward it.
Corner joints where grout, tile, and caulk meet need extra care. These are transition points where different materials with different hardnesses come together, creating the highest risk for accidental gouging. Work slowly around corners, using the tip of your utility knife to separate the caulk from both surfaces before you try to pull or scrape. If you feel resistance, stop and cut more rather than forcing the caulk out.
You can protect grout when working with aggressive chemicals by applying painters tape along grout lines next to the caulk. Press the tape down firmly so chemicals can’t seep underneath. This adds a few minutes of prep time but prevents grout discoloration or degradation from prolonged chemical contact.
Remember the difference between caulk joints and grout joints. Caulk joints are flexible and waterproof, designed for areas where movement occurs (wall-to-tub transitions, corner seams). Grout joints are rigid and porous, designed to fill space between stationary tiles. Never scrape grout thinking it’s caulk, and never apply so much force during caulk removal that you damage the grout beneath or beside it.
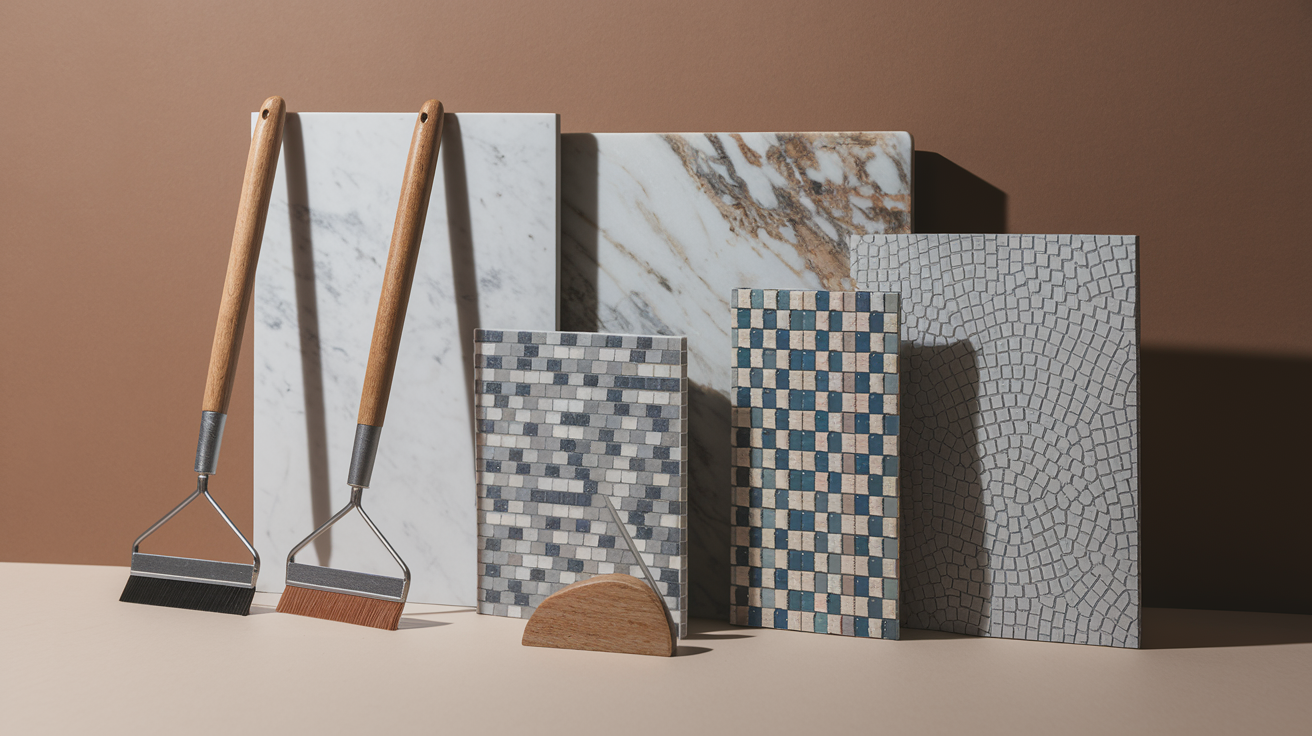
Special Considerations for Different Tile Types
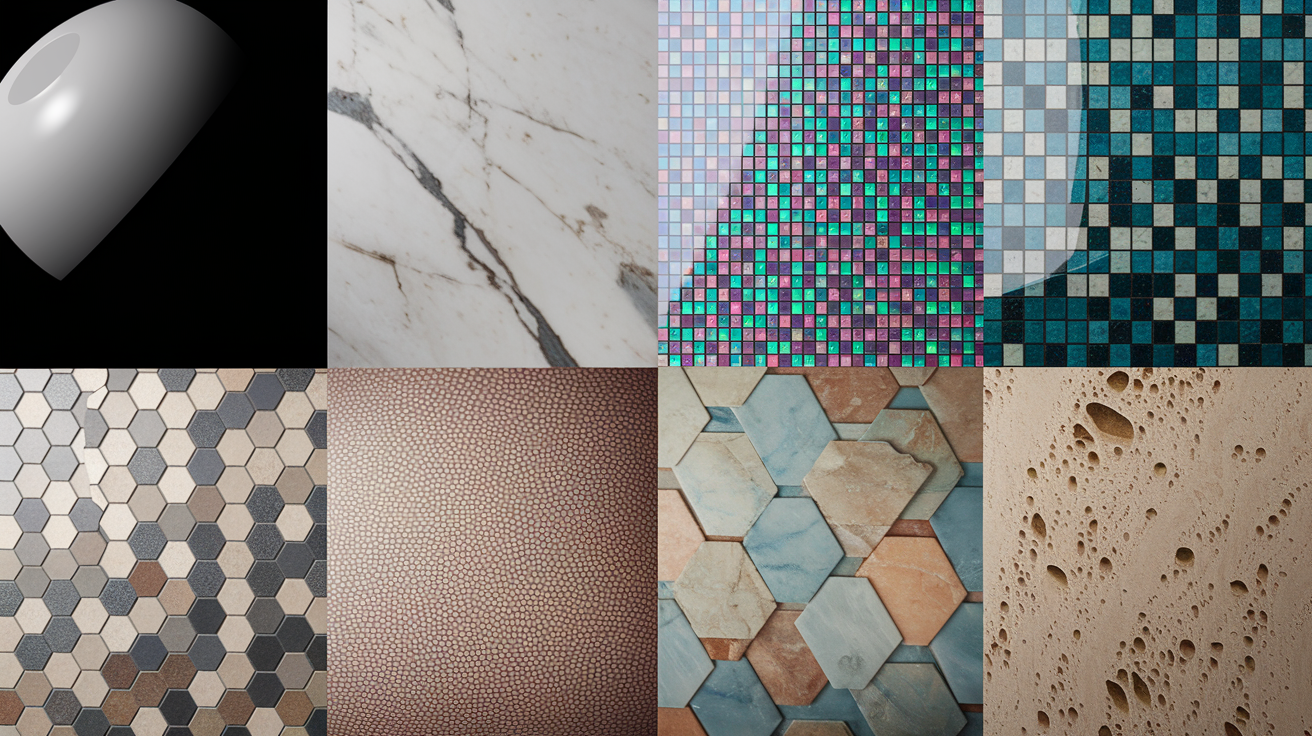
Tile material and finish dictate which removal methods are safe and which will cause permanent damage.
Glazed Ceramic and Porcelain Tile
These are the most forgiving tile types for aggressive removal methods. The glaze creates a hard, non-porous surface layer that resists scratching from metal scrapers, tolerates chemical solvents without staining, and handles moderate heat without cracking. Through-body porcelain and glazed porcelain tiles are durable enough to withstand most cleaning processes, including firm scraping with sharp blades. You can use utility knives, razor blade scrapers, chemical removers like Goof-Off or acetone, and heat from hair dryers without significant risk. Still keep proper blade angles and avoid too much pressure, but these tiles give you the most room for error.
Natural Stone Tile
Porosity creates the main concern with natural stone. Marble, travertine, limestone, and similar stones absorb liquids, including oils from certain silicones. Some silicones have oils that can seep into natural stone, leaving permanent dark stains that appear as shadow lines where the old caulk was. Use plastic scrapers instead of metal to avoid surface scratches. Don’t use acidic cleaners like vinegar at all because acid etches stone, creating dull spots. Choose gentler solvents like rubbing alcohol over harsh chemicals, and always test in a hidden area first. Many natural stone installations have protective sealers applied, and aggressive solvents can strip these sealers, requiring professional resealing after caulk removal.
Glass Tile
The edges are the vulnerable points on glass tile, not the face. Glass tile faces handle gentle scraping well, but too much pressure near edges can chip or crack them. Use plastic scrapers only, or use extreme caution with razor blades kept absolutely flat against the tile face. A pencil eraser works surprisingly well on light silicone residue on glass without any risk of scratching. Never use heat on glass tile because uneven heating creates stress points that can cause cracks to spread, especially on back-painted glass tiles where the paint layer creates different expansion rates.
Textured and Matte-Finish Tile
Residue in texture valleys creates the main challenge here. A smooth scraper glides over the surface but leaves residue deep in the texture. Use soft-bristle brushes (like an old toothbrush) to work cleaner into textured areas, and allow extended time for chemical softeners to get into low spots. Scrubbing motions work better than scraping on textured surfaces. Matte finishes show scratches more obviously than glossy finishes, so reduce pressure and use plastic scrapers or softer tools even if the tile material would normally handle metal.
Bathroom and Shower Caulk Removal Best Practices
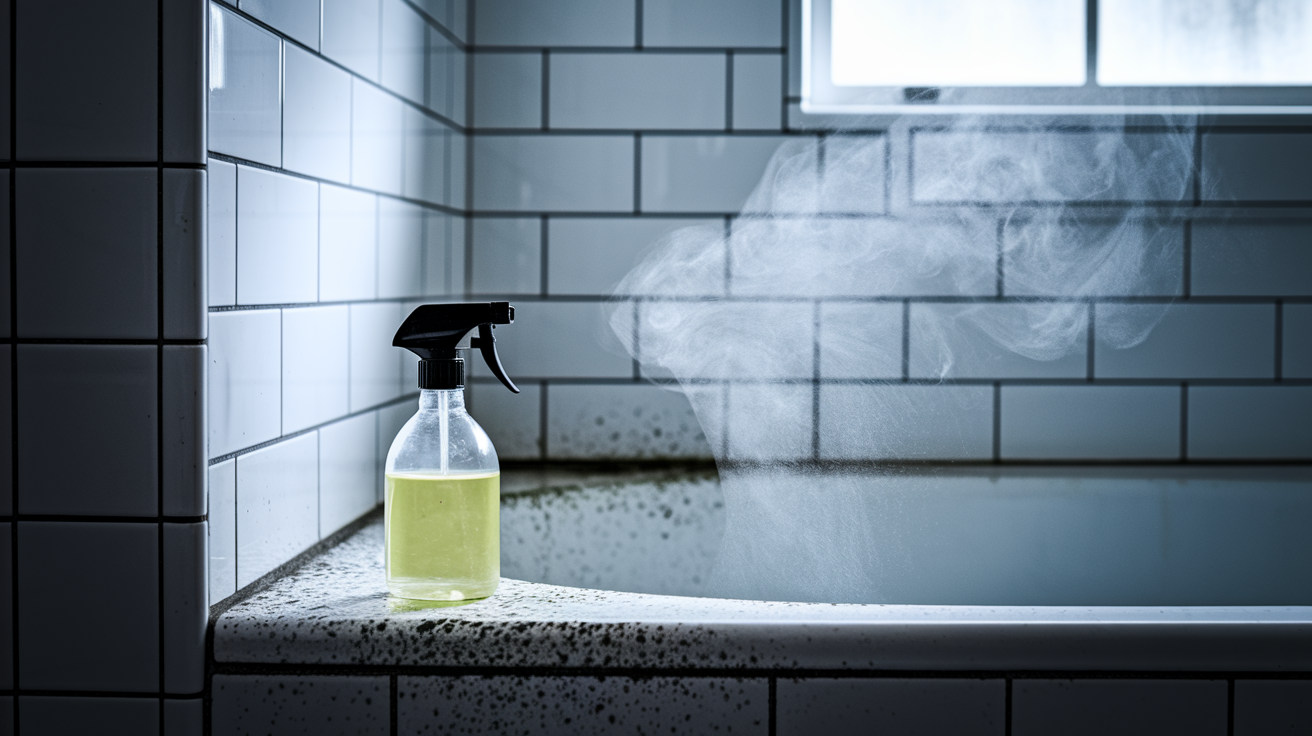
Bathroom caulk often has mold and mildew that need extra cleaning steps before you even start removing the caulk.
Pre-treat moldy caulk with a bleach solution (one part bleach to ten parts water) sprayed directly onto the affected areas. Let it sit for 10-15 minutes to kill active mold growth. This doesn’t remove the mold staining, but it kills live spores that would otherwise get airborne during scraping and potentially spread to new areas. Make sure you’ve got good ventilation during bleach application because bleach fumes in an enclosed bathroom can irritate eyes and lungs.
Critical waterproofing areas in showers must be recaulked properly after removal. The tub-to-wall joint is the primary water barrier preventing moisture from running down behind your tub or shower pan. Corner seams channel water away from wall cavities. Fixture penetrations (faucet trim, showerheads) need sealed edges to prevent water getting in. When you remove caulk from these areas, you temporarily compromise your home’s water barrier, which is why finishing the job through to recaulking matters so much. Shower floor joints between wall and floor tiles should be filled with silicone or polyurethane sealant to stay waterproof and prevent mold growth in the gap.
Thorough drying before recaulking prevents trapped moisture that creates mold growth beneath your fresh caulk. After removing all caulk and residue, wipe the area dry with clean towels, then allow 24-48 hours of drying time in high-moisture bathroom areas. Run the bathroom fan continuously during this period if you have one. Point a small fan directly at the work area if you don’t. The goal is to evaporate all moisture from tile pores, grout, and substrate materials.
Extended drying time isn’t optional in showers and tub surrounds. These areas get daily water exposure, which means moisture’s often present deep in grout and behind surface materials even when the visible surface looks dry. Putting new caulk over damp surfaces leads to adhesion failure within weeks and creates an ideal environment for mold growth. The visible tile face might dry in hours, but the grout, backer board, and tile adhesive beneath need days to fully dry.
Bathroom ventilation during and after removal speeds drying and reduces chemical fumes from solvents. Open windows, run exhaust fans, or set up a portable fan blowing toward an open door. Solvent fumes build up quickly in small, enclosed bathrooms and can cause headaches, dizziness, or nausea. Fresh air circulation protects your health and carries moisture out of the space, supporting the thorough drying your bathroom needs before recaulking.
Common Caulk Removal Mistakes That Damage Tile
Understanding common mistakes helps you avoid repeating them and spot problems before they cause permanent damage.
| Mistake | Consequence | Prevention |
|---|---|---|
| Using incorrect blade angle (too steep) | Gouges in tile surface, scratched glaze | Keep blade 10-15 degrees to surface, nearly flat |
| Excessive scraping pressure | Chipped tile edges, cracked corners | Use chemical softeners first, let product do the work |
| Prying between tiles | Loosened tiles, broken grout, cracked tiles | Work along tile surface only, never insert blade into joints |
| Leaving chemicals too long | Dulled glaze, discolored grout, damaged sealers | Follow product times, wipe promptly with clean cloth |
| Skipping test area | Visible damage on prominent surfaces | Always test method on hidden spot (behind toilet, under sink) |
| Using power tools without experience | Deep gouges, cracked tiles, rapid damage | Master manual methods first, practice with power tools on scrap |
Patience and testing prevent most tile damage. The urge to speed things up by pressing harder or using more aggressive methods causes the majority of DIY tile disasters. When a method isn’t working quickly, the solution’s usually a better product or more time, not more force.
Stop and reassess when tile shows stress marks. If you see white lines appearing on colored tile, hairline cracks forming, or hear cracking sounds during scraping, you’re damaging the tile. Stop immediately, switch to a gentler method, apply a chemical softener, or try a different angle. Continuing when you see or hear these warning signs turns minor surface damage into cracks that spread and tiles that need replacement.
Professional help makes sense when tile’s valuable (hand-painted, imported, antique), already compromised (existing cracks, loose tiles, damaged grout), or when you’ve made multiple DIY attempts without success and see damage starting to appear. Professionals have specialized tools (like controlled oscillating blades with depth stops) and experience with delicate materials that can justify their cost when you’re working with tile you can’t easily replace.
Preparing Tile Surface for New Caulk Application
Proper prep between old caulk removal and new caulk application determines whether your new caulk lasts years or fails within months.
Prep steps:
- Remove all residue completely using appropriate methods for your tile type
- Clean entire area with isopropyl alcohol on lint-free cloth
- Dry thoroughly for 24-48 hours with good ventilation
- Check for tile damage that needs repair before recaulking
- Assess gap width to figure out if backer rod’s needed
- Apply painters tape along both sides of joint for clean caulk lines
The alcohol wipe-down removes oils, soap residue, body oils, and mineral deposits that prevent proper caulk adhesion. Dampen a clean lint-free cloth with 70% or higher isopropyl alcohol and wipe the entire joint area, including an inch or two on each side where new caulk will contact the tile. Let the alcohol evaporate completely (usually 2-3 minutes). The surface should feel squeaky clean when you run a dry finger along it, with no slickness or tackiness remaining.
Figure out whether gaps need backer rod before new caulk. Gaps wider than 3/8 inch need backer rod (foam rope) inserted first to provide backing and reduce the amount of caulk needed. Measure your gap at its widest point. If it varies a lot (like in an old house where nothing’s square), use a backer rod sized to the widest section. Push the backer rod into the gap until it’s about 1/4 inch below the surface, creating depth for the caulk to sit in. This prevents three-sided adhesion, which causes caulk to fail early.
Test for complete dryness using both visual inspection and touch. Look for darker areas that show moisture, water droplets, or condensation. Run your hand along the surface. It should feel completely dry, not cool or damp. In humid climates or poorly ventilated bathrooms, surface drying happens quickly but deeper moisture remains. When in doubt, give it another 24 hours. Rushing this stage is the main cause of new caulk failure. Moisture trapped beneath new caulk creates mold growth, prevents proper adhesion, and causes the caulk to peel away from surfaces within weeks.
Time and Cost Expectations for DIY Caulk Removal
Realistic time and budget estimates help you plan properly and decide whether DIY makes sense for your situation.
Small projects like a bathroom sink take 1-2 hours including prep, removal, cleanup, and surface prep for recaulking. A standard tub surround with three sides runs 3-4 hours because of the increased footage and common presence of mold that needs pre-treatment. A full shower enclosure including floor seams can take 4-6 hours, particularly if you’re working with thick silicone beads or multiple layers of old caulk that previous owners kept applying over failing caulk.
Basic tool and material costs for a typical bathroom project range from $15-30 if you’re starting from nothing. This includes a utility knife with extra blades ($8-12), a razor blade scraper or pack of single-edge blades ($5-8), and basic safety items. Chemical removers add $8-15 depending on brand and quantity. A small bottle of Goof-Off costs $6-8, while specialty caulk remover gels run $10-15 per tube. Safety gear including chemical-resistant gloves and safety glasses adds $10-20 if you don’t already own these.
Compare DIY costs to professional caulk removal service, which typically runs $150-400 depending on project scope, your location, and tile condition. Professional service makes sense when you’re dealing with expensive or delicate tile, when the caulk removal’s part of a larger bathroom renovation, or when you’ve already damaged tile during a DIY attempt and need expert repair. Professionals finish the work faster and carry insurance that covers accidental damage.
Several things increase time beyond basic estimates. Multiple caulk layers that previous homeowners applied over each other add an hour or more because each layer needs separate treatment. Silicone on porous tile takes longer because residue seeps into surface pores. Extensive mold and mildew need pre-treatment time plus more careful scraping to avoid spreading spores. Large gaps (over 1/2 inch) often mean caulk has pulled away from one surface and created thick, irregular beads that resist simple scraping.
Work in sections and take breaks to prevent fatigue-related mistakes. Remove the caulk from one wall or one fixture area, clean it completely, then move to the next section. Working for 30-45 minutes then stepping away for 5-10 minutes keeps your hands steady and your judgment sharp. Most tile damage happens in the final hour of a project when fatigue sets in and people rush to finish.
First-time DIYers should add extra time for the learning curve, usually 50% on top of standard estimates. Your first few feet of caulk removal teaches you proper blade angle, how much pressure to use, and how your specific caulk responds to different methods. By the end of the project you’ll work much faster, but those first sections require patience while you develop technique.
Troubleshooting Stubborn Caulk and Difficult Scenarios
Some caulk situations need escalated techniques beyond basic scraping and chemicals while still keeping tile safe.
Multi-layer caulk removal’s common in older homes where previous owners kept applying new caulk over failing old caulk instead of removing and replacing it. You’ll recognize this by unusually thick beads (over 1/2 inch), visible color variations showing different product types, or beads that peel away in distinct layers. Remove the top layers first using your standard scraping technique, then treat each underlying layer separately. The bottom layer often bonds most strongly because it had the best surface prep, so focus your chemical softener application on that final layer.
Oscillating multi-tools speed up removal but need practice and caution to avoid gouging tile. Use a rigid scraper blade attachment (not flexible), set the speed to medium (not high), and keep an absolutely flat angle to the tile surface. Tilting the blade even slightly drives the vibrating edge into the tile and creates deep scratches in seconds. Practice on scrap tile or in a hidden area first. The oscillating action works well on thick silicone beads that resist manual scraping, but it’s noisy, creates a lot of dust, and requires careful control.
Stubborn silicone that resists standard methods responds to combination treatment. Apply heat with a hair dryer for 60 seconds, immediately apply chemical softener while the silicone’s warm, allow extended time of up to 2 hours, then scrape while reapplying gentle heat. The heat opens up the silicone structure, the chemical gets in deeper while it’s open, and the combination breaks down bonds that resist either method alone. This works on silicone that’s been in place for 10+ years and has developed an extremely strong bond.
Oil-stained grout or porous tile presents a different problem. Sometimes the staining’s permanent. Try an enzyme cleaner designed for grease, applied with a small brush and allowed to sit overnight. For deep stains, create a poultice by mixing baking soda with hydrogen peroxide into a paste, applying a 1/4-inch layer over the stain, covering with plastic wrap, and leaving for 24-48 hours. The poultice draws stains out as it dries. If the staining doesn’t improve after two poultice applications, it’s probably penetrated too deep to remove, and you’ll need to decide whether you can live with it or if replacement’s necessary.
Professional assessment becomes worth it when you’ve made multiple DIY attempts with different methods and products without success, when your tile’s valuable or irreplaceable (antique, imported, discontinued), when you’re seeing tile damage appear during your attempts, or when the project scope expands beyond simple caulk removal into fixing water damage, replacing tiles, or dealing with mold in wall cavities. At that point, the cost of professional help’s usually less than the risk of further damage from continued DIY attempts.
Final Words
Getting caulk off tile without damage comes down to using the right tools, applying chemicals correctly, and keeping your blade angle shallow.
Test your method somewhere hidden first. Work slowly through each section. Let chemicals sit for their full dwell time.
If you see scratches forming or grout starting to crumble, switch to a gentler approach right away.
Most tile damage happens from rushing or using too much force, not from the removal method itself. When you take your time and follow the steps, you’ll end up with clean tile that’s ready for fresh caulk and a watertight seal that actually lasts.
FAQ
How to remove caulk without damaging tiles?
To remove caulk without damaging tiles, score both edges of the caulk bead with a utility knife at a 45-degree angle, then use a razor blade scraper held nearly flat against the tile surface with gentle, controlled pressure. Work slowly in small sections, maintain a 10-15 degree blade angle, and test your technique in an inconspicuous area first before proceeding to visible surfaces.
What dissolves dried caulk?
Dried caulk dissolves with chemical solvents including commercial caulk remover gel, Goof-Off, mineral spirits, rubbing alcohol, or acetone depending on the caulk type. Apply the solvent with a lint-free cloth, allow the manufacturer’s recommended dwell time (typically 30 minutes to 2 hours for stubborn silicone), then wipe promptly to prevent dulling tile finishes.
How do you remove silicone from tiles without damaging them?
Silicone removes from tiles without damage by first softening it with a hair dryer on low setting or chemical remover, then using a sharp razor blade scraper held at a 10-15 degree angle with gentle pressure. For delicate tiles like natural stone or glass, switch to plastic scrapers and avoid excessive force that can chip edges or scratch glazes.
Will rubbing alcohol remove caulking?
Rubbing alcohol will not remove intact caulking beads but effectively dissolves leftover silicone residue and adhesive film after manual scraping. Apply isopropyl alcohol (70% or higher) with a clean cloth to wipe away stubborn haze, and use it as a final cleaning step before recaulking to remove oils and soap residue that prevent new caulk adhesion.