
You’ve seen nicotine stains bleed through two coats of fresh paint like they’re mocking your effort, right? Regular paint fails because tar and resin don’t just sit on the surface. They soak into drywall and reactivate when moisture from new paint hits them. The fix isn’t more paint. It’s the right primer that physically seals those oily compounds before you even think about color. Shellac and oil based formulas lock in stains and odors that water based products can’t touch, but only if you match the primer type to how bad the damage actually is.
Top Performing Primers That Block Nicotine Stains and Odors
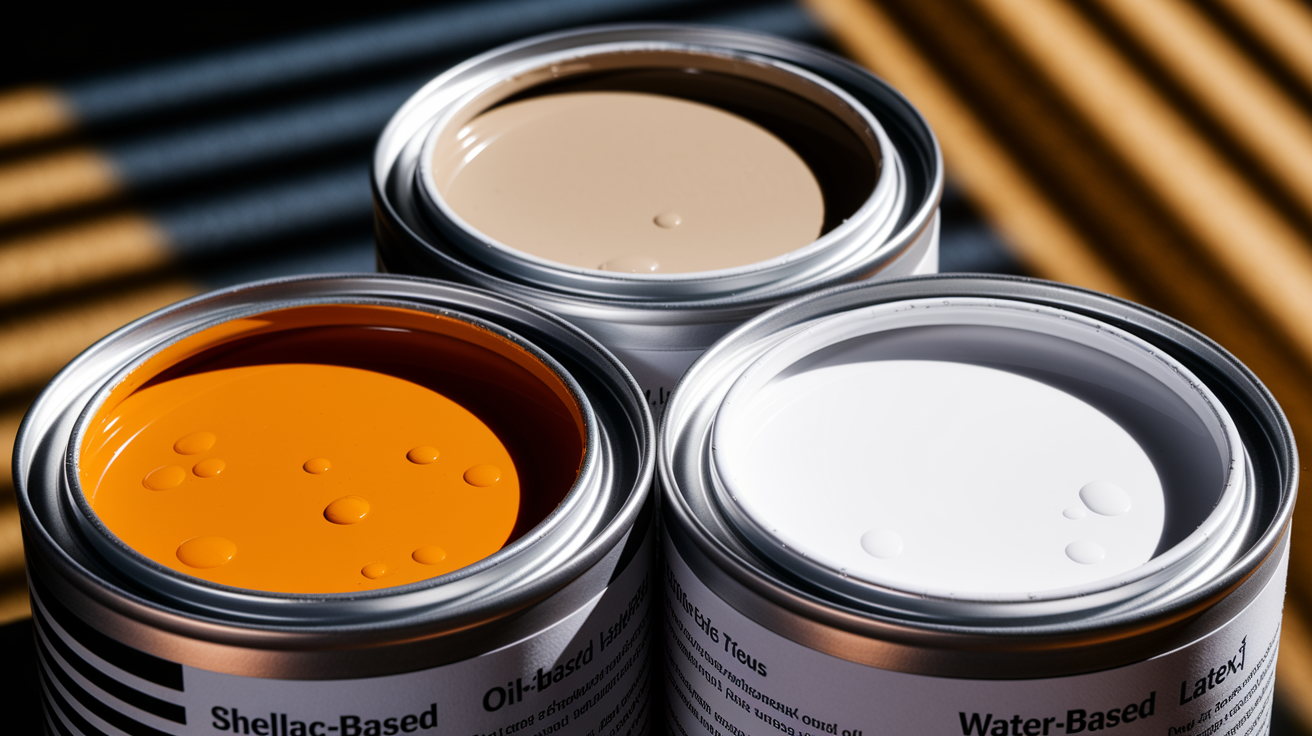
Three primer types handle nicotine stains: shellac, oil, and water based. Shellac and oil primers dominate the heavy duty category because they create a physical barrier that locks in tar and resin instead of just covering it. Water based versions work for light stains but can’t handle heavy tobacco buildup.
Oil and alcohol based primers outperform latex because of how they seal. Nicotine residue contains sticky tar and resin that dissolves and migrates through porous latex films. Oil and shellac dry harder and form a barrier that physically blocks migration rather than just absorbing it.
| Primer Type | Best For | Base Formula | Odor Blocking | Coats Needed | Application Location | VOC Level | Price Range/Gallon |
|---|---|---|---|---|---|---|---|
| BIN Shellac | Worst nicotine stains, heavy tar buildup, persistent odors | Denatured alcohol with pigmented shellac | Excellent | 1-2 | Interior, spot exterior only | High | $45-65 |
| Kilz Original | Smoke and fire damage, moderate to heavy nicotine, odor sealing | Oil-based | Very Good | 2 | Interior and exterior | High | $25-40 |
| Kilz 2 | Light nicotine stains, mild yellowing, small touch-ups | Latex water-based | Fair | 2-3 | Interior | Low | $20-30 |
Two coats are typically required for complete stain coverage and bleed through prevention, especially with oil based formulas. You can apply latex paint over oil based primers without compatibility issues once the primer cures. These primers are available at Home Depot, Lowe’s, Ace Hardware, most paint supply stores, Amazon, and dedicated paint websites.
Cost Analysis and Where to Buy Nicotine Stain Blocking Primers

Cost depends on primer type, room size, number of coats, and whether you’re doing it yourself or hiring out. Shellac primers cost the most per gallon but often need fewer coats on bad stains. Oil based options offer the best balance of cost and performance for most nicotine jobs.
Spot priming saves money when nicotine damage concentrates on specific walls or areas near smoking spots. Full room treatment makes sense when yellowing covers most surfaces or when you’re selling the property and need uniform results. Targeted application on affected walls only can reduce expense versus repainting an entire house, but you risk visible differences if the nicotine spread more than you thought.
| Primer Type | Price Range/Gallon | Coverage/Gallon | Cost/100 sq ft (2 coats) | Where to Buy |
|---|---|---|---|---|
| BIN Shellac | $45-65 | 300-400 sq ft | $30-45 | Home Depot, Lowe’s, Ace Hardware, Amazon, paint supply stores |
| Kilz Original | $25-40 | 300-400 sq ft | $15-25 | Home Depot, Lowe’s, Menards, Walmart, Amazon, local hardware stores |
| Kilz 2 | $20-30 | 300-400 sq ft | $15-23 | Most hardware and big-box stores, Amazon, paint retailers |
Rental property owners and house flippers face different math than homeowners doing a personal project. Proper nicotine remediation affects resale value and marketability, especially since buyers can smell lingering smoke even if they can’t see stains. For more on how repairs impact property value, check out Home Improvement ROI Guide.
DIY projects save labor costs but take longer. Professional painters charge $1.50 to $3.50 per square foot for primer and paint, which includes their contractor pricing on materials. If you’re managing multiple rental units, buying contractor grade primer in 5 gallon pails drops the per gallon cost by 15 to 25%. Major retailers often run sales on stain blocking primers during spring and fall painting seasons.
Understanding Nicotine Stains and Why Standard Paint Fails

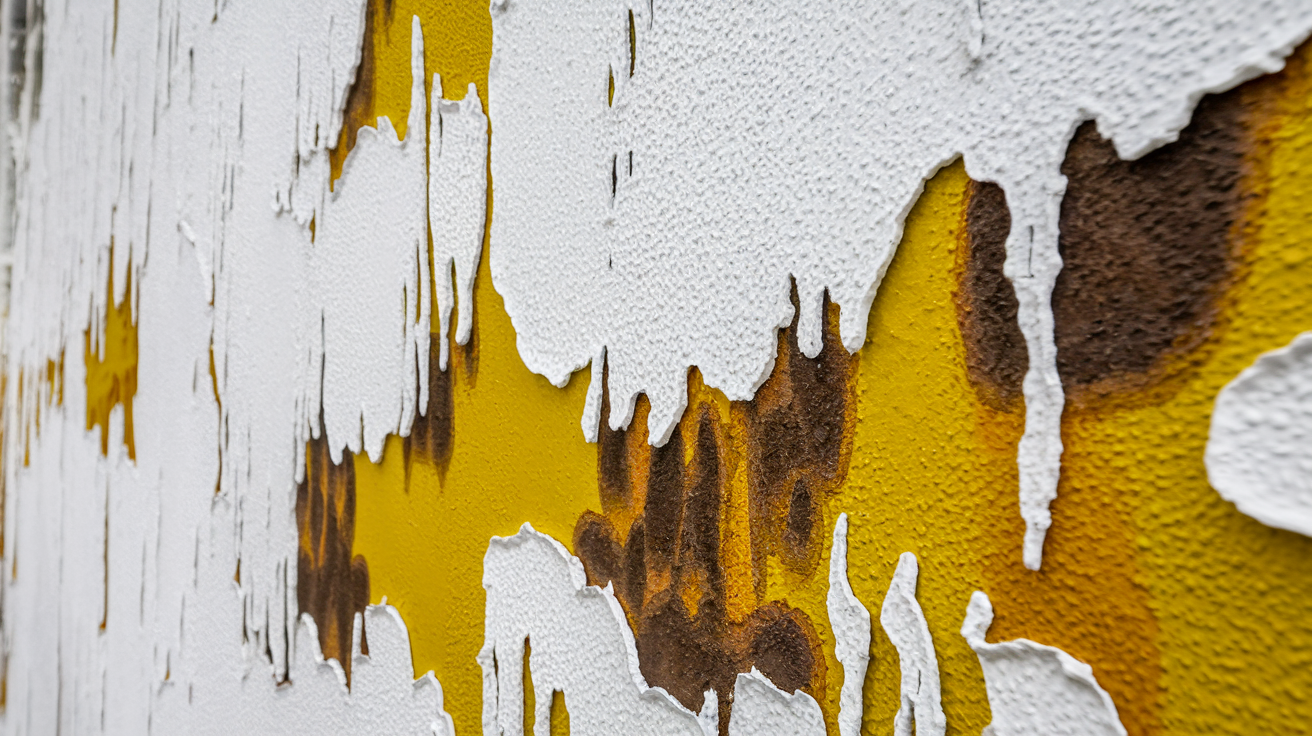
Cigarette smoke residue contains tar, resin, and nicotine that penetrate porous surfaces like drywall and plaster over time. These compounds are sticky and oily, which is why they cling to walls instead of washing off. The residue soaks into the microscopic pores of painted surfaces and even seeps behind the paint film itself.
Nicotine stains bleed through standard paint because the moisture in new paint reactivates the tar and resin underneath. The oily compounds dissolve slightly and migrate upward through the fresh paint layer before it fully cures. Even multiple coats of regular paint can’t stop this process. Simply painting over stained walls without primer allows stains and odors to seep through within days or weeks.
Yellowing and amber discoloration patterns appear heaviest near smoking areas and on ceilings where smoke rises and settles. You’ll see darker patches around seating areas, concentrated spots near ashtrays or favorite chairs, and general yellowing on ceilings above. The stains look worse on white or light colored walls because the contrast shows more. Heavily stained areas develop a brown or tan tint that looks almost like a coffee spill soaked into the surface.
Cleaning alone can’t remove embedded nicotine residue from surfaces because tar and resin bond chemically with the paint and drywall. Wiping removes surface film but doesn’t touch what’s soaked in. TSP and other cleaners help but only get the loose material. The embedded residue stays put until something seals it in or you remove the affected material entirely. That’s why nicotine discoloration can bleed through fresh paint coats even after thorough cleaning and repainting.
Surface Preparation and Application Methods for Nicotine Stain Blocking Primers

Proper surface prep determines primer performance more than the primer brand itself. Loose residue and failing paint create adhesion problems that let stains bleed around the primer edges. Clean surfaces let primers bond properly and form the seal you need.
Walls must be wiped with damp cloth and allowed to dry before primer application. Cleaning removes loose residue but can’t eliminate embedded nicotine. The goal is a stable surface, not complete stain removal.
- Wipe down all surfaces with TSP solution or damp cloth and rinse if using TSP
- Allow walls to dry completely, at least 4 to 6 hours in normal humidity
- Remove any loose or peeling paint with a scraper or putty knife
- Degloss glossy surfaces with fine sandpaper or liquid deglosser for better adhesion
- Fill cracks and holes with spackle if present, let dry and sand smooth
- Stir primer thoroughly before application and occasionally during use, especially oil based formulas that separate
Roller Application for Large Wall Areas
Use a 3/8 inch nap roller for smooth walls and 1/2 inch nap for light texture. Pour primer into a roller tray and load the roller evenly without oversoaking. Start in one corner and work in 4 to 6 feet sections at a time. Roll in a W or M pattern first to distribute primer, then fill in with straight vertical passes to even out coverage. Each gallon covers 300 to 400 square feet, depending on surface texture and porosity. Heavily stained drywall soaks up more primer on the first coat.
Brush Technique for Cutting In and Trim
Apply painter’s tape around baseboards and moldings before priming. Use a 2 to 2.5 inch angled brush for cutting in edges and corners. Dip the brush about one third into the primer, tap off excess on the can edge rather than wiping. Cut in around edges 4 to 6 feet at a time, then roller fill the section before moving on. This wet edge technique prevents lap marks where sections meet. For shellac primers, work faster because they dry quickly. Oil based primers give you more working time. Remove tape before paint is fully dry to prevent peeling.
Spray Primer for Ceiling Stains and Large Projects
Spray application works well for ceilings with nicotine buildup and for large projects where speed matters. You need an airless sprayer or HVLP system rated for the primer type you’re using. Thin the primer if required per manufacturer instructions. Mask everything you don’t want coated because overspray travels. Ventilation requirements double with spray because you’re creating a mist. Spray in overlapping passes with consistent distance from the surface. Spray is fastest for popcorn ceilings where roller application leaves holidays and thin spots.
Allow 24 hours drying time before checking for bleed through after priming. Temperature and humidity affect drying. Aim for 50 to 85°F and below 70% humidity for best results. Heavily stained areas may require spot treatment with a second primer type even after full room priming. Two coats of KILZ stain blocker are required before repainting for best results with heavy nicotine damage, though one coat of KILZ Original Primer seals smoke stains and odors on walls with light to moderate contamination. Oil based primers need 4 to 6 hours before recoating. Shellac primers dry faster, often recoat ready in 45 minutes to 2 hours.
Ventilation, Safety Requirements, and Cleanup Procedures

VOC levels differ dramatically between primer formulations and directly impact indoor air quality during application. Oil based and shellac primers release high volatile organic compounds as they dry, creating strong fumes that can cause headaches, dizziness, and respiratory irritation. Water based latex primers with low VOC formulations release minimal fumes but don’t block nicotine stains as effectively. You’re trading convenience for performance.
Oil based and shellac primers require superior ventilation compared to latex options because of those VOC levels. Open all windows in the work area and adjacent rooms. Set up box fans to create cross ventilation that moves fumes outdoors rather than deeper into the house. Don’t just crack a window and call it done. You need active air movement pulling fresh air in one side and pushing contaminated air out the other.
Respiratory and skin protection needs vary by primer type. For oil based primers like Kilz Original, use an organic vapor respirator with replaceable cartridges rated for paint fumes, not a dust mask. Shellac primers using denatured alcohol need the same organic vapor protection. Latex primers only require a basic dust mask if you’re sensitive to particulates. Wear nitrile gloves for all primer types because prolonged skin contact causes irritation. Safety glasses prevent splatter from reaching your eyes during cutting in and roller work.
Required ventilation setup: open windows on opposite sides of the room, position one fan blowing in and one fan blowing out to create airflow through the space. Respirator mask specifications: organic vapor respirator with P95 or P100 filters for oil based and shellac primers, basic N95 dust mask sufficient for latex primers. Protective gloves and eye protection: nitrile gloves resist all primer types, safety glasses with side shields prevent splatter. Water cleanup procedure for latex primers: wash brushes and rollers with warm soapy water immediately after use, rinse until water runs clear. Mineral spirits cleanup for oil based primers: pour mineral spirits into a container, work it through bristles or roller, squeeze out, repeat until clean, then wash with soap and water. Denatured alcohol cleanup for shellac primers: BIN shellac requires denatured alcohol for brush cleanup, pour alcohol over bristles and work through, repeat as needed, final soap and water wash. Safe disposal methods: let contaminated solvents settle overnight, pour clean solvent off top for reuse, dispose of sludge and used rags at hazardous waste collection sites.
Follow manufacturer safety guidelines for each primer type because they’re written after testing in controlled conditions. The label isn’t suggestions. It’s the difference between finishing your project safely and ending up with chemical exposure symptoms.
Primer to Topcoat Compatibility and Paint Adhesion Considerations
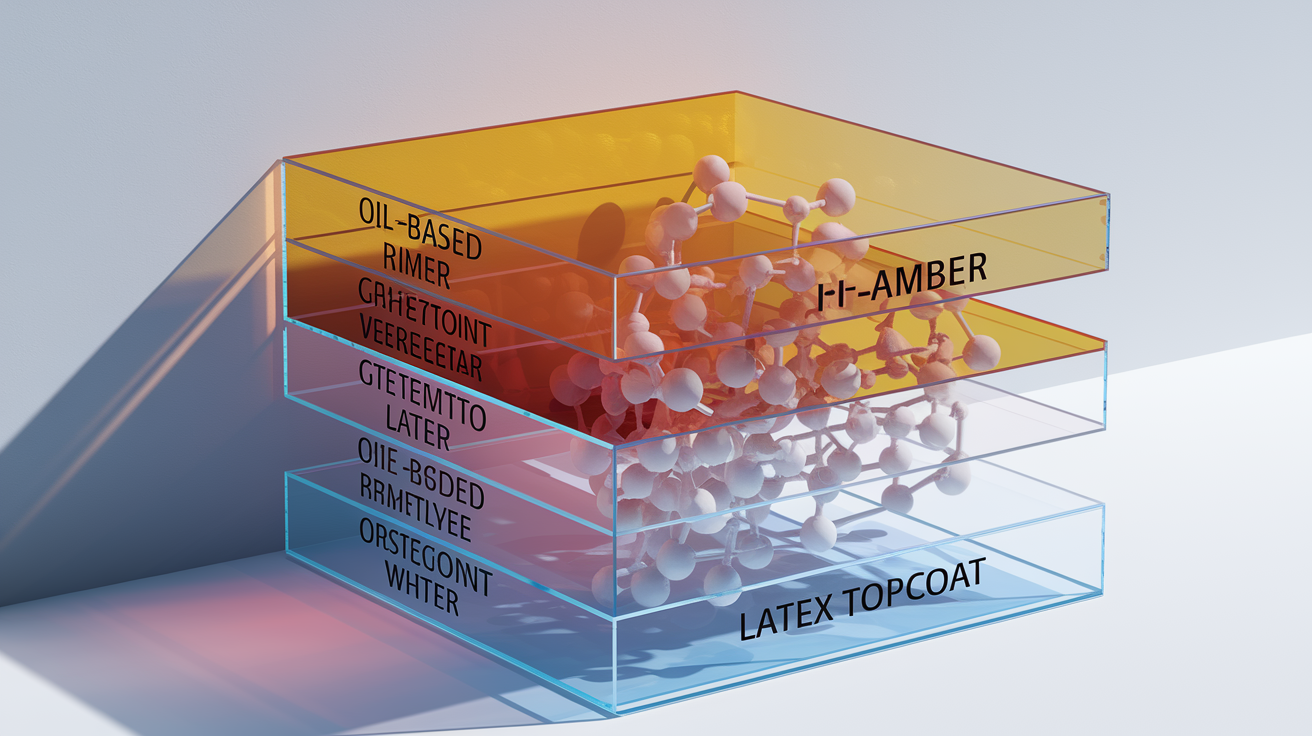
Latex paint can be applied over oil based KILZ primer without compatibility issues once the primer fully cures. The oil based primer creates a stable surface that latex adheres to through mechanical bond rather than chemical bond. Wait the full recommended cure time, usually 24 hours for most oil based primers, before applying topcoat.
Primer color affects topcoat coverage and final color accuracy. White primer works under light and medium paint colors. Gray tinted primer helps when painting medium to dark colors because it reduces the number of topcoat layers needed for full color development. Some contractors tint stain blocking primer to approximate the final color, which improves hiding power on the first topcoat layer. Most stain blocking primers come in white or can be tinted at the paint counter.
You’ll typically need two topcoat layers over properly primed nicotine stains for full color saturation and uniform appearance. The first topcoat builds color. The second topcoat evens out sheen and ensures no thin spots reveal primer underneath. If you used a tinted primer close to your final color, you might get away with one topcoat on walls without heavy damage. Ceilings almost always need two coats because overhead viewing angles show every imperfection.
Sheen selection matters after priming. Flat and matte finishes hide surface imperfections best but show dirt and are harder to clean. Eggshell and satin sheens offer better cleanability while still minimizing wall flaws. Semi gloss and gloss amplify every surface defect, so they’re better for trim than walls. Primer provides excellent adhesion properties to help paint better adhere to interior surfaces regardless of sheen, but it doesn’t fix texture problems or drywall imperfections that will show through glossy finishes.
Persistent Odors and When Primers Alone Aren’t Sufficient

KILZ Original blocks pet, food and smoke odors when the contamination lives in the wall surface itself. One coat of KILZ Original Primer seals smoke stains and odors on walls under normal circumstances. But odors can originate from HVAC systems, carpeting, furniture, drapes, and porous materials beyond walls that primer never touches.
Third hand smoke contamination soaks into insulation, subflooring, ceiling joists, and ductwork in homes with years of heavy smoking. Primer seals the wall surface but doesn’t address the contaminated materials behind it or in other parts of the house. If you prime and paint all walls but still smell smoke, the odor source is somewhere primer didn’t reach. Pull an outlet cover and smell inside the wall cavity. If it reeks, the insulation absorbed years of smoke and might need removal in severe cases.
Ozone treatment or air purification should accompany painting when odors persist after priming. Ozone generators oxidize odor molecules in the air and on surfaces throughout the entire space, including inside ductwork and between walls. Run an ozone generator in an empty, sealed house for 24 to 48 hours, then ventilate thoroughly before moving back in. This kills residual odor but doesn’t remove stains. Air purifiers with activated carbon filters help during and after painting to capture lingering particulates and VOCs from both the smoke residue and the primers themselves.
Seek professional smoke remediation assessment when you’ve primed all surfaces but odors remain strong, when you find extensive nicotine residue inside walls or HVAC systems, or when dealing with fire damage beyond cosmetic staining. Professionals use thermal foggers, hydroxyl generators, and industrial air scrubbers that go beyond what DIY methods can achieve. If you’re preparing a property for sale and the smoke smell won’t quit, a professional assessment costs $200 to $500 but prevents deals from falling apart at inspection.
Troubleshooting Bleed Through and Heavily Stained Areas
Bleed through assessment requires a 24 hour waiting period because stains don’t always show immediately. Fresh primer looks great at first. The problem appears as it dries and the solvents evaporate, allowing embedded stains to migrate upward. Don’t assume success until the primer fully cures.
Common bleed through patterns include yellowing spots where nicotine concentration was heaviest, brown discoloration around old smoking areas, and amber streaks on ceilings above seating locations. The stains look faint at first, like a watermark, then darken over the first day or two after priming. Pink bleeding through primer indicates wood tannins requiring shellac based primer if you’re working on wood paneling or trim.
Light yellowing after 24 hours means the primer coat was too thin or you used a water based formula on heavy stains. Fix: apply a second coat of the same primer, or switch to oil based or shellac if you started with latex. Brown spots appearing through primer indicate concentrated tar deposits breaking through. Fix: spot prime those areas with shellac based BIN, let dry, then apply another full coat of your original primer. Pink bleeding indicating tannins happens on wood surfaces, not drywall nicotine stains. Fix: use shellac based primer on those spots specifically. Persistent odor despite visual coverage means the primer sealed the stain but odor sources exist in carpets, ducts, or behind walls. Fix: address non wall contamination with cleaning or ozone treatment. Ceiling stains reappearing happens because smoke rises and ceiling contamination runs deepest. Fix: ceilings often need two coats of primer where walls needed one, or switch to shellac primer for bad ceiling stains. Heavily stained areas showing through after two coats of oil based primer need shellac spot treatment. Fix: apply BIN Shellac to those areas, let dry completely, then topcoat everything normally.
The spot treatment strategy using shellac primer on problem areas works when most surfaces primed successfully but a few spots keep bleeding through. Apply BIN to those specific spots, feather the edges, let it dry for an hour, then apply a full coat of your original primer over the entire surface for uniformity. This combination approach saves money compared to using expensive shellac primer everywhere.
When to apply additional full coats versus targeted spot priming depends on how much bleed through you see. If more than 20 to 30% of the surface shows yellowing or brown spots, apply another full coat. If only scattered spots appear, treat them individually and recoat just those areas. The difference between one coat sealing for light stains versus two coat requirements for heavy nicotine damage comes down to how long someone smoked in the space and whether they smoked indoors constantly or occasionally. Years of daily smoking in small spaces needs two coats minimum. Occasional smoking in well ventilated areas might seal in one.
Special Considerations for Rental Properties and Real Estate Projects

Disclosure requirements regarding previous smoke damage in property sales vary by state and local jurisdiction. Some states require sellers to disclose known material facts about the property, which includes significant smoke damage and remediation efforts. Check your local real estate laws because failing to disclose can create legal problems after closing. Even if disclosure isn’t required, buyers often walk away when they smell smoke during showings.
Proper nicotine remediation affects property value and marketability more than most cosmetic repairs. Smoke smell and visible staining drop property value by 10 to 30% according to real estate industry estimates because many buyers won’t consider a smoker’s home at any price. Thorough priming and repainting removes that stigma and brings the property back to market rate, often returning 150 to 200% of the remediation cost in final sale price.
Rental property owners face a cost benefit analysis for basic coverage versus complete remediation. If the tenant violated a no smoking lease, you want complete remediation and can pursue deposit or damages to offset costs. If you’re preparing a unit for the next tenant in a competitive market, complete remediation prevents vacancy time that costs more than the primer. In a soft rental market with older units, basic coverage with two coats of oil based primer and fresh paint meets the standard without overspending. For more on how repair choices affect property value, check out Home Improvement ROI Guide.
Timeline considerations when preparing properties for sale or new tenants include drying time between coats, ventilation time for fumes to clear, and final inspection scheduling. Oil based primers need 4 to 6 hours between coats, then 24 hours before topcoat. Shellac primers dry faster but smell worse during application. Budget 3 to 4 days minimum for a full room: day one for priming, day two for second primer coat or spot fixes, day three for first topcoat, day four for final coat and trim. Add a fifth day for ventilation before showing the property if you used oil based primers.
Contractor grade products versus retail options matter for multi property projects. Buying Kilz Original in 5 gallon pails from contractor supply houses costs $90 to $140 versus $125 to $200 for five separate gallons at retail. Professional painting accounts at Sherwin Williams or Benjamin Moore get you 30 to 40% off retail pricing. If you manage multiple units or flip houses regularly, those accounts pay for themselves in three properties.
Treating Trim, Ceilings, and Non Standard Surfaces

Nicotine residue accumulates differently on trim, ceilings, and specialty surfaces than on flat walls because of how smoke rises and settles. These surfaces need adapted techniques for complete coverage.
Ceiling Stain Blocking Techniques
Overhead application creates drip and splatter challenges that don’t exist on vertical walls. Use a roller with a good nap (1/2 inch minimum) to carry enough primer without overloading, which causes drips. Work in smaller sections on ceilings, about 3×3 feet at a time, and keep the roller perpendicular to the ceiling to control drips. Gravity pulls wet primer downward, so build coverage in thinner coats rather than trying to get full hiding in one pass.
Spray works better than roller for popcorn or heavily textured ceilings because you can’t effectively work primer into all the crevices with a roller. Thin the primer per manufacturer specs (usually 10% for oil based, 5% for latex) and spray at 30 to 40 PSI depending on your gun. Make overlapping passes in a consistent pattern to avoid holidays. Protect everything below with plastic sheeting because overspray will coat floors and walls if you don’t.
Coverage patterns for textured ceilings need planning. Start at the corner farthest from your exit and work backward toward the door so you’re never painting over your head while standing in a section you just coated. BIN Shellac Primer works best for worst ceiling stains because it dries fast and locks in odors better than oil based options.
Trim, Baseboards, and Molding Treatment
Sand glossy surfaces on painted trim with 150 grit sandpaper to create tooth for primer adhesion. You don’t need to remove the gloss completely, just rough it up enough that primer can grab. Wipe with a damp cloth after sanding to remove dust, then let dry before priming. Liquid deglossers work faster than sanding if you’re doing a whole house, but they’re nasty chemicals that need good ventilation.
Use a 2 inch angled brush for detailed woodwork because it gives you control in tight corners and along edges. Load the brush about one third full, tap off excess, and use long smooth strokes following the wood grain direction. Painter’s tape application around baseboards protects floors and wall edges, but peel it off within 30 minutes of priming to prevent primer from bonding to the tape and pulling away when you remove it.
Paneling and Textured Wall Applications
Wood paneling absorbs nicotine differently than drywall because the wood grain creates deep channels where tar and resin settle. The grooves between panels concentrate staining worse than the flat surfaces. Use a brush to work primer into those grooves first, then roller the flat panel faces for efficiency.
Texture compatibility varies by primer formulation. Oil based primers work on any texture. Latex primers can pull or flatten some softer texture styles. Shellac primers dry too fast for heavy texture application with a roller, so brush or spray them instead. Addressing grooves and recessed areas requires smaller brushes (1 to 1.5 inch) that fit into the channels without overloading and pooling primer in corners.
Primer adhesion properties on non porous surfaces like glossy paneling or pre finished trim depend on mechanical bond from sanding or deglossing. Skip that step and you’ll get peeling within weeks even with good primer.
Storage, Shelf Life, and Leftover Primer Management
Shelf life differences between oil based, shellac based, and water based primers affect how long you can keep leftovers. Oil based primers like Kilz Original last 2 to 3 years in sealed containers stored properly. Shellac primers like BIN last 3 to 5 years because the alcohol base doesn’t support bacterial growth. Water based primers spoil fastest, usually 1 to 2 years, because bacteria can grow in the can and cause separation or odor.
Proper storage conditions mean keeping primers in a temperature controlled space between 50 to 80°F. Freezing ruins water based primers permanently by breaking the binder structure. Heat above 90°F can cook oil based and shellac primers, creating skin on top or causing separation. Seal the lid completely by tapping it down evenly around the rim with a rubber mallet. Don’t hammer on one spot because you’ll dent the rim and create gaps where air leaks in.
Test stored primer viability before using it on your next project by stirring thoroughly and painting a test spot on cardboard. Oil based primers might have a skin on top that you remove and discard before stirring. Water based primers should recombine completely when stirred. If you see chunky material that won’t mix smooth, or if the primer smells sour or rotten, it’s done. Shellac primers rarely go bad but can thicken over time. Thin with denatured alcohol if needed.
How to reseal containers: wipe the rim clean with a rag, lay plastic wrap over the opening before replacing the lid, then tap the lid down evenly around the perimeter with a rubber mallet. Labeling leftover primer: write the date opened, the room or project name, and the primer type on the can lid with permanent marker so you know what you have later. Testing old primer viability: stir for 2 to 3 minutes, paint a test patch on scrap material, let dry 24 hours and check for proper adhesion and smell. Disposing of unusable or expired primers: let oil based primers dry completely in the can with the lid off outdoors, then dispose as solid waste, or take liquid primers to household hazardous waste collection days. Maintaining brushes and rollers between coats: wrap brushes in plastic wrap or foil between coats during the same day, clean completely at end of project using appropriate solvent for the primer type.
Final Words
Nicotine stains require specialized primers because tobacco residue penetrates surfaces in ways regular paint can’t seal. Whether you choose shellac-based BIN for the worst damage, oil-based Kilz Original for reliable blocking, or water-based Kilz 2 for lighter stains, proper surface prep and two coats make the difference.
Don’t skip the 24-hour wait before checking for bleed-through. If spots reappear, hit them with a shellac-based stain blocking primer for nicotine stains before your second coat.
Most projects stay budget-friendly when you prime only the affected walls. With the right primer and a little patience, those yellowed walls turn into a fresh start.
FAQ
What primer covers nicotine stains?
Shellac-based primers like BIN cover nicotine stains most effectively, followed by oil-based options like Kilz Original. Both alcohol-based and oil-based formulations prevent yellowing and bleed-through better than standard latex primers.
What is the best stain blocker for nicotine?
The best stain blocker for nicotine is BIN Shellac Primer because it uses pigmented shellac in a denatured alcohol base. This formulation seals heavy tobacco stains and odors in one coat for interior applications.
Will Kilz primer cover cigarette smoke?
Kilz Original primer will cover cigarette smoke stains and seal smoke odors on interior and exterior surfaces. Two coats are typically required for complete coverage and to prevent bleed-through on heavily stained areas.
Which Zinsser is best for nicotine stains?
Zinsser BIN Shellac Primer is best for nicotine stains because it blocks the worst tobacco discoloration and odors. Its alcohol-based shellac formula works on heavy tannins and severe smoke damage where other primers fail.
Can you paint latex over oil-based primer?
You can paint latex topcoat over oil-based primer without compatibility issues. Oil-based primers like Kilz Original provide excellent adhesion properties that help latex paint bond properly to the primed surface.
How long does nicotine stain blocking primer take to dry?
Nicotine stain blocking primer takes about 24 hours to dry before you can check for bleed-through. However, recoating time varies by formula: shellac primers dry faster than oil-based, while water-based options have the shortest recoat windows.
Do you need two coats of stain blocking primer?
You need two coats of stain blocking primer for heavy nicotine damage to prevent bleed-through completely. Light tobacco stains may seal with one coat of Kilz Original or BIN, but heavily stained areas always require two applications.
How do you prepare walls before applying nicotine blocking primer?
You prepare walls before applying nicotine blocking primer by wiping them with a damp cloth or TSP solution, allowing them to dry completely, and stirring the primer thoroughly. Remove loose paint and apply painter’s tape around baseboards.
What removes nicotine smell from walls?
Stain blocking primers like Kilz Original remove nicotine smell from walls by sealing smoke odors so they can’t seep through topcoat paint. One coat typically seals odors, though persistent smells may indicate contamination beyond wall surfaces.
Can you spray stain blocking primer?
You can spray stain blocking primer for large ceiling areas and whole-room projects, but this requires proper ventilation, overspray protection, and respiratory equipment. Spray application works efficiently on popcorn ceilings and heavily textured surfaces.
How much does nicotine stain blocking primer cost?
Nicotine stain blocking primer costs between $25-$50 per gallon depending on formulation. Shellac-based BIN runs higher than oil-based Kilz Original, while water-based Kilz 2 offers the most budget-friendly option for light staining.
Will primer alone eliminate cigarette odor?
Primer alone will eliminate cigarette odor on walls but not if smoke contaminated carpets, HVAC ducts, insulation, or subflooring. Persistent smells after proper priming indicate third-hand smoke in porous materials beyond painted surfaces.