
You just painted over a water stain and two weeks later, that brown ring is back. Here’s why: regular primer doesn’t actually seal water damage. It sits on top while tannins, minerals, and organic residue keep migrating through from underneath. Stain blocking primers use specific resins that create a permanent barrier between the damaged surface and your topcoat, stopping bleed through for good. This guide breaks down which primer chemistry works for light stains, typical ceiling damage, and severe tannin problems, plus the prep and application steps that prevent comebacks.
Understanding Primer Types and Their Stain Blocking Performance

Water stains come back after you paint because regular primers can’t actually lock in the discoloration. When you roll over water damage with standard primer, the tannins, minerals, and organic gunk in the stain are still sitting there under the surface. They’re active. As moisture works through the paint or the substrate keeps releasing dissolved material, those brown spots and yellow rings just migrate right through your fresh coat. Stain blocking primers fix this by creating a permanent seal between the damaged surface and your topcoat, using specific resins that stop bleed through.
Stain blocking primers get ranked by how strong they seal based on their chemistry. Three main types exist: water based latex, oil based alkyd, and shellac based. Each one offers different sealing power, drying speed, and how they go on.
Water Based Latex Primers: Light Duty Performance
Water based formulas handle light water staining where damage is minor and surface level. Kilz 2 and Zinsser Bulls Eye 1-2-3 both dry in about 30 minutes with recoat times around 1 hour, making them quick for spaces people are still using. These clean up with soap and water, smell minimal, and won’t fill your house with fumes. Zinsser Bulls Eye 1-2-3 includes a biocide that protects against fungal breakdown, which matters in bathrooms, laundry rooms, and other humid spots where water damage tends to happen.
The catch is blocking power. Water based latex primers work for light humidity stains, small ceiling spots from slow drips, and minor discoloration. They won’t seal heavy water stains, tannin bleed, or brown marks from leaks that went on for a while. If you’ve got a faint water ring on the ceiling after a quick roof fix, latex works. Dark brown staining or old damage? You need stronger chemistry.
Oil Based Alkyd Primers: Heavy Duty Blocking
Oil based primers are the standard pick for typical water damage restoration. Kilz Original and Zinsser Cover Stain use alkyd resins that build a tougher barrier than latex, permanently sealing brown spots, yellow marks, and water rings on ceilings and walls. Cover Stain dries in 30 minutes and you can recoat in 2 hours. Kilz Original shows up everywhere at big box stores, costs less, and works really well for standard ceiling stains from roof leaks and wall damage from plumbing failures.
These work indoors and outdoors, which matters when you’re dealing with exterior water damage on cedar siding, window restoration, or soffit repairs. They also block tannin bleed from wood, plus smoke and fire stains if water damage happened during or after a fire. The chemistry matching idea applies here. Oil based primers block water soluble stains because the oil resin doesn’t dissolve or wake up the water based compounds in the stain.
The downside is smell and cleanup. Oil based primers stink, need mineral spirits for brush cleaning, and you want good ventilation. Zinsser Cover Stain can also leave visible brush marks if your technique isn’t smooth, though rolling usually avoids this.
Shellac Based Primers: Maximum Strength Solution
BIN Shellac Primer is the premium blocking solution for severe staining. It uses pigmented shellac dissolved in denatured alcohol, dries in 15 minutes, and is ready for topcoat in 45 minutes. The permeability rating sits under 1, meaning it creates a superior vapor barrier that locks in both stains and odors more effectively than oil or latex chemistry. Fire restoration companies use BIN as their standard because it seals smoke, soot, and water damage all at once.
You need shellac based primer when pink tannin bleed shows up. That pink discoloration happens with old growth wood, knot holes in pine trim, cedar siding, and redwood. If you already tried an oil based primer and stains are still bleeding through, shellac is the next move. It also works on combination damage where water and smoke have both stained the surface, or when you need serious odor blocking after sewage backups or flooding.
BIN is limited to interior use and spot exterior application only. It’s not rated for full exterior coating, especially in hot climates where the shellac can soften. Cleanup requires denatured alcohol, and the smell is strong while wet (though it clears faster than oil based primers).
Picking the right chemistry depends on damage type. Water based works for light scenarios in occupied spaces where low odor matters. Oil based is the standard choice for typical water damage restoration from roof leaks, burst pipes, and plumbing failures. Shellac based handles severe staining, tannin problems, and situations where other primers failed or you need maximum odor control.
Essential Surface Preparation Before Applying Primer

Stop the leak and let everything dry before you touch a paint can. Rushing this is the most common reason primers fail and stains come back weeks later.
-
Stop the leak source and verify the repair. Check that the roof patch is solid, the pipe stopped dripping, and water isn’t still getting in. If the source isn’t fixed, primer won’t help.
-
Wait a minimum of one week for drywall to dry completely. Drywall holds moisture longer than it looks like it should. A ceiling that feels dry to the touch might still be damp inside. Seven days is baseline. Thicker textures, multiple drywall layers, or cool humid conditions need longer.
-
Inspect drywall for structural damage requiring replacement. Press on the stained area. If it feels soft, spongy, or gives under light pressure, the gypsum core is shot. You can’t prime over damaged drywall. Cut it out and replace it. Look for sagging, bulging, or paper peeling off as well.
-
Clean affected areas before priming. Use TSP (Trisodium Phosphate) for general cleaning or chemical sponges (vulcanized rubber, no actual chemicals) if there’s soot mixed with water damage. Dirt, dust, and residue stop primer from sticking and can add to future bleed through.
-
Make sure the surface meets clean, dry, dull criteria. Clean means no dirt or grease. Dry means no moisture when you press a paper towel against it. Dull means the surface isn’t glossy. Sand glossy areas lightly so primer can grip.
-
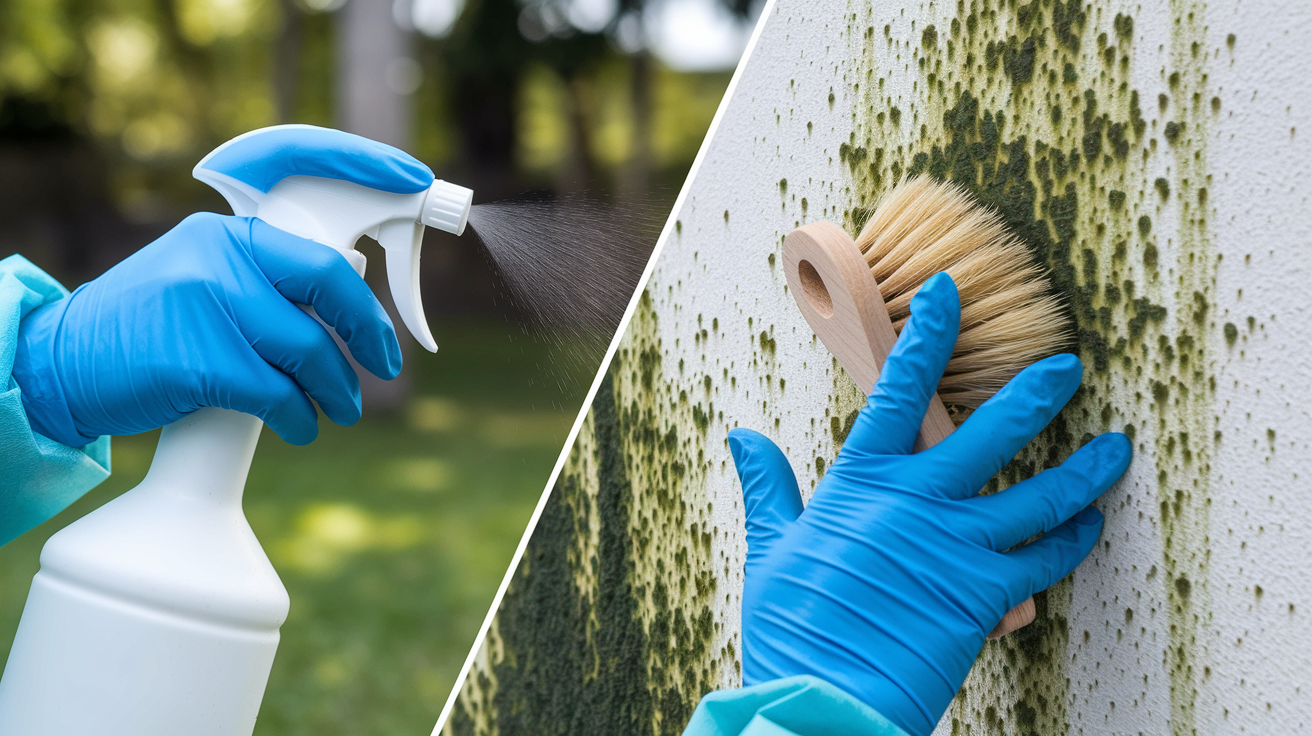
Address any mold growth with appropriate remediation before priming. If you see black, green, or fuzzy growth, clean it with a proper mold cleaner or bleach solution. Let it dry fully. Primer is not mold treatment. It goes over clean surfaces only.
When you skip the drying period, moisture trapped under the primer reactivates the stain. The tannins, mineral deposits, and organic material dissolve again and move through the primer film. You’ll see the stain come back, sometimes within days, sometimes after a few weeks when humidity rises. Damp substrate also stops proper primer adhesion. The film might look fine but will eventually peel or bubble as trapped moisture tries to escape.
Drywall replacement becomes necessary when the core is soft or when paper facing is coming apart. Water breaks down the gypsum and paper bond. Once that happens, no amount of primer or paint will restore structural integrity. Cut out the damaged section, install a new piece, tape and mud the seams, then prime the repair along with the stained area.
Step by Step Primer Application for Water Stains
Pick your tools based on primer type and project size. A quality synthetic brush works for all three primer types and handles cut in work around edges. A 3/8 inch nap roller covers walls and ceilings faster. For shellac and oil based primers, a disposable foam brush saves cleanup hassle on small repairs. Spraying works well for large areas if you’ve got the equipment and ventilation, but rolling is the standard DIY method.
-
Set up ventilation and put on safety equipment. Open windows, run fans to push fumes outside, and wear a respirator with organic vapor cartridges when using shellac or oil based primers. Latex primers need less protection, but airflow still matters. Wear safety glasses and gloves.
-
Stir the primer thoroughly without shaking. Shaking creates bubbles. Stir from the bottom up to redistribute settled pigments. This matters more with shellac primers, which have thin consistency and separate faster.
-
Cut in the edges with a quality brush. Work a 2 to 3 inch border around the stained area, ceiling lines, and trim. Load the brush about halfway up the bristles. Too much primer drips. Too little leaves thin coverage.
-
Roll or spray the main area with even coverage. Work in small sections, roughly 3×3 feet. Apply steady pressure with the roller. Don’t press hard enough to squeeze out excess primer, but don’t go so light that coverage is thin. You want a consistent wet film.
-
Maintain a wet edge to avoid lap marks. This matters most with fast drying shellac primer. Overlap each pass slightly while the previous section is still wet. If you let an edge dry and then roll over it, you’ll see a line.
-
Allow proper drying time per product specifications. BIN shellac dries in 15 minutes. Oil based primers need about 30 minutes before they’re dry to touch. Water based primers also hit 30 minutes. Don’t rush this. Touch a corner lightly. If primer comes off on your finger, wait longer.
-
Inspect after 24 hours for bleed through. This is critical. Stains sometimes take time to move through primer. Check in good light. Look for any brown, yellow, or pink discoloration showing through. Wood tannins in old growth lumber, knot holes, cedar, and redwood can take longer than 24 hours to appear, so check again at 48 hours on those substrates.
-
Apply a second coat if needed and allow full cure. If you see any bleed through, apply another coat. Don’t skip to topcoat hoping paint will cover it. It won’t. Let the second coat cure for 24 hours before topcoating.
Application technique differences matter. Shellac primer is thin and flows easily, almost like water. It levels itself and rarely shows brush marks, but it dries fast, so you can’t go back over areas. Oil based primers are thicker and can show brush marks if you don’t smooth them out. Use long, even strokes and don’t overwork the surface. Latex primers fall in between. Moderate thickness, moderate drying time, forgiving if you need to touch up a spot.
Before you apply topcoat, verify complete coverage. Stand at different angles to the light. Bleed through sometimes shows better from the side than straight on. If you spot any discoloration, touch up those areas with more primer and wait another 24 hours. Addressing this now prevents having to reprime after you’ve already applied finish paint.
Troubleshooting and Preventing Primer Failure

Bleed through happens even with stain blocking primers when the application isn’t right or the damage is more severe than the primer chemistry can handle. The stain isn’t gone. It’s sealed. If the seal fails, discoloration comes back. Common causes include not enough dry time in the substrate before priming, wrong primer chemistry for the specific stain type, extreme staining that overwhelms the blocking agent, primer applied too thin to create a proper barrier, and priming over surfaces that are still damp.
-
Priming over damp or not quite dried surfaces. This is the top failure point. Drywall feels dry on the outside before the interior is ready. Trapped moisture reactivates stains and stops proper adhesion.
-
Skipping surface cleaning and prep steps. Dirt, grease, and residue mess with primer bonding. Clean surfaces let primer grip properly and create an effective seal.
-
Applying primer too thin to save product. Thin coverage doesn’t build enough barrier thickness. You need adequate film build to block stain migration. Don’t stretch a gallon too far.
-
Using wrong primer chemistry for stain type. Water based primer won’t seal heavy water stains. Oil based primer struggles with certain tannins. Match the chemistry to the damage.
-
Not allowing proper dry time before checking coverage. Checking too early misses bleed through that takes time to develop. Wait the full 24 hours minimum, longer for wood substrates prone to tannin bleed.
-
Applying topcoat before primer fully cures. Primer needs to cure, not just dry to touch. Topcoating too soon can reactivate the blocking agent or trap solvents that cause adhesion problems.
-
Ignoring ventilation requirements for solvent based products. Poor airflow extends drying time and creates health risks. Proper ventilation helps primers cure correctly.
Pink tannin bleed is a specific problem that tells you shellac based primer is mandatory. When you see pink or reddish discoloration bleeding through oil based primer, that’s wood tannins from old growth lumber, knot holes in pine and fir, cedar siding, or redwood trim. Oil based primers can’t fully seal these tannins because the tannin compounds are too aggressive. Switch to BIN shellac primer. The alcohol based formulation with shellac resin creates a barrier that even heavy tannins can’t get through.
When bleed through occurs after priming, here’s what to do.
Upgrade to stronger primer chemistry. If water based failed, switch to oil based. If oil based failed, switch to shellac. Don’t apply more of the same primer that already failed.
Apply additional coats of the correct primer. Sometimes one coat isn’t enough, especially with severe damage. Two coats of oil based primer often seal what one coat couldn’t.
Spot treat heavy areas with shellac primer. For exterior projects where you can’t use shellac as the full coating, spot prime the worst areas with BIN, let it dry, then cover everything with oil based primer rated for exterior use. This targets the problem spots with maximum strength while keeping the overall system exterior appropriate.
Make sure the surface is completely dry before priming again. If moisture caused the first failure, more primer won’t fix it. Let the substrate dry another week before trying again.
Test a small area first on severe damage. On really bad staining, prime a 1 foot section and check it after 48 hours. If it bleeds through, you’ll know before you’ve primed the entire ceiling.
When staining is too severe for DIY, you’ll see it. If you’ve applied two coats of BIN shellac primer and stains are still coming through, the damage goes beyond surface sealing. This happens with long term water exposure, extensive smoke damage, or contamination that’s soaked deep into the substrate. Drywall replacement becomes necessary. Professional remediation companies have specialized sealers and techniques beyond standard primers, plus the experience to spot when structural work is needed instead of more primer coats.
One more thing. Some users report Kilz Original gallon containers drying slower and staying sticky for days, while quart sizes cure normally. If you run into this, it might be a batch or formulation issue. Try a different container or switch to Zinsser Cover Stain for more consistent results.
Drying Times and Recoat Scheduling for Water Damage Primers

Dry to touch means the surface feels dry when you lightly press it. Recoat time means when you can apply a second coat of primer. Topcoat ready means when you can apply finish paint. These three timelines are different. Understanding them prevents applying the next layer too soon, which causes wrinkling, poor adhesion, or reactivated bleed through.
| Primer Type | Product Example | Dry Time | Recoat Time | Topcoat Ready |
|---|---|---|---|---|
| Shellac Based | Zinsser B-I-N | 15 minutes | 45 minutes | 45 minutes |
| Oil Based Alkyd | Zinsser Cover Stain | 30 minutes | 2 hours | 2 hours |
| Water Based Latex | Zinsser Bulls Eye 1-2-3 | 30 minutes | 1 hour | 1 hour |
| Odorless Oil | Zinsser Odorless Oil | 30 to 45 minutes | 2 to 3 hours | 2 to 3 hours |
Environmental factors change these times. Temperature below 50°F slows drying significantly. High humidity adds hours to cure time because moisture in the air prevents solvents and water from evaporating. Poor ventilation traps vapors around the surface and extends dry time. Thick application increases drying time. A heavy coat might take twice as long as a normal coat. Porous substrates like bare drywall absorb some of the primer, which can speed surface drying but doesn’t mean the film is fully cured.
The 24 hour waiting period before checking for bleed through success is non negotiable. Even though shellac primer dries in 15 minutes and you could topcoat in 45 minutes, stains can take much longer to move through the primer film. Water stains and tannins don’t always show up immediately. Wood tannins in old growth lumber, knot holes in softwoods, cedar siding, and redwood trim often take 24 to 48 hours to bleed through if the primer wasn’t strong enough. Check the primed surface in good natural light at 24 hours. For wood substrates prone to tannin bleed, check again at 48 hours before topcoating.
Temperature requirements matter most for water based primers. Zinsser Bulls Eye 1-2-3 shouldn’t be applied below 50°F. The latex formula won’t come together properly in cold conditions, leading to poor film formation and reduced stain blocking. BIN shellac primer works in colder temperatures because alcohol evaporates readily even when it’s cool. Oil based primers handle moderate cold better than latex but still perform best above 50°F. If you’re working in an unheated space during winter, shellac based primer is the most cold tolerant option.
Safety Precautions and Ventilation for Stain Blocking Primers

Solvent based primers (shellac and oil formulations) release fumes that need more safety measures than water based options. The alcohol in shellac primer and petroleum solvents in oil based primer evaporate into the air you’re breathing. These vapors irritate eyes, skin, and lungs. Water based primers release minimal fumes because the carrier is mostly water.
Wear a respirator with organic vapor cartridges for shellac and oil based primers. A dust mask doesn’t filter chemical vapors. You need cartridges rated for organic vapors. This isn’t optional. The fumes cause headaches, dizziness, and nausea even if you think you’re handling them fine.
Set up cross ventilation with fans. Open windows on opposite sides of the room. Place a fan in one window blowing out to pull fumes outside. Fresh air comes in the other window. This creates airflow that removes vapors instead of letting them build up.
Protect your skin with gloves and long sleeves. Shellac and oil based primers irritate skin on contact. Nitrile gloves work for all primer types. Disposable gloves are fine since cleanup will ruin them anyway.
Wear safety glasses or goggles. Primer splatter, especially when rolling overhead on ceilings, gets in your eyes. Goggles with side shields are better than regular glasses for overhead work.
Keep pets and children out of the work area. Their smaller body size means fumes affect them faster and more severely. They shouldn’t be in the room or even the house while you’re applying solvent based primers. Wait until fumes clear before letting them back in.
Properly dispose of solvent soaked materials. Rags, roller covers, and brushes used with oil based or shellac primers are fire hazards. Lay them flat outside to dry completely or seal them in a metal container with water before disposal. Don’t stuff them in the trash while still wet.
VOC (Volatile Organic Compound) content and odor intensity varies significantly. Shellac primer releases alcohol fumes. Sharp, strong, and medicinal smelling. The smell is intense but clears faster than oil based odors, usually within a few hours with good ventilation. Oil based primers release petroleum solvent vapors. The smell is heavy, lingering, and unpleasant to intolerable for most people. It can hang around for days even with ventilation. Water based primers have minimal odor, sometimes described as “paint smell” but nowhere near the intensity of solvent types. These are the most environmentally friendly option with the lowest VOC content.
For occupied spaces where you can’t evacuate residents or shut down areas for days, Zinsser Odorless Oil Primer offers a compromise. It’s still oil based with strong stain blocking, but the odor is way reduced compared to standard oil primers. It’s not completely odorless, but it’s tolerable in spaces where regular oil primer wouldn’t be. Dry time and recoat time are similar to standard oil formulas.
Cleanup procedures depend entirely on primer chemistry. Shellac primers require denatured alcohol to clean brushes and rollers. Pour alcohol in a container, work the brush in it to dissolve the shellac, then rinse with water. Oil based primers need mineral spirits or paint thinner. Pour some in a container, work the brush through it, wipe on newspaper, repeat until the brush comes clean, then wash with soap and water. Water based primers clean up with soap and water immediately after use. Don’t let any primer dry on tools. Dried primer is much harder to remove and often ruins brushes and rollers permanently.
Product Recommendations Matched to Water Damage Scenarios

Product selection depends on three factors. How severe the damage is, whether it’s interior or exterior, and what you’re willing to spend. Light staining in a bedroom calls for different chemistry than heavy smoke and water damage from a fire.
Budget Friendly Option for Standard Water Stains
Kilz Original handles typical water damage at the lowest cost. It’s an oil based primer available at Home Depot, Lowe’s, and most hardware stores, which means you can grab it the same day you’re ready to work. The formula permanently seals standard ceiling stains from roof leaks, wall damage from burst pipes, and general water spot restoration. Coverage and blocking power match primers costing more.
Use Kilz Original for ceiling water rings after fixing a leaky roof, brown staining on walls from plumbing leaks, water damage around windows from exterior water entry, and basement walls with old water staining after the source is stopped.
It smells strong like all oil based primers, requires mineral spirits for cleanup, and takes 2 hours before recoat. But for standard water damage restoration where you need good blocking without specialty performance, it’s the practical choice.
Professional Grade Multi Surface Solution
PPG Seal Grip (17-941NF) works as both a stain blocker and a bonding primer, which matters when you’re priming over surfaces that paint doesn’t usually stick to well. Professional contractors keep this product on hand for situations where adhesion promotion is as important as stain blocking. Priming over old oil based paint before switching to latex topcoat, sealing stains on glossy or semi glossy painted surfaces without sanding, and priming over tile backsplashes or glossy paneling that’s staying in place.
The bonding chemistry works on metal, ceramic, glass, glossy enamel, and other hard to prime substrates. If you’ve got water damage on unusual surfaces or you’re combining stain blocking with adhesion challenges, PPG Seal Grip handles both issues with one product.
Maximum Blocking for Severe Damage
Zinsser B-I-N (pricing from £17.80) is the premium solution for worst case scenarios. When water damage combines with smoke staining, when tannins are bleeding through oil based primer, when you need to seal odors from sewage backups or flooding, or when other primers have already failed, BIN is the next step.
Fire restoration companies use BIN as their standard because it seals smoke, soot, water damage, and odors all at once. The shellac based formula with permeability rating under 1 creates a vapor barrier that even aggressive tannins and odor causing compounds can’t get through.
Use B-I-N for severe tannin bleed showing pink discoloration through other primers, old growth wood substrates with heavy resin content, combination water and smoke damage from fires, odor sealing after floods or sewage backups, and knot holes that keep bleeding through oil based primer.
The limitations are interior use only (spot exterior application acceptable), denatured alcohol required for cleanup, and strong fumes during application. But when you need maximum blocking and everything else has failed, it’s the product that works.
Versatile Interior and Exterior Options
Zinsser Cover Stain (pricing from £8.87) and Bulls Eye 1-2-3 (pricing from £11.04) handle projects requiring both indoor and outdoor application capability. Cover Stain is oil based, offering strong stain blocking on exterior siding, soffits, window restoration, and interior walls and ceilings. Bulls Eye 1-2-3 is water based with biocide protection against fungal breakdown, making it suitable for high humidity areas prone to future moisture problems.
Sherwin Williams Extreme Block is another professional alternative in this category. Oil based formula with strong blocking on interior and exterior substrates. These primers sit between the budget Kilz Original and premium BIN in terms of cost and performance.
Invest in premium products when damage is severe, when other primers have already failed, or when the repair needs to last without callbacks. Budget options work fine for standard water damage where the staining isn’t extreme and you’ve properly addressed the source. If you’re dealing with typical ceiling stains after a roof leak repair and the drywall is sound, Kilz Original seals it. If you’re dealing with pink tannin bleed, heavy smoke damage, or situations where durability is critical, spend the extra for BIN. The cost difference per project is usually small compared to the time and hassle of repainting when cheaper products fail.
Mold and Mildew Considerations After Water Damage
Water damaged areas are at elevated mold risk because the conditions that caused water intrusion often create the moisture and organic material that mold needs to grow. Even after the surface dries, mold spores can sit dormant in the substrate. If humidity rises or another water event happens, active growth can restart. Stain blocking primers are not mold treatment. They go over clean, remediated surfaces to seal stains and prevent bleed through, but they don’t kill mold or remove it.
Before priming any water damaged area, inspect for visible mold growth (black, green, gray, white, or fuzzy spots). Check behind and around the damaged area, not just the surface you’re planning to paint. If you find mold, clean it properly with a solution designed for mold (bleach solution, commercial mold cleaner, or professional remediation for extensive growth). Let the cleaned area dry completely before priming. If the affected area is larger than 10 square feet, or if you’re dealing with contaminated HVAC systems or hidden mold in wall cavities, professional remediation is safer and more thorough than DIY approaches.
Some primers include fungicidal additives specifically designed to resist future mold growth. Zinsser Bulls Eye 1-2-3 contains biocide that protects the primer film against fungal breakdown. This matters in bathrooms, laundry rooms, kitchens, basements, and other high humidity environments where water damage occurred. The biocide doesn’t kill existing mold, but it prevents mold from growing on the dried primer film if conditions become damp again. Think of it as insurance against future problems rather than treatment for current contamination.
Vapor barrier properties in shellac primers add another layer of protection. BIN has a permeability rating under 1, meaning it’s a superior vapor barrier. Water vapor has a much harder time moving through the primer film, which reduces the moisture available to support mold growth behind the paint. This doesn’t make surfaces waterproof or get rid of the need for proper ventilation and humidity control, but it does create a tighter seal that slows moisture transmission.
The distinction matters. Stain blocking primers seal discoloration and create barriers against bleed through. Mold remediation removes contamination and treats affected areas to get rid of active growth. These are separate steps. You can’t skip remediation and just paint over mold with primer. It will keep growing under the paint, eventually breaking through and causing health problems for occupants. Clean first, make sure it’s completely dry, then prime to seal any remaining staining from the water damage and mold cleaning process.
Achieving Professional Results with Proper Topcoat Selection

Stain blocking primers give you complete freedom in topcoat selection because they’ve already sealed the problem. This is better than using stain covering paint, which limits your finish options to whatever’s in that specific product line. Once you’ve properly primed water damaged surfaces, any quality paint works as your topcoat. Flat, eggshell, satin, semi gloss, specialty coatings for high traffic areas, whatever matches your room’s needs.
The primer’s job is stain blocking and adhesion. The topcoat’s job is appearance, durability, and cleanability. Keeping these functions separate means you get the best performance from both products. Zinsser B-I-N, Cover Stain, and Bulls Eye 1-2-3 all accept any topcoat. Latex, acrylic, oil based, or specialty coatings. You’re not locked into one brand or formula.
For water damaged areas, high quality latex paint is the recommended topcoat. Latex offers better application (smoother, easier to work with), better appearance (more uniform color, better sheen consistency), easier cleaning (scrubbable surfaces resist future staining), and better longevity (flexibility prevents cracking as surfaces expand and contract with temperature and humidity changes). Acrylic latex is even more durable, especially in high moisture areas like bathrooms and kitchens where the original water damage occurred.
If the water damaged area is in a high traffic space or somewhere that needs frequent cleaning, consider satin or semi gloss sheen. These finishes are more scrubbable than flat paint. Bathrooms, kitchens, hallways, and kids’ rooms benefit from washable surfaces. Flat and matte finishes work for ceilings and low traffic spaces where appearance matters more than durability.
Timing matters for topcoat application. Wait for the primer to fully cure, not just dry to touch. This varies by primer type. BIN shellac is ready in 45 minutes, oil based primers need 2 hours minimum, water based primers need 1 hour. But these are minimum times. In cool, humid conditions, waiting longer makes sure the primer has hardened completely. If you apply topcoat too soon, the primer underneath can wrinkle, especially with latex topcoat over oil based primer. The water in the latex paint can wake up the still soft oil primer.
Adhesion on properly primed surfaces is excellent. Stain blocking primers are designed to accept topcoats readily. You shouldn’t need to sand between primer and topcoat unless you’re worried about texture from brush marks or roller stipple. If you do sand, use fine grit (220) and don’t sand through the primer to the substrate.
Common mistakes when applying topcoat over freshly primed water damaged areas include rushing the cure time, applying topcoat too thick in one coat trying to save time (two thinner coats always look better), not checking for complete primer coverage first (topcoat won’t hide bleed through that’s already showing), and using flat paint in areas that need scrubbability (it will stain and wear faster).
Interior Versus Exterior Application Limitations

Shellac based primers have exterior limitations despite offering the strongest stain blocking. BIN is rated for interior use and spot exterior application only. The shellac resin can soften in hot conditions, especially direct sun exposure on dark siding or metal surfaces. This doesn’t mean it will fail immediately, but the manufacturer doesn’t recommend full exterior coating, particularly in hot climates like the southern United States or anywhere with intense summer sun.
That said, real world experience varies. One user reported using BIN shellac successfully as a full exterior primer in central Florida for 20 years with no failures. But that’s outside the manufacturer’s recommendation and comes with risk. For most DIYers, following the intended use guidance makes more sense than experimenting with products in ways they’re not rated for.
Oil based primers are the go to choice for exterior water damage. Kilz Original and Zinsser Cover Stain both work on exterior wood siding (cedar, pine, fir, redwood), exterior plywood, soffits and fascia damaged by roof leaks, window restoration where water has stained the wood around sills and frames, and exterior trim with water damage from ice dams or gutter overflow. These primers handle temperature swings, UV exposure, and moisture cycling without softening or failing.
For exterior projects, oil based primers also seal tannin bleed from cedar and redwood siding, which is a common problem in new construction or when replacing damaged boards with fresh wood. The tannins in these species will bleed through latex primer but get sealed by oil based chemistry.
Water based exterior primers exist (Zinsser Bulls Eye 1-2-3 is rated for interior and exterior use), but they have temperature restrictions. Don’t apply below 50°F. The latex formula won’t come together properly in cold conditions. If you’re working in cooler weather, oil based primers handle lower temperatures better and cure more reliably.
The spot treatment strategy solves the exterior problem when you need maximum blocking. Use BIN shellac on the worst trouble spots (heavy tannin bleed, severe staining, knot holes that keep bleeding through), let it dry, then coat the entire surface with oil based primer rated for full exterior use. This gives you shellac’s maximum blocking power on problem areas while keeping the overall system exterior appropriate.
Final Words
Picking the right stain blocking primer for water damage comes down to matching chemistry to your situation.
Water-based handles light stains in occupied spaces. Oil-based takes care of standard ceiling and wall damage. Shellac-based locks down severe tannin bleed and combo damage that keeps bleeding through.
Prep the surface right, let everything dry completely, and give the primer a full 24 hours before deciding if you need a second coat.
If you stick to clean-dry-dull and choose the correct formula, those brown spots and yellow rings stay buried under your topcoat for good.
FAQ
Q: What is the best stain blocker for water damage?
A: The best stain blocker for water damage is BIN Shellac-Based Primer, which uses denatured alcohol and pigmented shellac to create a vapor barrier with a permeability rating under 1, making it the gold standard used by fire restoration companies for severe water stains, tannin bleed, and odor sealing.
Q: What is the best primer for covering water stains?
A: The best primer for covering water stains depends on damage severity. Oil-based primers like Kilz Original handle standard ceiling and wall water stains effectively. For severe tannin bleed, pink discoloration, or combination water and smoke damage, upgrade to shellac-based BIN Primer for maximum blocking strength.
Q: Does primer protect against water damage?
A: Primer protects against water damage by sealing existing stains and preventing bleed-through to topcoats, but it does not waterproof surfaces or prevent future leaks. You must stop the leak source, allow complete drying for at least one week, and address any mold before applying stain-blocking primer.
Q: What is a stain blocking primer?
A: A stain blocking primer is a specialized coating that creates a permanent barrier between damaged substrate and topcoat, preventing water stains, brown spots, yellow marks, tannin bleed, and odors from bleeding through newly applied paint layers using oil-based alkyd, shellac-based, or water-based formulations.
Q: How long should you wait after water damage before priming?
A: You should wait at least one week after fixing the leak before priming to allow drywall to dry completely. Priming over damp surfaces causes primer failure and recurring stains. Check that surfaces are clean, dry, and dull before applying any stain-blocking primer.
Q: Can water-based primer block water stains?
A: Water-based primer can block light water stains only. Products like Kilz 2 and Zinsser Bulls Eye 1-2-3 work for minor ceiling spots and humidity staining with low odor and water cleanup convenience, but they lack the sealing chemistry for standard or severe water damage repairs.
Q: What’s the difference between oil-based and shellac primers for water stains?
A: Oil-based primers like Kilz Original handle standard water damage with 2-hour recoat time and interior/exterior capability, while shellac-based BIN dries in 15 minutes with superior blocking strength for severe tannin bleed, pink discoloration, and situations where oil-based primers have failed, though shellac is interior-only.
Q: Why do water stains bleed through regular paint?
A: Water stains bleed through regular paint because standard primers lack the sealing chemistry to lock in discoloration. Water-soluble tannins, minerals, and organic compounds migrate through insufficient barriers. Stain-blocking primers use oil-based alkyd, shellac, or specialized latex formulations to permanently seal these water-soluble compounds.
Q: How many coats of stain blocking primer do you need?
A: You typically need one coat of properly matched stain-blocking primer for standard water damage. Apply a second coat if bleed-through appears after the 24-hour inspection period. Severe tannin stains or old-growth wood may require upgrading to shellac-based primer rather than additional coats.
Q: Can you use stain blocking primer on exterior water damage?
A: You can use oil-based primers like Kilz Original and Zinsser Cover Stain on exterior water damage for full coverage. Shellac-based BIN is limited to spot exterior use only due to hot climate vulnerability. For heavy exterior blocking, apply multiple coats of oil-based primer.
Q: How do you know if water-damaged drywall needs replacement before priming?
A: Water-damaged drywall needs replacement if it feels soft, crumbles when pressed, sags or bulges, shows brown or black mold growth beyond surface cleaning, or has lost structural integrity. Minor surface staining on firm, intact drywall can be primed without replacement after proper drying.
Q: What safety equipment do you need for stain blocking primers?
A: You need a respirator with organic vapor cartridges for shellac and oil-based primers, cross-ventilation with fans, chemical-resistant gloves, eye protection, and long sleeves for skin protection. Water-based primers require minimal safety equipment beyond basic ventilation and gloves for skin protection.