
You just washed fire damaged walls and the water turned black, but the stain came right back through your fresh paint. That’s because smoke penetrates surfaces, not just sits on top. The right stain blocking primer creates a permanent barrier between nicotine, soot, and tar residue and your new finish coat. Shellac formulas deliver the strongest seal for heavy damage, while oil primers handle moderate smoke and exterior work better than water alternatives.
Top-Rated Primers That Block Smoke Damage and Seal Odors

Shellac primers beat oil and water alternatives when it comes to blocking smoke stains. They create a dense barrier that stops nicotine, soot, and tar from bleeding through months after you’ve applied them. For serious fire damage and heavy nicotine buildup, shellac gives you permanent sealing that water primers just can’t deliver.
Three primers dominate smoke damage work:
- Zinsser B-I-N Shellac Primer touches dry in 15 minutes, ready for recoat in 45, and handles the worst nicotine stains, soot, and smoke damaged ceilings better than anything else
- Kilz Original Oil-Based Primer dries to touch in 30 minutes, recoats in 2 hours, blocks smoke and fire damage on interior and exterior surfaces while sealing smoke and food odors
- Zinsser Cover Stain Oil-Based also touches dry in 30 minutes with 2 hour recoat time, works well on cedar and redwood smoke bleed but shows brush marks more than shellac
Shellac works better on nicotine and soot because it dries by solvent evaporation into a non-porous film. Water primers can actually rewet contamination and let it migrate through to your topcoat. Oil primers create better barriers than water options, but heavy smoke still bleeds through single coats sometimes. Shellac forms a harder, more impermeable seal that locks in even stubborn tar and nicotine. Think peanut butter consistency going on, but it dries to a shell-hard finish nothing gets through.
All three seal smoke odors in addition to blocking visible stains. Shellac and oil formulations trap odor molecules inside the dried film so they can’t release into your space. Each accepts both latex and oil topcoats once cured, making them work with any finish you choose for smoke damaged ceilings, walls, and trim.
Understanding Smoke Damage Stain Types and Primer Selection

Smoke damage comes in two categories that need different approaches. Light nicotine from years of cigarettes creates yellow to brown discoloration on ceilings and upper walls, but it’s relatively surface level. Heavy soot and tar from actual fires penetrates deep into drywall texture, wood paneling, and plaster, leaving black carbon deposits and oily residues regular paint won’t cover.
Smoke doesn’t just sit on surfaces. It migrates into porous drywall paper, unsealed wood grain, and acoustic ceiling tiles. The microscopic particles bond with these materials, which is why washing alone rarely removes all traces. On textured ceilings, soot settles into every valley and creates a shadow that shows through multiple coats of regular paint.
Visual cues tell you what primer strength you need. Yellow-brown ceiling discoloration near kitchens or in rooms where people smoked means nicotine buildup that moderate primers can handle. Brown streaking with visible grease or tar residue means heavier contamination requiring oil or shellac solutions. Black carbon from fire damage always demands the strongest shellac primers because carbon particles are so fine they migrate through weaker barriers. If you still smell smoke after washing and drying, that odor will absolutely come back through standard primer and paint.
Whether you’re dealing with years of cigarette smoke or actual fire soot determines if you can get away with water primer or need to invest in shellac for permanent results.
Primer Formulation Comparison: Shellac vs Oil-Based vs Water-Based
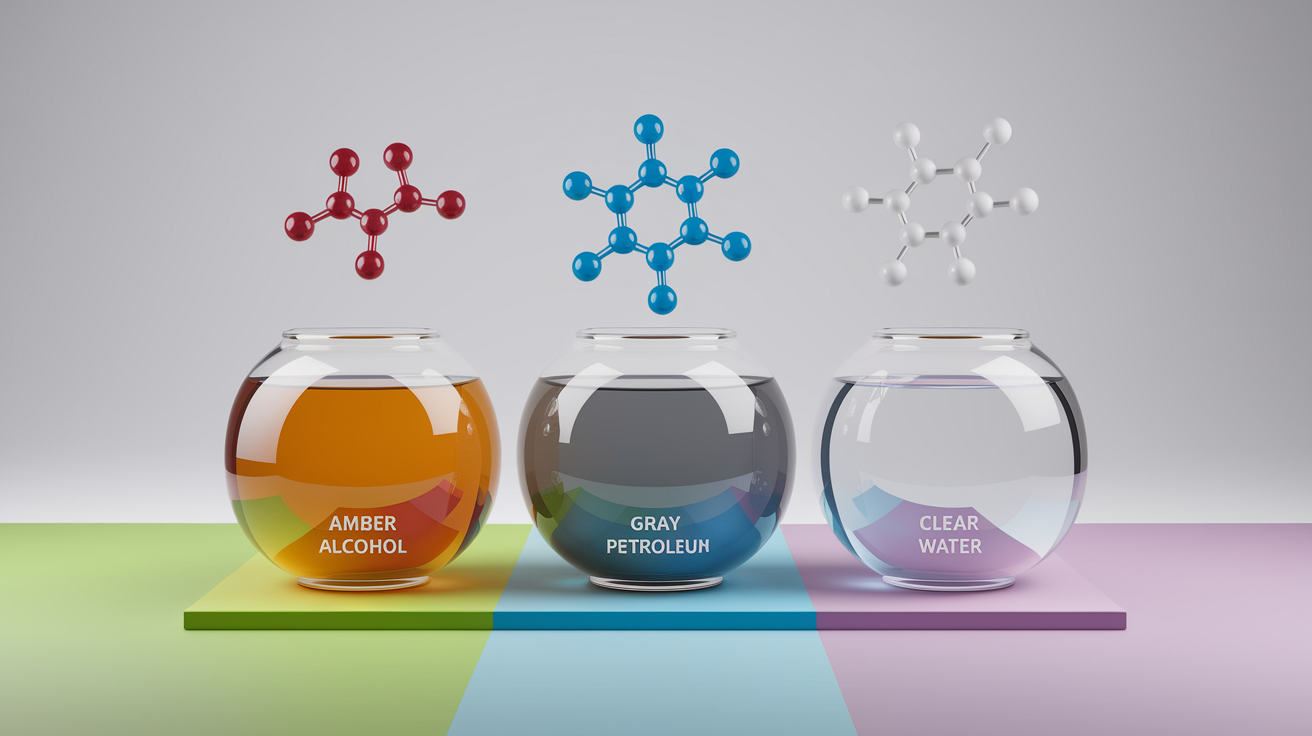
Three distinct formulations exist for smoke damage. Shellac uses denatured alcohol carrying natural shellac resin. Oil formulations suspend blocking pigments in petroleum distillates. Water primers use acrylic resins dispersed in water with biocide additives.
| Formulation Type | Drying Time | Recoat Time | Stain Blocking Strength | Odor Sealing | VOC Level | Interior/Exterior | Cost Per Gallon | Best Used For |
|---|---|---|---|---|---|---|---|---|
| Shellac-Based (B-I-N) | 15 minutes | 45 minutes | Highest | Permanent | High (550+ g/L) | Interior only | $45-55 | Heavy fire damage, severe nicotine, fast turnaround projects |
| Oil-Based (Kilz Original, Cover Stain) | 30 minutes | 2 hours | High | Very Good | Medium (340-400 g/L) | Interior and exterior | $25-35 | Moderate to heavy smoke, exterior surfaces, tannin bleed |
| Water-Based (Bulls Eye 1-2-3, Kilz 2) | 30 minutes | 1 hour | Low to Moderate | Limited | Low (50-100 g/L) | Interior and exterior | $20-30 | Light nicotine only, occupied spaces, low-odor requirement |
Shellac creates superior smoke barriers through its alcohol solvent drying mechanism. When the denatured alcohol evaporates, it leaves behind a dense, non-porous film of natural shellac resin and pigment. This hard coating prevents contamination migration better than any other formulation. The 15 minute touch dry and 45 minute recoat window make shellac ideal for insurance restoration requiring fast turnaround. But shellac dries hard and brittle, making it unsuitable for exterior wood exposed to expansion, contraction, and weather cycles. The brittleness causes cracking and film failure outdoors.
Oil primers offer the best compromise between aggressive stain blocking and interior/exterior versatility. The petroleum solvents penetrate porous surfaces and carry blocking pigments deep into smoke contaminated drywall texture. Kilz Original specifically blocks tannin bleed, graffiti, smoke, and fire stains while sealing pet, smoke, and food odors on both interior walls and exterior trim. The 2 hour recoat time compared to shellac’s 45 minutes slows down timelines, but oil formulas remain the default when exterior application is necessary and shellac can’t be used.
Water primers work only on light nicotine staining. The kind from moderate cigarette smoke in a single room over a few years. Bulls Eye 1-2-3 includes biocide protection against fungal degradation, making it suitable for bathrooms and high humidity spaces with minor smoke exposure. But water formulations pose a fundamental problem for heavy contamination. Because water is the carrier, it can actually rewet nicotine and tar deposits during application, allowing them to migrate into the wet primer film. When the primer dries, those contaminants sit near the surface where they eventually bleed through the topcoat. Kilz 2 specifically warns it’s suitable only for light to moderate stains like crayons and light nicotine, not structural fire damage.
Choose shellac when dealing with severe fire damage or heavy nicotine on interior surfaces where fast completion matters. Select oil when you need strong stain blocking on exterior surfaces or have moderate smoke damage without time pressure. Use water only when smoke damage is genuinely light, VOC restrictions apply, or the space stays occupied during restoration.
Surface Preparation Before Applying Smoke Damage Primer
Primers seal contamination but don’t remove loose soot and tar. If you apply primer over powdery carbon deposits or greasy residue, the primer bonds to that contamination layer instead of the wall surface. When the contamination eventually releases, it takes your primer and topcoat with it, creating peeling and adhesion failure.
-
Vacuum all surfaces with a HEPA filter vacuum or shop vac to remove loose soot particles without smearing. Use the soft brush attachment on walls and ceilings. Don’t wipe with dry cloths because that grinds carbon into porous drywall texture.
-
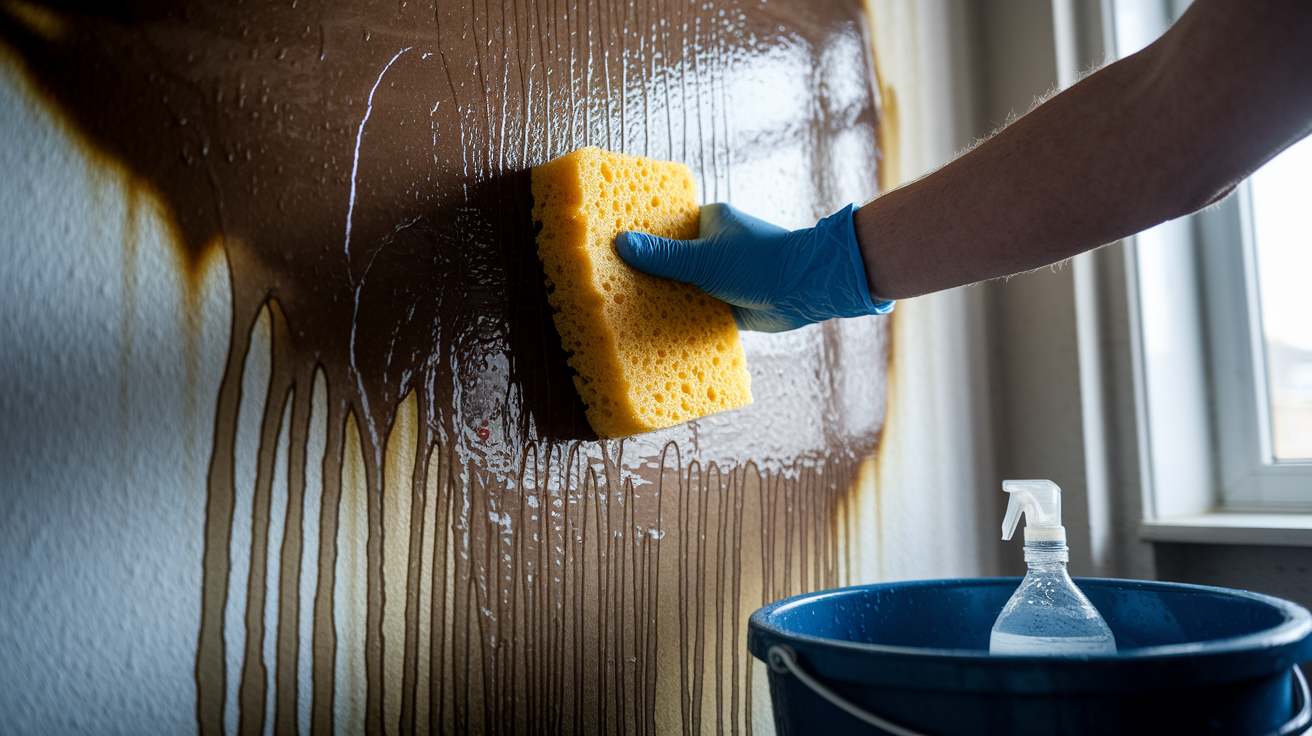
Wash walls and ceilings with TSP (trisodium phosphate) solution mixed at ½ cup per gallon of warm water. Work from bottom to top in 4 foot sections using cellulose sponges. The alkaline cleaner breaks down nicotine oils and tar residue that water alone can’t remove.
-
Rinse each section with clean water immediately after TSP application to prevent white residue buildup. Change rinse water frequently as it darkens with dissolved contamination.
-
Treat any visible mold with biocidal wash before priming. Mix 1 part bleach to 3 parts water and apply with spray bottle, letting it sit 10 minutes before rinsing. Shellac primers seal mold staining but don’t kill active growth.
-
Lightly abrade glossy surfaces with 220 grit sandpaper to create mechanical adhesion. This matters most on aged gloss trim and varnished wood that smoke has coated with greasy film.
TSP washing requires specific technique for smoke residue removal. Mix the solution in a dedicated bucket. Never use the same bucket for rinsing because contamination transfers back to walls. Apply with a wrung out sponge so water doesn’t run down walls and create drip marks. You’ll see the sponge turn gray or brown immediately on fire damaged surfaces. That discoloration confirms contamination removal. Wring out the sponge frequently and keep working until it stays relatively clean after wiping a section.
Surfaces must dry completely before primer application. Typically 24 to 48 hours after deep TSP cleaning depending on humidity and ventilation. If you’re dealing with water damage cleanup from firefighting efforts in addition to smoke staining, that drying window extends to 3 to 5 days for wall cavities to release trapped moisture. Use fans and dehumidifiers to accelerate the process.
Never skip preparation and jump straight to priming. That loose soot layer prevents chemical bonding between primer and substrate. You end up sealing contamination to contamination instead of contamination to wall. The primer might look fine initially, but within weeks it starts peeling at the edges or develops adhesion failure in high traffic areas where people brush against walls.
Application Methods for Smoke Damage Stain Blocking Primers

Application method directly affects coverage quality on smoke damaged texture. Brush, roller, and spray each work for different project scales and surface conditions, but shellac primers require specific techniques because they dry too fast for standard painting approaches.
Brush application suits trim work, corners, and cut-in areas where roller access is limited. Synthetic bristle brushes work best with shellac primers because natural bristles absorb alcohol solvent and become soft. Use 2 to 2.5 inch angled brushes for trim and 3 to 4 inch flat brushes for larger flat areas. Load the brush moderately, about one third of bristle length, and apply in smooth, continuous strokes. Don’t overwork shellac primers because they start setting within 60 to 90 seconds after contact with air. Once you’ve laid down a coat, leave it alone. Going back over partially dried shellac creates drag marks and uneven film thickness. Feather the edges like blending makeup. Light pressure as you pull away from the main stroke.
Roller application works efficiently on walls and ceilings with 3/8 inch or 1/4 inch nap roller sleeves. Short nap prevents excessive texture buildup on already irregular smoke damaged surfaces. Pour primer into a tray, load the roller evenly, and roll off excess against the tray grid. Apply in 3 to 4 foot sections using W pattern or N pattern rolling to distribute primer evenly without creating lap marks. For ceilings, work across the narrow dimension of the room in straight sections from corner to corner. The key with shellac is complete each section before moving to the next because you can’t blend back into areas that have started drying. Roll with moderate pressure. Pushing too hard embeds the roller texture into the primer coat.
HVLP spray method works for large fire restoration projects covering multiple rooms or entire homes. Thin shellac primers 10 to 15% with denatured alcohol for proper spray viscosity. Set up extraction fans to remove overspray and solvent vapors. Apply in light, overlapping passes at 8 to 12 inches from the surface. Spraying eliminates brush marks and roller texture entirely, creating the smoothest possible finish over smoke damaged surfaces. But spraying requires sealed rooms, extensive masking, and more material waste from overspray.
Common application mistakes to avoid:
- Applying primer too thick in an attempt to cover heavy staining in one pass, which causes cracking as the shellac film cures and contracts
- Overworking fast drying shellac by going back over sections that have started to set, creating drag marks and uneven coverage
- Using thick 3/4 inch nap rollers designed for rough surfaces, which add unnecessary texture that shows through topcoat
- Failing to clean brushes and rollers immediately after use, making tools unusable once shellac or oil primer sets up
The two thin coats approach works better than one heavy coat for smoke damage. Apply the first coat at standard coverage rate, about 400 square feet per gallon. Let it dry completely. Then inspect for bleed-through 24 hours later before adding the second coat. If brown or yellow staining shows through, you know exactly where to focus additional primer coverage. Spot prime those areas first, then apply the full second coat once spot treatment dries. This targeted method uses less material than blindly applying thick coats everywhere.
Coverage Rates and Multiple Coat Requirements for Smoke Primers
Typical coverage rates run 300 to 400 square feet per gallon for smoke damage primers, but that assumes clean, previously painted drywall. Actual coverage on smoke damaged surfaces typically drops to 250 to 350 square feet per gallon because the rough, contaminated texture absorbs more primer than smooth surfaces.
One coat rarely provides complete sealing on heavy fire damage and nicotine staining. The contamination is simply too dense for a single primer layer to block all migration. Shellac based B-I-N might seal severe staining in one coat on non-porous surfaces like aged gloss trim, but drywall and plaster always require a minimum of two coats for reliable long term blocking. Trying to save money with single coat application leads to bleed-through appearing weeks after you’ve finished painting, forcing a complete repaint project.
| Smoke Damage Level | Coats Required | Coverage Per Gallon |
|---|---|---|
| Light Nicotine (yellow-brown ceiling discoloration, no odor after washing) | 1-2 coats | 350-400 sq ft |
| Moderate Smoke (brown streaking, lingering odor, visible grease) | 2 coats | 300-350 sq ft |
| Heavy Fire Damage (black carbon deposits, tar residue, strong odor) | 2-3 coats plus spot treatment | 250-300 sq ft |
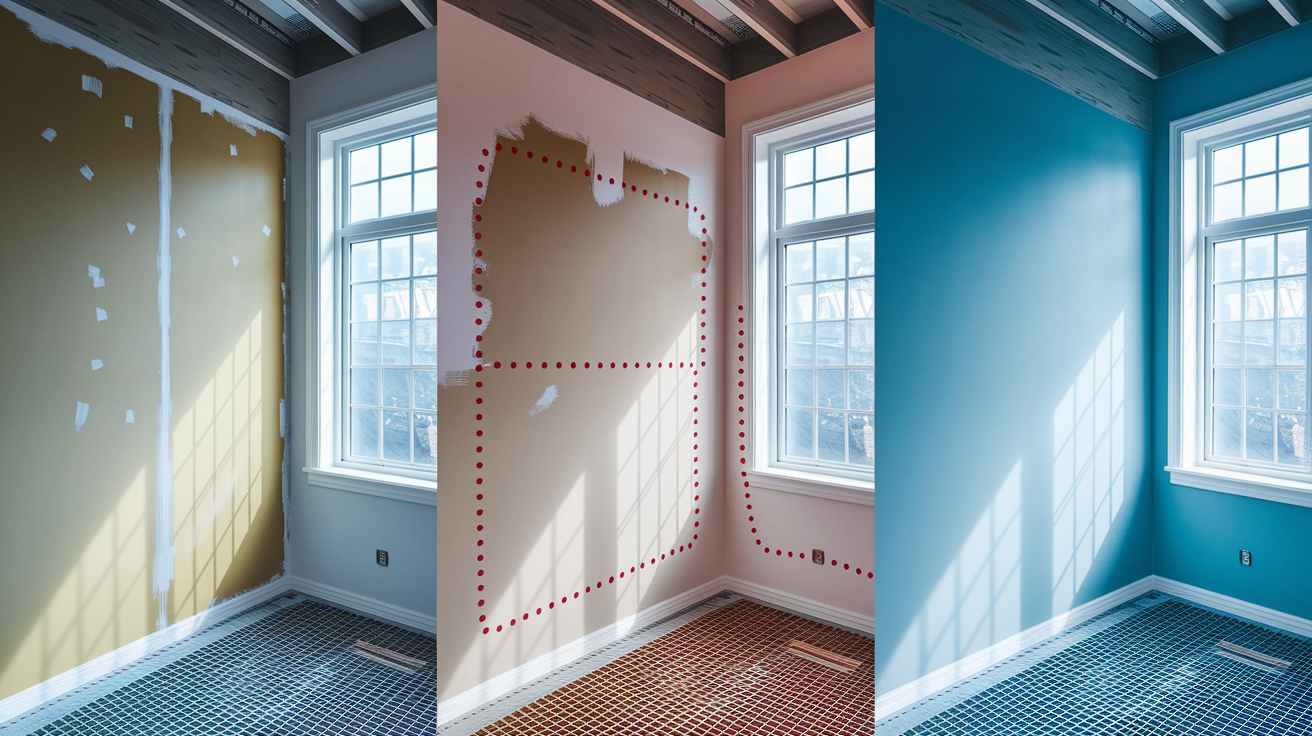
The 24 hour bleed-through check matters more than rushing to topcoat. After applying primer, wait a full day before assuming coverage is successful. Look at walls and ceilings under bright light. Natural daylight shows bleed-through better than artificial lighting. Brown spots, yellow patches, or pink discoloration indicate contamination migrating through the primer film. Pink specifically signals wood tannins bleeding through and almost always requires shellac primer for correction. If you see any discoloration at 24 hours, those areas need spot priming or a full second coat depending on how widespread the bleed-through appears.
Spot treating problem areas uses less material than full re-priming. If bleed-through shows in scattered locations (around ceiling light fixtures, in room corners, or on the top six inches of walls near the ceiling) spot prime just those sections. Apply a second or third coat only where needed, feathering the edges 6 to 8 inches beyond visible staining. Let the spot treatment dry 24 hours, then check again before applying full second coat or moving to topcoat. This targeted approach might add an extra day to the timeline but saves the cost of a full additional coat on surfaces that sealed properly the first time.
Drying Time and Recoat Windows for Smoke Damage Primers
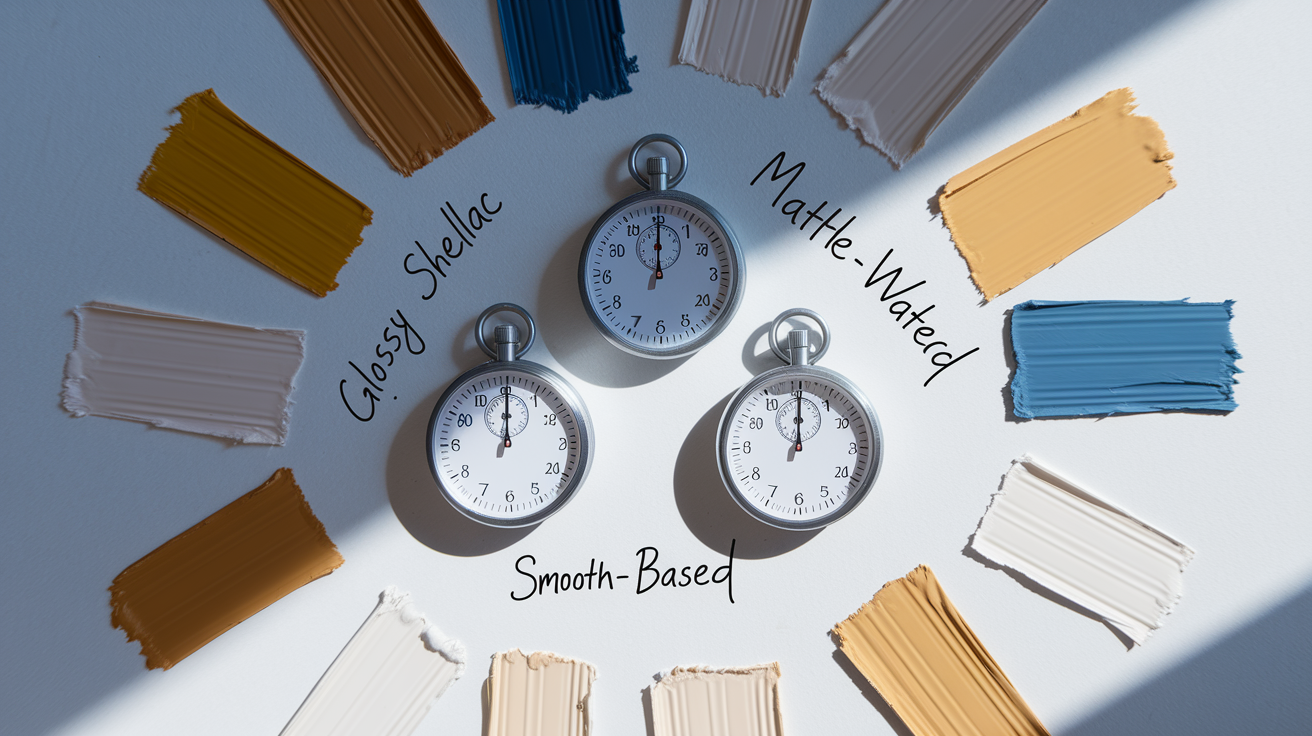
Touch dry time means the primer surface feels dry to gentle touch but hasn’t reached full hardness. Recoat time indicates when you can apply a second primer coat or topcoat without softening the first layer. Full cure time marks when the primer has reached maximum hardness and chemical resistance. The difference matters because applying paint over insufficiently dried primer causes wrinkling, poor adhesion, and extended final drying times.
| Primer Type | Touch Dry | Recoat Time | Full Cure |
|---|---|---|---|
| Shellac-Based (B-I-N) | 15 minutes | 45 minutes | 24 hours |
| Oil-Based (Kilz Original, Cover Stain) | 30 minutes | 2 hours | 7 days |
| Water-Based (Bulls Eye 1-2-3) | 30 minutes | 1 hour | 24-48 hours |
| Notes | Surface feels dry, not safe for topcoat | Safe for next coat, chemical bonding still occurring | Maximum hardness reached, safe for normal use |
Temperature and humidity significantly affect drying rates across all primer types. Shellac based B-I-N dries by alcohol evaporation, so it remains relatively unaffected by humidity but slows down below 50°F. Oil primers require oxygen exposure for proper curing, meaning they dry slower in poorly ventilated spaces and high humidity above 70%. Water primers slow dramatically in cold temperatures below 55°F and high humidity above 80%, sometimes remaining tacky for days instead of the advertised 30 minute touch dry time.
The 45 minute shellac recoat time creates substantial advantages in insurance restoration work and occupied spaces. You can prime a smoke damaged ceiling in the morning, recoat at lunch, and topcoat in the afternoon. Completing full restoration in a single day. Oil primers stretch that same process across two days minimum because of the 2 hour recoat window between primer coats and recommended overnight dry before topcoating. For homeowners living in the space during repairs, minimizing disruption often justifies shellac’s higher material cost.
Recent Kilz Original formulation appears to have changed based on user reports of extended tackiness problems. Earlier versions dried reliably within stated times, but recent gallon sized containers reportedly remain sticky for days even in proper temperature and humidity conditions. If you’re using Kilz Original and notice the primer staying tacky past 4 to 6 hours in normal conditions, increase ventilation and wait a full 24 hours before recoating. Some users report quart sized versions dry normally while gallons show the formulation issue, possibly indicating batch specific quality control problems.
Odor Control and VOC Considerations for Smoke Primer Selection

Smoke damage primers face a dual odor challenge. They must seal existing smoke smell while introducing their own application odors. This creates a temporary “odor spike” during and immediately after application that occupants find concerning, but proper primer selection balances effective contamination sealing with manageable exposure windows.
Shellac primers contain high VOC levels, typically 550+ grams per liter, from the denatured alcohol carrier. That solvent smell is strong and unmistakable during application. But the 15 minute dry time means exposure duration is extremely short compared to oil primers. If you prime a 12×12 bedroom at 9 AM with good ventilation, the solvent smell is mostly gone by 10 AM. Oil primers have medium VOC levels around 340 to 400 grams per liter but maintain that chemical odor for 4 to 6 hours as petroleum distillates slowly evaporate. The longer exposure window affects occupied spaces more severely than shellac’s intense but brief smell.
Ventilation and safety requirements during primer application:
- Set up cross ventilation with one box fan exhausting fumes out a window and another pulling fresh air in from opposite side of room or building
- Wear organic vapor respirator with P100 filter cartridges rated for alcohol and petroleum distillates, not just a dust mask
- Evacuate building occupants, especially children and people with respiratory conditions, for minimum 4 hours after shellac application or 12 hours after oil application
- Apply primers during cooler months when windows can remain open for extended periods, avoiding mid-summer application in non-air-conditioned spaces
- Keep pets away from application areas until primers reach full touch dry status and ventilation has cleared visible fumes
Primers control smoke odor through encapsulation rather than neutralization. The dried primer film physically traps odor molecules within its structure, preventing them from volatilizing into room air. Shellac and oil primers form particularly effective barriers because their dense, non-porous films don’t allow molecular migration. This is why you can still smell smoke on un-primed areas while primed sections have no detectable odor. The contamination hasn’t been removed or neutralized, just sealed behind an impermeable coating.
Water based low-VOC primers like Bulls Eye 1-2-3 work for occupied spaces with only light smoke damage because their reduced solvent content creates less application odor. But that same reduced solvent content limits their sealing effectiveness on moderate to heavy contamination. If you’re living in the space during repairs and can’t evacuate for ventilation periods, water primers become the only practical option despite their inferior stain blocking performance. Plan on multiple coats and accept that some smoke odor may persist long term.
Cost Analysis and Budget Planning for Smoke Damage Primer Projects

Primer costs vary substantially between formulation types, affecting total project budgets especially when multiple coats and large square footage are involved. Shellac primers cost $45 to $55 per gallon, oil primers $25 to $35 per gallon, and water primers $20 to $30 per gallon. But per gallon price doesn’t tell the complete cost story. Coverage rates and required coat counts change the actual cost per square foot.
| Primer Type | Gallon Cost | Coverage (2 coats) | Cost Per 100 SF |
|---|---|---|---|
| Shellac (B-I-N) | $45-55 | 150-200 sq ft | $22-37 |
| Oil-Based (Kilz Original) | $25-35 | 150-175 sq ft | $14-23 |
| Water-Based (Bulls Eye 1-2-3) | $20-30 | 175-200 sq ft | $10-17 |
| Notes: Assumes heavy smoke damage requiring 2 full coats. Light damage single coat costs would be roughly half. |
Additional costs beyond primer purchase add 20 to 40% to material budgets. TSP cleaner runs $8 to $15 for a box that makes several gallons of cleaning solution. Synthetic bristle brushes suitable for shellac cost $12 to $18 each and can’t be effectively cleaned for reuse once shellac sets. Factor $25 to $40 for disposable brush sets. Short nap roller sleeves run $4 to $6 each with 3 to 4 needed for average room coverage. Denatured alcohol for shellac cleanup costs $15 to $20 per gallon with a gallon sufficient for cleaning tools from 3 to 4 gallons of primer. Respirator cartridges rated for organic vapors cost $15 to $30 per pair and should be replaced after 8 to 10 hours of actual use, not just per project.
Professional application makes financial sense when dealing with whole house fire restoration exceeding 1,500 square feet of damaged surface area. A professional crew can prime an entire smoke damaged home in 2 to 3 days with proper equipment, sprayers, and experience managing fast drying shellac. DIY approach might stretch to 2 to 3 weeks working evenings and weekends while maintaining ventilation and managing occupied space complications. Professional pricing typically runs $1.50 to $2.50 per square foot for smoke damage priming including surface prep, materials, and labor. On a 1,500 square foot project that’s $2,250 to $3,750 compared to $600 to $900 in DIY materials but substantial time investment and physical labor.
The long term value calculation favors proper primer selection over cheap alternatives. Using water primer on moderate smoke damage because it costs $10 less per gallon seems economical until bleed-through appears six months later. At that point you’re repainting with proper shellac primer anyway, paying twice for materials, labor, and disruption. Spending an additional $40 to $60 on shellac primer for a standard room prevents that repeated expense and delivers permanent results instead of temporary coverage.
Safety Equipment and Protective Measures for Primer Application
Smoke damage primers contain solvents requiring protection beyond standard painting projects. Denatured alcohol in shellac primers and petroleum distillates in oil formulations create vapor exposure risks that dust masks and cotton gloves don’t address. Proper safety equipment prevents both immediate health effects like dizziness and headaches and long term exposure consequences.
Required protective equipment for smoke damage primer application:
- Organic vapor respirator with P100 filter cartridges rated for alcohol, toluene, and xylene exposure, not paper dust masks that provide zero vapor protection
- Nitrile gloves that resist solvent penetration, changed every 2 to 3 hours as solvents eventually permeate the material
- Safety glasses with side shields to prevent primer splatter reaching eyes during overhead ceiling work
- Long sleeve shirts and long pants to minimize skin contact with primer. Solvents absorb through skin creating systemic exposure
- Box fans positioned for cross ventilation, one exhausting at floor level where heavier than air solvent vapors collect, one pulling fresh air in at ceiling height
- ABC rated fire extinguisher within 20 feet of work area when using flammable shellac or oil primers
Respirator cartridge selection depends on primer type and application duration. Organic vapor cartridges with P100 particulate filters handle shellac and oil primer vapors while also filtering any remaining soot or dust particles from smoke damaged surfaces. These combination cartridges cost $15 to $30 per pair but protect against both vapor and particulate hazards. Water primers in well ventilated spaces technically don’t require respirators, but any confined area application or poor ventilation makes respiratory protection advisable regardless of primer type. Replace cartridges after 8 to 10 hours of actual use or when you start detecting primer odor through the respirator. That indicates saturation.
Proper ventilation setup requires actual air exchange, not just open windows. Position one box fan in a window exhausting air outward from the work area. Place a second fan in a window or doorway on the opposite side of the space pulling fresh air inward. This creates directional airflow that carries vapors out of the building rather than letting them accumulate in the workspace. For multi room projects, exhaust from the room you’re currently priming and pull fresh air from adjacent spaces or outdoors. Measure vapor reduction by smell. If you can’t detect primer odor at the fresh air intake side, your ventilation is working effectively.
Immediate cleanup and proper solvent disposal prevent fire hazards and environmental contamination. Clean shellac covered brushes and rollers with denatured alcohol immediately after use. Shellac sets up within 20 to 30 minutes making tools unsalvageable if cleanup waits. Pour used denatured alcohol into sealed metal containers labeled as flammable waste. Never pour denatured alcohol or mineral spirits down drains or into yards. They’re classified as hazardous waste requiring proper disposal at household hazardous waste collection sites. Oil primer cleanup uses mineral spirits with the same immediate attention and hazardous waste disposal requirements. Rags saturated with oil primer or solvents can spontaneously combust. Spread them flat to dry outdoors before disposal or store in sealed metal containers filled with water.
Topcoat Compatibility and Final Finish Over Smoke Damage Primers
All three primer types (shellac, oil, and water) accept both latex and oil topcoats once properly cured. This universal compatibility means you can choose topcoat based on desired finish characteristics and washability requirements rather than worrying about primer/topcoat chemical bonding. Zinsser specifically markets their primers as compatible with any topcoat choice, and that applies across brands.
Wait for proper cure time before topcoating even though recoat times suggest earlier application is possible. Shellac primers show 45 minute recoat times, meaning you can apply a second primer coat that soon. But switching to latex topcoat over shellac works better after waiting 24 hours for full cure. The alcohol in shellac primer can soften fresh latex paint applied too early, creating a slightly tacky surface that takes days to fully harden. If you’re using oil topcoat over shellac primer, the 45 minute recoat window applies because oil paints don’t soften from residual alcohol.
Sheen selection significantly affects how well the final finish conceals remaining surface irregularities from smoke damage. Flat and eggshell sheens hide the slightly uneven texture that smoke contamination and multiple primer coats create. These lower sheen finishes scatter light rather than reflecting it, making minor surface imperfections invisible under normal lighting. Semi-gloss and gloss finishes reflect light directly, highlighting every texture variation and primer brush mark on walls and ceilings. Save higher sheens for trim and doors where smooth surfaces exist, and use flat or eggshell on large wall and ceiling areas.
Primer sandability between coats varies by formulation. Oil and shellac primers sand easily at 220 grit for smoothing brush marks and eliminating dust nibs before topcoating. The hard, brittle dried film creates fine dust that vacuums away cleanly. Water primers can gum up sandpaper because their softer acrylic films don’t abrade as cleanly. The primer rolls into balls rather than creating fine dust. If you must sand water primer, use 320 grit or finer to minimize gumming, and replace sandpaper frequently as it loads up.
High traffic smoke damaged areas in rental properties, commercial spaces, and homes with children require scrubbable acrylic topcoats rated for washability. Standard latex paint over primer won’t withstand repeated cleaning in kitchens, hallways, and bathrooms where walls need periodic washing. Look for topcoats labeled “scrubbable” or “washable” with specific scrub cycle ratings. Premium products withstand 2,000+ scrub cycles while economy grades fail after 200 to 300 cycles. In bathrooms where smoke damage accompanied water exposure, shellac primer blocks both contamination types but still needs a durable semi-gloss acrylic topcoat resistant to humid conditions.
DIY Restoration vs Professional Application for Smoke Damage Projects
DIY primer application works for light to moderate nicotine staining in single rooms, small kitchen fires contained to one area, and isolated smoke damage without structural concerns. If you can see defined damage boundaries (smoke staining limited to ceilings and upper walls, or confined to one room with a door) the project scope is manageable for homeowners comfortable with respirators and working from ladders.
Professional assessment and restoration services become necessary when:
- Fire damage extends beyond surface level smoke staining into charred drywall, compromised framing, or melted electrical components
- Drywall shows soft spots, delamination, or visible water damage from firefighting efforts combined with smoke contamination
- Mold growth appears widespread across multiple walls or within wall cavities, requiring remediation beyond surface treatment
- HVAC system ducts show soot contamination requiring professional cleaning before reoccupying the space
- Insurance claims require professional documentation, scope of work estimates, and licensed contractor involvement for payment
Final Words
Smoke damage doesn’t have to mean living with stains and odors if you choose the right primer.
Shellac-based formulas like BIN handle the heaviest contamination fast. Oil-based options work well when you need interior and exterior coverage. Water-based primers are fine for light nicotine if you prep well.
Match the best stain blocking primer for smoke damage to your actual damage level, not what sounds easiest.
Two thin coats with proper ventilation and a 24-hour bleed-through check beat guessing and repainting later.
You’ve got this.
FAQ
Q: What is the best primer for smoke damage?
A: The best primer for smoke damage is Zinsser B-I-N Shellac Primer. It uses denatured alcohol and pigmented shellac to create a dense barrier that permanently blocks heavy nicotine, soot, and fire stains while sealing odors in 15 minutes with recoat readiness at 45 minutes.
Q: What is the best stain blocker for smoke damage?
A: The best stain blocker for smoke damage is shellac-based primer like Zinsser B-I-N. Shellac creates a harder, denser barrier film than water-based or oil-based primers, preventing heavy contamination from bleeding through while simultaneously sealing smoke odors into porous surfaces like drywall.
Q: What is the best stain blocker for cigarette smoke?
A: The best stain blocker for cigarette smoke is Zinsser B-I-N Shellac Primer for heavy nicotine staining, or Kilz Original oil-based primer for moderate yellow discoloration. Light nicotine may respond to Zinsser Bulls Eye 1-2-3 water-based primer with proper surface cleaning first.
Q: What is the best primer for nicotine stain blocking?
A: The best primer for nicotine stain blocking is shellac-based Zinsser B-I-N, which permanently seals yellow and brown nicotine stains that penetrate drywall texture. For interior and exterior applications needing aggressive blocking, Kilz Original oil-based primer provides versatile coverage with 2-hour recoat time.
Q: Can you use water-based primer on smoke damage?
A: Water-based primer works only on light cigarette smoke staining after thorough TSP cleaning. Heavy nicotine, soot, or fire damage requires shellac-based or oil-based primers because water-based formulas can re-wet contamination and allow bleed-through within days of topcoat application.
Q: How many coats of primer do you need for smoke damage?
A: Smoke damage typically requires two thin coats of primer rather than one thick coat. Wait 24 hours after the first coat to inspect for bleed-through before applying a second coat or topcoat, as one coat rarely provides complete sealing on moderate to heavy contamination.
Q: Do you need to wash walls before priming smoke damage?
A: You must wash smoke-damaged walls with TSP cleaner before priming to remove loose soot and tar residue that prevents primer adhesion. Vacuum loose particles first, then TSP wash, rinse thoroughly, and allow 24 to 48 hours drying time before applying stain-blocking primer.
Q: How long does smoke damage primer take to dry?
A: Shellac-based smoke primers dry to touch in 15 minutes and allow recoating after 45 minutes. Oil-based primers require 30 minutes touch-dry and 2-hour recoat time. Water-based primers need 30 minutes to dry with 1-hour recoat windows, though full cure takes longer for all types.
Q: Can you spray shellac primer for smoke damage?
A: You can spray shellac primer using HVLP equipment for large fire restoration projects, achieving faster coverage than brush or roller. Work in thin coats to avoid drips, maintain continuous ventilation, and clean spray equipment immediately with denatured alcohol due to rapid 15-minute dry time.
Q: Does smoke damage primer seal odors?
A: Smoke damage primers seal odors by encapsulating odor molecules within a dense barrier film rather than neutralizing them. Shellac-based and oil-based primers provide superior odor isolation compared to water-based options, permanently trapping nicotine and soot smells beneath the primer layer.
Q: What’s the difference between shellac and oil-based primer for smoke?
A: Shellac primer dries in 15 minutes and blocks heavier stains but works only on interior surfaces due to brittleness. Oil-based primer requires 2-hour recoat time but handles interior and exterior applications with aggressive stain blocking and better flexibility for surfaces exposed to movement.
Q: Can you use Kilz instead of BIN for smoke damage?
A: You can use Kilz Original oil-based primer instead of BIN for moderate smoke damage needing interior and exterior versatility. For severe nicotine staining, heavy soot, or fastest turnaround, BIN shellac provides superior blocking with 45-minute recoat versus Kilz’s 2-hour window.
Q: Do smoke damage primers have high VOCs?
A: Smoke damage primers have high VOC content, especially shellac-based formulas requiring denatured alcohol solvents. Shellac primers dry within 15 minutes, limiting exposure duration despite high VOC levels. Oil-based primers have strong odors with extended drying, while water-based options offer lower VOCs for light damage only.
Q: What topcoat works over smoke damage primer?
A: Any latex or oil-based topcoat works over fully cured smoke damage primer. Wait 45 minutes minimum for shellac recoat, but allow 24 hours before latex topcoats to prevent softening. Choose scrubbable acrylic finishes in flat or eggshell sheens for high-traffic restored areas.
Q: When should you hire a professional for smoke damage priming?
A: Hire professionals when fire damage extends beyond surface level, drywall or framing shows structural compromise, widespread mold growth appears, electrical or HVAC systems show contamination, or insurance claims require documented restoration work with certified contractors and proper equipment.