
You’ve pressed on that tile a hundred times, haven’t you? That slight wobble or hollow tap isn’t going away on its own, and ignoring it just lets water seep behind and turn a $20 fix into a $500 problem. Most loose bathroom tiles can be rebonded in an afternoon using basic tools and adhesive, but only if you pick the right method for your situation. This guide walks you through two proven repair techniques, shows you exactly when to use each, and explains how to spot the hidden moisture issues that caused the problem in the first place.
Quick Diagnostic and Two Repair Methods
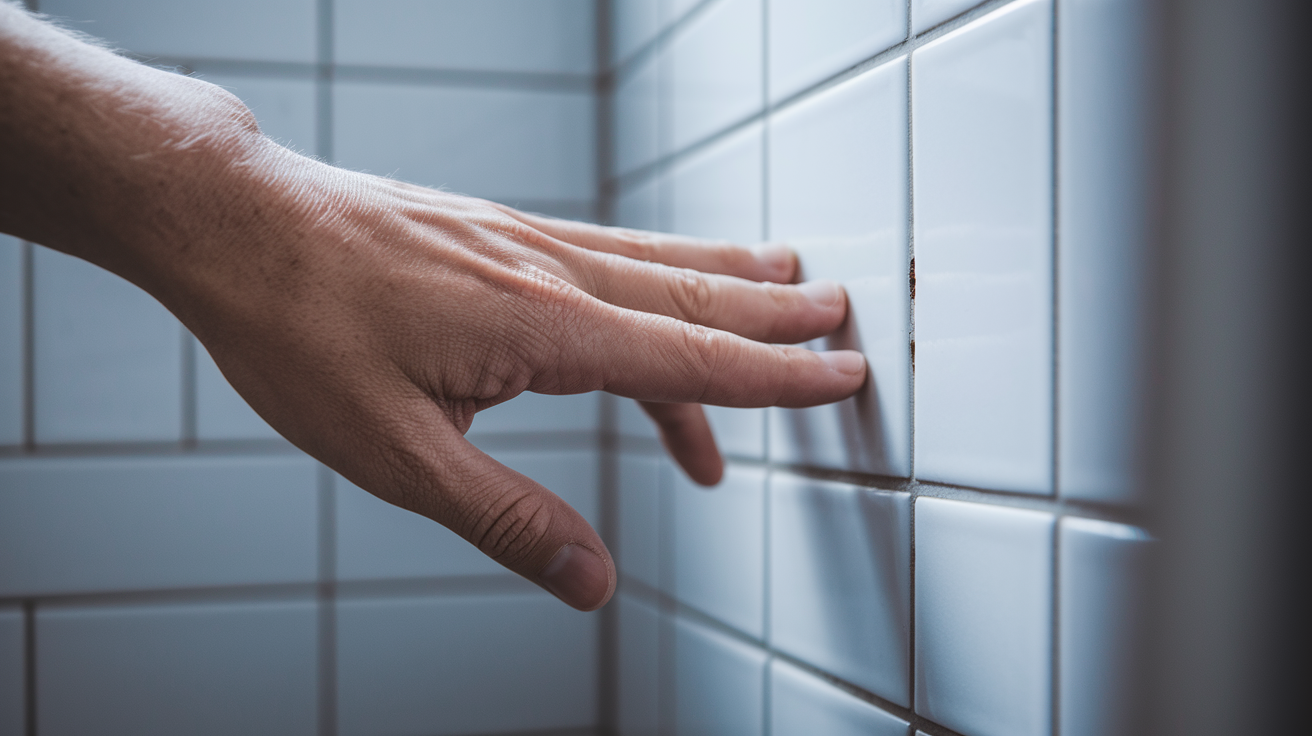
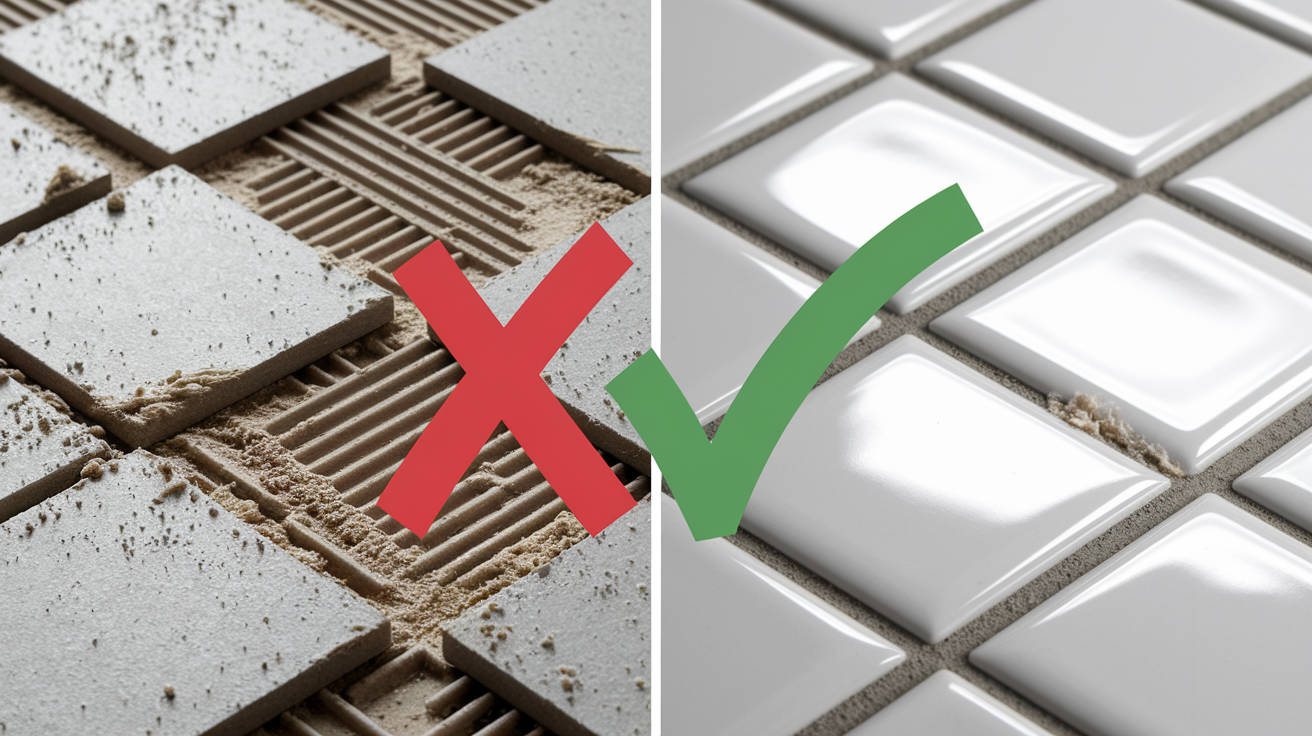
Press on your bathroom tiles and tap with your knuckles. A hollow sound or visible movement means the tile has lost its bond. Check the grout around edges for cracks, gaps, or missing sections.
DIY rebonding costs $15 to $30 in materials and takes 2 to 3 hours of active work plus 24 hour drying time. Full tile replacement runs $25 to $50 per tile and takes 3 to 4 hours plus a 48 hour curing period before you can regrout. Neither method requires expensive specialty tools.
Method 1: Rebonding Without Removal (For Intact Tiles)
- Remove grout around the loose tile with a grout rake and drill 2 to 3 small holes along the grout lines at the tile edges using a masonry bit.
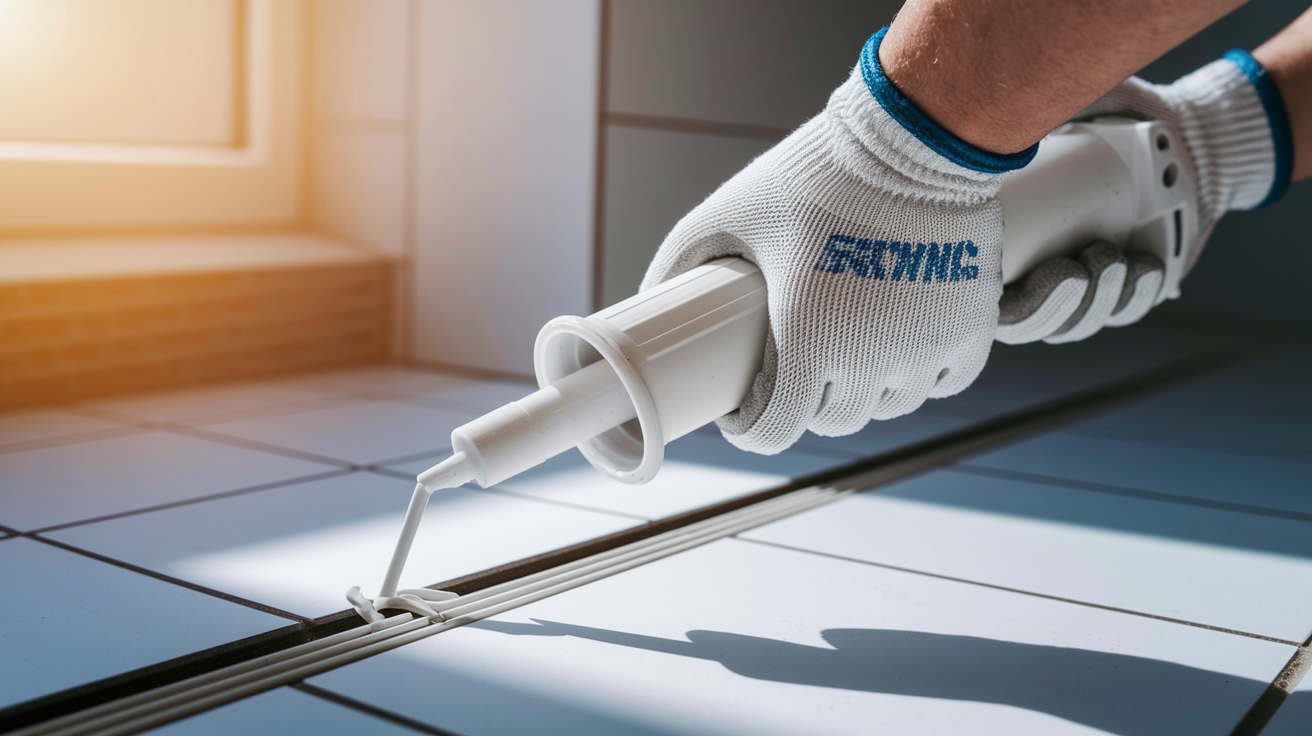
- Load tile adhesive into a caulking gun and inject through holes until adhesive seeps from the other holes, showing the space is filled.
- Press the tile firmly for 1 minute with a slight twisting motion, then wipe away excess adhesive immediately with a damp cloth.
- Wait 24 hours before regrouting to allow complete adhesive cure.
Method 2: Full Tile Replacement (For Cracked or Severely Loose Tiles)
- Remove all grout around the tile and drill a center hole using a masonry bit.
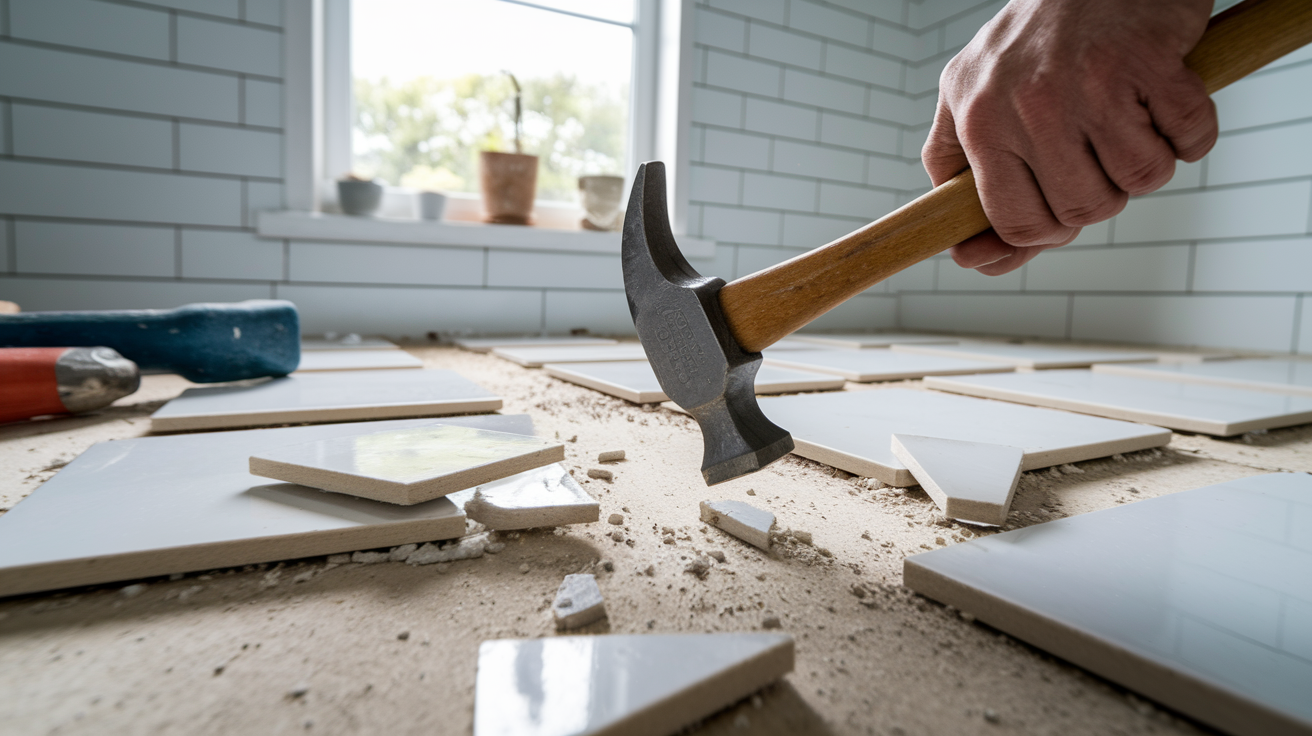
- Use a chisel and hammer to break the tile from center outward, then scrape away old adhesive completely.
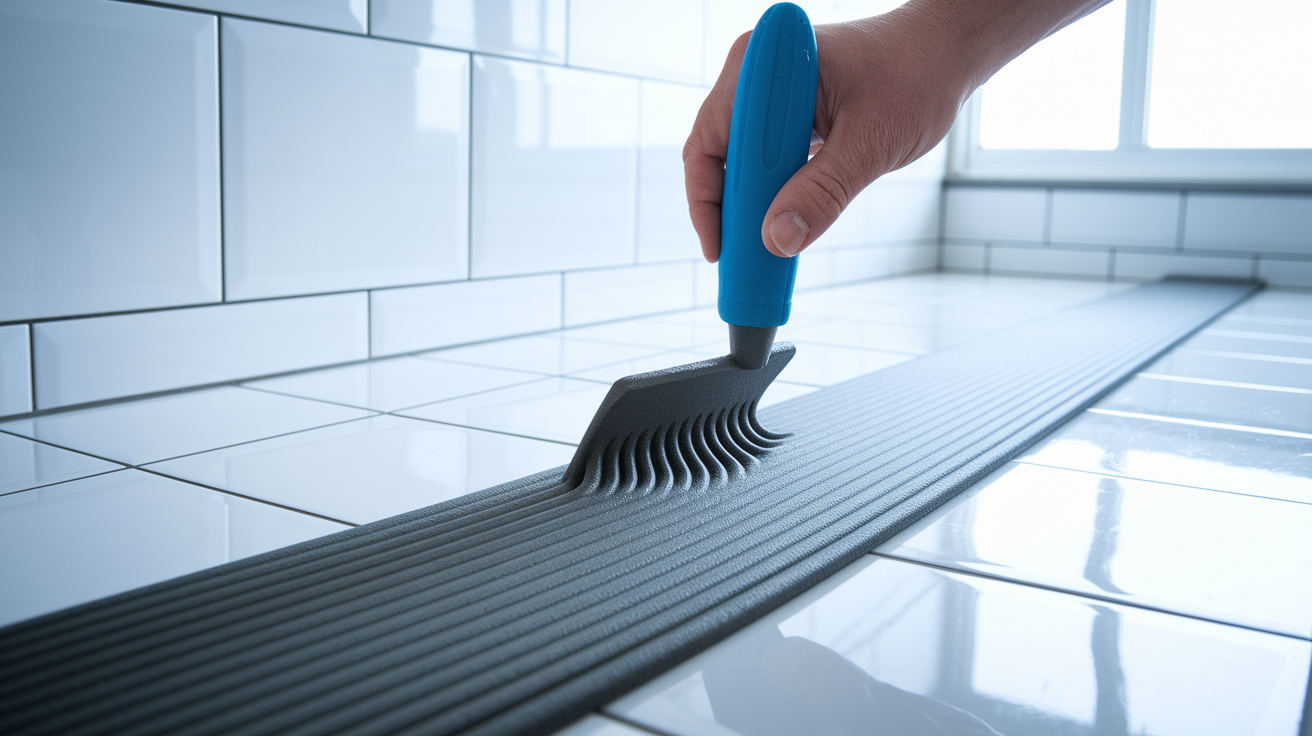
- Apply new thinset mortar with a notched trowel, creating even ridges across the repair area.
- Press the replacement tile into place with spacers for alignment and hold firmly for 1 minute.
- Wait 48 hours for full cure, then remove spacers and regrout.
Choose Method 1 when your tile has no cracks and moves only slightly when pressed. The tile surface should be intact and the movement minimal. Choose Method 2 when tiles show cracks, have extensive looseness, or when water damage is suspected underneath. If multiple adjacent tiles are loose, that usually indicates a substrate problem requiring full replacement.
Why Bathroom Tiles Come Loose: Common Causes
Understanding what caused your tiles to loosen prevents the same problem from happening again after repair. Sometimes addressing the root cause matters more than the repair itself.
Moisture penetration from failed grout joints or deteriorated caulk allows water behind tiles, weakening adhesive bonds over months or years. Inadequate adhesive application during original installation leaves hollow spots that eventually fail under pressure or movement. Subfloor movement or deflection from joists spaced too far apart creates flex that breaks the rigid tile bond. Natural expansion and contraction from bathroom temperature and humidity changes stresses grout joints and tile bonds. Improper curing time during original installation when tiles were grouted before adhesive fully set also causes problems. Structural settlement in older homes causes subtle shifts that crack grout and break tile adhesion.
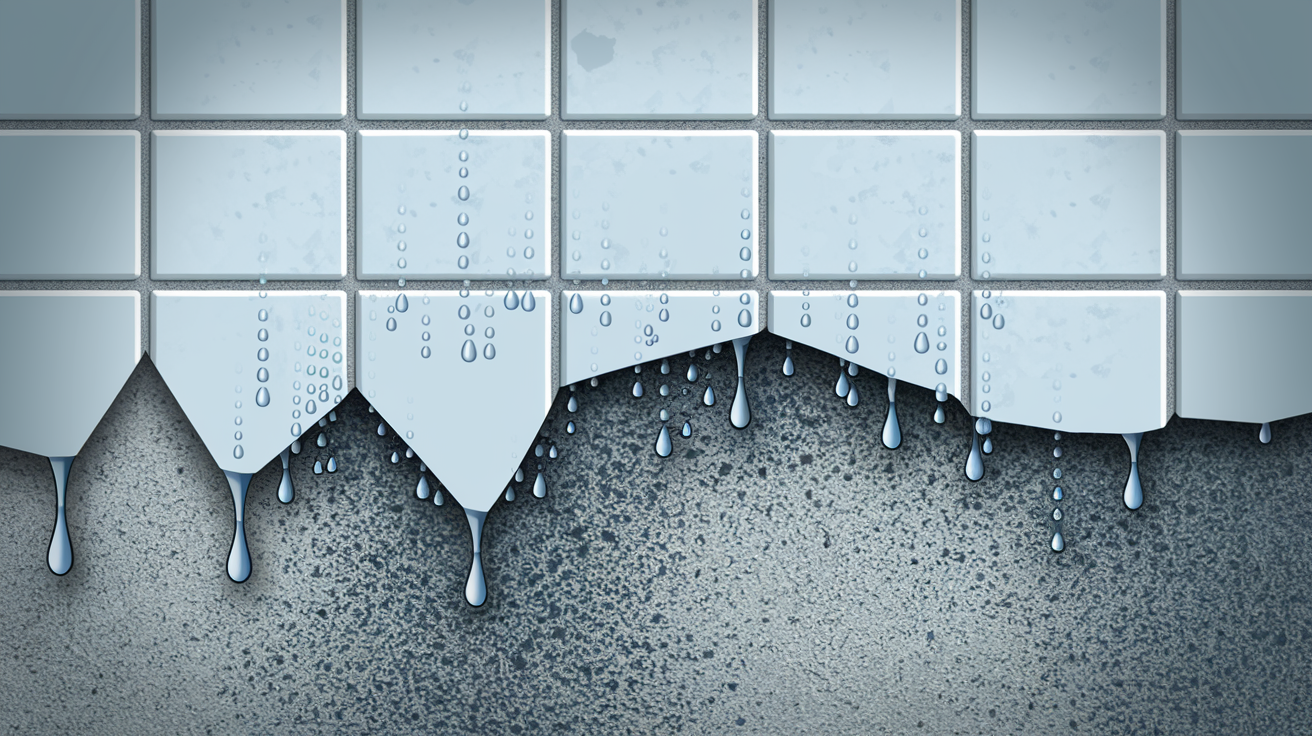
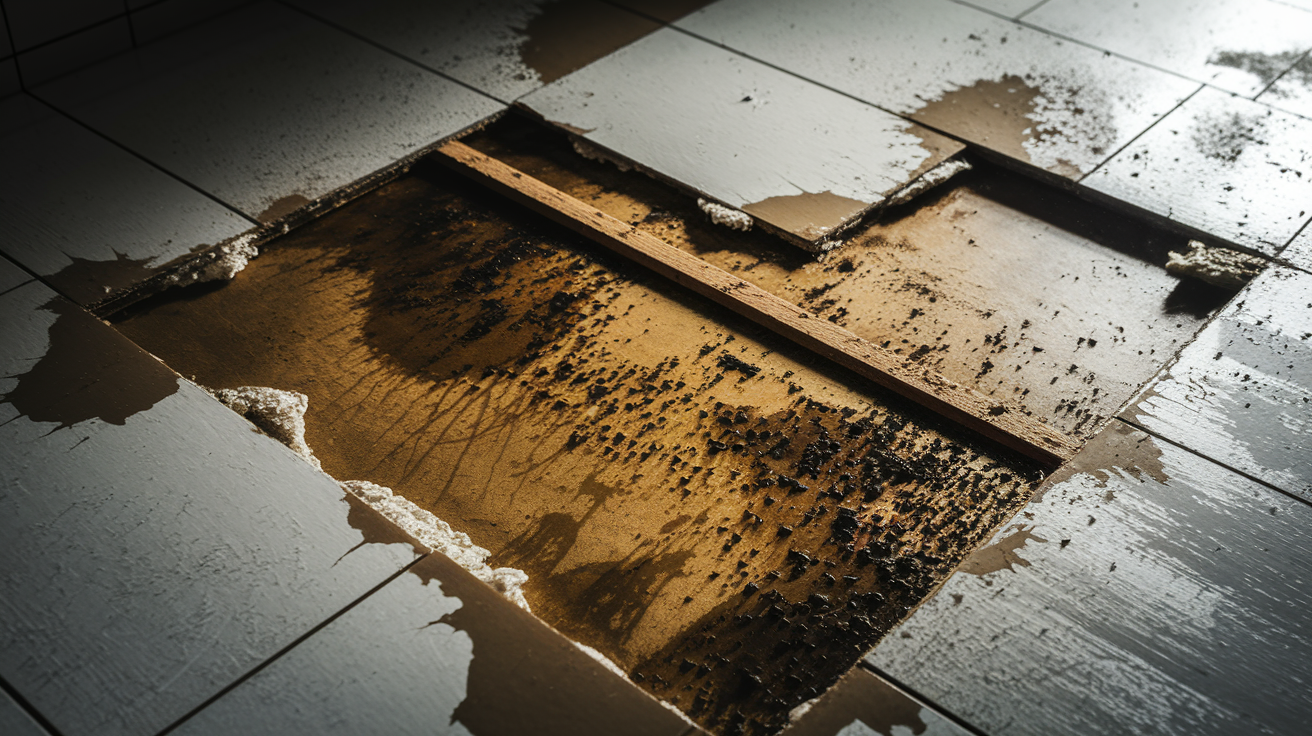
Moisture damage ranks as the most common culprit in bathrooms. Water infiltrates through damaged grout lines or failed caulk joints, especially around tubs and shower pans. Once behind the tile, that moisture sits trapped against the adhesive layer. The adhesive softens, loses grab, and eventually fails completely. The substrate underneath can rot if it’s wood based, or develop mold if conditions stay damp long enough. You’ll sometimes see water staining on grout lines or smell mustiness near loose tiles.
Multiple factors often combine to cause failure. A bathroom with poor ventilation traps humidity, which penetrates through aging grout, which then weakens adhesive that was marginally applied during installation. The tile might have held for years until those conditions aligned. That’s why inspection of the substrate matters before reattaching tiles.
Essential Tools and Materials for Tile Repair
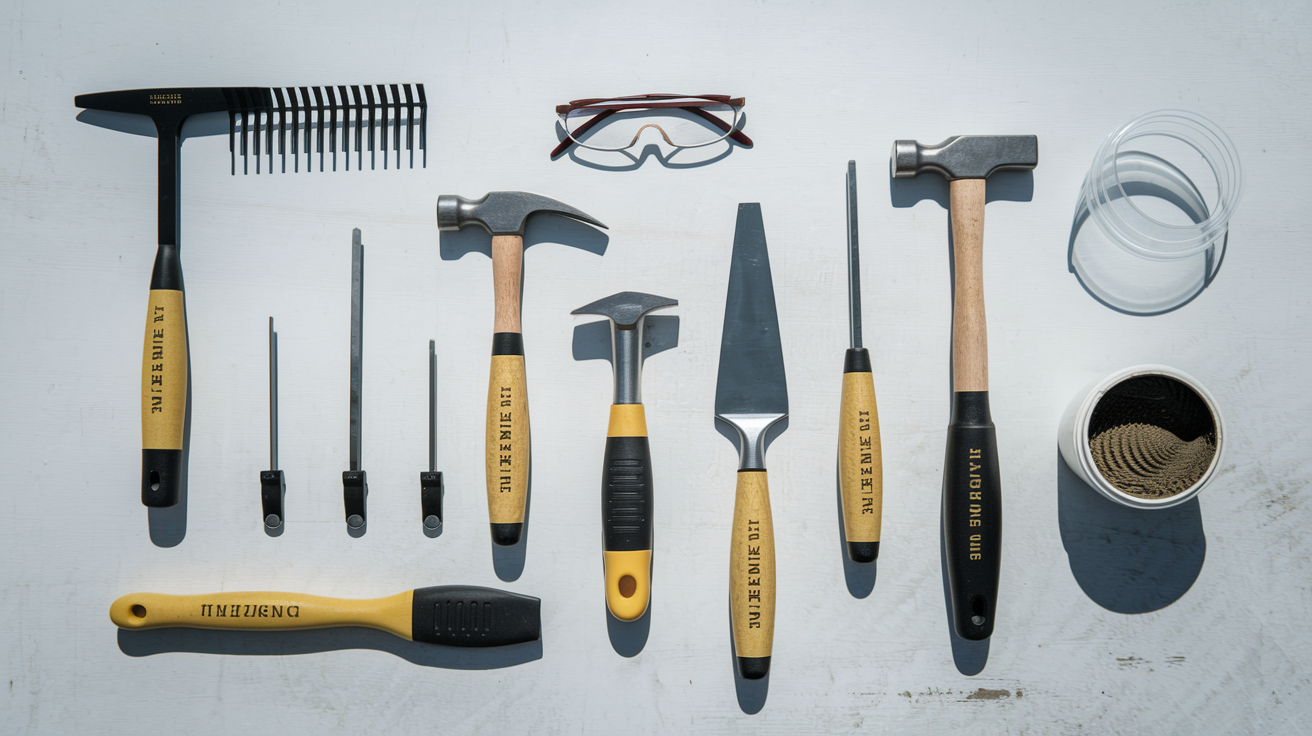
Gather everything before starting work. Nothing stalls a tile repair faster than discovering halfway through that you need a specialty trowel or specific grout type.
| Tool/Material | Purpose | Approximate Cost |
|---|---|---|
| Grout rake or rotary tool with grout removal bit | Removing old grout without damaging tiles | $8 to $15 |
| Hammer and cold chisel | Breaking and removing damaged tiles | $12 to $20 |
| Notched trowel (1/4 inch) | Applying adhesive in even ridges | $6 to $12 |
| Putty knife or scraper | Removing old adhesive and cleaning substrate | $5 to $8 |
| Tile spacers | Maintaining consistent grout joint width | $4 to $7 |
| Thinset mortar or pre-mixed tile adhesive | Bonding tiles to substrate | $15 to $30 |
| Replacement grout (sanded or un-sanded) | Filling joints between tiles | $8 to $15 |
| Sponge and bucket | Cleaning tiles during grouting process | $5 to $10 |
| Waterproof silicone sealant | Sealing joints at fixtures and corners | $6 to $12 |
| Safety gear (glasses, mask, gloves, knee pads) | Protecting against dust, fumes, and injury | $15 to $25 |
Thinset mortar and pre-mixed tile adhesive both bond tiles, but they’re not interchangeable. Thinset comes as a powder that you mix with water to a specific consistency. It creates a stronger, more water resistant bond and costs less per square foot. Mix only what you can use in 30 to 45 minutes because it starts setting. Pre-mixed adhesive comes ready to use in a bucket or tube, stays workable longer, and requires no mixing skills or cleanup. It costs more and creates a slightly weaker bond, but works fine for small repairs where you’re replacing just one or two tiles.
Safety gear isn’t optional when you’re breaking tiles or mixing powder. Tile dust contains silica particles that damage lungs with repeated exposure. The dust mask should be rated N95 or better. Safety glasses protect against flying tile chips when you’re chiseling. Gloves prevent cuts from sharp tile edges and skin irritation from adhesive. Knee pads matter if you’re working on floor tiles because you’ll spend significant time kneeling on hard surfaces.
Tile Material Considerations: Ceramic, Porcelain, and Natural Stone
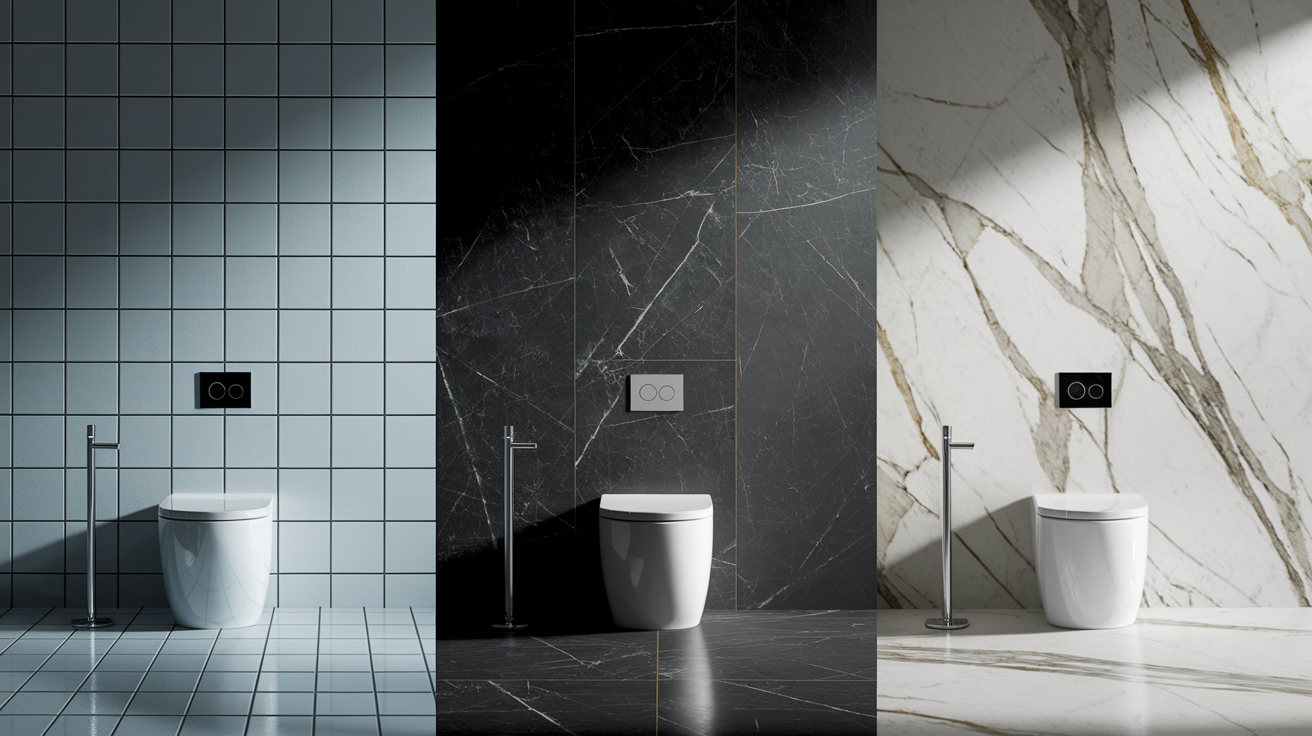
Identifying your tile type before buying adhesive or replacement tiles prevents incompatibility problems and wasted materials. The wrong adhesive won’t bond properly and the wrong tile won’t match.
Ceramic tiles are the most common bathroom tile and the most forgiving for DIY repair. They’re made from clay fired at lower temperatures than porcelain, which makes them softer and easier to drill or cut. Standard thinset mortar works well for bonding ceramic tiles. The tile body is porous, so edges should be sealed to prevent water absorption through the unglazed sides. Ceramic tiles are relatively easy to match for replacement because they’re still widely manufactured in standard sizes and common colors. If you’re repairing a 10 year old bathroom, you can usually find close color matches.
Porcelain tiles are denser and harder than ceramic. They’re fired at higher temperatures, which creates a nearly non-porous material that’s more water resistant and more durable. Porcelain requires modified thinset mortar with polymer additives for better adhesion because the dense surface doesn’t absorb moisture from regular thinset. These tiles are difficult to drill without a proper masonry bit and significant pressure. They’re also harder to cut cleanly. The advantage is that porcelain is uniform throughout, so chips are less noticeable and water absorption is minimal. The disadvantage for repairs is that exact color matching can be difficult because porcelain varies between production runs.
Natural stone tiles including marble, granite, slate, and travertine require specialized care during repair. Use white thinset mortar specifically formulated for stone. Regular gray thinset can telegraph through light colored marble and stain porous stone. Stone is highly porous and must be sealed before installation, then resealed after grouting. Water, adhesive moisture, and grout can all stain unsealed stone. Matching natural stone for replacement is very difficult because each piece has unique color variation, veining, and texture. Even tiles from the same quarry and production run show differences. If you’re replacing a single marble tile in a visible area, professional help may be worth considering because achieving an invisible repair requires skill in selecting and orienting the replacement.
You can identify your existing tile type by checking unglazed edges or the back of a tile. Porcelain is uniform in color all the way through the tile body. Ceramic shows a different color core, usually reddish or tan clay beneath the glazed surface. Natural stone shows obvious natural texture, no glazed surface, and often visible pores or veining throughout.
Reattaching Loose Tiles Without Removal
This method works when your tile is structurally sound but has lost adhesion. The tile shouldn’t be cracked. Movement should be minimal, just slight give when you press firmly. If the tile rocks dramatically or you can lift an edge, skip to full replacement.
Proper adhesive preparation determines bond strength. For pre-mixed adhesive, remove the lid and stir thoroughly from the bottom up. Product can separate in the container. For thinset powder, start with clean water in your mixing bucket. Add the powder slowly while mixing with a margin trowel or paddle mixer on low speed. The typical ratio is 4 to 5 parts powder to 1 part water, but check your specific bag because formulations vary. Mix to peanut butter consistency. It should hold peaks but still be spreadable. Let the mixed thinset slake for 10 minutes. This allows the polymers to fully activate. Remix briefly before loading into your caulking gun or using with a trowel.
-
Remove grout around the loose tile using a grout rake, working carefully along the grout lines without cutting through to the waterproof membrane beneath. Clean out all loose grout and debris with a small brush or vacuum.
-
Drill small holes (2 to 3) along the grout lines at the tile edges using a masonry bit sized around 1/8 inch. Angle the drill at 45 degrees and drill only as deep as the tile thickness. Stop if you feel the bit break through to the substrate.
-
Load tile adhesive into a caulking gun if using pre-mixed product, or use thinset in a grout bag for better control. Insert the nozzle into one drilled hole and inject adhesive slowly.
-
Inject through the first hole until adhesive starts seeping from the other holes you drilled. This indicates the void beneath the tile is filled. Slow, steady pressure works better than quick pumping, which can create air pockets.
-
Press the tile firmly with both hands and hold for 1 minute. Add a slight twisting motion while pressing to help spread the adhesive. Wipe away excess adhesive that squeezes from the grout lines immediately with a damp cloth.
-
Allow 24 hours minimum drying time before regrouting. Don’t use that shower or tub during the cure period. Weight or traffic on the tile before the adhesive sets will break the fresh bond.
The 45 degree drilling angle reduces the chance of breaking through the waterproof membrane. Drilling straight down increases that risk. Watch your drill depth carefully. Most bathroom tiles are 1/4 to 3/8 inch thick. Measure your replacement tile if you’re unsure. Adhesive seepage from alternate holes is your visual confirmation that you’ve injected enough product. When adhesive appears at the second or third hole, stop injecting. More adhesive doesn’t create a stronger bond.
This rebonding method only works for tiles with intact backing and no water damage beneath. If the substrate is soft, damaged, or shows signs of mold, full removal is necessary to address those underlying issues.
Complete Tile Removal and Replacement Process
Full removal becomes necessary when tiles are cracked, when multiple adjacent tiles are loose, or when you suspect substrate damage beneath. Cracked tiles can’t be repaired with adhesive injection. The structural integrity is compromised.
Thinset preparation for full tile replacement follows the same mixing process but in larger quantities. Mix powder to water in the manufacturer’s specified ratio, typically 4 to 5 parts powder to 1 part water. Add the powder to the water slowly while mixing, not the other way around. Dumping water onto powder creates lumps that won’t fully hydrate. Mix to peanut butter consistency where the thinset holds soft peaks. Let slake for 10 minutes, then remix briefly before application. Only mix what you can apply in 30 to 45 minutes because thinset begins setting after that window.
-
Remove all grout around the damaged tile with a grout rake or rotary tool. Work carefully to avoid scratching adjacent tiles. Clean out all grout debris.
-
Drill one hole in the center of the tile using a masonry bit. For tiles larger than 6 inches square, drill several holes spaced 2 to 3 inches apart. These holes give the chisel starting points.
-
Use a cold chisel and hammer to break the tile from the center outward into small pieces. Start at the drilled hole and work toward the edges with controlled taps. Keep the chisel angle flat against the substrate to avoid gouging. Remove tile pieces as they break free.
-
Scrape away all old adhesive using a putty knife or scraper. The substrate must be clean, flat, and solid. Remove any loose material. Vacuum or wipe away dust and debris.
-
Inspect the waterproof membrane (if present) for tears, punctures, or damage. Patch any damage with compatible membrane repair products before proceeding. Check for soft spots that indicate water damage in the substrate.
-
Apply new thinset with a 1/4 inch notched trowel held at a 45 degree angle. Spread thinset in an even layer across the repair area, creating ridges that run in one direction. The ridges improve coverage when you press the tile down.
-
Press the replacement tile firmly into the thinset with a slight twisting motion and hold for 1 minute. Insert spacers around all edges to maintain proper alignment with surrounding tiles. Check that the tile sits level with adjacent tiles using a straightedge.
-
Allow 24 to 48 hours curing time before proceeding to grout. Porcelain and natural stone require the full 48 hours. Ceramic can sometimes be grouted after 24 hours in warm, dry conditions. Check your thinset bag for specific cure times.
Starting chisel work from the center holes prevents damage to adjacent tiles. If you try breaking from the edges inward, force transfers to the surrounding tiles and can crack them. Use sharp tapping motions with the hammer rather than heavy blows. Heavy hits send shock waves that can loosen nearby tiles or crack grout lines. Keep the chisel angle flat against the substrate, almost parallel to the floor or wall. Angling the chisel down risks gouging the substrate or puncturing the waterproof membrane.
Apply thinset to the substrate, not to the back of the tile. This method gives better control over thickness and coverage. The ridges created by the notched trowel collapse when you press the tile down, spreading adhesive evenly across the entire back surface. No voids, no hollow spots.
Matching replacement tiles requires bringing a broken piece to the store or photographing the surrounding tile area for color reference. Lighting in stores differs from bathroom lighting, which makes visual matching difficult. Natural light photographs help. If you can’t find exact matches and the repair is in a visible area, consider creating an accent pattern or replacing a larger section with complementary tiles.
Regrouting and Sealing Your Repaired Tiles
Wait for full adhesive cure before grouting. Regrouting too early can disturb the tile bond. For rebonding repairs, wait 24 hours minimum. For full tile replacement, wait 48 hours minimum, longer if humidity is high or temperatures are below 65°F.
Grout selection depends on your grout joint width. Measure the space between tiles with a ruler. Un-sanded grout is suitable for joints 1/8 inch or less. The fine particles fill narrow spaces without scratching tile surfaces. Sanded grout is suitable for joints wider than 1/8 inch. The sand particles provide structural strength in wider joints and prevent excessive shrinkage. Choosing color matters for appearance. Bring a grout sample or photograph to the store. Many stores have grout color cards that show dry grout appearance. Remember that grout looks darker when wet and lighter once it fully dries and cures.
-
Mix grout powder with water to toothpaste consistency. Start with less water than you think necessary and add gradually. Too wet grout shrinks excessively and leaves weak joints. Let mixed grout slake for 5 to 10 minutes, then remix.
-
Apply grout diagonally across the joints using a grout float. Hold the float at a 45 degree angle and work the grout into joints with firm pressure. Make several passes to ensure joints are completely filled.
-
Remove excess grout by holding the float at a 90 degree angle and scraping diagonally across the tiles. Most excess should come off during this step.
-
Wait 15 to 20 minutes for the grout to firm up. A haze will form on the tile surface. The grout should be firm enough that pressing lightly doesn’t leave an indentation.
-
Clean with a damp sponge in circular motions. Rinse the sponge frequently in clean water. Make multiple light passes rather than heavy scrubbing. Too much water weakens surface grout.
Apply silicone caulk at tile to fixture joints and inside corners where grout would crack from movement. Grout is rigid and cracks when surfaces flex or expand. Caulk stays flexible. Use waterproof silicone sealant rated for bathrooms. Cut the tube nozzle at a 45 degree angle for better control. Apply steady pressure while moving the gun along the joint. Tool the bead smooth with a wet finger immediately after application. Wipe excess onto a damp rag.
Wait 48 to 72 hours after grouting before applying penetrating grout sealer. The grout must cure completely before sealing. Sealer applied too early traps moisture in the grout, which weakens it and can cause discoloration. Penetrating sealer soaks into the grout and creates a moisture resistant barrier that prevents staining and reduces water absorption. Follow product instructions for application. Most require multiple coats.
Addressing Water Damage and Substrate Issues
Ignoring water damage before reattaching tiles sets up repeated failure. The tile might stick temporarily, but moisture continues degrading the adhesive and substrate underneath. Within months, you’re back to loose tiles, often with worse damage.
Inspect substrates carefully once you remove old tiles. Press firmly on the exposed subfloor or wall backing. Soft spots indicate water damage and rot requiring replacement. Check for discoloration or dark staining on the substrate surface or edges, which shows water infiltration history. Smell for musty or moldy odors that indicate active moisture problems or hidden mold growth. Examine waterproof membranes for tears, gaps at seams, or areas where the membrane has separated from the substrate. Assess structural deflection by pressing hard on the substrate. Excessive flex or movement means the underlying framing needs reinforcement.
When substrates need repair or replacement, address those issues before retiling. Water damaged drywall should be cut out and replaced with cement backer board rated for wet areas. Regular drywall turns to mush when exposed to moisture repeatedly. Cement board won’t rot or support mold growth. Deflecting subfloors need additional support, either by sistering joists (attaching new joists alongside existing ones) or adding blocking between joists to reduce span. Damaged waterproof membranes require patching with products compatible with the existing membrane type. Sheet membranes need sheet patches. Liquid applied membranes need liquid patches. Mixing types creates weak spots where water penetrates.
Upgrade waterproofing during repairs if the original installation used substandard materials. Install waterproof membrane systems throughout shower and tub areas, extending 6 inches beyond the fixture perimeter. Use cement backer board on walls instead of regular or green board drywall. Create proper slope in shower floors so water drains toward the drain, not toward grout joints where it can infiltrate. A slope of 1/4 inch per foot is standard. Standing water on flat shower floors eventually finds its way behind tiles.
Substrate damage sometimes exceeds DIY capability, especially when it involves structural framing, extensive mold remediation, or plumbing and electrical complications. If you expose soft joists, large mold colonies, or questionable electrical work behind tiles, professional assessment protects your investment and safety.
Common Mistakes That Cause Tile Repair Failures
Small mistakes during repair compromise long term results. Some errors show up within days. Others take months before the tile comes loose again.
Not allowing adequate drying time between steps rushes the cure process and creates weak bonds that fail under normal use. Skipping substrate inspection and repair means reattaching tiles over damaged backing that won’t support them. Using wrong adhesive type for wet areas like applying non-water resistant products in showers where moisture attacks the bond causes problems. Drilling too deep and damaging the waterproof membrane underneath creates leak paths that cause recurring problems. Grouting before adhesive fully cures can shift the tile position or weaken the fresh bond. Insufficient cleaning of old adhesive residue leaves an uneven surface that prevents new adhesive from bonding properly. Forgetting to match grout colors before starting means repair areas stand out visually even when structurally sound. Reusing damaged or chipped tiles because they’re “close enough” undermines the effort when those tiles fail shortly after.
Rushing the drying and curing process is the most critical mistake. Adhesive needs time to fully cure and develop maximum bond strength. Walking on floor tiles or using a shower before the cure period completes prevents proper curing. Moisture trapped in incompletely cured adhesive weakens the bond from the start. The tile might feel solid initially but fails within weeks once normal use begins. Worse, that trapped moisture creates conditions for mold growth behind the tile. You then have a bigger problem than loose tiles. Always follow minimum cure times listed on product bags. When in doubt, wait longer. An extra day of cure time never hurts. Insufficient cure time always causes problems.
Surface preparation failures rank second. Leaving dust or debris on the substrate prevents adhesive from making direct contact with the solid backing. The bond forms to the dust layer, not the substrate. That’s a weak connection that fails quickly. Not removing all old adhesive creates high spots that prevent the new tile from sitting level with surrounding tiles. The tile rocks or sits proud, which looks bad and concentrates stress on the high points. Skipping primer on porous surfaces means the substrate absorbs moisture from the adhesive too quickly. This rapid moisture loss prevents proper curing and weakens the bond. Primer seals porous substrates and allows controlled curing.
Inadequate waterproofing sets up future problems even when the repair itself is done correctly. If water continues infiltrating through damaged grout joints or failed caulk, it works behind the tiles and attacks the fresh adhesive. The cycle repeats. Proper sealing of all penetrations, joints, and corners protects the repair.
Preventing Future Tile Problems Through Maintenance
Small routine maintenance prevents major repairs. An hour per year invested in inspection and resealing saves thousands in water damage remediation and full tile replacement.
Inspect grout lines every 3 months for cracks, gaps, or sections that have fallen out. Bathrooms with daily shower use need more frequent inspection. Catch grout failures early, when repair involves cleaning and regrouting a small section rather than full removal.
Reseal grout annually in shower areas where water exposure is constant. Grout sealers wear away over time from cleaning chemicals and water exposure. Resealing maintains the moisture barrier and prevents staining.
Check caulk at fixtures every 6 months. Look for cracks, gaps, or areas where caulk has separated from the tile or fixture. Replace deteriorating caulk immediately. Caulk failure lets water behind tiles.
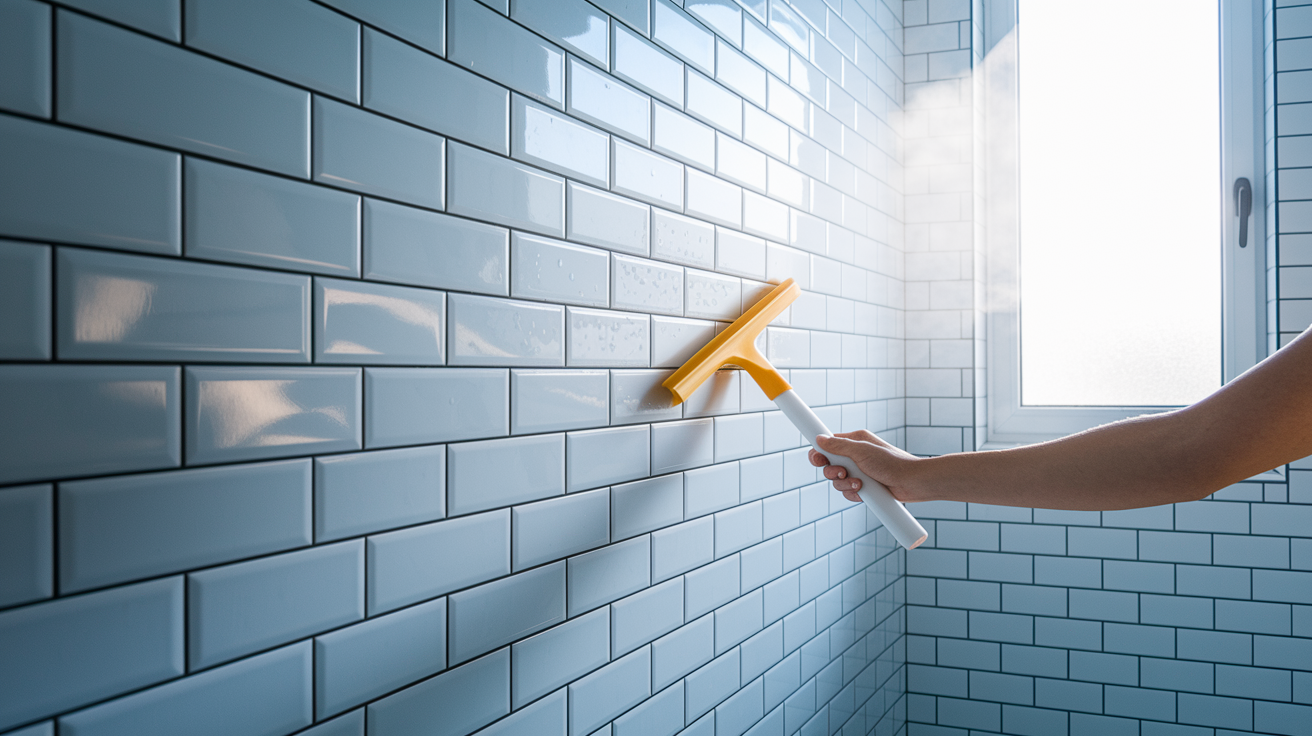
Wipe tiles dry after showers using a squeegee or towel. This simple step significantly reduces moisture exposure and extends grout life. Standing water on tiles and grout eventually infiltrates.
Run the exhaust fan during showers and for 20 minutes after. Removing humid air from the bathroom prevents condensation on tiles and reduces moisture penetration through grout lines.
Address loose or damaged tiles immediately, before water infiltrates behind them. A single loose tile can lead to substrate damage that affects surrounding tiles and turns a simple repair into a major project.
Humidity control matters as much as direct water exposure. Bathrooms without adequate ventilation trap humid air. That moisture condenses on cooler surfaces, including tile and grout. Over time, the constant dampness degrades grout and attacks adhesive bonds. Run exhaust fans during every shower, not just when it’s steamy. Keep bathroom doors open after use to allow air circulation. In chronically damp bathrooms, consider running a small dehumidifier. The goal is keeping humidity below 60%, which prevents mold growth and reduces material degradation.
Proper cleaning extends material life. Avoid acidic cleaners like vinegar or harsh chemicals that degrade grout and etch certain tile surfaces. Use pH neutral tile cleaners designed for bathroom use. Never use abrasive scrubbers on tile surfaces. The scratches dull the finish and create places for mold and mildew to establish. Address mildew growth promptly with appropriate cleaners. Left unchecked, mildew colonizes grout and requires more aggressive treatment.
Annual professional inspection makes sense for older bathrooms or those with previous water damage history. A contractor or tile specialist can spot developing problems that homeowners miss. Early detection of failing waterproof membranes, substrate deflection, or systematic grout failure allows planned repairs before emergency situations develop.
When to Call a Professional for Bathroom Tile Repair
Know your limits. Some tile problems exceed DIY capability, and attempting repairs can make situations worse or create safety hazards.
Extensive water damage affecting multiple tiles or large wall/floor areas requires systematic demolition and rebuilding that most homeowners lack tools and skills to handle properly. Soft or sagging subfloor indicates structural issues with joists or beams that need engineering assessment and may involve permits for proper repair. Visible mold growth behind tiles, especially black mold, requires professional remediation with containment, air filtration, and proper disposal procedures. Repeated repair failures in the same location suggest underlying problems you haven’t identified that need professional diagnosis. Inability to find matching replacement tiles for visible areas where mismatched tiles affect room appearance and home value can warrant professional help. Complex waterproof membrane damage, especially in shower pans, where improper repair guarantees future leaks and major damage needs professional attention. Electrical or plumbing complications behind tile, like relocating fixtures or addressing wiring within walls, require licensed tradespeople. Full bathroom renovation being considered, where coordinating multiple trades and ensuring code compliance makes professional management worthwhile.
Structural concerns require professional attention. Loose tiles can indicate serious subfloor deflection from joists spaced too far apart, undersized for the span, or damaged from rot or insects. Floor bounce when you walk suggests the entire tile installation will fail because the substrate moves too much. Joist spacing issues often require sistering new joists alongside existing ones or adding mid span blocking. Foundation settlement can cause systematic cracking that returns even after repair unless the underlying settlement is addressed. These repairs typically require permits and inspections because they involve structural modifications.
When black mold is visible behind tiles or musty smell persists despite cleaning, professional mold remediation protects your health. Mold spreads through airborne spores. Breaking into mold contaminated areas without proper containment releases those spores throughout your home. Professionals use negative air pressure containment, HEPA filtration, and proper personal protection. They identify the moisture source, remove contaminated materials, treat affected areas with antimicrobial products, and verify clearance with air testing. DIY mold cleanup of small surface colonies (less than 10 square feet) is generally considered safe. Anything larger or involving hidden mold behind walls requires professional help.
Get multiple quotes before committing to professional tile repair. Request detailed estimates that specify materials, timeline, and warranty coverage. Verify contractor licensing and insurance. Ask for references from recent bathroom projects. Understand project scope, including what prep work you’re responsible for (moving furniture, removing toilets) and what’s included in the bid (disposal, cleanup, protecting other areas). A clear contract prevents disputes and ensures both parties understand expectations before work begins.
Final Words
A loose bathroom tile repair doesn’t have to mean calling a contractor or living with the problem.
Once you’ve identified whether your tiles need simple rebonding or full replacement, the actual work is straightforward if you follow the steps and don’t rush the drying time.
Match your adhesive to your tile type, address any water damage you find, and give each stage the full cure time it needs.
Most repairs hold up for years when you prep the surface right and seal everything properly afterward.
If you run into soft subfloors or widespread looseness, that’s your signal to get a pro opinion. But for one or two problem tiles? You’ve got this.
FAQ
How do you fix a tile that has come loose in the bathroom?
To fix a loose bathroom tile, you remove the grout around it, inject tile adhesive through small holes drilled in the grout lines if the tile is intact, or fully remove and replace it if cracked. Wait 24-48 hours for curing before regrouting.
How do you fix loose tiles without removing them?
Loose tiles can be fixed without removal by drilling small holes in the surrounding grout lines, injecting tile adhesive through the holes with a caulking gun, and pressing the tile firmly for one minute. This rebonding method only works for intact tiles without cracks.
Why are tiles suddenly popping up?
Tiles suddenly pop up due to moisture infiltration weakening the adhesive bond, subfloor movement or deflection, poor adhesive application during original installation, or natural expansion and contraction from temperature changes. Water damage is the most common bathroom culprit.
How do you fix loose tile before grouting?
To fix loose tile before grouting, press the tile firmly into the thinset with a slight twisting motion and hold for one minute, checking alignment with spacers and level against surrounding tiles. Allow 24-48 hours for adhesive to cure completely before applying grout.
What causes bathroom tiles to come loose over time?
Bathroom tiles come loose over time from moisture penetration through failed grout or caulk, inadequate adhesive application, subfloor movement, thermal expansion and contraction, improper curing during installation, or structural settlement. Multiple factors often combine to cause failure.
How long does tile adhesive need to dry before grouting?
Tile adhesive needs 24 hours minimum drying time for rebonded tiles and 48 hours for fully replaced tiles before grouting. Grouting before adhesive fully cures traps moisture and leads to bond failure and mold growth.
What type of adhesive should you use for bathroom tiles?
For bathroom tiles, use modified thinset mortar with polymer additives for water resistance, mixed to peanut butter consistency at manufacturer’s specified ratio (typically 4-5 parts powder to 1 part water). Pre-mixed tile adhesive works but thinset is stronger for wet areas.
When should you call a professional for loose bathroom tiles?
Call a professional when you find extensive water damage affecting multiple tiles, soft or sagging subfloor, visible mold behind tiles, repeated repair failures, complex waterproofing membrane damage, or structural issues. Water damage exceeding one or two tiles typically needs contractor assessment.