
If you’ve got water in your basement right now, you’re probably wondering whether to grab a shop vac or call someone with a truck full of pumps. The honest answer depends on how deep it is, what’s in it, and whether it’s still rising. Clean water from a busted pipe that’s only a couple inches deep? You can handle that yourself with the right equipment and some patience. But sewage backup, water deeper than four inches, or anything still pouring in? That’s a professional job, and trying to DIY it puts you at real risk. This guide breaks down exactly which removal methods work for different flood situations, what safety steps you can’t skip, and when to stop and make the call for help.
Critical Safety Protocols Before Water Removal Begins
If you’ve got 1 to 2 inches of clean water from a leaky pipe or rainwater, you can use a wet/dry vacuum after shutting off power at the breaker. Water deeper than 4 inches, still rising, or contaminated with sewage? Call professionals immediately. Always verify electrical safety before you step into anything.
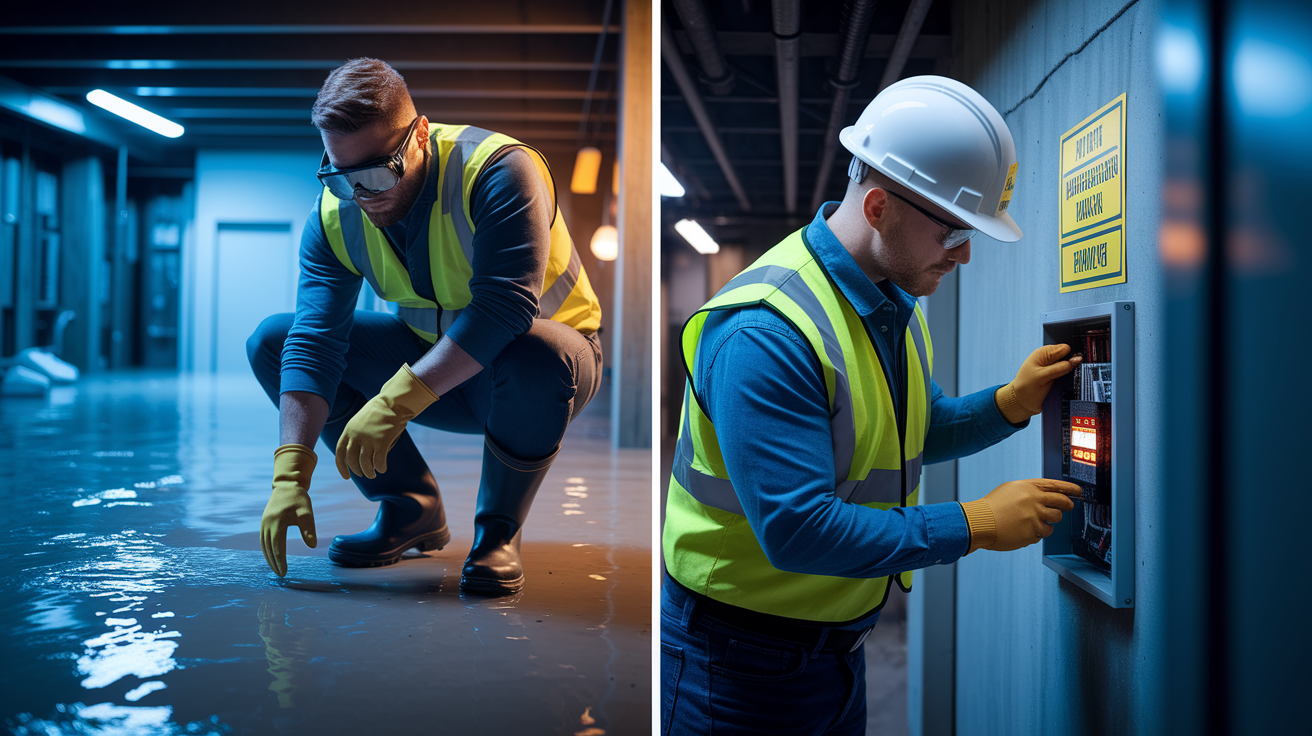
Turn off electricity at the main breaker before you go near standing water. If the circuit breaker box is in the flooded basement or you can’t get to it safely, call a qualified electrician to handle shutoff. Standing water near outlets creates shock risk even when you’re wearing boots. Can’t reach the breaker yourself and water’s near electrical devices? Stay out and wait for help.
Wear waterproof boots with rubber soles and heavy duty rubber gloves before entering any flooded space. For mold exposure risk, FEMA recommends wearing goggles and an N95 or N100 face mask (available at hardware stores). These aren’t just suggestions. Floodwater can contain raw sewage, chemicals, pollutants, and harmful bacteria, even if it looks relatively clear. Don’t touch electrical devices still plugged into outlets until the basement is sufficiently dried and inspected.
Basement floodwater falls into categories. Clean water from a burst supply pipe is one thing. Sewage backup or water from outside drains is another. If your water contains sewage, chemicals, or comes from a contaminated source, stop. This isn’t a DIY job. Sewer backup or floodwater requires professional cleanup due to harmful bacteria, viruses, and contaminants that protective equipment alone can’t fully guard against.
Before you enter, run through these mandatory checks:
Power shutoff verification (breaker off, electrician contacted if needed). Water source identification (clean pipe leak vs sewage vs groundwater). Contamination assessment (clear water vs visible debris, odor, discoloration). PPE gear checklist (boots, gloves, goggles, respirator). Structural stability check (no sagging ceiling, intact stairs, stable footing). Gas line inspection (no gas smell, appliances secure).
Professional restoration is required when water contains bacteria, viruses, or sewage. The cost of getting sick or missing hidden contamination isn’t worth the money you’d save doing it yourself.
Core Water Removal Techniques for Flooded Basements
For 1 to 2 inches of clean water, homeowners can handle removal themselves using wet/dry vacuums and basic pumps. Anything deeper than a few inches, or if water’s still rising? Hire a professional basement water damage restoration specialist. The line between manageable and overwhelming sits right around that 2 to 3 inch mark.
Select equipment based on water volume and your timeline. A wet/dry vacuum works for small amounts but requires multiple trips to empty the canister and takes considerable time. A submersible pump moves larger volumes faster but needs proper hose routing and a good discharge location away from your foundation.
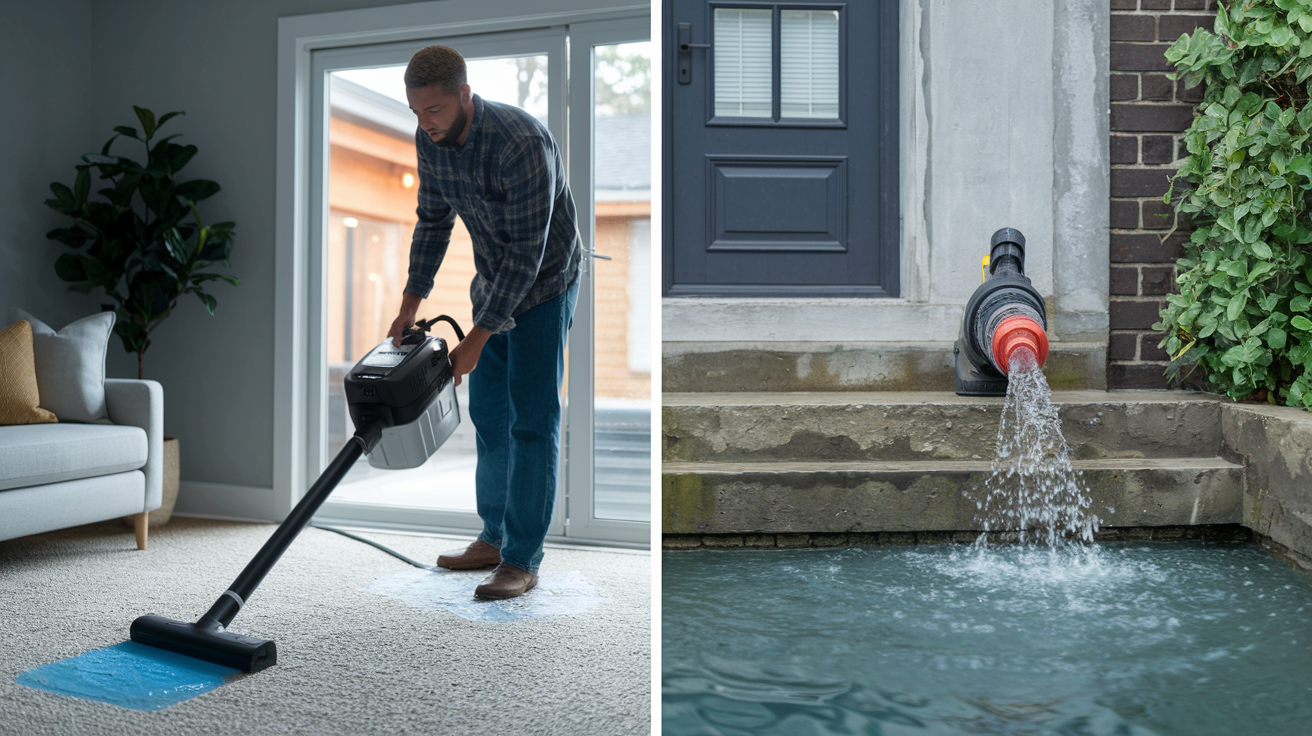
Wet/Dry Vacuum Method
Best for 1 to 2 inches of standing water where speed isn’t critical but precision matters. Remove the shop vacuum’s air filter before starting (water will destroy it otherwise). Use the wide flat attachment to suction standing water efficiently.
Work in sections, making multiple passes over waterlogged carpet to maximize extraction. The canister fills quickly, so plan on frequent trips outside to dump water far from your house foundation (at least 10 feet away, sloped away from the building).
Expect this to take several hours for even a small basement area. The vacuum pulls moisture from carpet fibers better than a pump can, but the trade off is time. Got 200 square feet of wet carpet? Budget 3 to 4 hours minimum for thorough extraction including dump trips.
Deposit extracted water where it won’t run back toward your foundation or pool near your home’s perimeter. A sloped lawn area, storm drain, or street gutter works. Don’t dump it against your neighbor’s foundation either.
Submersible and Utility Pump Approach
For deeper water (3+ inches) or larger volumes, a submersible pump or utility pump cuts removal time significantly. These pumps sit in the deepest water point and push water through a hose to an exterior discharge location.
Select pump capacity based on your situation. A 1/4 HP utility pump handles most residential flooding (1800 gallons per hour). For faster work or deeper water, a 1/3 HP or 1/2 HP submersible pump moves 2500 to 3500 gallons per hour.
Route discharge hose to avoid creating new problems. Run it away from your foundation, uphill if possible, to a location where water can disperse or drain into a storm system. Secure the hose so it doesn’t whip around or disconnect under pressure.
Equipment capacity matching and cost considerations:
Equipment capacity matching to water volume. 1 to 2 inches means wet/dry vac (1 to 3 gallons per cycle). 3 to 6 inches means utility pump (1800+ GPH). 6+ inches means professional equipment or large submersible pump. Discharge location requirements include minimum 10 feet from foundation, sloped away from building, avoid creating runoff toward neighbors. Time estimates for different water depths. 2 inches in 400 sq ft takes 4 to 6 hours with wet/dry vac, 1 to 2 hours with utility pump. 6 inches in same area takes 8+ hours DIY, 2 to 3 hours with submersible pump. Cost comparison. Wet/dry vac purchase $80 to 150, rental $35 to 50/day. Utility pump rental $50 to 75/day. Submersible pump rental $65 to 90/day. When to escalate to professional equipment. Water deeper than 6 inches, contaminated water, multiple rooms flooded, water still entering space.
Step-by-Step Flood Water Cleanup Process Sequence

Mold can form within 48 hours of flooding, making quick action critical. You need a systematic approach to avoid missing steps that create bigger problems later. Here’s the exact sequence that prevents mistakes and speeds recovery.
Follow these steps in order:
Source identification and water flow stoppage. Before you remove a drop of water, find where it’s coming from and stop it. Common sources and how to identify them. Burst pipes and plumbing failures show visible water streams from walls or ceilings, with localized pooling directly below the source. Look for wet pipes, loose connections, or holes in supply lines. Failed or overwhelmed sump pump causes water entering from the sump pit area, often with the pump motor humming but not moving water, or the pit overflowing during heavy rain. Foundation cracks and groundwater seepage bring water through walls or floor, typically at multiple entry points rather than one spot, and often appear during or after rain. Check for hydrostatic pressure signs like water pushing through floor cracks or wall seams. Clogged gutters and improper drainage show timing correlation with rainfall, water pooling near the foundation outside, and possibly staining on exterior walls below gutter lines. Sewer backup brings contaminated water with visible debris and strong odor, usually from floor drains or basement toilets. Heavy rainfall overwhelm shows timing that matches storm events, water entering from window wells or exterior door thresholds. Hydrostatic pressure from saturated soil causes water through floor cracks in multiple locations, damp walls, and occurs when ground outside is saturated.
Safety assessment and power shutoff. Verify electricity is off at the breaker. Check for gas leaks. Put on protective gear before entering.
Documentation for insurance. Take photos and video of water depth, damaged materials, and affected areas before you start removing anything. Timestamp matters for claims.
Removal of salvageable items and furniture elevation. Pull items out of standing water that can be saved. Elevate furniture legs onto blocks if water is shallow and you’re working fast.
Standing water extraction using appropriate equipment. Use wet/dry vacuum for 1 to 2 inches, utility or submersible pump for deeper water. Work from deepest point toward drainage points.
Moisture removal from saturated materials. Make multiple vacuum passes over wet carpet and porous surfaces to pull trapped water.
Surface cleaning and disinfection. Clean walls and floors with water and detergent after surfaces are dry enough to work on safely. This comes later, not immediately.
Final drying and ventilation setup. Position fans and dehumidifiers after standing water is gone. This is a days long process, not a quick finish.
One time events like a burst pipe are different from chronic issues. If water came through foundation cracks or you see signs of hydrostatic pressure (water entering from multiple floor points, saturated soil outside), you’re dealing with a recurring problem that needs permanent drainage solutions. A failed water heater floods once if you catch it. Groundwater seepage will return every heavy rain until you fix exterior drainage or install interior perimeter systems.
Monitor progress as you work. If you discover water volume is larger than you initially thought, or if new water keeps entering despite your repair attempts, escalate to professional help rather than fighting a losing battle for hours.
Drying and Dehumidification After Water Extraction

Removing standing water is only half the job. Moisture trapped in carpet padding, drywall, concrete pores, and wood framing will cause mold growth and structural damage if you don’t dry it out completely. The real work starts after you empty the visible water.
Fan placement creates cross ventilation that speeds evaporation. Place large fans to blow across wet surfaces, not just into corners. If you have multiple fans, position them to create airflow that moves through the entire space. Direct airflow across the wettest carpet areas and along walls where water wicked up. Open windows if outside humidity is lower than inside (check weather, this usually only works on dry days).
Run a dehumidifier continuously in the room after removing all standing water. Basement dehumidifiers with automatic drainage features (like units that drain directly into floor drains or sump pits) prevent the constant emptying required with bucket style units. Look for models with humidity controls so they shut off automatically when target levels are reached and restart when moisture creeps back up.
| Drying Equipment | Coverage Area | Runtime Needed | Purpose |
|---|---|---|---|
| Large fans (20 inch box or floor fans) | 300 to 500 sq ft per fan | 3 to 7 days continuous | Air circulation and surface evaporation |
| Commercial dehumidifiers (50+ pint capacity) | Up to 2500 sq ft | 5 to 10 days continuous | Humidity reduction and moisture extraction from air |
| Air movers (professional carpet drying fans) | 100 to 200 sq ft per unit | 2 to 5 days continuous | Forced air under carpet and into wall cavities |
| Moisture meters | Point measurement | As needed for testing | Verification of dryness in materials before stopping equipment |
Use a moisture meter to verify dryness before calling the job complete. Acceptable moisture readings vary by material. Drywall should read below 1% moisture content. Wood framing should be under 15 to 19% depending on species. Concrete floors can take weeks to fully dry but should show decreasing readings over time (target below 4% before installing new flooring).
Timeline expectations run 3 to 7 days for complete drying in most residential basement floods. Thicker materials like concrete and dense carpet padding take longer than drywall or wood. High humidity outside extends the timeline. Signs that drying is complete include humidity levels stabilizing between 30 to 50%, moisture meter readings in acceptable ranges, and surfaces feeling dry to the touch without cool or damp spots.
Material Removal and Damage Assessment for Flooded Basements

Some materials can’t be saved once they get soaked. The 48 hour timeline before mold starts growing in porous materials means you need to decide fast what stays and what goes. Drywall, insulation, and carpet padding are the most common casualties.
Inspect for damage using these criteria. Warping, swelling, soft spots, discoloration, and musty odor. Press on drywall to check for soft spots where the gypsum core has broken down. Look for wood framing that feels spongy or shows dark staining. Carpet that stayed wet for more than 48 hours or got soaked with contaminated water needs to go. Insulation behind walls traps moisture and leads to hidden mold growth you won’t see until it’s extensive.
The National Electrical Manufacturers Association recommends discarding electrical outlets and wiring exposed to flood water. Water intrusion weakens wood framing and compromises structural integrity over time even if it looks okay initially. Watch for warped wood, stained drywall, and moldy spots on wet carpets as clear signs material is too damaged to save.
| Material Type | Remove If | Can Save If | Drying Time |
|---|---|---|---|
| Carpet and padding | Wet more than 48 hours, contaminated water, visible mold, padding saturated | Clean water only, dried within 24 to 48 hours, professional cleaning possible | 3 to 5 days with proper extraction and airflow |
| Drywall | Soft spots, crumbling texture, wet above 2 feet from floor, visible mold, swelling or warping | Wet less than 24 inches up wall, dried completely within 3 days, hard surface intact | 5 to 7 days with ventilation |
| Insulation | Any water contact with fiberglass or cellulose, compressed or matted, musty odor | Foam board if dried quickly and no mold present | Not applicable, usually must be replaced |
| Wood framing | Soft or spongy texture, dark staining, visible rot, structural sagging | Surface wet only, dries within 7 days, maintains hardness and structure | 7 to 14 days depending on thickness |
| Concrete flooring | Cracking, crumbling, extensive spalling, efflorescence covering large areas | Surface water only, structurally sound, minor cosmetic damage | 2 to 3 weeks for complete moisture cure |
Assess structural integrity of wood framing by checking load bearing posts and beams for soft spots or dark water staining. Compromised framing needs professional structural evaluation before you close up walls. Water weakens dimensional lumber by breaking down lignin (the natural glue holding wood fibers together).
Cut drywall 12 to 24 inches above the visible water line. Drywall wicks water upward through capillary action, so the damage extends past where you see wetness. Make horizontal cuts at a logical height like 24 or 48 inches (standard drywall dimensions) to simplify replacement later.
Inspect baseboards and trim by pulling them away from walls to check the framing and drywall behind. Baseboards trap moisture against wall surfaces. Even if the baseboard looks okay, the wall behind it might be wet and moldy.
Sanitizing and Mold Prevention in Water-Damaged Basements

Cleaning happens only after complete drying. You can’t sanitize wet surfaces effectively. EPA guidelines require dry surfaces before you start scrubbing with detergent and water. Trying to clean too early just spreads contamination around and pushes moisture deeper into materials.
After surfaces are dry (verified with moisture meter readings in acceptable ranges), clean walls and floors with a water and detergent solution. Mix basic dish soap or laundry detergent with warm water and scrub all hard surfaces that contacted flood water. This removes dirt, debris, and the food sources mold needs to grow. Rinse with clean water and let air dry.
Antimicrobial treatment becomes necessary if floodwater came from contaminated sources. Sewage backup, water carrying chemicals or pollutants, or floodwater from outside drains requires disinfection beyond basic detergent washing. Use diluted bleach solution (1 cup bleach per gallon of water) or commercial antimicrobial cleaners rated for flood remediation.
Disinfection steps in order:
Surface preparation and debris removal. Sweep or vacuum all dried sediment, loose materials, and debris before wet cleaning begins.
Detergent and water cleaning solution. Scrub all surfaces to remove organic material and visible contamination.
Disinfectant application. Bleach solutions for general disinfection (1:10 bleach to water), commercial antimicrobials for sewage contamination (follow product contact time exactly).
Contact time requirements. Bleach needs 10 minutes minimum contact with surfaces, commercial products vary (read labels).
Rinse and ventilation procedures. Rinse bleach with clean water after contact time, ventilate heavily to clear fumes, repeat air circulation.
Odor elimination techniques. Baking soda on concrete after cleaning, activated charcoal in room during final drying, possible ozone treatment for persistent sewage smell (only with proper equipment and unoccupied space).
Monitor for mold in hidden areas during the weeks after cleanup. Check behind remaining baseboards, under stairs, in utility spaces, and inside closed cabinets. Small mold colonies can establish in forgotten corners while you’re focused on main areas. Check weekly for the first month, especially during humid weather.
Professional Service Considerations: When to Call and Cost Analysis

Water deeper than 4 to 6 inches requires professional equipment and expertise. Some restoration standards put the DIY cutoff at 2 inches, especially for finished basements with carpet, drywall, and belongings at risk. The question isn’t just “can I physically remove this water?” It’s “can I remove it fast enough to prevent secondary damage?”
Cost factors balance against professional advantages. Consider water volume, contamination level, material damage extent, and equipment needs. Then weigh those against speed, thoroughness, and specialized tools professionals bring. Saving $1000 doing it yourself means nothing if mold remediation costs you $3000 six weeks later.
Professional help is required for these scenarios:
Water depth exceeding 4 to 6 inches (equipment capacity and extraction speed matter more as volume increases). Sewage or contaminated water presence (Category 2 gray water or Category 3 black water classifications require professional sanitation protocols). Active water rise (source cannot be stopped, or water entering faster than you can remove it). Visible structural damage or compromise (sagging, cracks, shifting, or any concern about building stability). Extensive mold growth already present (visible colonies covering more than 10 square feet total). Electrical systems exposed or compromised (panel boxes underwater, outlets sparking, wiring damage). Flooded finished basement with significant material damage (multiple rooms, extensive drywall removal needed, valuable contents).
| Approach | Equipment Costs | Time Investment | Best For | Limitations |
|---|---|---|---|---|
| Full DIY | $200 to 400 (vacuum, fans, dehumidifier purchase) | 20 to 40 hours over 5 to 7 days | 1 to 2 inches clean water, unfinished basement, minimal material damage | Slow extraction, no moisture verification tools, risk of hidden moisture pockets |
| Equipment rental + DIY labor | $150 to 300 rental fees (3 to 5 day rental period) | 15 to 30 hours over 3 to 5 days | 2 to 4 inches clean water, some material removal, faster timeline needed | Still lacks professional moisture detection, drying verification, and insurance documentation standards |
| Professional restoration service | $3 to 5 per sq ft for extraction, $1000 to 5000+ depending on scope | 1 to 3 days for extraction and initial drying setup (professionals handle monitoring) | Deep water, contaminated water, finished space, insurance claims, structural concerns | Higher upfront cost, though often offset by insurance coverage and prevention of secondary damage costs |
Typical costs break down this way:
Wet/dry vacuum purchase or rental. $50 to 150 purchase for 5 to 6 gallon residential unit, or $35 to 50/day rental for larger 12+ gallon shop vacuum. Dehumidifier rental. $40 to 60/day for 50 to 70 pint commercial unit, or $200 to 400 purchase for residential 50 pint model. Submersible pump rental. $50 to 75/day for 1/4 HP utility pump, $65 to 90/day for 1/3 HP submersible pump. Professional restoration. Typically $3 to 5 per square foot for water extraction and initial drying, $1500 to 3000 minimum call out for most services. Hidden costs. Replacement drywall, insulation, carpet, baseboards ($2 to 6 per square foot materials), mold remediation if delayed ($500 to 6000+ depending on extent), lost workdays if DIY takes longer than expected.
Professional advantages include IICRC certified technicians who know exactly what moisture readings should be in different materials. They use thermal imaging cameras to find hidden moisture in wall cavities you’d never spot until mold appears weeks later. 24/7 emergency response means they start extraction within hours of your call, not tomorrow after you rent equipment. Industrial grade air movers and dehumidifiers dry spaces in half the time residential units take.
Insurance claims documentation matters for final out of pocket costs. Most policies require professional assessment for coverage. Professional restoration companies provide detailed moisture mapping, photo documentation, scope of work reports, and itemized repair estimates that satisfy insurance adjusters. DIY cleanup rarely includes that level of documentation, which can result in claim disputes or reduced payouts that exceed what professional service would have cost.
Long-Term Prevention Strategies After Flood Water Removal
Addressing the root cause after emergency cleanup prevents recurrence. You don’t want to do this twice. A layered prevention approach combines exterior drainage improvements, interior backup systems, and ongoing maintenance routines that catch small problems before they become floods.
Permanent solutions cost more upfront but pay for themselves by preventing future damage. Calculate what one flood cleanup costs in time, materials, ruined belongings, and stress. Then prevention systems look a lot more reasonable.
Interior Protection Systems
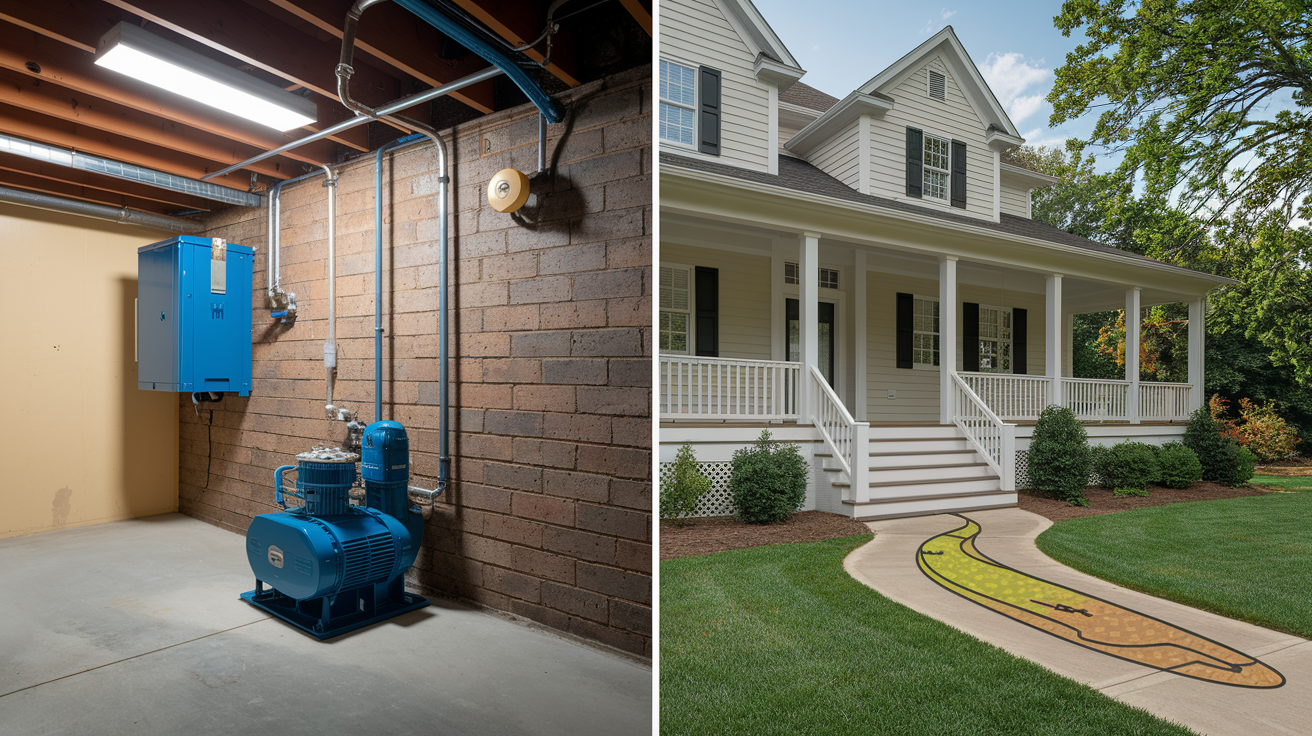
Install a sump pump if you don’t have one, or upgrade to a higher capacity model if yours gets overwhelmed during heavy rain. Sump pumps automatically remove water from a collection pit before it reaches basement floor level. Size the pump based on your typical water volume and how fast water enters during worst case scenarios.
Battery backup systems keep sump pumps running during power outages, which is exactly when storms cause both flooding and electrical failures. Battery powered backup pumps automatically activate when primary pumps lose power or can’t keep up with water volume. Expect 4 to 8 hours of runtime from quality battery backup systems.
Check valve installation prevents backflow when municipal sewer systems get overwhelmed. Water that flowed out through your drain lines can reverse direction and push back into your basement when street drains back up. A check valve acts as a one way gate in your drain line.
Perimeter drainage systems installed inside the basement capture water before it creates standing floods. These systems channel water along interior foundation walls to a sump pit for removal. They work when exterior solutions aren’t possible or when hydrostatic pressure pushes water through foundation walls.
Exterior Water Management
Extend downspouts at least 6 feet from your foundation, preferably 10 feet. Short downspouts dump roof water directly next to foundation walls where it saturates soil and creates hydrostatic pressure. Add corrugated drain pipe or splash blocks to route water away from the building on a slope.
Clean gutters and downspouts twice per year minimum, more often if you have trees overhead. Clogged gutters overflow and dump water at foundation level instead of routing it away through downspouts. Schedule cleaning in spring before storm season and fall after leaves drop.
Improve yard grading so ground slopes away from your foundation at minimum 5% grade (6 inches drop over 10 feet). Settling soil, landscaping changes, and erosion can reverse slope over years. Add fill dirt as needed to restore proper drainage away from the building.
French drain installation solves chronic groundwater issues when water keeps entering through foundation walls or floor. These perforated pipe systems buried in gravel collect groundwater before it reaches your foundation and route it away to drainage areas or storm systems. French drains address the source rather than just managing symptoms.
Seasonal maintenance tasks that prevent surprises:
Spring. Inspect foundation for cracks after freeze thaw cycles and snow melt, test sump pump with bucket of water to verify operation, check grade around perimeter for settling.
Summer. Clean gutters before severe weather season begins, verify downspout extensions haven’t disconnected or shifted, trim vegetation away from foundation walls.
Fall. Clear leaves from gutters and downspouts after trees finish dropping, test and clean sump pump before winter, inspect basement for moisture or musty odors.
Winter. Prevent frozen pipe bursts by insulating exposed lines, maintain battery backup system charge levels, keep basement heated to prevent freezing.
Year round. Test sump pump monthly in high risk areas (pour water in pit until pump activates, verify discharge), monitor humidity levels, check for foundation cracks or new seepage patterns.
Final Words
Standing water doesn’t wait. Your best bet is shutting down power, assessing contamination risk, and matching your basement flood water removal methods to the water depth you’re facing.
For clean water under two inches, a wet/dry vac and dehumidifier can handle it. Deeper than that, or anything contaminated, calls for professional equipment and expertise.
Either way, speed wins. Mold doesn’t care about your schedule.
Dry it fast, clean it thoroughly, and fix what caused it so you’re not doing this again next spring.
FAQ
Q: What is the best way to get water out of a flooded basement?
A: The best way to get water out of a flooded basement depends on depth. For 1-2 inches, use a wet/dry shop vacuum after shutting off power. For deeper water or contaminated flooding, use a submersible pump or call professionals immediately.
Q: How much does it cost to remove water from a flooded basement?
A: Water removal from a flooded basement typically costs $3-5 per square foot for professional restoration services. DIY equipment rental ranges from $35-75 per day for pumps and vacuums, plus dehumidifier rental at $40-60 daily or $200-400 to purchase.
Q: How long does it take for mold to grow in a flooded basement?
A: Mold can grow in a flooded basement within 48 hours of water exposure, particularly in porous materials like drywall, insulation, and carpet padding. Quick water removal and thorough drying within this timeframe helps prevent mold formation.
Q: Will homeowners insurance pay for a flooded basement?
A: Homeowners insurance coverage for a flooded basement depends on the water source. Sudden internal failures like burst pipes are typically covered, while groundwater seepage and external flooding usually require separate flood insurance. Document all damage with photos for claims.
Q: When should I call a professional instead of removing basement water myself?
A: Call a professional for basement water removal when water exceeds 4-6 inches deep, contains sewage or contaminants, continues rising, shows structural damage, has extensive mold growth, or involves compromised electrical systems requiring IICRC-certified restoration expertise.
Q: What safety equipment do I need before entering a flooded basement?
A: Before entering a flooded basement, you need waterproof rubber-soled boots, rubber gloves for electrical protection, an N95 or N100 respirator mask for mold exposure, and goggles. Always verify power shutoff before entry if water is near outlets.
Q: How long does it take to completely dry a flooded basement?
A: A flooded basement typically takes 3-7 days to completely dry after water extraction, depending on water volume, affected materials, ventilation, and dehumidifier capacity. Use moisture meters to verify dryness before replacing materials or ending ventilation.
Q: What materials must be removed after a basement flood?
A: After a basement flood, you must remove wet drywall and insulation within 48 hours, contaminated carpet and padding, waterlogged wood showing warping or soft spots, and any electrical outlets or wiring exposed to floodwater per safety standards.
Q: How do I prevent my basement from flooding again?
A: Prevent basement flooding by installing a sump pump with battery backup, extending downspouts at least 6 feet from your foundation, cleaning gutters regularly, improving yard grading away from the house, and installing perimeter drainage or French drains for chronic groundwater issues.
Q: What causes basement flooding besides heavy rain?
A: Basement flooding causes include burst pipes and plumbing failures, failed or overwhelmed sump pumps, foundation cracks allowing groundwater seepage, clogged gutters and improper drainage, sewer backups, hydrostatic pressure from saturated soil, and poor yard grading directing water toward foundations.