
You just spent good money on stain blocking primer, sealed that water stain or nicotine bleed, and now you’re staring at a chalky white surface wondering if you can actually paint over it. Short answer: yes, and you should. Stain blocking primer isn’t a final finish. It’s a barrier coat designed to lock in stains and create a stable surface that accepts paint. Once it’s dry, you can topcoat it with latex, oil based enamel, or most other paints. But rushing this step causes peeling, poor adhesion, and wasted effort. Here’s what you need to know before you crack open the paint can.
Painting Over Stain Blocking Primer: What You Need to Know

Yes, you can paint over stain blocking primer. That’s the whole point. These products are made to be covered with topcoat paint, not to stand alone as a final finish. They create a sealed barrier that stops stains from bleeding through while giving you a surface that paint can actually grip.
The primer locks in problem stains. Water marks, smoke damage, nicotine residue, wood tannins, grease spots. Without this barrier, those stains would show through even if you slapped on three coats of paint. Once the primer dries, it forms a stable surface that accepts paint just like any other prepared substrate. Before you paint, do a quick scratch test with your fingernail. If the primer flakes or peels easily, it hasn’t cured yet.
Drying time depends on what you’re using. Water based stain blocking primers typically dry in 1 to 2 hours and you can topcoat them pretty quickly. Oil based primers need 3 to 4 hours before you can safely apply paint. Shellac based primers dry fastest, usually within 45 minutes to an hour. These are touch dry times. If the primer still feels tacky or you can leave a fingerprint, wait longer. Rush this and your paint will lift or peel later.
Most stain blocking primers accept both latex and oil based topcoats. You can use acrylic latex paint, interior or exterior enamel, spray paint, all in one paint and primer combos, or specialty finishes like milk paint, lacquer, and shellac. Specific products might perform better with certain topcoat types, so check the label before you start. Water based primers pair naturally with latex paints, but most modern versions tolerate oil based topcoats too. Oil based and shellac based primers are even more flexible, accepting basically any paint type you throw at them.
For severe stain situations, smoke damaged walls, heavy nicotine stains, persistent water marks, run a spot test before committing to the whole surface. After the primer dries, paint a small section in an inconspicuous area, about 6 inches square. Let it dry completely, then check for any discoloration bleeding through. If you see the stain coming through the paint, apply a second coat of primer to that test spot and wait for it to dry. Test again with topcoat. If bleeding continues after the second primer coat, the primer needs more cure time, or you might need to switch to a stronger formulation like shellac based primer for the most stubborn stains.
Surface Preparation Steps After Primer Dries

Light sanding between primer and paint isn’t required, but it makes a noticeable difference in how smooth your final finish looks. Once the primer has cured, lightly sand the surface with 220 grit sandpaper to knock down any brush marks, roller texture, or drips that dried in the primer coat. This creates an even smoother base for your topcoat.
Dust removal is not optional. Sanding generates fine particles that will show up as grit under your paint if you don’t clean them off. Even if you skip sanding, primer can collect dust while it dries, especially in active rooms or during renovations.
- Inspect the primed surface for rough spots, drips, or missed areas once the primer is fully dry.
- Sand lightly with 220 grit sandpaper using even pressure, just enough to smooth the texture without removing the primer layer.
- Remove all dust by wiping the entire surface with a tack cloth, which grabs particles without leaving residue.
- Final wipe down with a slightly damp rag if the surface still feels dusty, then let it dry completely before painting.
These steps matter most when you’re aiming for a professional looking finish on trim, cabinetry, or furniture where imperfections show easily. On walls and ceilings, you can often skip sanding unless you see obvious texture issues. But always clean off dust before you open the paint can.
Application Techniques for Painting Over Primer
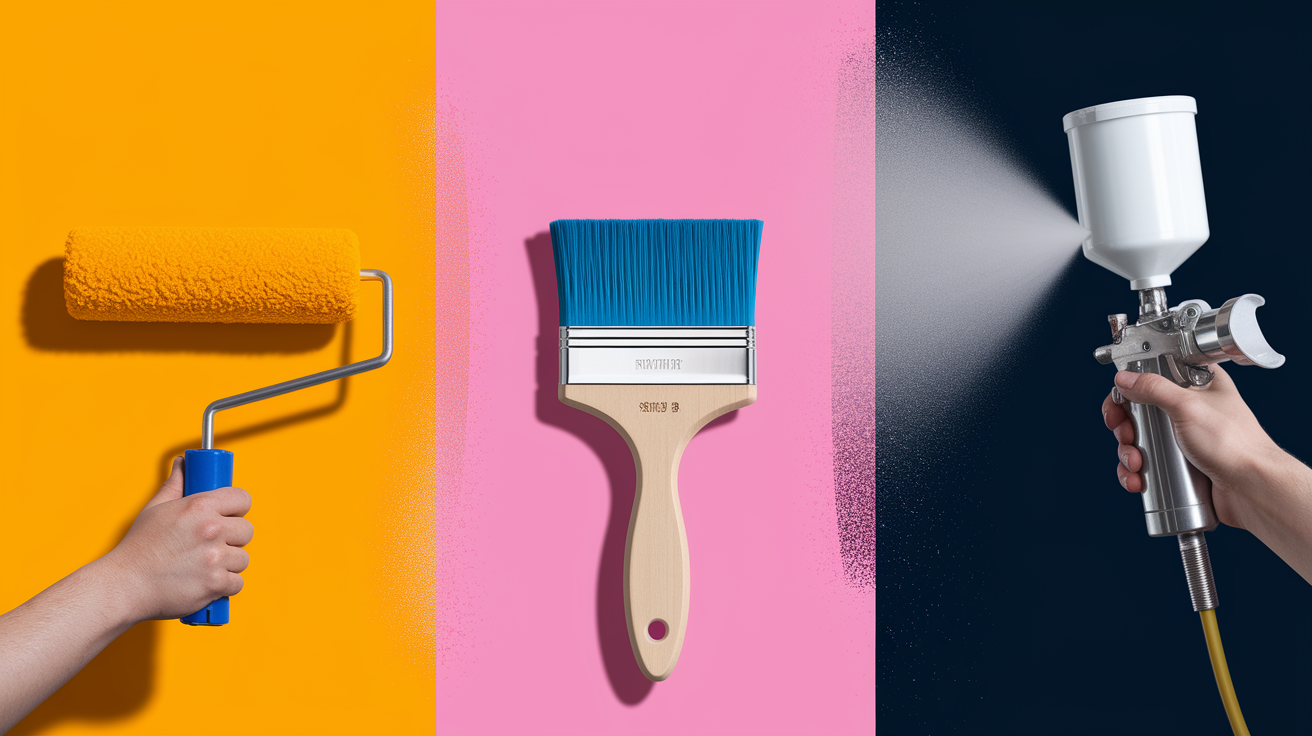
How you apply the paint determines whether you end up with smooth, even coverage or visible streaks and roller marks. The primer gives you a uniform surface to work with, but technique still matters once you start painting.
For large flat surfaces like interior walls, drywall, and ceilings, use a foam roller or short nap roller cover. Load the roller evenly without oversaturating it, then roll in overlapping W or M patterns to spread the paint smoothly. Work in sections about 3 feet square, blending the edges while the paint is still wet. Apply thin, even coats rather than trying to get full coverage in one thick pass. Thick coats sag, show roller marks, and take forever to dry. Two thin coats always look better than one heavy one.
For trim, edges, moldings, and detailed wood surfaces, switch to a high quality synthetic brush with angled bristles. Brushes give you control in tight corners and along edges where rollers can’t reach cleanly. Dip the brush about one third of the way into the paint, tap off the excess against the side of the can (don’t wipe it), and use smooth, steady strokes in the direction of the wood grain or along the length of the trim. Avoid over brushing the same area, which leaves visible stroke marks and pulls up the paint you just applied.
Spray application works well for furniture, cabinets, and other projects where you want a completely smooth finish without brush marks or roller texture. Spraying requires more prep. You’ll need to mask and cover everything nearby. But it delivers even coverage quickly. Use thin, overlapping passes held 10 to 12 inches from the surface, keeping the spray gun moving constantly to avoid drips. Multiple light coats prevent runs and give you better control over the final appearance.
Multiple Coats and Coverage Over Stain Blocking Primer

Two coats of paint over primer is the standard minimum for a solid finish. The first coat seals the primer and begins building color coverage. The second coat evens out any thin spots, streaks, or slight variations in sheen that are visible after the first coat dries. Trying to stop at one coat usually leaves you with a finish that looks uneven or lets the primer show through in certain light.
Color selection affects how many coats you’ll need. If you’re painting a light color over a light tinted primer, two coats usually cover completely. Dark colors over light primer may need three coats to achieve full hiding and consistent color. White paint over a white or gray primer typically covers in two coats, but bright reds, deep blues, and sunny yellows often need that extra layer. If you’re covering dark stained wood that required multiple primer coats, expect to use at least two coats of paint, possibly three if the stain was extremely dark.
Lightly scuff the first coat of paint with 220 grit sandpaper after it dries completely but before you apply the second coat. This step is optional for walls, but it makes a real difference on furniture, trim, and cabinets. Sanding smooths any texture from the roller or brush, knocks down dust particles that dried in the paint, and helps the next coat stick better. Wipe away the sanding dust with a tack cloth before you apply the second coat.
Let the final coat cure fully according to the paint manufacturer’s instructions before you subject the surface to normal use. Cure time is different from dry time. Paint may feel dry to the touch in a few hours, but it takes days or even weeks to reach full hardness and durability. During this cure period, avoid scrubbing, bumping, or placing objects against the painted surface. If you don’t wait, the paint can scuff, peel, or show marks that won’t buff out.
Primer Types and Their Paint Compatibility
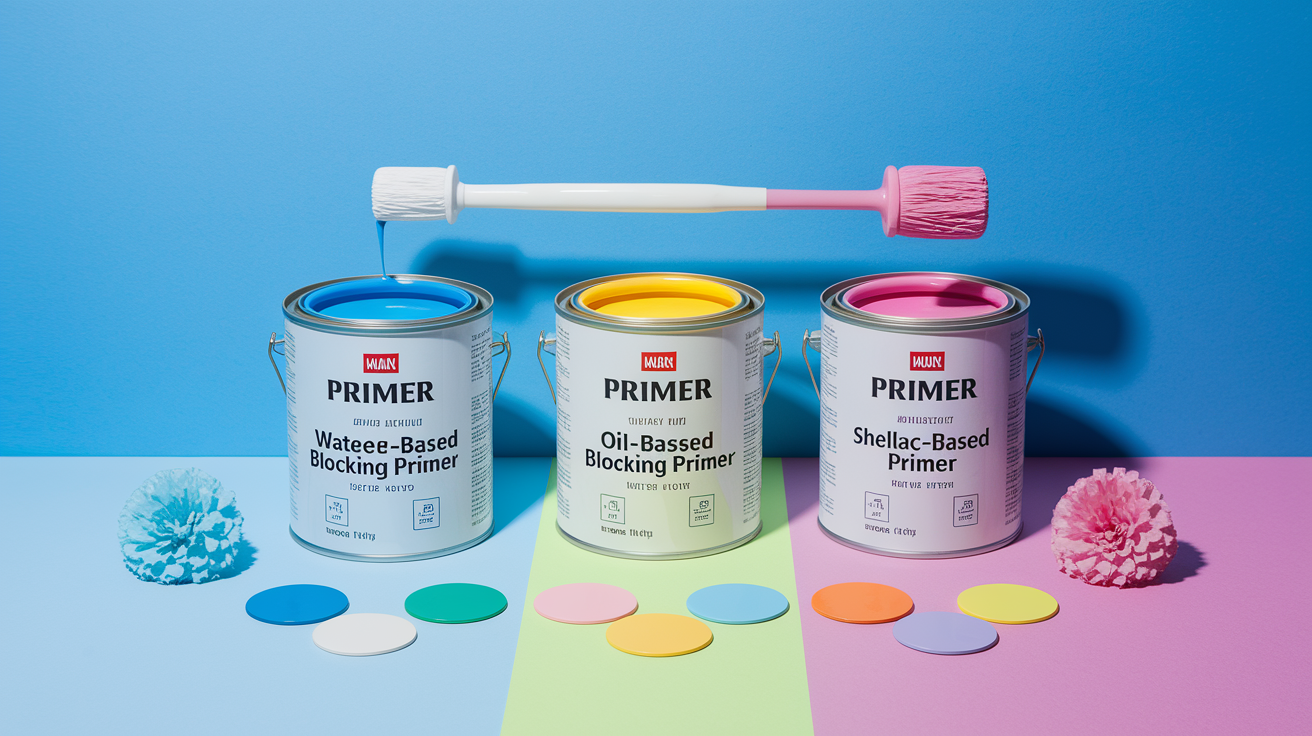
Stain blocking primers seal porous surfaces like bare wood and drywall while locking in existing stains so they can’t bleed through your topcoat. They create a barrier that stops water stains, smoke damage, nicotine residue, wood tannins, and grease spots from migrating upward and discoloring your fresh paint. Beyond blocking stains, these primers create uniform surface texture and porosity, which helps paint spread evenly and stick properly instead of soaking in at different rates across the surface.
Water Based Stain Blocking Primers
Water based stain blocking primers handle light to moderate stains like scuff marks, pencil marks, crayon marks, and minor water spots. They seal these stains while offering lower VOC levels than oil based alternatives, which means less odor and easier breathing during application. Cleanup is simple with soap and water. These primers dry faster than oil based options, typically 1 to 2 hours, so you can apply topcoat paint the same day. They pair naturally with latex and acrylic latex paints, which are the most common interior paints. If you’re working on interior walls, ceilings, or drywall with minor staining issues, water based stain blockers give you good sealing performance without the hassle and smell of oil based products.
Oil Based Stain Blocking Primers
Oil based stain blocking primers tackle severe stains that water based products can’t fully contain. Smoke damage, heavy grease stains, and wood tannins from species like cedar, redwood, and mahogany require the stronger blocking power of oil based formulations. These primers have solid adhesion properties, gripping surfaces tightly even when conditions aren’t perfect. They accept both latex and oil based topcoats, including enamel paints and alkyd finishes, which makes them useful for different project types. The tradeoff is longer drying time, usually 3 to 4 hours before you can paint over them, and higher odor levels that require good ventilation. If you’re dealing with persistent stains that have bled through water based primer before, oil based is the stronger option.
Shellac Based Primers
Shellac based primers provide exceptional bleed through prevention for the most severe staining situations. They block nearly everything. Smoke, nicotine, water damage, pet urine stains, marker, and wood tannins, better than water based or oil based alternatives. They also dry the fastest, typically 45 minutes to 1 hour, which lets you move quickly on time sensitive projects. Shellac based primers are compatible with all paint types: latex, oil based, spray paint, milk paint, lacquer, and shellac finishes. This makes them the go to choice when you need maximum blocking power and fast turnaround. The main drawback is strong odor and high alcohol content, which requires excellent ventilation and potentially respiratory protection during application. Despite the smell, shellac based primers are the safest bet when you absolutely need stains to stay locked down.
Common Surfaces Where Paint Goes Over Primer

Interior walls made of drywall or plaster are the most common surfaces where you’ll paint over stain blocking primer. Water stains from roof leaks, plumbing issues, or humidity show up as brown or yellow spots on walls and ceilings. Smoke damage from fires or years of cigarette smoke leaves discoloration that regular paint won’t cover. Primer seals these stains so your topcoat looks clean and uniform. Drywall is porous and absorbs paint unevenly without primer, leading to blotchy coverage and wasted paint. Plaster walls, especially older ones, may have staining from water damage, age, or previous repairs that need sealing before you repaint.
Wood surfaces, both bare wood and previously stained wood, benefit from stain blocking primer before painting. Bare wood contains natural oils, tannins, and resins that can bleed through paint, especially in species like pine, cedar, redwood, and oak. Knots in pine and fir are particularly prone to bleeding because they’re dense with resin. Even if you’re painting over wood that was previously stained and finished, the primer locks in those old stain pigments and creates a uniform surface for paint adhesion. If you’re painting over dark stained wood with a light color, stain blocking primer prevents the old color from showing through and reduces the number of paint coats you’ll need for full coverage.
Ceilings, especially in kitchens, bathrooms, and basements, develop water stains from leaks or condensation. Primer seals these stains so they don’t reappear through your topcoat. Previously painted surfaces that have yellowing, nicotine stains, or other discoloration also require stain blocking primer before repainting. If the old paint is in good condition but stained, you can apply primer directly over it after light sanding and cleaning, then proceed with your new paint color.
Troubleshooting Paint Problems Over Stain Blocking Primer

Most problems when painting over stain blocking primer come from insufficient drying time or skipped surface prep steps. If the primer hasn’t cured fully, paint can lift it or cause adhesion failures. If dust or grease remains on the primed surface, paint won’t stick properly.
Poor adhesion or peeling paint means you need to strip the loose paint, sand the primer lightly with 150 grit sandpaper to create texture, clean off all dust, and apply a fresh coat of primer if needed, then repaint.
Visible brush marks or roller texture? Use thinner coats of paint, sand lightly with 220 grit sandpaper between coats, or switch to a foam roller for smoother application on flat surfaces.
Bleed through from severe stains requires an additional coat of stain blocking primer. Allow it to dry completely, then repaint. Severe stains like smoke, nicotine, and tannins sometimes need two or even three primer coats.
Uneven coverage or streaky appearance calls for a second coat of paint after the first coat dries, using consistent roller pressure and overlapping strokes to even out the coverage.
Slow drying or tacky surface? Check humidity and temperature. Paint and primer dry slowly in cold or humid conditions. Increase ventilation and allow more time before applying the next coat.
Strong odor during or after painting requires proper ventilation, especially with oil based or shellac based primers. Odor fades as the primer and paint cure, but ventilation speeds the process.
Peeling at edges or corners happens when these areas were under primed or contaminated with dust or grease. Scrape off loose paint, clean thoroughly, re prime the affected area, and repaint.
Discoloration appearing after painting indicates the primer didn’t fully block the stain. Apply another primer coat over the painted surface, let it dry, then apply fresh topcoat.
For severe stains like smoke damage, nicotine buildup, or persistent water marks, run a spot test before painting the entire surface. Choose a small, inconspicuous area about 6 inches square. Apply your topcoat paint to that test spot after the primer has dried. Wait for the paint to dry completely, at least 2 to 4 hours for latex, longer for oil based. Inspect the area carefully in good light. If you see any yellowing, brown tint, or other discoloration bleeding through the paint, the stain is still active.
If stains bleed through your test area, apply a second coat of primer to that spot and let it dry completely. Test again with topcoat paint. If the discoloration still appears, the primer needs additional cure time. Wait 24 hours before testing again. For extremely stubborn stains, switch to a shellac based primer, which has the strongest blocking power. Some stains, particularly from smoke or nicotine, are so persistent they require two coats of shellac based primer before any paint goes on.
Knowing when to add another primer coat versus when to proceed with additional paint coats comes down to what you see. If the stain is bleeding through, more paint won’t help. You need more primer. If coverage is thin or streaky but no discoloration is showing, a second or third coat of paint will solve it. Use the scratch test to verify primer curing: drag your fingernail firmly across the primed surface. If the primer flakes, peels, or leaves a groove, it hasn’t cured enough. Wait longer before painting.
Best Practices for Painting Over Stain Blocking Primer

Following best practices when painting over stain blocking primer ensures durability and a professional appearance. Skipping steps or rushing the process leads to peeling, uneven coverage, and visible imperfections that require touch ups or full repainting later.
Environmental conditions during application directly affect how well primer and paint dry, cure, and stick. Work in a space that meets manufacturer recommendations for temperature and humidity. Cold temperatures slow drying and curing dramatically, while high humidity can prevent paint from setting properly or cause blushing, a milky, cloudy appearance.
Maintain proper ventilation by opening windows, using fans, or running exhaust systems to remove fumes and help primers and paints dry at the correct rate without trapping moisture.
Keep temperature between 50°F and 85°F during application and drying. Primers and paints perform poorly outside this range, with slower drying in cold conditions and too fast drying in extreme heat.
Control humidity below 70% to prevent moisture from interfering with paint adhesion and curing. Avoid painting during rainy weather or in damp basements without dehumidification.
Follow manufacturer instructions printed on the primer and paint cans for specific products. Mixing incompatible products or ignoring recoat windows causes adhesion problems.
Allow adequate drying between coats, testing with the fingernail scratch method to verify the primer or paint has cured before applying the next layer.
Use quality tools like synthetic brushes rated for the paint type you’re using and foam or microfiber rollers that don’t shed lint or leave heavy texture.
Patience with manufacturer specified drying and curing times is the most critical factor for preventing peeling and scuffing. Paint may feel dry to the touch within hours, but full cure takes days or weeks depending on the product. During this time, the paint is still hardening and bonding to the primer. If you scrub the surface, place furniture against it, or subject it to heavy use too soon, you’ll damage the finish. Let the final coat cure completely according to the manufacturer’s instructions, typically 7 to 14 days for most latex paints, longer for oil based, before returning the space to normal use. This patience delivers maximum durability and a finish that holds up to cleaning and daily wear.
Safety and VOC Considerations When Painting Over Primer

VOC levels, volatile organic compounds, vary significantly between primer types and directly affect indoor air quality during and after application. Water based stain blocking primers contain lower VOC levels, typically 50 to 150 grams per liter, which means less chemical smell and fewer airborne irritants. These primers are safer for indoor use in occupied homes, especially in spaces like bedrooms or living areas where people will return quickly after painting. Oil based primers have higher VOC levels, often 300 to 400 grams per liter, producing stronger fumes that linger longer. Shellac based primers fall somewhere in between but have high alcohol content, which contributes to strong odor even if traditional VOC levels are moderate.
Ventilation requirements depend on the primer and paint type you’re using. Water based primers and paints need basic airflow. Open windows and doors, run a fan to keep air moving, and avoid completely sealed rooms. This level of ventilation clears odors and prevents moisture buildup that slows drying. Oil based primers require more aggressive ventilation because of higher VOC levels and stronger fumes. Open multiple windows, use exhaust fans, and consider wearing a respirator with organic vapor cartridges if you’re working in a smaller space or if ventilation is limited. Shellac based primers demand the most ventilation due to their alcohol base and rapid evaporation, which fills the air with strong fumes quickly. If you can smell the product strongly, ventilation isn’t adequate.
Basic safety practices reduce risk when working with primers and paints. Wear nitrile gloves to protect your skin from prolonged contact with solvents and chemicals, especially with oil based and shellac based products. Use a respirator rated for organic vapors when working with high VOC primers in enclosed spaces. Dust masks don’t filter fumes. Protect your eyes with safety glasses if you’re spraying primer or paint, or if you’re working overhead where drips can fall. Dispose of rags, brushes, and leftover primer according to local hazardous waste guidelines. Oil based and shellac based products are flammable and can’t go in regular trash. Never pour leftover primer down drains. Store partially used cans tightly sealed in a cool, dry location away from heat sources and out of reach of children and pets.
Final Words
You can paint over stain blocking primer, and getting it right comes down to three things: letting it dry completely, choosing compatible paint, and testing severe stains before you commit.
Most primer types accept both latex and oil-based topcoats. Just check the dry time first—water-based primers cure faster than oil-based ones.
If you’re covering smoke damage or heavy water stains, do that spot test. A second primer coat now beats repainting the whole wall later.
Take your time between coats, and the finish will hold up.
FAQ
Can you paint straight over stain block?
You can paint straight over stain block once it has dried completely. Stain-blocking primers are designed specifically to be covered with topcoat paint. Water-based primers typically need 1-2 hours, oil-based need 3-4 hours, and shellac-based dry in 45 minutes to 1 hour before painting.
What is the best primer for painting over stained wood?
The best primer for painting over stained wood is a shellac-based or oil-based stain-blocking primer. These formulations seal wood tannins, prevent bleed-through, and provide excellent adhesion. For severe wood stains like smoke or water damage, oil-based KILZ Original or shellac-based primers block most effectively.
Is stain blocking paint worth it?
Stain-blocking paint is worth it when covering problem areas like water stains, smoke damage, nicotine stains, or wood tannins. These primers create a sealed barrier that prevents discoloration from bleeding through your topcoat. For light marks like crayon or pencil, fast-drying water-based primers work fine.
How soon can I paint over Zinsser Coverstain primer?
You can paint over Zinsser Coverstain primer in 2-3 hours for typical conditions. This oil-based primer needs adequate drying before topcoat application. Perform a scratch test with your fingernail to verify the primer has cured properly. High humidity or cold temperatures may require longer drying time.
What type of paint works over stain-blocking primer?
Most stain-blocking primers accept latex, acrylic latex, enamel, spray paint, oil-based, milk paint, and specialty finishes. Water-based primers work best with latex and acrylic topcoats. Oil-based and shellac primers accept both water-based and oil-based paints for maximum flexibility.
How many coats of paint do you need over stain-blocking primer?
You need at least two coats of paint over stain-blocking primer for a seamless finish. Dark or severe stains may require three coats for complete coverage. Light sanding between coats with 220-grit sandpaper improves smoothness. Always let each coat dry completely.
Do you need to sand stain-blocking primer before painting?
You should lightly sand stain-blocking primer with 220-grit sandpaper before painting for best results. This smooths brush marks and drips. After sanding, wipe the entire surface with a tack cloth or slightly damp rag to remove all dust before applying paint.
Can stains bleed through primer and paint?
Stains can bleed through primer and paint if the wrong primer type is used or insufficient coats are applied. Test severe stains by painting a small section first. If discoloration appears after drying, apply a second primer coat and retest before coating the entire area.