
You can’t tell just by looking at the surface whether swollen drywall is worth saving or needs to be ripped out. Press on it, check what kind of water hit it, and measure how long it’s been wet. Those three things decide if you’re drying it out or cutting it out. This guide walks you through the decision, the drying steps if you can save it, and the replacement process when you can’t.
What You’re Facing: Recognizing Swollen Drywall and Immediate Actions

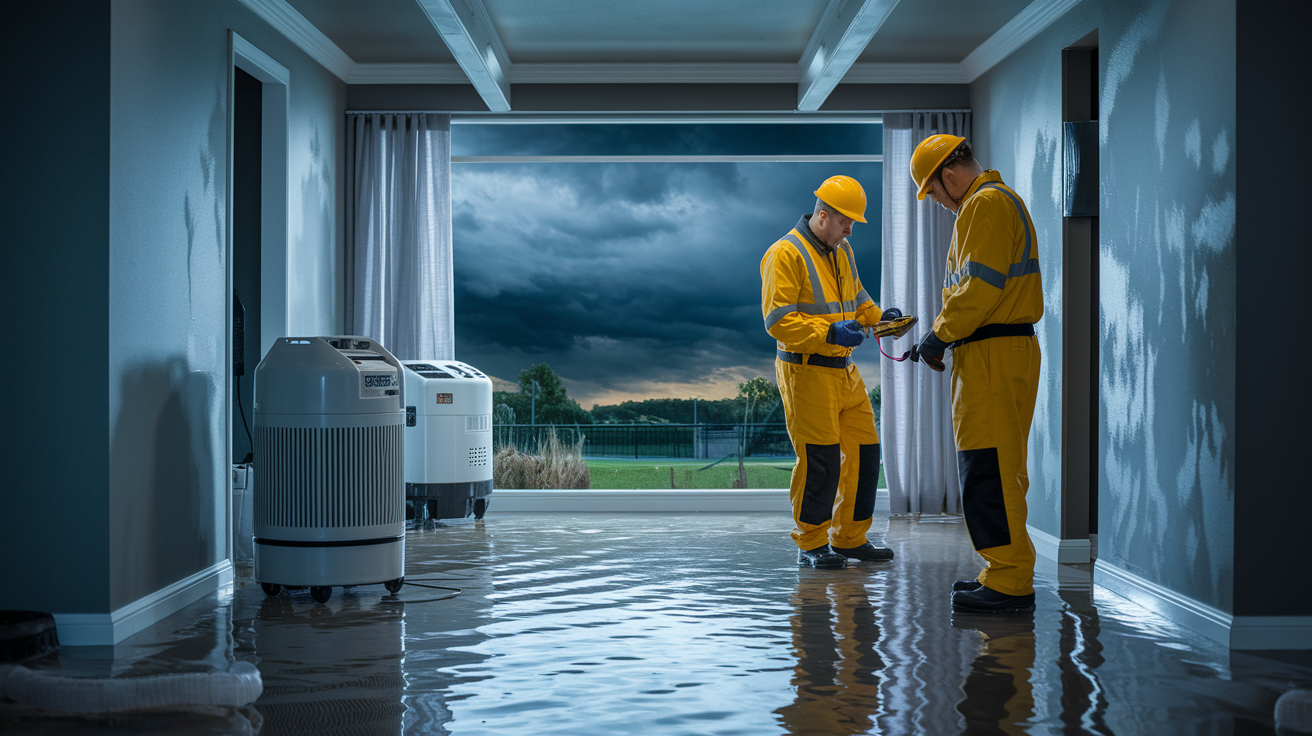
Swollen drywall means water’s gotten into your wall and compromised the structure. You need to figure out fast if you’re dealing with a drying job or a full replacement. Good news is that quick action can save the material and your budget, but you’ve got a tight window to work with.
Start with what you can see and feel. Look for surfaces that bulge or bubble. Water stains show up as yellowish-brown patches when it’s minor, dark brown or black when it’s severe or been sitting awhile. Paint that’s peeling or bubbling away from the surface is another tell. Press gently on the problem area. Does it feel soft, mushy, or spongy instead of firm? That’s saturation. Check for crumbly surfaces, cracks along seams, and baseboards pulling away from the wall or showing gaps at the floor.
You’ve got 24 to 48 hours before mold can start growing. Drywall that’s been wet less than 48 hours might be salvageable if you dry it quickly and completely.
Whether you dry or replace depends a lot on what kind of water you’re dealing with. Clean water from burst pipes or supply lines (Category 1) gives you the best shot at saving the drywall if you move within 48 hours. Gray water from appliance discharge or toilet overflow without sewage (Category 2) needs careful assessment. Black water from sewage or flooding (Category 3) means immediate full replacement. No exceptions. The contamination and health risks are too serious.
Test the physical condition to decide if it’s worth trying to save. If the drywall stays firm after drying with no crumbling, severe warping, sagging, or mold spots, you might be okay. But soft, warped, mold-spotted, or crumbly drywall has to come out. Also, wet insulation behind the drywall loses effectiveness and becomes a mold factory, so even if the surface looks intact, the insulation often needs to go.
Immediate recognition and action checklist:
- Identify and stop the water source immediately
- Check for bulging, bubbling, or sagging wall surfaces
- Press on affected areas to test for soft, spongy, or mushy texture
- Look for water stains and discoloration patterns
- Determine water category (clean, gray, or black water)
- Note how long the drywall has been wet (under or over 48 hours)
- Inspect for peeling paint and cracks at seams
- Check baseboards for separation and gaps at floor line indicating swelling
The Science Behind Drywall Swelling and Water Absorption

Drywall (also called gypsum board) is made of a gypsum core sandwiched between paper facings. Both the paper and the gypsum are porous, which means they soak up water fast when exposed to moisture.
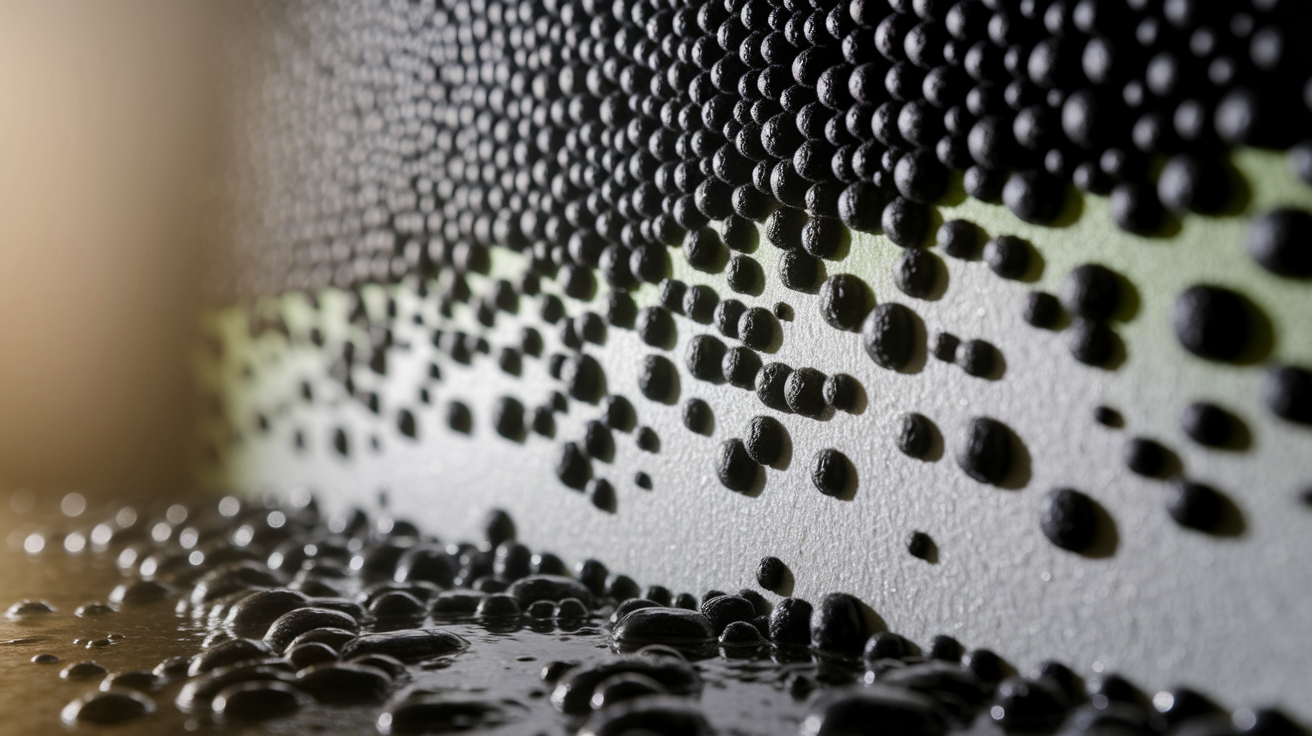
Water penetrates the paper facing and saturates the gypsum core. The material expands and loses its rigid structure. It becomes soft, spongy, and mechanically weak. That’s what causes the visible bulging, warping, or sagging you see on damaged walls.
Swelling tells you structural integrity is compromised. How much water the material absorbed determines whether it can dry out and return to a usable state or whether it’s permanently damaged and needs replacement.
Common Sources Behind Water Damage and Drywall Swelling

Before you can dry or repair anything, you need to stop the water source. Otherwise you’re just chasing a problem that keeps coming back.
Internal plumbing failures are common. Leaking pipes hidden behind walls, burst pipes, toilet or sink overflows, and appliance failures like dishwashers, washing machines, and refrigerators that leak slowly over time or fail suddenly.
External and environmental sources also cause trouble. Roof leaks from damaged shingles or flashing let water seep through ceilings. Basement flooding from storms or foundation cracks allows groundwater intrusion. Condensation in bathrooms and kitchens from poor ventilation creates ongoing moisture exposure. HVAC system leaks, especially from drain pans or condensate lines, can saturate walls over weeks without you noticing.
Assessing Hidden Moisture and Swelling Severity Behind Walls

Surface inspection only tells part of the story. You need to check what’s happening inside the wall cavity to understand the full scope.
Start with what you can see and touch. Walk around the affected area and press on the wall looking for soft spots, bulges, or discoloration. But water often travels behind the surface, so you’ll need tools or exploratory cuts to assess hidden moisture. A non-penetrating moisture meter scans without making holes and gives you a general reading of moisture content. A penetrating moisture meter uses probes that pierce the drywall to check internal levels and whether studs are wet.
Sometimes you need to get invasive. Remove baseboards to inspect behind them. Poke small holes with a screwdriver near the floor to check if drywall is soft inside. If moisture is present or the wall has been wet for several days, cut the drywall 2 or 4 feet up from the floor to inspect insulation and framing. Wet fiberglass or cellulose insulation loses its insulating value and becomes a mold risk, so it usually needs removal even if the drywall looks okay on the outside.
| Assessment Method | When to Use | What It Reveals |
|---|---|---|
| Visual inspection | First step for all water damage | Bulging, stains, peeling paint, cracks, soft spots |
| Non-penetrating moisture meter | Checking moisture without damaging wall | Surface and near-surface moisture levels |
| Penetrating moisture meter/probe test | Confirming internal saturation and stud wetness | Moisture deep in drywall and framing |
| Exploratory cutting | Suspected hidden damage or prolonged exposure | Insulation condition, framing damage, full extent of water intrusion |
Mold Risks and Health Hazards from Swollen, Water-Damaged Drywall
Mold can start growing within 24 to 48 hours if drywall stays wet.
You’ll recognize mold by its appearance and smell. Look for black, green, or brown spots with a fuzzy or powdery texture, especially in high-humidity areas like bathrooms and basements. Even without visible growth, a persistent musty or damp odor means moisture is trapped inside the wall and mold may already be forming in hidden cavities.
Mold exposure isn’t something to ignore. It causes allergies, asthma attacks, and other respiratory issues, especially in enclosed living spaces where spores circulate through your home’s air. Wet walls and insulation hold moisture for a long time, creating perfect conditions for mold clusters to form inside wall cavities where you can’t see them until the problem is severe.
Trying to remove mold yourself without proper containment and equipment can make things worse by spreading spores throughout your home. When mold is widespread or growing inside walls, professional mold remediation is the safer choice.
Step-by-Step Drying Process for Water-Damaged Drywall
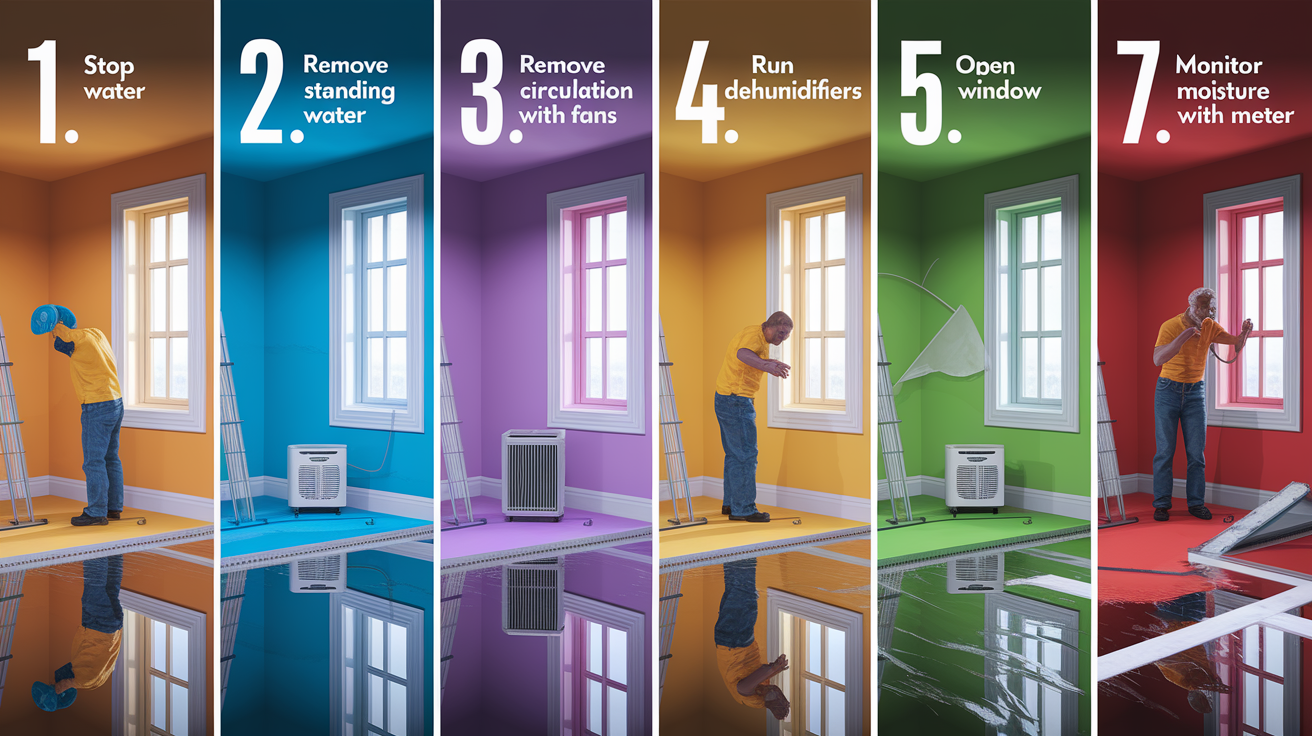
Successful drying requires stopping the water source first, then creating optimal airflow and humidity control to pull moisture out of the material.
- Stop the water source immediately
- Remove standing water and wet materials (furniture, carpet, baseboards)
- Increase air circulation with fans positioned to blow across wall surfaces
- Run dehumidifiers continuously to reduce indoor humidity below 50%
- Open windows if outdoor humidity is lower than indoor levels
- Cut small inspection holes near baseboards to allow airflow into wall cavities
- Monitor moisture levels daily with a moisture meter until readings return to normal (below 15 to 20%)
Drying can take 3 to 7 days depending on saturation level, wall thickness, and how much water got inside the cavity. Hidden moisture inside walls takes longer to evaporate than surface moisture, which is why daily monitoring with a moisture meter matters. Don’t rush into repairs until readings confirm the material is fully dry.
How to Remove and Replace Swollen Drywall Sections Safely

Replacement is necessary when drywall is crumbly, mold-spotted, severely warped, or has been wet for more than 48 hours.
You’ll need a utility knife, drywall saw, replacement drywall sheets, joint compound, drywall tape, putty knife, sandpaper, primer, and paint that matches your existing wall color.
- Mark cut lines in a square or rectangle around the damaged area extending to the nearest studs
- Cut along the lines with a utility knife and drywall saw
- Remove the damaged section and inspect insulation and studs for moisture or mold
- Let the cavity dry completely and treat any mold on framing with antimicrobial solution
- Cut a replacement drywall piece to fit the opening
- Secure the new piece to studs with drywall screws (space them about 8 inches apart)
- Apply joint compound and drywall tape over seams, pressing out air bubbles
- Let it dry and apply a second coat, feathering the edges outward to blend with the surrounding wall
- Sand smooth and apply texture to match the surrounding wall (knockdown, orange peel, or smooth)
Prime the repair area and then paint to blend it with the rest of the wall. Matching existing texture takes practice, so if your walls have a heavy texture pattern, you might want professional finishing for results that don’t stick out.
Safety Precautions and Protective Equipment for Water Damage Work
Water damage falls into three categories, each with increasing contamination and safety risks. Category 1 is clean water from supply lines (burst pipes, supply line leaks). Category 2 is gray water from appliances or toilet overflow without feces (dishwasher discharge, washing machine overflow). Category 3 is black water from sewage or flooding, which contains harmful bacteria, pathogens, and contaminants that require immediate full replacement and professional handling.
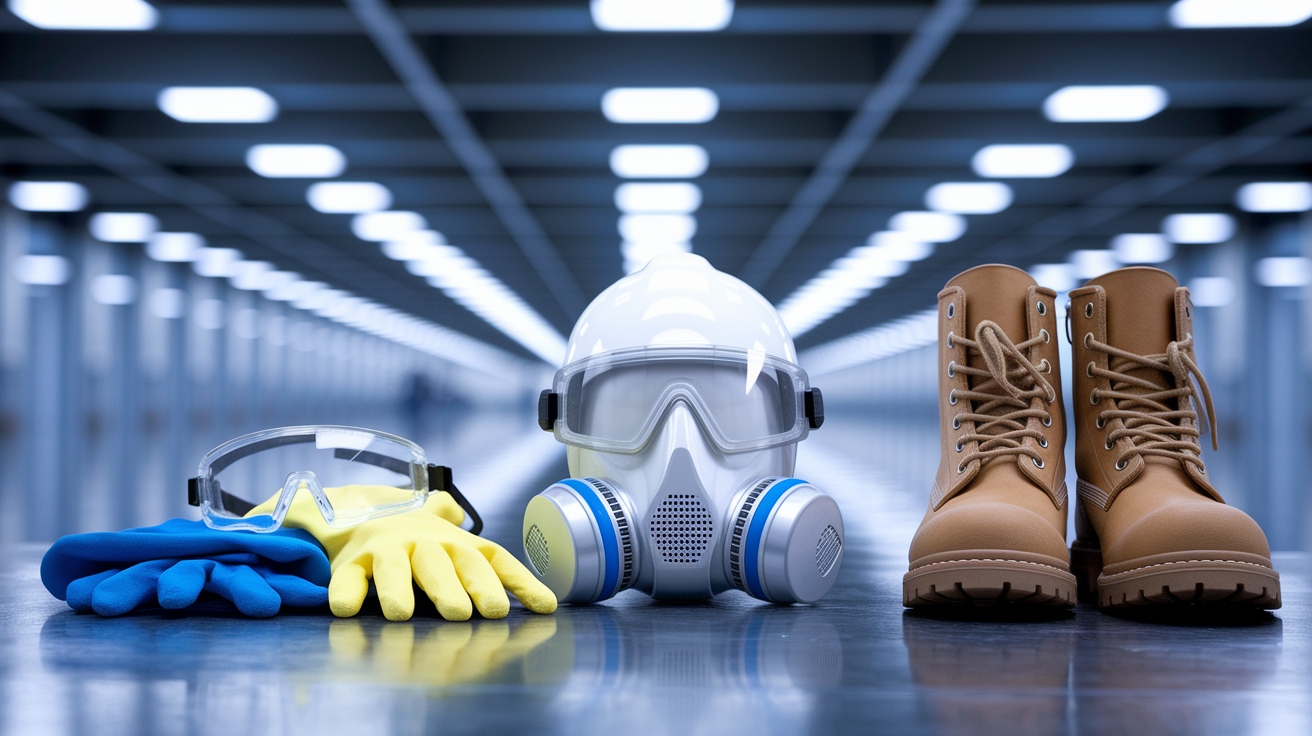
Mold spores and bacteria present serious respiratory and skin contact risks, especially when you’re working in enclosed spaces where disturbed spores circulate in the air you’re breathing. Don’t skip protective equipment even for “minor” repairs.
Required protective equipment:
- N95 or P100 respirator mask for mold and dust
- Waterproof gloves (nitrile for clean water, heavy-duty rubber for contaminated water)
- Safety goggles to protect eyes from debris and spores
- Long sleeves and pants to prevent skin contact
- Rubber boots for flooded areas
- Disposable coveralls for black water situations
Timeline Expectations and Cost Factors for Drywall Swelling Repairs
Timeline depends on damage scope and drying requirements. Drying alone takes 3 to 7 days. Small patch repairs (under 10 square feet) take 1 to 2 days including drying time for joint compound between coats. Larger replacements like full walls or entire rooms can take 1 to 2 weeks when you factor in drying, multiple joint compound coats, sanding, priming, and painting.
Cost breaks down into materials and labor. Materials for small repairs (drywall sheets, joint compound, tape, primer, paint) typically run $50 to $150. If you’re hiring contractors, labor costs $50 to $90 per hour depending on your location and the complexity of the work. Mold remediation adds $500 to $3,000 depending on the extent of contamination and whether it’s contained to one area or spread through wall cavities.
Hidden costs can add up fast. Insulation replacement is often necessary and adds material and labor expenses. If electrical outlets were exposed to water, you may need an inspection or rewiring. Structural framing repair becomes necessary if studs are damaged, rotted, or mold-contaminated. Extensive work may require building permits, which add fees and inspection requirements.
| Repair Scope | Timeline | Estimated DIY Cost | Estimated Professional Cost |
|---|---|---|---|
| Small patch (under 10 sq ft) | 1-2 days | $50-150 | $200-500 |
| Medium repair (10-50 sq ft) | 3-5 days | $150-400 | $500-1,500 |
| Full wall replacement | 1-2 weeks | $300-800 | $1,500-3,500 |
| Multi-room water damage with mold | 2-4 weeks | Not recommended DIY | $3,000-10,000+ |
When to Call a Professional for Water-Damaged Drywall
While minor drywall repairs are DIY-friendly, certain situations require licensed contractors and restoration specialists who have the equipment, expertise, and safety protocols to handle serious damage.
When to hire professionals:
- Widespread mold growth (more than 10 square feet)
- Category 2 or 3 water contamination
- Structural damage to framing or load-bearing walls
- Electrical wiring exposed to water
- Ceiling damage or sagging (collapse risk)
- Insurance claim requiring documented professional remediation
- Hidden moisture behind multiple walls requiring thermal imaging
- Damage affecting more than one room or floor
Certified water damage restoration services have industrial dehumidifiers, moisture detection equipment, antimicrobial treatments, and insurance documentation expertise that ensure thorough remediation and prevent recurring problems. They also know building codes and can handle permit requirements for extensive repairs, which protects you if you’re planning to sell your home or if the insurance company needs proof of proper restoration.
Preventing Future Drywall Swelling and Water Damage in Your Home
Prevention is far less expensive and disruptive than water damage repairs. It requires only regular inspection routines and minor upgrades that catch problems before they get out of hand.
Moisture control is the central prevention strategy. You need to target both internal humidity from daily activities and external water intrusion from plumbing failures, roof leaks, and foundation issues. Small maintenance habits and upgrades make a big difference in keeping walls dry and structurally sound over the long term.
Key prevention strategies:
- Inspect plumbing fixtures and supply lines annually for leaks, corrosion, or wear
- Install moisture-resistant drywall (green board or cement board) in bathrooms, laundry rooms, and basements
- Improve ventilation with exhaust fans in bathrooms and kitchens, running them during and 20 minutes after showers or cooking
- Maintain gutters and downspouts, directing water at least 6 feet away from the foundation
- Seal basement walls and floors to prevent groundwater intrusion
- Keep indoor humidity between 30% and 50% using dehumidifiers if needed
- Insulate pipes to prevent condensation and freezing that leads to bursts
- Inspect roof and flashing annually for damage, especially after storms
- Check around windows and doors for water stains after heavy rain
Final Words
Drywall swelling from water damage won’t fix itself, but you’ve got a clear plan now.
Stop the water source first. Dry fast if you’re inside that 24-48 hour window. Cut out what’s too far gone.
If the damage is widespread, contaminated, or hiding mold behind the surface, call a pro. No shame in that.
For smaller repairs, you’ve got the steps. Take your time on the finish work and it’ll blend right in.
Once it’s done, keep an eye on your plumbing and ventilation. A little prevention beats tearing into walls again.
FAQ
How long does it take for drywall to dry after water damage?
Drywall typically takes 3-7 days to dry after water damage, depending on saturation level and airflow. Hidden moisture inside wall cavities takes longer to evaporate than surface moisture, so use a moisture meter to confirm readings drop below 15-20% before starting repairs.
How to fix swollen drywall?
Fixing swollen drywall requires cutting out the damaged section in a square or rectangle to the nearest studs, letting the cavity dry completely, installing a replacement drywall piece, then taping, mudding, and sanding the seams smooth before priming and painting.
What does water damage behind drywall look like?
Water damage behind drywall looks like bulging or bubbling surfaces, water stains ranging from yellowish-brown to dark brown or black, peeling paint, and soft or spongy texture when pressed. Separated baseboards and gaps at the floor line also indicate swelling behind the surface.
Does sheetrock swell when it gets wet?
Yes, sheetrock swells when it gets wet because both the gypsum core and paper facing are porous and absorb water rapidly. As water saturates the material, it expands and loses structural integrity, causing visible bulging, warping, sagging, or blistering on the surface.
Can water-damaged drywall be saved or does it need replacement?
Water-damaged drywall can be saved if exposed to clean water for less than 48 hours and dried quickly without crumbling, severe warping, or mold growth. Drywall that’s soft, crumbly, mold-spotted, contaminated by gray or black water, or wet beyond 48 hours must be replaced.
What causes drywall to bubble after water exposure?
Drywall bubbles after water exposure because moisture penetrates the paper facing and saturates the gypsum core underneath, causing the layers to separate and expand. The trapped water pushes the paper outward, creating visible bubbles or blisters that indicate compromised structural integrity beneath.
How do you know if there’s hidden moisture inside walls?
You can detect hidden moisture inside walls by using a non-penetrating or penetrating moisture meter, removing baseboards to inspect behind them, cutting small exploratory holes near the floor, or noticing persistent musty odors even without visible surface damage.
When should you call a professional for water-damaged drywall?
You should call a professional for water-damaged drywall when mold covers more than 10 square feet, water is contaminated (gray or black water), structural framing is damaged, electrical wiring was exposed, ceilings are sagging, or damage affects multiple rooms requiring industrial equipment.