
You just slapped stain blocking primer over water damage or smoke stains and now you’re staring at the wall, wondering when you can actually paint. The answer isn’t simple. Depending on what type of primer you used, drying can take anywhere from 45 minutes to literally a full day before recoating, and rushing this step wrecks everything. Touch dry doesn’t mean ready to paint. This guide breaks down actual dry times, recoat windows, and full cure for water based, oil based, and shellac primers so you stop guessing and start scheduling your repair right.
Typical Drying Time Ranges for Stain Blocking Primers
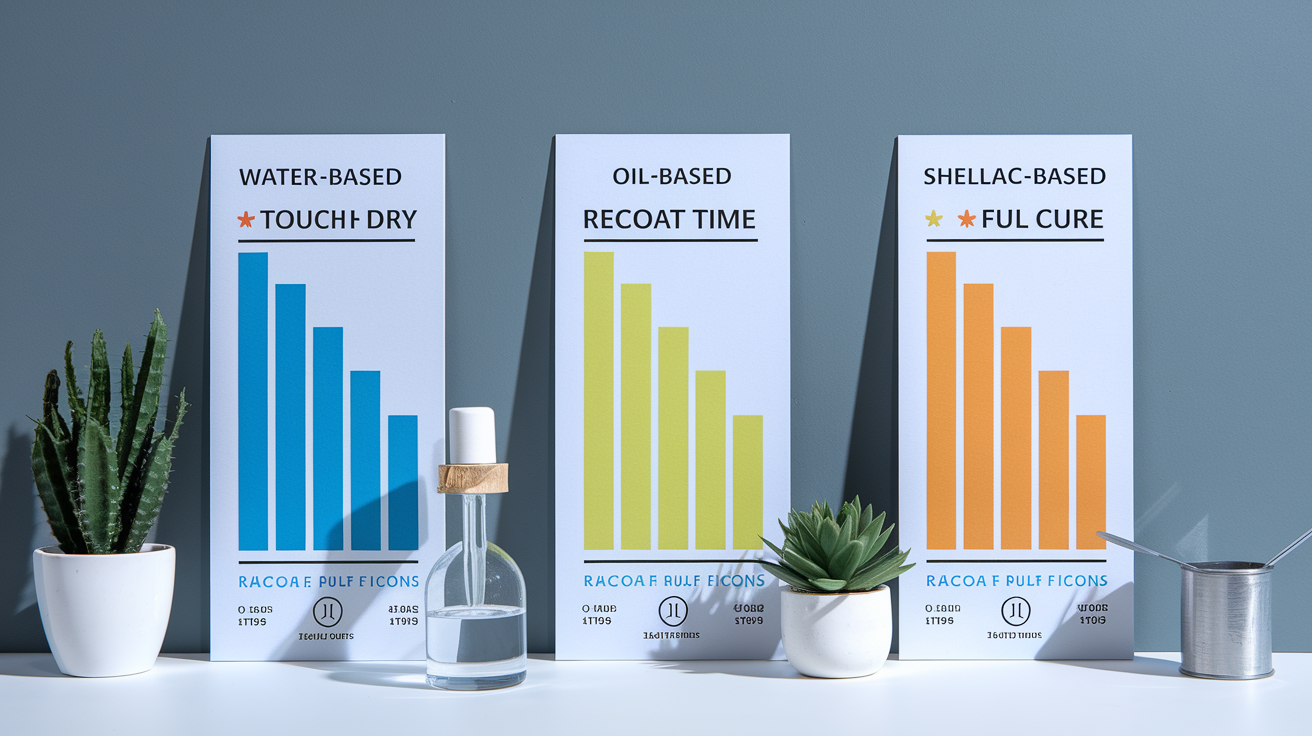
Stain blocking primers dry at different speeds depending on what they’re made of. You’ll want to understand three stages: touch dry (surface feels dry when you lightly press it), recoat time (when you can add another coat without messing up what’s underneath), and fully cured (when the primer reaches maximum strength and stain blocking power).
| Primer Type | Touch Dry | Recoat Time | Full Cure |
|---|---|---|---|
| Water-Based | 30 minutes to 1 hour | 1-3 hours | 7-14 days |
| Oil-Based | 6-8 hours | 16-24 hours | 30 days or longer |
| Shellac-Based | 45 minutes to 1 hour | 1-2 hours | 2-3 hours |
These times assume decent conditions: temps between 50 and 85°F, reasonable humidity, and airflow that actually moves. Brands like Kilz, Zinsser BIN, Bulls Eye, and Coverstain each have their own specs on the technical sheets. Your specific can might be different, so check the label before you start. Saves you from scheduling headaches and guarantees proper coverage.
Environmental Factors Affecting Drying Time

Temperature swings matter more than you’d think. Sweet spot sits between 50 and 85°F. Below 50°F and you’re looking at double or triple the wait because everything slows down. Chemical reactions crawl. Solvents barely evaporate. Above 85°F creates its own problem where the top layer dries fast but traps wet primer underneath, which leads to cracking or adhesion failures down the road.
Humidity messes with both water based and oil based formulas, just differently. Water based can’t release moisture when the air’s already saturated. Think about wet laundry on a humid day. Oil based faces a similar issue since air gets loaded with solvents faster in moisture heavy conditions. Rain or high humidity can stretch drying by 50% or more. Working in wet weather? Plan for way longer waits.
Air circulation lets solvents escape from oil based primer and moisture leave water based primer. No airflow means no drying. The air right next to wet primer fills up with what’s evaporating, and if that air just sits there, nothing else can leave. Open windows on opposite sides to get a cross breeze going. Position fans about 6 to 10 feet away, not aimed right at the wet surface (blows debris onto it). This keeps indoor air decent while handling the strong smell from sealing products.
Different seasons need different fixes. Humid conditions? Run a dehumidifier for 2 to 3 hours before you start and keep it going. Cold weather? Space heaters work great to maintain temps, but keep them at least 4 feet from wet surfaces to avoid uneven drying. More fans help no matter what. Different rooms act differently too. Interior walls in central areas typically dry faster than exterior ones affected by outside temps. Small bathrooms trap humidity and smells, needing more ventilation than large rooms. Basements or spaces with poor airflow might need commercial fans or extended timelines. Adjust your schedule based on all these factors instead of just trusting the label.
How to Speed Up Drying Time

How you apply it, how thick it goes on, and what product you pick all change your wait time and overall timeline.
- Go thin with consistent coverage instead of trying to knock out full stain blocking in one heavy pass. Two thin coats dry faster together than one thick one and look better.
- Brush edges and detail work, keeping a wet edge and not going back over drying areas (creates drag marks and uneven thickness).
- Roll large walls and ceilings using a 3/8 inch nap roller for smooth surfaces, 1/2 inch for textured ones, working in a W pattern to spread primer evenly.
- Spray application gets you the thinnest possible coat and eliminates brush or roller marks completely.
- Don’t go heavy. Thick layers dry way slower. A thick coat might feel dry on top while staying wet underneath for days.
- Match your tools to the primer type. Synthetic brushes and rollers work for water based, natural bristle suits oil based better.
- Prep surfaces right before you prime. Clean surfaces take primer evenly, cutting down the number of coats you’ll need.
Thin coats beat thick ones because solvents or moisture only travel a short distance to reach the surface and evaporate. Thickness affects not just speed but how well it seals stains. A coat about as thick as two sheets of paper dries way faster than one twice that thick. Surface prep really matters. Properly prepped wood, drywall, plaster, masonry, and metal accept primer consistently. When primer soaks in evenly instead of pooling in low spots, you get better adhesion and better results overall. Light sanding with 120 grit paper, wiping with a damp cloth, and making sure everything’s completely dry before you start makes the biggest difference. In bathrooms with water stains, handling proper caulking techniques before priming stops future moisture problems.
Rush jobs often need fast drying options while keeping proper coverage and sealing power. Shellac formulas dry overnight and often let you paint the same day in good conditions. A shellac based product applied at 9 AM in a 70°F room with decent airflow can take paint by 2 PM. Spraying creates thinner coats and faster evaporation compared to brushing or rolling. Quick dry primers exist from major brands, trading some extreme blocking power for way faster times without giving up basic adhesion.
More ways to speed things up include controlled heat and better airflow. Space heaters keeping things at 75 to 80°F speed up chemical reactions and evaporation without causing problems. Position heaters to warm the whole room instead of blasting one wall. Multiple fans work best (one pulling fresh air in, one pushing saturated air out). Dehumidifiers in moisture prone spots like bathrooms and basements pull out humidity that would slow everything down. But excessive heat above 90°F might yellow oil based primer or crack the surface as the top dries too fast compared to what’s beneath it.
Surface Type and Porosity Effects on Primer Drying
Porous versus sealed surfaces behave completely differently while drying. Understanding this prevents surprises and helps you know what to expect.
Fast drying happens on porous surfaces. Wood, new drywall, and unfinished plaster soak up primer quickly, sometimes reaching touch dry 20 to 30% faster than the label says. The material acts like a sponge, pulling solvents or moisture away from the primer film and into itself, speeding surface drying noticeably. This absorption often means you’ll need a second coat for proper stain coverage since some primer soaked in rather than staying on top to block stains.
Sealed surfaces, metal, previously painted walls, and sealed masonry present slower drying. Primer sits on top with nowhere to go, meaning everything must evaporate into the air. A coat that dries in 45 minutes on raw drywall might take 90 minutes on painted drywall. Metal can be particularly slow since it pulls heat away from the primer layer and offers zero absorption.
Prep steps normalize drying across different materials. Light sanding with 120 or 150 grit on sealed or glossy surfaces creates tiny texture that helps primer grab and allows minimal absorption into surface flaws, speeding drying slightly. Cleaning with TSP substitute or degreaser removes invisible gunk that would prevent proper primer contact. Making sure surfaces are completely dry before priming matters most on porous stuff like wood and drywall. If the material itself holds moisture, that moisture migrates into the primer layer and dramatically slows drying. Wait 24 to 48 hours after cleaning or water exposure before priming to get consistent results no matter what you’re working on.
Testing Primer Readiness Before Applying Topcoat

Painting too soon risks peeling, blistering, and poor adhesion that wrecks the whole job. Testing dryness properly keeps you from redoing everything.
- Start with a light finger touch in a corner. Surface should feel completely dry with no tackiness, coolness, or primer transfer to your finger.
- Wait 5 minutes, then press your thumbnail firmly into the primer at an edge or corner. It should resist without denting, leaving a mark, or feeling soft underneath.
- Do a gentle scratch test with your fingernail on the same spot. Properly dried primer won’t scratch away or roll up under light pressure.
- Check for solvent smell by putting your nose close. Water based should smell neutral or faintly of acrylic. Oil based will still have some odor, but faint, not strong.
- Feel the whole surface for cool or tacky spots, which mean that section’s still releasing moisture or solvents even if most feels dry.
The best recoat window matters for top results. During the first few hours after touch dry (typically 1 to 4 hours for water based, 8 to 16 for oil based), the primer surface stays chemically active. Applying latex, acrylic, or enamel paint during this window allows chemical bonding where the topcoat and primer actually link at a molecular level. This gives you better compatibility and adhesion. Wait too long and the primer fully cures into a hard, inactive surface that needs light sanding before painting to create mechanical bonding through physical texture instead of chemical linking.
Fully dried primer looks uniform without shiny wet spots or darker patches showing moisture. Feels room temperature instead of cool (coolness means evaporation’s still happening). Smells much less intense than when first applied. For oil based, expect some lingering solvent smell even when dry enough for topcoat, but that strong headache inducing odor should be gone. Water based should smell almost neutral. The tacky test involves lightly pressing your palm against the surface and pulling away. Properly dried primer releases immediately without any pulling or stickiness. Allow full wait time between coats even if it seems ready early. Rushing causes problems that don’t show up until days or weeks later.
Common Stain Types and Their Impact on Primer Drying

Severe water stains, smoke damage, and nicotine stains often need shellac or oil based primer instead of water based. Water based formulas struggle with these because they don’t fully lock in oily or resinous stain components. Shellac creates an alcohol based barrier that seals virtually anything, drying through alcohol evaporation rather than water evaporation. Oil based uses petroleum solvents to dissolve and lock in stain components, preventing color bleed through the topcoat. These stronger formulas naturally take longer to dry but seal better and block odors. A nicotine stained ceiling might need 12 to 16 hours with oil based, but trying the same job with water based often gives you yellow bleed through within weeks even if it dried in 2 hours.
Tannin bleed from wood, grease spots in kitchens, and mold situations each need adequate coverage. Tannin bleed from oak, cedar, or redwood needs specialized blocking because these water soluble wood chemicals migrate through standard primer. Grease spots need deglossing and primer that sticks to slick surfaces. Mold needs a mold killing primer and complete dryness before application since any remaining moisture reactivates mold growth under the primer layer. These severe cases often need thicker application or a second coat, which extends overall drying significantly. A single coat might dry in 4 hours, but that second coat needed for proper sealing means waiting 4 hours, applying it, then waiting another 6 to 8 hours before topcoat. Plan for longer timelines with difficult stains. When dealing with water damage, reviewing a water damage repair guide helps you understand proper prep before priming.
The trade off between coverage and drying speed requires patience for permanent results. Rushing with thin coats on severe stains leads to bleed through days or weeks later, requiring complete repainting. Proper stain blocking with adequate thickness requires waiting longer but delivers permanent coverage and prevents color bleeding. If you’re dealing with smoke damage on walls from a kitchen fire, two coats of shellac with proper drying between coats might take 6 hours total, while trying to speed things with one thin coat of water based might dry in 90 minutes but fail completely within a month. The time investment in proper blocking pays off long term.
Troubleshooting Slow Drying Stain Blocking Primer
Sometimes primer stays tacky or wet way beyond expected drying time despite acceptable conditions. These problems usually trace to how you applied it rather than the environment.
| Problem | Likely Cause | Solution |
|---|---|---|
| Primer still tacky after 12 hours | Applied too thick or over contaminated surface | Increase ventilation and heat, wait additional 12-24 hours, or remove and restart |
| Primer remains soft after 24 hours | Wrong product type for substrate or moisture in substrate | Check if oil-based primer was used on damp surface; may need complete removal |
| Surface feels dry but smears when touched | Surface dried but underlayer still wet | Wait additional 24 hours; add fans and heat; avoid touching until fully cured |
| Primer dries in patches (some areas dry, some wet) | Uneven application thickness or porous substrate variation | Apply second thin coat after tacky areas dry to even out coverage |
| Primer has strong odor days later | Trapped solvents from thick application or poor ventilation | Increase ventilation for 48-72 hours; if odor persists beyond 5 days, underlying issue exists |
How you applied it causes most extended drying times. Thick coverage that traps solvents underneath the surface layer happens most often. The top skins over while the bottom stays liquid, sometimes for days. This happens when trying to get full coverage in one coat instead of building up with two or three thin applications. Contaminated surfaces prevent proper adhesion and drying. Grease, wax, soap residue, or silicone from old caulking creates an invisible barrier that stops primer from making direct contact with the material. The primer just sits on top of the contamination, never properly bonding or drying right. Wrong primer type for the specific stain creates problems too. Using water based over oil based stains or glossy surfaces without proper prep leads to poor results. Moisture in the material itself prevents proper drying. If you’re priming over a water stain before the underlying drywall or plaster has completely dried (which can take days or weeks depending on severity), that moisture moves into the primer layer and prevents it from curing.
Slow drying sometimes means fixable errors but other times signals the need to start over. If primer’s still tacky after double the expected drying time and you’ve added heat, ventilation, and waited patiently, test a small corner. Try to scrape it gently with a putty knife. If it peels away easily in a gummy sheet, the primer never bonded and needs removal. If it scrapes but leaves most of the coating intact, it’s probably salvageable with more drying time. Poor adhesion shows up as wrinkling, bubbling, or easy removal when you press tape against the surface and pull it off. These are peeling failures waiting to happen. If you see these signs, stop and remove the primer before topcoat. Blistering appears as small bubbles or raised areas, indicating moisture or contamination underneath. These won’t improve with time. Testing methods include the tape test (press painter’s tape firmly against primer, wait 10 seconds, pull off at 90 degree angle) and thumbnail test (press firmly and see if primer dents, which means incomplete drying). When primer fails these tests after extended drying time, removal and proper surface prep before reapplication is the only solution that works long term.
Comparing Popular Stain Blocking Primer Brands and Their Dry Times

Manufacturer instructions and product specs give you the most accurate drying time estimates. Generic advice helps with planning, but specific products perform differently based on their exact formula.
| Product | Base Type | Touch Dry | Recoat Time | Best For |
|---|---|---|---|---|
| Zinsser BIN | Shellac | 45 minutes | 1-2 hours | Severe stains, smoke damage, water stains, odor sealing |
| Kilz Original | Oil-based | 6-8 hours | 24 hours | Water stains, smoke damage, tannin bleed, heavy odors |
| Bulls Eye 1-2-3 | Water-based | 30-60 minutes | 1-3 hours | Light to moderate stains, general purpose sealing, low odor needs |
| Coverstain | Oil-based | 4-6 hours | 16 hours | Stain blocking, graffiti coverage, problem surfaces |
While these are typical ranges from technical sheets, actual performance changes with temperature, humidity, and how you apply it. Always do touch dry testing before proceeding with topcoat no matter what the label says. A product listing 2 hour recoat time means under ideal conditions (70°F, 50% humidity, thin application, good ventilation). Your 55°F basement with 70% humidity and thick application might need 6 hours for the same result. Check the manufacturer website for technical sheets that include drying times at various temperature and humidity combinations, which helps set realistic expectations for your specific conditions.
Final Words
Stain blocking primer drying time ranges from 30 minutes to 24 hours depending on what you’re using and where you’re working.
Water-based formulas get you back to painting fastest in good conditions. Oil-based and shellac primers need more patience but deliver serious stain coverage when you’re dealing with smoke damage or tannin bleed.
Temperature, humidity, and how thick you roll it on matter just as much as the product you choose.
Test before you topcoat, even if the clock says you’re good to go. A little extra wait time beats repainting peeling spots next month.
FAQ
How long does stain blocking primer take to dry before painting?
Stain blocking primer typically takes 30 minutes to 8 hours to become touch dry, depending on the primer type, with recoat times ranging from 1 to 24 hours. Water based primers dry fastest at 30 minutes to 1 hour touch dry, shellac primers at 45 minutes to 1 hour, and oil based primers require 6 to 8 hours before they’re ready for a second coat or topcoat.
Is ProBlock a good primer?
ProBlock functions as a reliable water based stain blocking primer that dries quickly and handles moderate water stains and odor sealing, though shellac based or oil based primers provide better coverage for severe smoke damage, nicotine stains, or tannin bleed. It offers a good balance between fast drying time and stain coverage for typical interior wall repair situations.
Do you have to wait 24 hours for primer to dry?
You don’t have to wait 24 hours for all primers to dry, as water based and shellac primers are often ready for recoating in 1 to 3 hours. Oil based primers typically require longer, with 8 to 24 hours being standard for full cure and sandable finish, though touch dry happens around 6 to 8 hours under good conditions.
How many coats of stain blocker do I need?
You typically need one coat of stain blocking primer for new drywall or light stains, but severe water stains, smoke damage, nicotine stains, or tannin bleed usually require two coats for complete color bleeding prevention. Porous surfaces like raw wood or unfinished plaster may also need a second coat application to achieve proper stain coverage and sealing.
What makes shellac primer dry faster than oil based primer?
Shellac primer dries faster than oil based primer because alcohol evaporates more quickly than petroleum solvents, allowing shellac to reach touch dry in 45 minutes to 1 hour compared to 6 to 8 hours for oil formulations. This makes shellac the fastest option for rush jobs while still providing excellent stain blocking for water stains and smoke damage.
Can I paint over primer if it feels dry to the touch?
You can paint over primer when it’s touch dry only if you’re within the early recoat window specified on the product label, which allows chemical bonding for superior adhesion. If you wait beyond this window, the primer needs to fully cure and may require light sanding for mechanical bonding to prevent peeling and poor topcoat compatibility.
Why is my stain blocking primer still tacky after 12 hours?
Your stain blocking primer remains tacky after 12 hours likely because of thick coverage that trapped solvents underneath, high humidity levels, poor air circulation, or temperatures below 50°F that slow evaporation. Contaminated surfaces with grease, wax, or moisture in the substrate can also prevent proper drying and adhesion.
Does temperature really matter for primer drying time?
Temperature significantly affects primer drying time, with the ideal range being 50 to 85°F for proper curing and solvent evaporation. Cold weather below 50°F can double or triple drying time, while temperatures above 85°F may cause surface skinning before the primer cures underneath, leading to adhesion problems and cracking.
What’s the difference between touch dry and recoat time for primer?
Touch dry means the primer surface feels dry when lightly touched but hasn’t fully cured, while recoat time indicates when a second coat or topcoat can be safely applied without causing adhesion problems. Touch dry happens much faster, often within 30 minutes to 1 hour for water based primers, but recoat time requires 1 to 3 additional hours for proper chemical bonding.
How do I know if primer is fully cured before painting?
Primer is fully cured when it no longer smells like solvents, feels completely hard when pressed with a thumbnail, and shows no tackiness or transfer when rubbed with light pressure. For oil based primers, this typically takes 24 hours, while water based and shellac primers often cure in 3 to 8 hours under good ventilation and temperature conditions.