
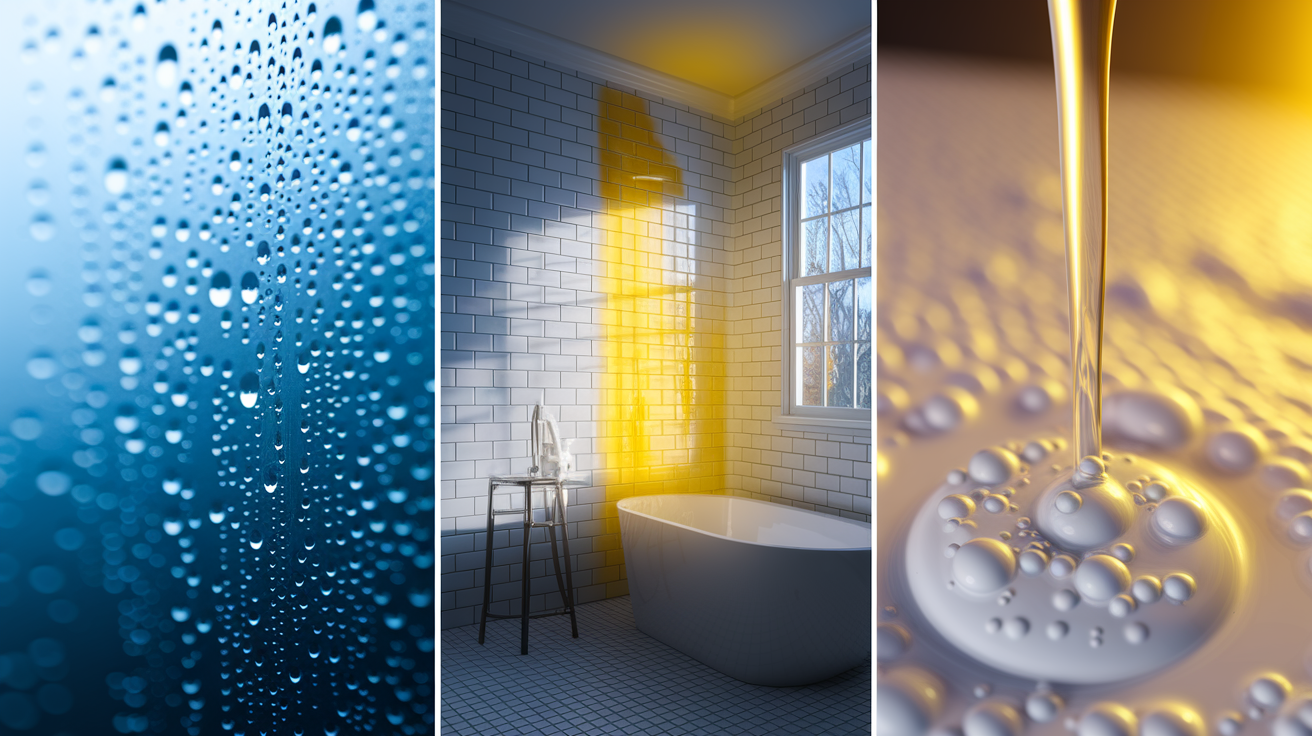
You’ve probably told yourself, “It’s just yellowed caulk, I’ll deal with it later.” Here’s the thing: later usually means when it’s cracked, peeling, or growing something fuzzy. Most yellowed silicone isn’t doomed yet. With the right method and 20 minutes of actual effort, you can restore brightness and push off a messy recaulking job for months or even years. This guide walks you through three proven cleaning methods, what causes yellowing in the first place, and the exact moment when cleaning won’t help and replacement is your only real option.
Effective Methods for Restoring Discolored Silicone Caulk

Yellowed silicone doesn’t always mean you’re stuck replacing it. Most of the time, the right cleaning approach brings back brightness and buys you months or even years before you need to recaulk. What matters is picking the right method and actually doing it correctly.
Start with prep work. Wipe down loose dirt, soap buildup, and general bathroom grime with a damp cloth so your cleaner can actually touch the caulk instead of sitting on top of crud. Let everything dry completely before you apply paste cleaners, since moisture waters down the mixture and kills effectiveness. Do a quick test scrub with a wet toothbrush on the yellowed spot. This tells you whether you’re dealing with surface staining that’ll come off or deeper problems like cracks and hidden mold, which means you’re looking at replacement no matter what you try.
Three cleaning methods that actually work, strongest to gentlest:
-
Hydrogen peroxide and baking soda paste – Mix ¼ cup baking soda with enough hydrogen peroxide to get a peanut butter consistency. This one’s your best bet for stubborn yellowing that’s been sitting for months. Slap it on thick and let it sit 20 to 30 minutes before scrubbing.
-
White vinegar and baking soda paste – One part baking soda, one part white vinegar. Gentler option for everyday yellowing without harsh stuff. Give it 15 to 30 minutes before working it in.
-
Bleach solution – One part bleach to 10 parts water (¼ cup bleach per gallon of water). Strongest whitening power but only works on white or clear silicone. Never use this on colored caulk. Apply with a sponge or cotton ball, wait 5 to 10 minutes max, then rinse right away.
Once you’ve picked your cleaner, application stays pretty much the same. Get it onto all the yellowed spots with an old toothbrush or sponge, pushing into seams and corners where discoloration hides. Cover every stain with enough product that it won’t dry out while it sits. Let it work for the right amount of time based on what you’re using, then scrub gently in circles with a soft brush. Don’t press hard enough to rough up the caulk.
Finishing makes or breaks whether your cleaning actually lasts. Rinse everything thoroughly with clean water, going over it multiple times to get every bit of cleaner off. Leftover product attracts dirt and causes new staining within days. Dry completely with a microfiber cloth, wiping in long strokes along the caulk line. Standing water brings back the exact moisture problems you just tried to fix. Look closely once it’s dry. If some yellowing’s still there, you can do another round after everything dries.
Results depend on how bad the discoloration is and what caused it. Surface yellowing from soap scum and minerals responds well. Deep oxidation from years of sun exposure or chemical breakdown might only lighten partway.
Safety beats speed every time. Never mix bleach with vinegar or ammonia. This creates chlorine gas that can seriously mess up your lungs even in small amounts. Keep your bathroom ventilated by running the exhaust fan or cracking a window during cleaning and for 30 minutes after. Wear rubber gloves to protect your hands, especially with bleach. Add goggles when you’re working overhead or in tight spots where stuff could splash toward your face.
Understanding Why Silicone Caulk Turns Yellow
Three things turn your caulk yellow: bathroom conditions, reactions with cleaning products, and biological growth like mold. Knowing which one’s hitting your caulk helps you pick the right cleaning approach and stop the same yellowing from coming back in a few weeks.
Moisture and humidity cause most bathroom yellowing. Shower and tub areas stay damp for hours after use, and that constant wetness traps organic particles, soap residue, and minerals from your water in the caulk’s texture. When heat from hot showers combines with these trapped particles, they oxidize and create a yellowish or brown tint that starts faint but gets darker over months. High traffic bathrooms and homes in humid areas see this happen faster than guest bathrooms in dry climates.
UV exposure works slower but just as effectively. Sunlight through bathroom windows and even overhead lighting gradually breaks down the compounds that give silicone its flexibility and color. This oxidation turns white caulk yellow or amber, and clear caulk gets a cloudy yellow haze. The damage goes deeper than the surface, which is why UV yellowed caulk sometimes doesn’t respond well to cleaning. Harsh cleaners make it worse instead of better. Products with bleach, ammonia, or strong alkaline ingredients react with silicone’s structure. Each use weakens the sealant slightly and speeds up discoloration, creating a cycle where aggressive cleaning causes the exact yellowing you’re trying to prevent.
Knowing whether you’re dealing with trapped debris, UV breakdown, or chemical damage tells you which cleaning method to try first and whether to expect full color restoration or just some improvement.
Essential Tools and Safety Gear for Caulk Cleaning
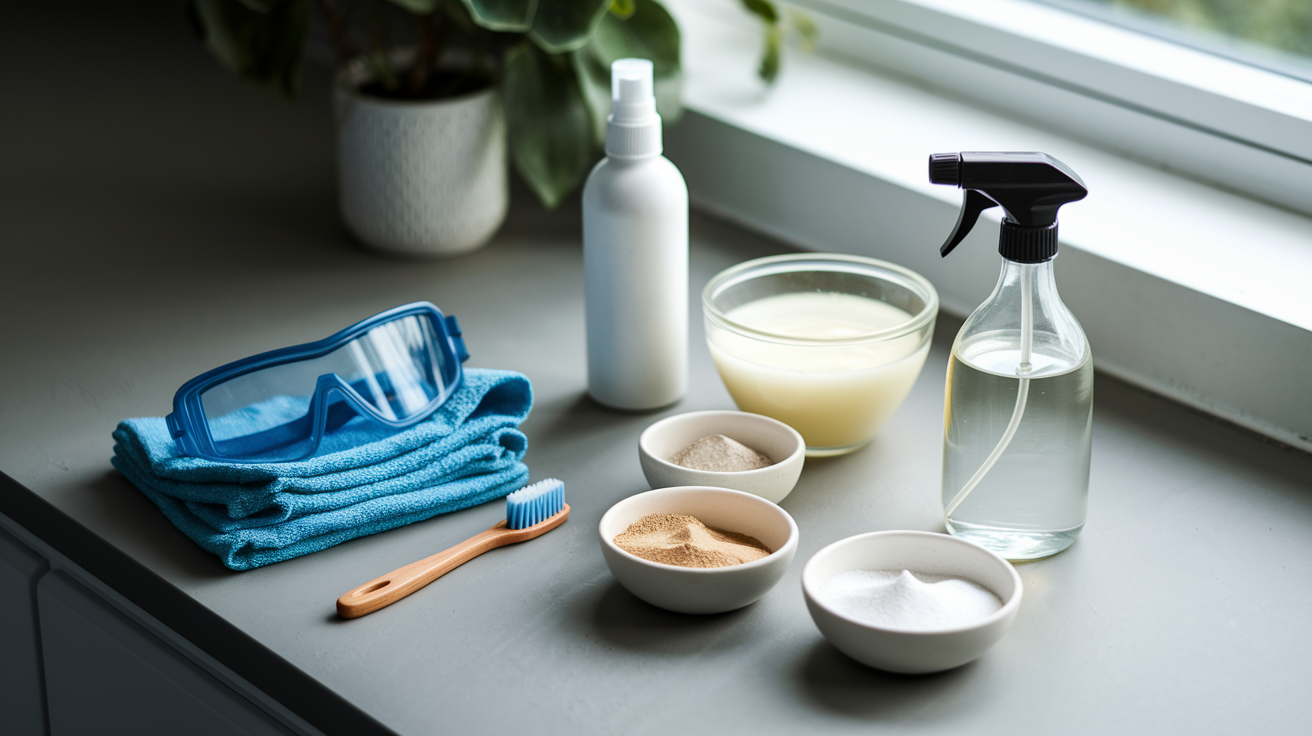
Get your stuff together before you start. This prevents mid project store runs and keeps you from damaging caulk with improvised tools that are too rough. You probably already have most of this.
- Old toothbrush or soft bristle brush for applying and scrubbing
- Spray bottle for liquid solutions
- Rubber gloves to protect your hands
- Protective eyewear or goggles, especially for overhead work
- Microfiber cloth or paper towels for drying
- Small mixing bowl for pastes
- Sponge or cotton balls for spot applications
- Exhaust fan or open window for ventilation
- Bucket of clean rinse water
Safety matters as much as the cleaning solution. Don’t use wire brushes, abrasive pads, or anything with stiff bristles that could scratch and rough up the silicone. Damaged caulk traps dirt faster and loses waterproofing even if it looks okay. Bleach based methods need the most caution. Always wear gloves and goggles, keep the room ventilated with a fan running or windows open, and never work in an enclosed space where bleach fumes build up. The most important safety rule is never mixing bleach with vinegar or ammonia. This creates chlorine gas that can cause serious respiratory damage in minutes. Even if you’re switching from one cleaning method to another, rinse thoroughly and let everything dry completely before applying a different product. Good airflow isn’t optional in small bathrooms where chemical fumes concentrate fast.
When Cleaning Won’t Work: Assessing Caulk Damage

Not every yellowed caulk line deserves another cleaning attempt. Sometimes discoloration signals deeper structural failure, and scrubbing just wastes time you could spend on proper replacement. Learning the difference saves frustration and prevents water damage that failing caulk can’t stop anymore.
Signs you need replacement instead of cleaning:
- Visible cracking or peeling that exposes gaps where water can get through
- Persistent mold that comes back within days or weeks after deep cleaning
- Loss of flexibility where caulk pulls away from tile, tub, or walls
- Vertical cracking along the line indicating rot behind the sealant
- Permanent yellowing that doesn’t lighten at all despite multiple cleaning attempts with different methods
- Visible gaps at joints where fixtures meet walls or where two caulk lines intersect
Bacteria and mold don’t just sit on the surface creating ugly stains. Over time, they eat into the silicone itself, breaking down its structure and weakening the bond between caulk and the surfaces it’s sealing. This biological damage reduces waterproofing even if the caulk line looks mostly intact from a distance. Once mold gets established beneath the surface, no amount of scrubbing or bleach kills it because the roots go deeper than cleaning solutions can reach. The yellowing you see is just the visible part of more extensive damage happening inside. At that point, removal and fresh application is the only thing that actually fixes the problem instead of temporarily hiding it. Protecting your home from water damage means knowing when cosmetic cleaning has turned into a waterproofing failure that needs proper attention.
Commercial Products Versus Homemade Caulk Cleaners
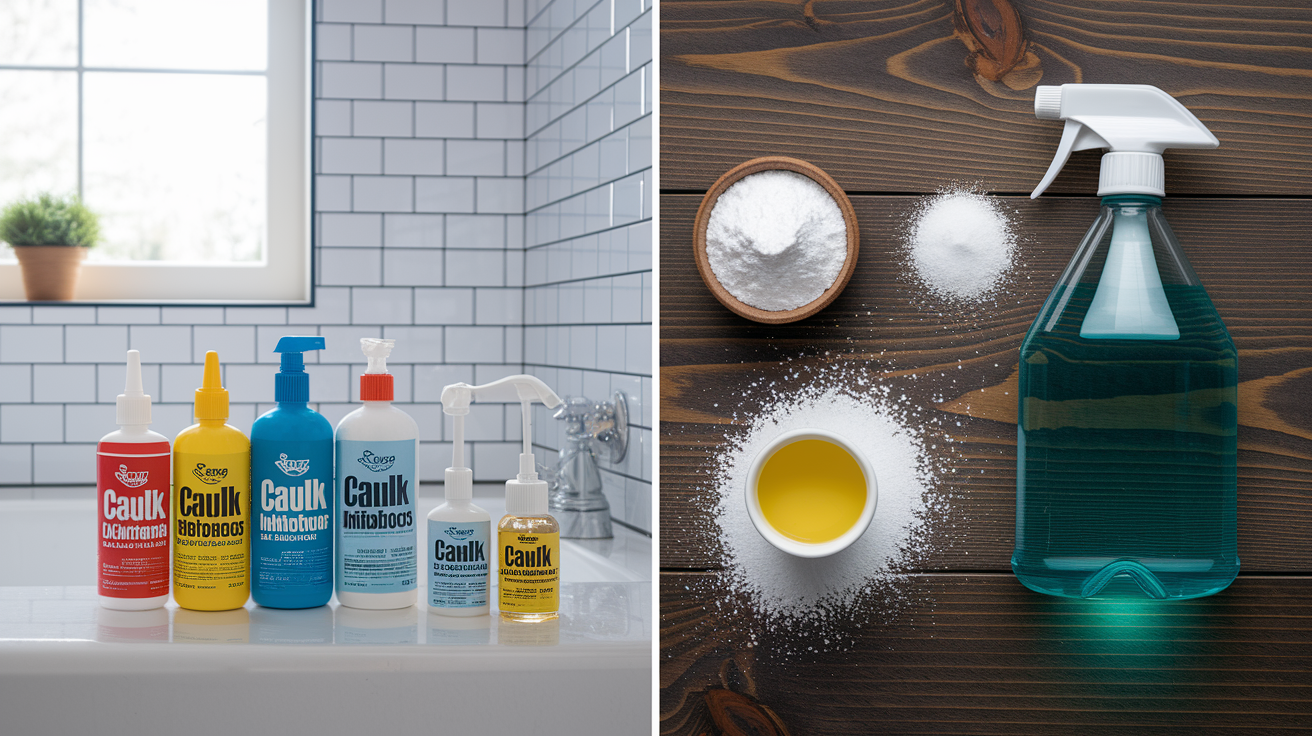
You’ve got two options for cleaning yellowed caulk: store bought products or DIY solutions from household items. Both work, but they come with different trade offs in cost, convenience, and what they’re safe to use on.
| Cleaner Type | Pros | Cons | Cost Range |
|---|---|---|---|
| Hydrogen peroxide and baking soda paste | Strong whitening power, safe for colored caulk, common household items | Requires mixing, longer sitting time, can be messy | $3-5 total |
| Vinegar and baking soda paste | Gentlest option, non-toxic, good for regular maintenance | Less effective on severe yellowing, acidic smell during application | $2-4 total |
| Bleach solution | Most powerful whitening, kills mold and mildew, inexpensive | Harsh fumes, requires ventilation, can damage colored caulk, speeds up deterioration with repeated use | $1-3 total |
| Commercial mold and mildew sprays | Ready to use, targeted formulas for bathrooms, trigger spray application | More expensive, may contain harsh chemicals that damage silicone over time, strong chemical odor | $5-12 per bottle |
| Grout whitener pens | Fast application, dries in 1 hour, covers stains instead of removing them | Cosmetic coating that wears off, doesn’t address underlying mold, needs reapplication every few months | $8-15 per pen |
Commercial products give you grab and spray convenience without measuring or mixing. Many are made specifically for bathroom surfaces and include mold inhibitors or surfactants that help lift soap scum. The downside is cost, especially if you’re cleaning multiple bathrooms or dealing with recurring yellowing that needs frequent treatment. They also tend to have stronger chemical ingredients that can react badly with silicone over time, creating the same discoloration problems you’re trying to fix.
Homemade solutions cost a fraction of commercial products and use ingredients that won’t chemically break down your caulk with repeated use. Vinegar, baking soda, and hydrogen peroxide work through physical and mild chemical action without the harsh alkalines or solvents in many store bought cleaners. They do need more prep time and active effort, and you need to mix fresh batches since they don’t store well once combined.
Material compatibility deserves attention regardless of which you choose. Some commercial bathroom cleaners contain ammonia or caustic ingredients that slowly break down silicone’s structure. If a product warns against use on certain plastics or needs ventilation beyond “use in well ventilated area,” it’s probably too aggressive for regular caulk maintenance even if it whitens effectively short term.
Cleaning Yellowed Caulk in Different Bathroom Locations

Caulk around your shower sees different abuse than the line behind your sink, and kitchen sink caulk faces its own challenges. Adjusting your approach based on location improves results and prevents damage to surrounding surfaces.
Shower and bathtub caulk gets the most severe moisture exposure in your home. These areas stay wet for extended periods after every use, creating constant humidity that speeds up yellowing from trapped soap residue and mineral deposits. Focus your cleaning on seams where tile meets fixtures, along bathtub edges where water pools, and in corners where two walls meet. These spots trap the most moisture and develop the darkest discoloration. For vertical caulk lines, apply your cleaning solution from bottom to top rather than letting it drip down, which dilutes the mixture and creates uneven results. Work in small sections so you can scrub each area while the solution’s still active.
Sink and countertop caulk deals with different problems. Kitchen and bathroom sink areas face hard water splashing that leaves mineral deposits, plus food particles near kitchen sinks that create discoloration different from typical soap scum yellowing. Use gentler cleaning methods near porous surfaces like natural stone countertops, since harsh chemicals or acidic solutions can etch or stain the material next to your caulk. Pay close attention to joints where fixtures meet walls or where countertops join backsplashes. These horizontal and vertical intersections trap debris and moisture in ways that create concentrated yellowing patterns.
Grout lines running alongside your caulk often need simultaneous cleaning for the whole area to look uniform. Discolored caulk next to bright white grout, or the other way around, makes both look worse than they actually are.
Preventing Future Yellowing and Discoloration

Stopping yellowing before it starts takes less time and effort than repeated deep cleaning. Most prevention comes down to controlling the moisture and residue that cause discoloration in the first place.
Moisture control makes the biggest difference in how long your caulk stays white. Run your bathroom exhaust fan during showers and for 20 to 30 minutes after to pull humid air out before it condenses on cool caulk surfaces. Wipe down wet caulk areas with a towel after each use, especially bathtub edges and sink perimeters where water pools. Keep your bathroom door open when nobody’s using it to promote air circulation and prevent humidity from hanging around. In bathrooms without windows or with weak exhaust fans, a small dehumidifier pulls moisture from the air and dramatically slows yellowing, especially in humid climates or basement bathrooms.
Cleaning routines catch yellowing while it’s still easy to remove. Weekly maintenance with a gentle dish soap solution (a few drops in a cup of warm water) applied with a soft cloth prevents soap scum and mineral buildup from bonding to the caulk. This takes two minutes per bathroom and eliminates the need for aggressive scrubbing later. Monthly inspections let you spot early yellowing before it becomes permanent. Look closely at high moisture areas and address faint discoloration right away with a quick vinegar treatment instead of waiting until it needs bleach or repeated applications. Avoid harsh chemical cleaners for routine maintenance. Products with bleach, ammonia, or strong alkalines speed up the chemical breakdown that causes permanent yellowing even while they appear to clean effectively in the moment.
Product selection matters when it’s time to recaulk. Choose high quality mold resistant or bathroom specific silicone sealant rather than general purpose or economy caulk that yellows faster under moisture exposure. The price difference is a few dollars per tube, but performance gaps are significant. Look for silicone labeled specifically for bathrooms or kitchens, and consider products with antimicrobial additives for high moisture areas like shower stalls or around bathtubs that see daily use. Better caulk costs more upfront but extends the time between replacement projects by years, not months. These prevention strategies work together for best results. Good ventilation combined with regular gentle cleaning and quality materials means you’ll spend less total time on caulk maintenance than you would with repeated emergency deep cleaning sessions.
Troubleshooting Common Caulk Cleaning Problems

Some yellowing resists standard cleaning and needs specific solutions. Here’s how to address the most frustrating problems.
Yellowing Returns Within Days After Cleaning
When discoloration comes back almost immediately after thorough cleaning, you’re not dealing with surface staining. This means mold growth beneath the caulk surface where cleaning solutions can’t reach. Your scrubbing only addresses the visible yellow or black spots on top while the mold roots stay alive and active underneath, spreading back across the surface within days or weeks. Persistent return of discoloration after multiple cleaning attempts with different methods signals that the caulk has reached the end of its life. The mold has penetrated deep enough that removal and replacement is the only thing that actually fixes the problem instead of temporarily hiding it.
Cleaning Method Left Residue or New Stains
Incomplete rinsing leaves cleaning product residue that attracts dirt and creates new discoloration different from the original yellowing. White streaks, hazy film, or sticky texture means you need to rinse more thoroughly. Go over the entire area multiple times with clean water and a sponge, then dry completely with a microfiber cloth. Mixing incompatible cleaners creates either useless compounds or dangerous reactions. Combining vinegar and baking soda causes a fizzy reaction that neutralizes the cleaning properties of both ingredients, leaving you with just salt water that does nothing. Mixing bleach with ammonia or with vinegar creates toxic chlorine gas. If you accidentally combined products, get out immediately, ventilate thoroughly, rinse the caulk with plain water multiple times, and let it dry completely before trying a different single ingredient method.
Stubborn Stains Won’t Lighten Despite Multiple Treatments
Surface yellowing responds to cleaning, but permanent discoloration from UV oxidation or deep chemical breakdown won’t lighten no matter how many times you scrub or how long you let solutions sit. If you’ve tried hydrogen peroxide paste, vinegar paste, and bleach solution without improvement, the yellowing has become part of the caulk’s structure rather than a surface layer you can remove. Hard water mineral deposits and soap scum sometimes create stubborn stains that resist whitening methods because they’re not actually yellowing. They’re a buildup of calcium, magnesium, or soap residue that needs descaling products with chelating agents rather than whitening treatments. Deeply embedded stains that won’t respond to any cleaning method mean the caulk has reached the end of its lifespan. Continued cleaning attempts waste time and supplies on a problem that needs replacement rather than restoration.
Alternative Whitening Options for Silicone Sealant
When yellowing’s too severe for traditional cleaning but your caulk is still structurally sound without cracks or gaps, whitening products offer a middle ground that buys you time before full replacement becomes necessary. These products work differently than cleaning by covering discoloration rather than removing it.
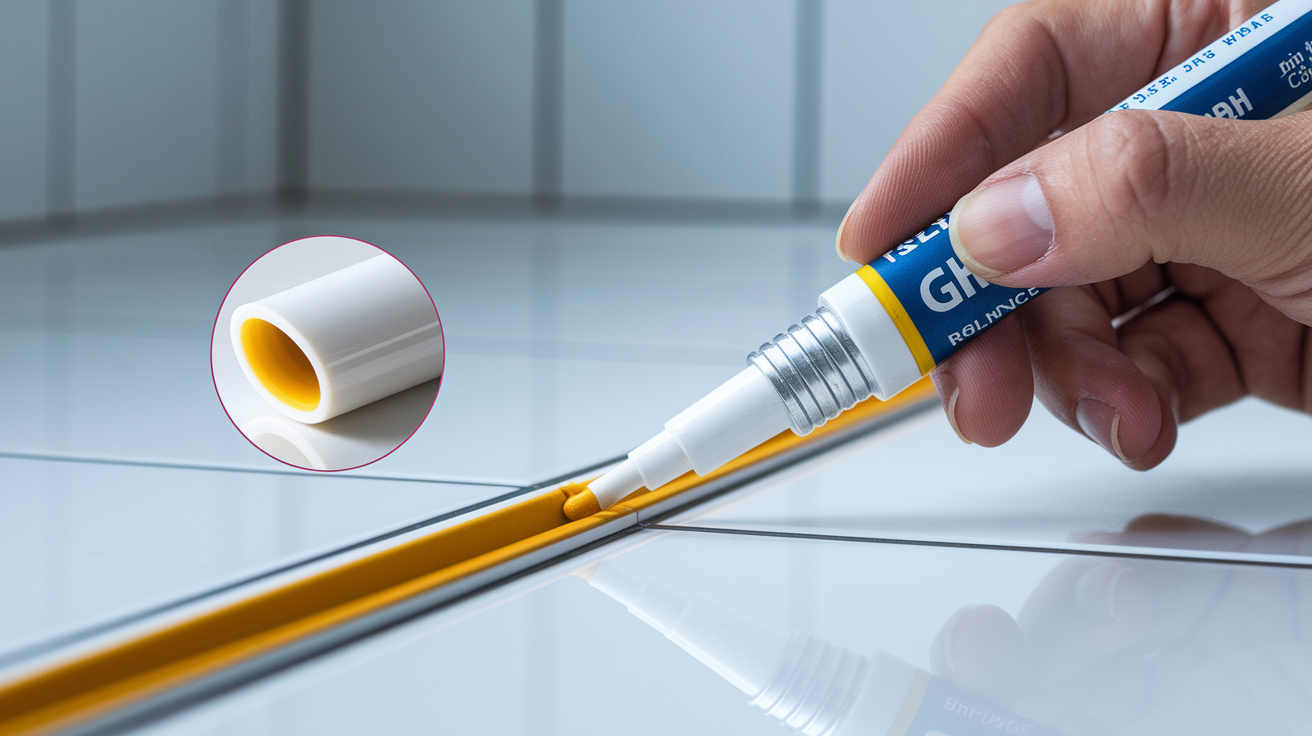
Grout whitener pens apply a white coating over yellowed caulk and grout lines, creating a fresh appearance without the scrubbing or harsh chemicals needed for deep cleaning. The GE Grout Whitener Pen is designed specifically for this and dries in just 1 hour, with the option to apply a second coat after the first dries for better coverage and brighter results. These pens work best on lightly textured caulk rather than perfectly smooth surfaces, since the coating needs some texture to grip. The trade off is this solution is purely cosmetic and temporary, providing an appearance boost that typically lasts several months with proper care before wearing away in high traffic areas.
Application technique determines how long the whitening lasts and how natural it looks. Clean and dry the caulk thoroughly before applying any whitener, since the coating won’t stick properly to dirty or damp surfaces. Remove all soap scum, mineral deposits, and surface mold with one of the gentler cleaning methods, rinse completely, and let the area dry for at least a few hours or overnight. Apply thin, even coats following the product directions rather than trying to cover severe yellowing with one thick application, which creates an uneven, chalky appearance that chips off quickly. Allow full curing time before exposing the area to water. Most whitening products need 24 hours before they can handle moisture without washing away, even if the surface feels dry to the touch after an hour.
Understand that whitener pens work best as a maintenance tool to extend time between deep cleanings or to postpone recaulking by several months when budget or time doesn’t allow for immediate replacement. They don’t address underlying mold growth, structural damage, or the conditions causing yellowing in the first place. If discoloration returns within weeks even after applying fresh whitener, that’s a clear signal that mold beneath the surface is too established for cosmetic solutions and proper caulk replacement is the next step.
Final Words
Yellowed caulk doesn’t always mean replacement is your only option.
Mix your cleaning solution, scrub gently, rinse thoroughly, and let it dry completely. If the first pass doesn’t get you all the way there, a second round often does the trick.
Keep moisture down with regular wipe-downs and good ventilation, and you’ll stretch the time between cleanings.
When learning how to clean yellowed silicone caulk, the right method matched to your situation makes all the difference.
FAQ
How do you whiten yellowed silicone caulk?
You whiten yellowed silicone caulk by applying a paste made from baking soda and hydrogen peroxide, letting it sit for 20-30 minutes, then scrubbing gently with a soft brush and rinsing thoroughly. For lighter yellowing, use a vinegar and baking soda paste with a 15-30 minute dwell time, or try a diluted bleach solution for the strongest results.
Can you reverse silicone yellowing?
You can reverse silicone yellowing if the discoloration is surface-level from soap scum, mineral deposits, or light oxidation. Deep cleaning with hydrogen peroxide paste, vinegar solutions, or diluted bleach often restores the original white appearance. However, permanent yellowing from UV breakdown or chemical reactions in aged caulk won’t respond to cleaning and requires replacement.
Why does silicone caulk turn yellow?
Silicone caulk turns yellow primarily from moisture and humidity trapping organic particles, UV light breaking down silicone compounds over time, and harsh cleaners containing bleach or ammonia reacting with the caulk. Bathroom areas with constant water exposure, sunlight from windows, and strong chemical cleaners accelerate this discoloration process.
Can you make silicone white again?
You can make silicone white again through targeted cleaning methods if the yellowing hasn’t penetrated too deeply into the material. Hydrogen peroxide and baking soda paste works for stubborn stains, while gentler vinegar-based solutions handle everyday discoloration. If cleaning fails after two attempts or yellowing returns within days, the caulk has likely deteriorated beyond surface repair and needs replacement.
When should you replace yellowed caulk instead of cleaning it?
You should replace yellowed caulk instead of cleaning it when you see vertical cracking, peeling that exposes gaps, persistent mold returning within days after cleaning, or loss of flexibility causing the caulk to pull away from surfaces. These signs indicate structural failure rather than surface staining, meaning cleaning won’t restore waterproofing ability or prevent water damage.
How often should you deep clean bathroom caulk?
You should deep clean bathroom caulk every one to two months for most homes, with monthly cleaning recommended in humid climates or high-use bathrooms. Weekly maintenance using gentle dish soap solution prevents buildup between deep cleaning sessions. Run the exhaust fan during and 20-30 minutes after showers, and wipe down wet caulk areas to reduce yellowing frequency.
Is bleach or hydrogen peroxide better for yellowed caulk?
Hydrogen peroxide is generally better for yellowed caulk because it whitens effectively without the harsh chemical reactions that bleach can cause with silicone. Bleach solution works faster and stronger but accelerates future discoloration on some caulk types and requires more safety precautions including gloves, eye protection, and ventilation. Choose hydrogen peroxide for regular maintenance and bleach only for severe non-colored caulk staining.
What safety gear do you need when cleaning caulk?
You need rubber gloves, protective eyewear or goggles, proper ventilation through an exhaust fan or open windows, and old toothbrushes or soft bristle brushes when cleaning caulk. Bleach-based methods require the most protective equipment due to fume risk. Never mix bleach with vinegar or ammonia as this creates dangerous chemical reactions.