
Most gutter leaks don’t just happen. They build up slowly while you’re not looking, and by the time you notice water dripping behind the downspout or staining your siding, the damage is already spreading. Here’s the thing. You can actually stop most leaks before they start, and it doesn’t take special skills or a bunch of expensive tools. Clean channels, sealed joints, proper slope, and knowing what to check twice a year will keep water moving where it belongs instead of testing every weak spot until something gives. This guide walks you through the prevention steps that actually work.
Essential Prevention Methods for Leak-Free Gutters

Most gutter leaks come from things you can actually prevent. Debris piles up, water can’t move like it should, and seams that were fine last year start to let water through. When leaves and twigs pack into the channel, water backs up and finds the weakest point. If your gutters don’t slope right, water just sits there testing every joint longer than it needs to. Seals at corners and downspout connections don’t fail overnight, they crack a little more with each storm. And if you’ve got metal gutters, rust or sun damage creates tiny holes that turn into real problems.
Here’s the thing about maintenance. It costs way less than fixing what happens when gutters fail. Water that escapes doesn’t just vanish. It gets into fascia boards, runs down your siding, pools next to your foundation, ends up in your basement. Foundation work runs thousands. So does mold cleanup. Replacing rotted trim and dealing with stained siding adds up fast. Spending a few hours twice a year beats dealing with water damage for weeks.
Gutter Cleaning and Debris Removal Essentials

Debris causes leaks two different ways. First, wet leaves weigh more than you’d think. A foot of packed, soggy material can stress a seam or pull hangers loose. Second, standing water sits against connections way longer than it should, finding gaps you can’t even see and turning them into drips. Pine needles are actually worse than regular leaves because they mat together and block everything. Twigs jam into downspout openings and create dams.
You need to clean gutters at least twice a year. Once in late spring after pollen and seed pods finish dropping, once in late fall after leaves come down. Got pine trees or branches hanging over your roof? Add a mid-summer cleaning. Heavy tree cover might mean you’re doing this quarterly.
Start at the downspout, work back toward the roof edge. Scoop out the big stuff with a plastic scoop or just use gloved hands. Drop it in a bucket hanging from your ladder, not on the ground where you’ll rake it later. Once the bulk is out, flush everything with a garden hose. Start at the far end, work toward the downspout. Water should move smoothly without pooling. If it backs up, something’s blocking the downspout outlet. Feed the hose in from the top and flush until water runs clear at ground level.
Maintaining Proper Gutter Slope and Pitch

Gutters can’t be level. They need a slight pitch. The right slope is 1/4 inch of drop for every 10 feet, angled toward the downspout. This keeps water moving instead of sitting. When pitch is off, water pools in low spots and tests every seam in that section.
Check for standing water a day after rain stops. Climb up and look inside the channel. See puddles? The slope needs work. From the ground, sight down the gutter line. Sagging shows up as dips or waves in what should be straight.
Loose or damaged hangers let gutters sag and lose their pitch. Hangers should be spaced every 24 inches in most places, closer if you get heavy snow. Hidden hangers inside the channel work better than old spike systems because they grip without punching holes through the gutter bottom. Check each hanger by pulling down gently on the gutter edge. It shouldn’t move more than a quarter inch.
If a section sags, tighten or add hangers there. For hidden hangers, you’ll need to remove the gutter to get at the mounting bracket. That’s probably a job for a pro unless you’re comfortable with it. For minor fixes to spike systems, just drive the spike back in hard or swap it for a longer one that bites into fresh wood.
Sealing Gutter Joints and Seams
Joints fail because materials expand when it’s hot and contract when it’s cold. A 40-foot gutter can change length by a quarter inch between summer and winter. That movement stresses every connection. Age makes sealants brittle. Cracks form. Weight from debris, ice buildup, leaning ladders against gutters, all of it speeds up separation.
The spots that leak first are downspout outlets where the gutter meets the drop tube, corner miters where two sections meet at an angle, and end caps that close off the channel. Check these first.
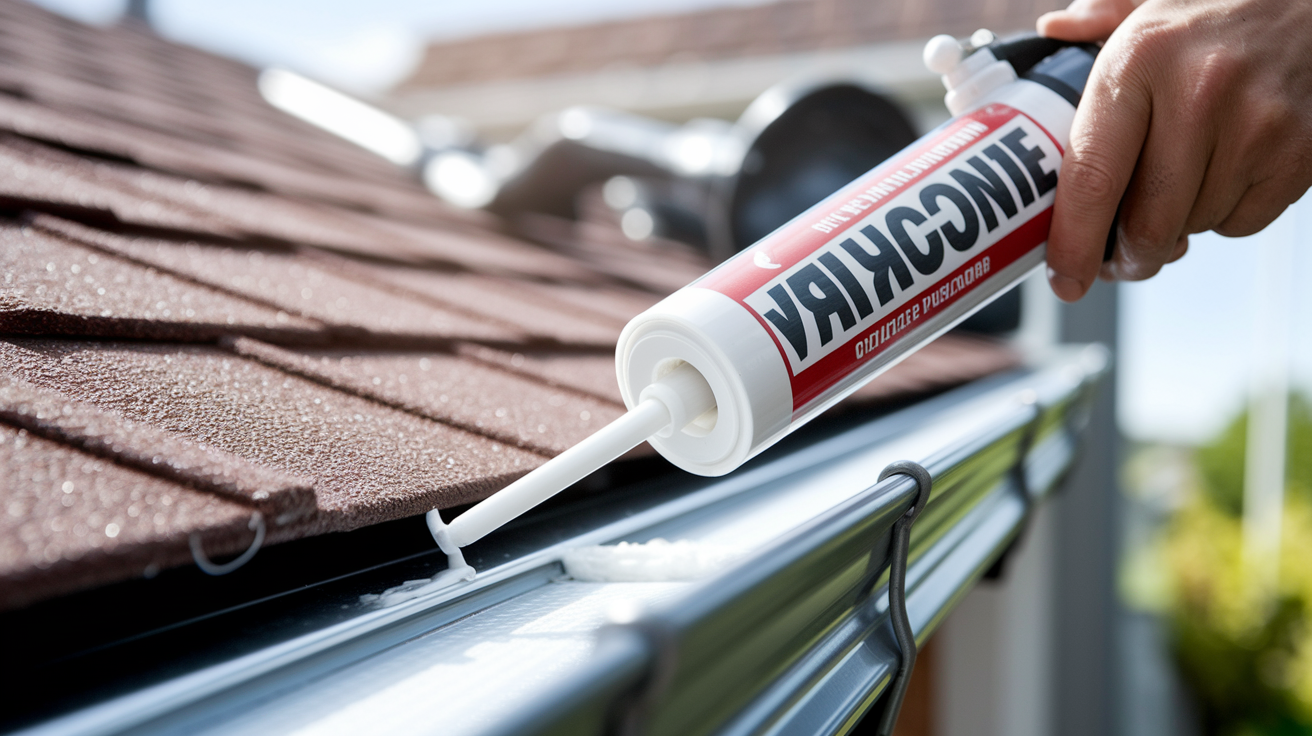
What you need for sealing repairs:
- Gutter sealant or 100% silicone caulk rated for outdoors
- Wire brush or coarse rag for prep
- Mineral spirits for cleaning old sealant
- Caulk gun
- Disposable gloves
Clean the area completely before you apply new sealant. Old caulk has to come off or the new stuff won’t stick. Scrub the metal or vinyl with a wire brush, wipe with mineral spirits, let it dry. Run a continuous bead of sealant along the joint, press it into the gap with a gloved finger or caulk tool. Gutter sealant is thicker than regular caulk and stays flexible longer, which matters for joints that move. Let it cure 24 hours before testing with water. If the joint separated more than a quarter inch or the gutter material cracked around the connection, sealant won’t hold. You need to replace that section.
Repairing Holes, Cracks, and Rust Damage
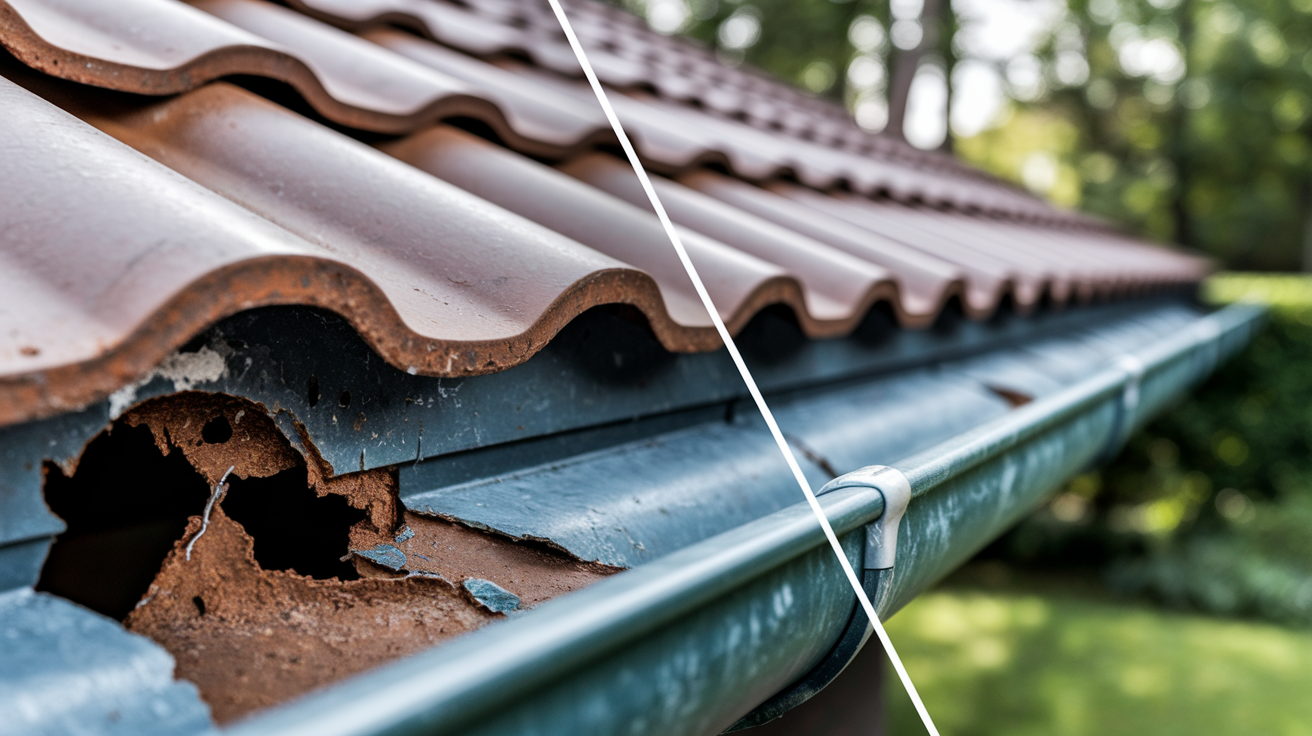
Small holes and hairline cracks, you can patch. Extensive rust, large holes bigger than a quarter, structural weakness? That section needs replacing.
Small Hole and Crack Repairs
Clean the damaged spot down to bare material with a wire brush or sandpaper. Wipe away dust with a damp cloth, let it dry completely. For pinholes and cracks up to an inch long, apply waterproof gutter sealant right over the damage, spread it a half inch past the edges. For slightly bigger holes up to dime size, use two-part epoxy rated for your gutter material. Mix it according to package directions, apply a thick layer over the hole, smooth it level. Cure times vary. Sealant takes about 24 hours. Epoxy can need 48 to 72 hours for full strength.
When Replacement Becomes Necessary
Replace the section when you find rust that flakes off in chunks, holes bigger than a quarter, multiple cracks in the same area, or metal that bends easily when you press it. Patching these buys you a few months at best. If you’re patching over old patches, the material is done. For sectional gutters, you can swap one 10-foot section without redoing everything. Mark the damaged area, pull the hangers, disconnect from neighboring sections, install a new piece with fresh sealant at the joints.
Preventing rust starts with material choice. Coastal areas or heavy rainfall regions? Avoid galvanized steel gutters unless they’re painted with rust-inhibiting coating. Aluminum resists rust naturally but can corrode from acidic runoff if you have cedar or redwood roofing. High-grade vinyl doesn’t rust at all, which makes it solid for high-moisture climates.
Installing and Maintaining Gutter Guards

Guards cut down how often debris blocks your gutters. Fewer clogs means fewer chances for overflow and the stress that causes leaks. Water flows through the guard while leaves, twigs, pine needles stay on top where wind can blow them off or you can brush them away.
| Guard Type | Best For | Maintenance Need |
|---|---|---|
| Mesh Screens | Standard leaf debris and medium rainfall | Brush off surface debris seasonally |
| Foam Inserts | Light debris and easy DIY installation | Remove and rinse annually, replace every 2-3 years |
| Brush Guards | Pine needles and small debris particles | Pull out trapped debris twice per year |
| Solid Covers | Heavy leaf areas with professional installation | Inspect edges annually, minimal cleaning |
| Micro-Mesh Systems | All debris types including roof grit | Light brushing seasonally, very low maintenance |
Guards don’t wipe out inspection or cleaning completely. They just reduce how often you’re up there and make maintenance faster. Install them right or you create new leak points. Some clip onto the gutter lip, others slide under the first row of shingles. Bad installation can lift shingles, let water flow under the guard instead of into the gutter, or create gaps where debris gets in anyway. If your gutters have a specific pitch, make sure the guard follows that angle instead of flattening it.
Different styles need different care. Mesh screens collect fine debris on top that you brush off with a soft broom a couple times a year. Foam inserts need to come out annually for rinsing because they soak up small particles that slow water flow. Brush guards trap debris between bristles, so you pull them out, shake them clean, put them back. Solid covers and micro-mesh need the least attention, but you still inspect to make sure nothing’s blocking the water entry slot.
Seasonal Inspection and Maintenance Schedule

Different seasons create different leak risks. Spring brings pollen and seed pods that turn into sludge. Summer storms test capacity with heavy rainfall. Fall loads gutters with leaves. Winter creates ice that expands in seams and freeze-thaw cycles that crack sealants.
What to focus on each season:
-
Spring Clean out winter debris and seed pods. Check for damage from ice expansion. Test water flow with a garden hose to make sure all downspouts are clear. Inspect hangers, tighten any that loosened during freeze-thaw cycles.
-
Summer Inspect after major storms for new damage from heavy rain or wind-blown branches. Check that water isn’t overflowing during normal rain, which means clogs or not enough capacity. Trim back tree branches hanging over the roof to cut down future debris.
-
Fall Do your most thorough cleaning after trees drop leaves. This is your last shot before winter to remove debris that’ll trap water and freeze. Inspect all seams and joints before cold weather arrives. Apply fresh sealant to any spots showing early separation.
-
Winter In cold climates, watch for ice dams forming at the roof edge. They can push water back under shingles and into gutters from the wrong direction. Check that downspouts aren’t blocked by ice at ground level. In moderate climates, inspect after any hard freeze for crack damage.
After heavy storms with high winds, fallen branches, or intense rain, do a quick walk around from ground level. Look for visible sagging, water marks on siding below gutters, or gutters pulled away from fascia. Take dated photos of your gutters twice a year so you can track how they’re wearing and catch problems before they leak.
Recognizing Early Warning Signs of Gutter Problems

Catching stuff early keeps minor issues from becoming major leaks that damage your home’s structure. Spotting a small separation before it opens completely saves you from fascia rot and interior water damage.
Look for these during monthly ground checks. You don’t need a ladder for most of them. Just walk around your home and scan the roof line, gutter exteriors, and ground near the foundation.
Warning signs by location:
- Roof line: Water staining or dark streaks on fascia boards right behind gutters
- Gutter exterior: Drips or streams falling from gutter seams during rain, not from downspouts
- Gutter shape: Visible sagging, pulling away from fascia, wavy sections instead of straight lines
- Foundation area: Puddles forming right below gutter runs, mud splatter on foundation walls
- Landscaping: Soil erosion channels or washed out mulch below gutter sections
- Siding: Water stains running down exterior walls between gutter and ground
- Interior walls: Musty smell in rooms right below roof line, especially attics
- Interior ceilings: Water spots, mold growth, peeling paint near exterior walls
During rain, watch your gutters work. Water should flow smoothly into downspouts and exit at ground level through extensions. If water pours over the gutter edge like a waterfall, you’ve got a clog or not enough capacity. If water drips from joints during normal rain, not just heavy storms, those seals are failing.
Proper Downspout Function and Drainage

Downspouts prevent what looks like gutter leaks but is actually overflow. When water can’t exit the system fast enough, it spills over the edge and causes the same foundation damage as an actual leak.
Install one downspout for every 30 to 40 feet of gutter, depending on your roof area and how much rain your region gets. High rainfall areas need downspouts spaced closer. If your roof has a large surface or valleys that concentrate water flow, add extra downspouts at those spots. Undersized systems cause overflow even when gutters are clean and pitched right.
Place downspout outlets to carry water at least 4 to 6 feet away from your foundation. Use splash blocks at ground level or attach extension pipes that direct flow toward yard drainage or away from basement walls. Water dumped right next to the foundation soaks into soil, expands when it freezes, creates the exact problems gutters are supposed to prevent. In areas with basements, this causes seepage through foundation walls and eventually cracks.
Check downspouts for clogs by looking up from the bottom opening. Can’t see daylight? Something’s blocking the tube. Feed a garden hose into the top opening at the gutter, turn on full pressure. If water backs up instead of flowing through, work a plumber’s snake down from the top to break up the clog. Downspout outlets at the gutter are common jam points for leaves and debris, so check there first.
Choosing Leak-Resistant Gutter Materials

Material choice affects how often you’ll deal with leaks over the system’s life. Some materials are more prone to joint separation, corrosion, or crack formation.
| Material | Leak Resistance | Lifespan | Climate Suitability |
|---|---|---|---|
| Aluminum | High when seamless, moderate with seams | 20-25 years | All climates, avoid acidic roof runoff |
| Vinyl (uPVC) | Moderate, joints are weak points | 10-15 years | Best in moderate climates, can crack in extreme cold |
| Copper | Very high, develops protective patina | 50+ years | All climates, premium cost |
| Galvanized Steel | Low, rust is primary failure mode | 15-20 years with maintenance | Dry climates only, requires protective coating |
Seamless gutters get rid of most joint-related leak points because they’re formed as one continuous piece for each run. Joints only exist at inside and outside corners and downspout outlets. Traditional sectional systems have seams every 10 feet where pieces connect, and each seam can leak. If you’re replacing or installing new gutters, seamless costs slightly more upfront but cuts long-term maintenance and leak risk.
Sizing matters as much as material. Gutters too small for your roof area overflow during normal rain, which stresses the system and looks like leaking even when seals are fine. Standard residential gutters are 5 inches wide. Homes with steep roof pitches, large roof areas over 1,500 square feet per gutter run, or regions with intense rainfall need 6-inch gutters. Calculate your roof’s square footage and check rainfall intensity data for your area to size right. A roofing pro can do this calculation during installation to match capacity to actual need.
DIY Leak Repairs You Can Safely Perform
Some repairs are fine for DIY if you’re comfortable on a ladder and the damage is within safe reach. Work on single-story sections where your ladder sits on stable, level ground. Don’t attempt repairs on two-story sections, above hard surfaces like concrete patios, or anywhere the ladder feels unstable.
Five-step DIY repair process:
-
Inspect and identify Climb up, examine the problem area closely. Take photos. Measure any gaps or holes. Figure out if it’s a sealant issue, loose hanger, small hole, or something beyond DIY scope.
-
Gather materials Based on your inspection, collect the specific tools and products needed. For loose hangers, you’ll need a drill and appropriate screws. For sealing work, get gutter sealant or 100% silicone caulk, wire brush, mineral spirits, gloves. For small holes, add two-part epoxy if needed.
-
Prep the repair area Remove old sealant completely with a wire brush. Clean surfaces with mineral spirits, let dry. For loose hangers, check that the fascia board is solid and not rotted. If wood is soft or crumbly, that’s a bigger problem requiring fascia replacement before gutter work.
-
Execute the repair Apply sealant in a continuous bead along separated joints. Tighten or replace loose hangers, spacing them 24 inches apart. Patch small holes with appropriate repair compound. Work carefully, don’t rush cure times.
-
Test and verify After the repair cures (24 to 48 hours depending on product), test with a garden hose. Run water through that section for several minutes, watch for any remaining drips. Check from below that water exits only through downspouts.
Tools you need for most DIY gutter repairs include a stable extension ladder rated for your weight plus 20 pounds, work gloves, safety glasses, a plastic gutter scoop, wire brush, caulk gun, and a cordless drill with bits for wood and metal. For materials, keep gutter sealant (not general-purpose caulk), replacement hangers that match your gutter type, and galvanized screws sized for your fascia board thickness.
When to Contact Professional Gutter Services
Some situations need professional expertise and equipment. Multi-story homes put repair work out of safe DIY reach. Widespread deterioration means the system needs comprehensive assessment and possibly full replacement. Complex roof configurations with multiple valleys, dormers, or unusual angles need precise slope calculations and custom fabrication.
If you’ve repaired the same spot multiple times and leaks keep coming back, the root cause is something you’re not seeing. Could be rotted fascia behind the gutter, roof edge problems above the gutter line, or improper original installation that no amount of patching will fix. Pros have diagnostic experience to identify underlying issues.
Annual professional inspection includes more than visual checks. Pros adjust slope precisely using levels and measuring tools, reseal all joints preventively before they leak, check structural attachment points, verify downspout capacity matches roof load, and assess overall system lifespan. They catch problems you might miss because they know what early failure looks like across hundreds of systems. This service typically costs $100 to $200 for a standard single-story home, takes one to two hours.
Cost expectations for professional services depend on scope. Basic cleaning runs $100 to $250 for an average home. Minor repairs including seal work and hanger replacement cost $150 to $400. Replacing one damaged section runs $200 to $500 depending on material and access difficulty. Full gutter replacement for a 1,500-square-foot ranch-style home ranges from $1,200 to $3,000 for aluminum, more for copper or custom work. Seamless gutters cost 20 to 30 percent more than sectional but include professional fabrication and installation.
Climate-Specific Gutter Leak Prevention
Regional weather creates unique vulnerabilities that standard maintenance doesn’t fully address. Your climate determines which prevention strategies matter most.
Cold Climate Considerations
Ice dams form when heat from inside your home melts roof snow. It runs down and refreezes at the cold gutter edge. This ice buildup blocks drainage and forces water back under shingles and into gutters from the wrong direction, overwhelming seals designed for water flowing through, not backing up. Prevention includes improving attic insulation to reduce roof heat loss, installing heating cables along the roof edge and through gutters, and making sure gutters are completely clear before winter so ice can’t form around debris. Freeze-thaw cycles expand water in small cracks and gaps, turning minor separations into full breaks. Check all seams in late fall, reseal any showing early separation before cold arrives.
High-Rainfall Regions
Areas getting over 40 inches of annual rainfall need gutters sized for capacity, not just coverage. Six-inch gutters instead of standard five-inch prevent overflow during intense storms. Material choice matters more in constant moisture. Rust-resistant aluminum or high-grade uPVC outlast steel options that pit and corrode faster. Inspect more often than dry-climate homes, at least quarterly instead of twice yearly, because constant water flow finds weaknesses faster. Install overflow scuppers at low points as secondary drainage if the primary system can’t handle peak rainfall.
Coastal and Humid Areas
Salt air speeds up corrosion on metal gutters, especially steel and even aluminum if it’s not treated. Joints and seams corrode first because that’s where protective coatings wear away. Consider copper or marine-grade aluminum that withstands salt exposure, or use vinyl systems that don’t corrode at all. Humidity creates constant moisture that supports mold growth in trapped debris. Clean more often, consider gutter guards that prevent organic buildup. Check fascia boards behind gutters for rot, which happens faster in humid climates when even small leaks go unnoticed.
Long-Term Gutter Protection and Maintenance Costs
Annual gutter maintenance costs $200 to $400 for professional service on a typical home. Foundation repair from water damage starts at $2,000 for minor crack sealing, can reach $10,000 or more for structural issues requiring excavation. Mold remediation ranges from $500 for small areas to $6,000 for extensive basement or wall cavity contamination. Replacing rotted fascia boards costs $500 to $2,000 depending on how much is damaged.
Material quality affects replacement timing. Aluminum gutters last 20 to 25 years with proper maintenance. Vinyl systems need replacement in 10 to 15 years. Copper can last 50 years or more but costs three to four times as much upfront. Budget for eventual replacement based on material choice and climate stress factors.
| Maintenance Type | Annual Cost Range | Prevented Damage Cost |
|---|---|---|
| DIY Cleaning (2x per year) | $0 (your time + supplies under $50) | $500-$2,000 overflow damage |
| Professional Cleaning | $200-$400 | $2,000-$10,000 foundation issues |
| Minor Repairs (sealant, hangers) | $150-$400 | $1,000-$5,000 fascia rot, siding damage |
| Major Repairs/Section Replacement | $500-$1,500 | $3,000-$15,000 full system failure, interior damage |
Budget-friendly strategies that maximize protection include doing your own twice-yearly cleaning, scheduling professional inspection every two to three years instead of annually if you’re diligent about DIY maintenance, installing gutter guards to reduce cleaning frequency, and addressing small repairs immediately before they grow into major problems. The most cost-effective approach combines regular DIY attention with occasional professional assessment to catch issues you might miss.
Final Words
Learning how to prevent gutter leaks starts with understanding that most problems stem from simple neglect, not complex failures.
Clean twice a year, check your slope, seal vulnerable joints, and catch warning signs early. That’s the core of it.
The few hours you spend on a ladder now beats watching water stain your siding or pool near your foundation later.
If something feels beyond your reach or comfort zone, call someone. There’s no prize for the toughest repair.
Your gutters do quiet, unglamorous work. Give them a little attention, and they’ll handle the rest.
FAQ
What can I use to stop my gutters from leaking?
To stop gutters from leaking, use waterproof silicone-based gutter sealant for joints and seams, apply roofing cement or epoxy for small holes, and replace damaged sections for extensive deterioration. Clean and dry surfaces completely before applying any sealant to ensure proper adhesion and lasting repairs.
Why is water dripping off the bottom of my gutters?
Water drips off the bottom of gutters when clogs force overflow, when seams and joints have separated and are leaking, or when improper slope causes standing water to seep through connections. Check for debris blockages first, then inspect seams and verify the gutter maintains 1/4 inch slope per 10 feet toward downspouts.
Can you caulk outside the seam of a gutter to prevent leaks?
You can caulk outside gutter seams as a temporary fix, but interior sealing provides better long-term protection because water pressure pushes sealant into joints rather than away from them. For best results, apply waterproof gutter sealant on both the inside and outside of separated seams after cleaning and drying the metal completely.
What is the best sealant for leaking gutters?
The best sealant for leaking gutters is 100% silicone caulk or specialized gutter sealant designed for exterior use and metal adhesion, which remains flexible through temperature changes and resists UV breakdown. These products bond to aluminum, vinyl, and steel gutters, cure fully waterproof, and last several years when applied to clean, dry surfaces.
How often should I clean gutters to prevent leaks?
Clean gutters at least twice per year, typically in late spring and late fall, to prevent debris buildup that causes clogs and overflow leaks. Homes with overhanging trees or pine needles may require quarterly cleaning to maintain proper water flow and reduce stress on seams and hangers.
What causes gutters to sag and leak?
Gutters sag and leak when hangers loosen or fail, when debris weight stresses connections, or when improper initial installation lacks adequate support spacing. Hangers should be positioned every 24 to 36 inches along the gutter length, and damaged or bent brackets require immediate replacement to restore proper pitch.
How do I know if my gutter slope is correct?
Your gutter slope is correct when water flows completely toward downspouts without pooling, measured at 1/4 inch drop per 10 feet of gutter length. Check slope by inspecting for standing water 24 hours after rainfall or by pouring water in the gutter and watching flow direction and speed.
When should I replace gutters instead of repairing them?
Replace gutters instead of repairing when you see extensive rust, multiple leak points along the length, structural sagging that bracket adjustment can’t fix, or repeated repair failures in the same sections. Gutters showing widespread deterioration, large holes, or material brittleness are beyond cost-effective patching and need full replacement for reliable protection.
Do gutter guards prevent leaks?
Gutter guards prevent leaks by blocking debris that causes clogs, overflow, and excessive weight stress on seams and hangers, though they don’t eliminate the need for periodic inspection. Quality mesh or micro-mesh systems allow water flow while keeping leaves and twigs out, significantly reducing maintenance frequency and overflow-related damage.
What are early warning signs of gutter problems?
Early warning signs of gutter problems include water overflowing during normal rain, visible sagging or gaps between gutter and fascia, water stains on siding or foundation, and dripping from anywhere except downspout outlets. Catching these symptoms early prevents expensive water damage to walls, foundation, and landscaping below.
How far should downspouts extend from the house?
Downspouts should extend at least 4 to 6 feet away from the house foundation to prevent water pooling near basement walls and causing foundation damage or basement flooding. Use splash blocks, flexible extensions, or buried drainage pipes to direct roof runoff safely away from the structure and landscape erosion zones.
Are seamless gutters better than sectional gutters?
Seamless gutters are better than sectional gutters for leak prevention because they eliminate joints along straight runs where sectional pieces connect and commonly separate over time. The only seams on seamless systems occur at corners and downspout outlets, dramatically reducing potential leak points and long-term maintenance needs.
What tools do I need for basic gutter repairs?
For basic gutter repairs, you need a stable ladder, work gloves, gutter scoop or trowel, garden hose, waterproof sealant or silicone caulk, putty knife, wire brush, and drill with screwdriver bits for tightening brackets. Having a bucket for debris collection and drop cloths for ground protection makes cleanup faster and prevents landscape damage.
Can I repair gutters in winter?
You can repair gutters in winter if temperatures stay above the sealant’s minimum application temperature, typically 40°F for most products, and surfaces are completely dry and ice-free. Cold weather slows curing time significantly, so plan repairs during warmer afternoon hours and check product labels for cold-weather formulations when available.
How long do gutter repairs last?
Gutter repairs last 3 to 7 years when done correctly with quality sealants on properly prepared surfaces, though lifespan depends on climate severity, material quality, and ongoing maintenance consistency. Minor seam sealing and bracket tightening provide shorter-term fixes, while section replacement using matching materials offers longer durability approaching the original gutter lifespan.