
Here’s your intro paragraph:
A flooded basement gives you about 48 hours before mold starts colonizing wet surfaces. That’s not a lot of margin for decision-making or hesitation. Mold spores are already present in your home, just waiting for moisture and darkness to activate. Once they do, you’re no longer preventing mold, you’re managing an infestation that requires demolition, remediation costs, and potential health risks. This guide walks you through the exact steps to take in those critical first hours: safe water removal, fast drying, contamination control, and humidity monitoring that actually stops mold before it takes hold.
Immediate Steps to Stop Mold After Your Basement Floods
-
Check for electrical hazards and structural safety. Don’t go in if you see sparking, smell gas, or notice sagging ceilings. Shut off power at the main breaker if you can reach it safely, or call an electrician first.
-
Remove standing water as quickly as possible. Use a sump pump for deep water, a wet/dry vacuum for moderate amounts, or buckets and mops for small puddles. Every hour counts.
-
Pull out soaked materials immediately. Remove wet carpet padding, cardboard boxes, fabric items, and anything that absorbed significant water. These trap moisture and feed mold growth.
-
Document everything before you start major cleanup. Take photos and videos of water levels, damaged items, and all affected areas. Your insurance claim depends on this.
-
Set up air circulation and dehumidification within the first few hours. Open windows if outdoor humidity is below 60%, aim fans at wet surfaces, and run a dehumidifier continuously.
-
Disinfect any surfaces touched by contaminated water. If sewage or outdoor floodwater entered your basement, treat all hard surfaces with a bleach solution (1 cup bleach per gallon of water) or antimicrobial cleaner.
-
Start monitoring humidity levels immediately. Use a hygrometer to track basement humidity. Your target is 30 to 50%. If it stays above 60%, mold spores will activate even after standing water is gone.
-
Identify and stop ongoing water entry. If water is still seeping in through cracks or window wells, address the source before drying makes real progress. Patch obvious leaks or divert exterior water flow temporarily.
Mold spores are everywhere. They just need moisture to grow into visible colonies. Research shows mold can begin colonizing damp surfaces within 24 to 48 hours after flooding. That’s not a lot of time. During that window, spores are dormant. After 48 hours of consistent dampness, they activate, spread, and become much harder to eliminate. Your drying actions during the first two days determine whether you’re preventing mold or just slowing it down.
If you wait three days to start water extraction, or if you remove standing water but ignore damp drywall and wet insulation, you’re likely too late for full prevention. You’re managing mold growth instead of stopping it. Damp organic materials, dark spaces, and poor air circulation create perfect conditions. Basements check all three boxes naturally, which is why speed matters more here than in other parts of your home. A delayed response often means tearing out more materials later, higher remediation costs, and potential health risks from airborne spores during demolition.
Safety Equipment and Precautions for Basement Flood Cleanup
You’re about to disturb contaminated water, potentially toxic materials, and mold spores that have already started growing. Street clothes and work gloves won’t cut it. Proper protective equipment isn’t optional. It’s the difference between a tough cleanup project and a trip to urgent care with a respiratory infection or chemical exposure.
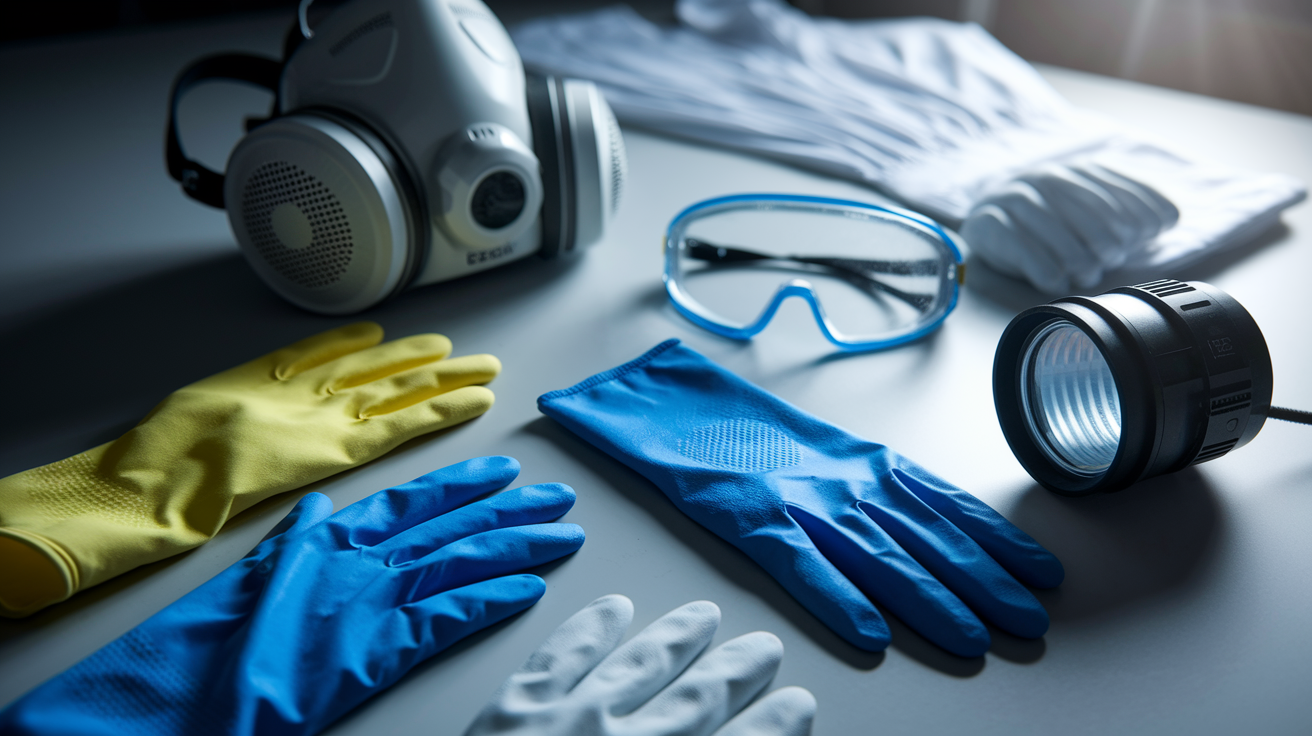
Required protective equipment for basement flood cleanup:
- N95 or N100 respirator mask protects against mold spores, dust from disturbed materials, and airborne bacteria. N95 works for clean water floods. Upgrade to N100 if you’re dealing with sewage backup or visible mold growth.
- Waterproof gloves rated for chemical resistance, nitrile or neoprene gloves that extend past your wrists. If the flood included sewage, use elbow-length rubber gloves.
- Rubber boots with non-slip soles. Your feet will be in contaminated water. Regular work boots absorb moisture and bacteria. Tall rubber boots keep your feet dry and safe.
- Safety glasses or goggles. Splashing contaminated water, bleach solution, or debris from demolition can all hit your face. Goggles seal around your eyes, glasses don’t.
- Long-sleeved work clothing you can discard, coveralls or old clothes that cover your arms and legs. Launder separately in hot water after each cleanup session, or throw them away if contamination is severe.
- Headlamp or waterproof flashlight. Basements lose lighting when power is shut off. You need hands-free illumination to work safely.
Floodwater comes in three contamination categories, and each demands different handling. Clean water from a broken pipe or rainwater seepage is Category 1. It’s still messy, but it won’t make you sick. Gray water from washing machines, dishwashers, or sump pump failures is Category 2. It contains bacteria and requires disinfection. Black water from sewage backup, toilet overflow, or outdoor flooding that mixed with soil and debris is Category 3. This is the most dangerous. Black water floods require full PPE, immediate disinfection of all surfaces, and disposal of any porous materials it touched. If you’re facing Category 3 contamination and the affected area is larger than a small bathroom, calling a professional restoration service is the safer choice.
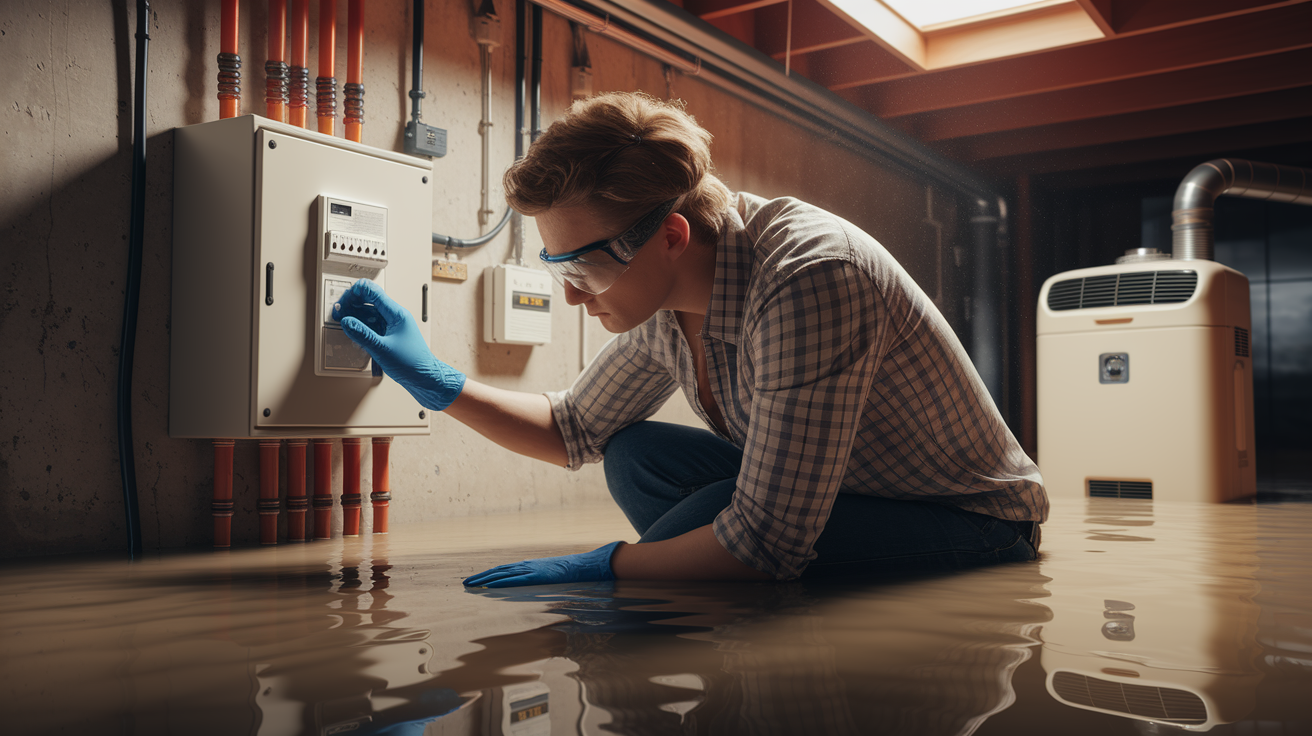
Electrical safety comes first, before you even think about water extraction. If your basement has standing water and the power is still on, do not enter. Water conducts electricity, and even a small amount can create a fatal shock hazard if it contacts outlets, appliances, or wiring. Locate your home’s main electrical panel. If it’s on an upper floor and you can reach it safely, shut off power to the basement circuits. If the panel is in the flooded basement, call an electrician to disconnect power from outside the home. Older homes sometimes have aluminum wiring, corroded panels, or ungrounded outlets, all of which increase electrocution risk during floods. When in doubt, treat the space as energized until a professional confirms it’s safe.
Water Removal Methods for Flooded Basements

You can’t start drying until standing water is gone. Even a thin layer of water across your basement floor will re-saturate materials as fast as fans and dehumidifiers can dry them. Complete water extraction is the foundation of mold prevention. Not just the first step, it’s the step that determines whether everything else works.
| Method | Best For | Speed | Cost Range |
|---|---|---|---|
| Sump pump (submersible) | Water deeper than 2 inches, ongoing seepage | 500 to 3000 gallons per hour depending on pump power | $100 to $300 for consumer models, $50 to $100 daily rental for commercial pumps |
| Wet/dry vacuum (shop vac) | Water depth under 2 inches, localized puddles | Slow, requires frequent emptying (5 to 16 gallon tank capacity) | $60 to $200 to purchase, $30 to $50 daily rental for large commercial units |
| Professional extraction equipment (truck-mount or portable extractors) | Large volumes, contaminated water, fast removal required | Very fast, 1000+ gallons per hour, continuous operation | $300 to $800 per visit depending on water volume and contamination level |
| Manual removal (buckets, mops, towels) | Small amounts under 1 inch, accessible puddles | Very slow, labor-intensive | $0 (uses household items) |
Choosing the right method depends on how much water you’re dealing with and how fast it’s still coming in. If you have two inches of standing water across a 500 square foot basement, that’s roughly 625 gallons. A quality sump pump can handle that in 30 minutes to two hours. A shop vac with a 12 gallon tank would require 50+ trips to empty. For anything deeper than a few inches, invest in or rent a sump pump.
While you’re removing water, look for where it’s entering. Common entry points include foundation cracks (especially where the wall meets the floor), window wells that filled with rainwater and leaked through the window frame, poorly sealed basement windows, floor drains backing up, and sump pump failures that let groundwater rise into the space. If water is actively flowing in, extraction alone won’t solve the problem. You might need to temporarily patch a crack with hydraulic cement, cover a window well with a tarp and sandbags, or redirect a downspout that’s dumping water against your foundation. Stopping the source, even with a temporary fix, makes everything else manageable. If you can’t identify or control the entry point, the basement will keep refilling and mold prevention becomes nearly impossible.
Drying Techniques to Eliminate Moisture from Basement Surfaces

Surface drying looks finished long before it actually is. Your basement floor might feel dry to the touch, but moisture trapped in drywall, insulation, and subfloors feeds mold growth you won’t see for weeks. Complete drying means eliminating moisture from every layer, not just the visible surfaces.
Essential Drying Equipment Setup
Position a commercial-grade dehumidifier in the center of the affected area. Consumer units rated for 30 to 50 pints per day work for small basements under 500 square feet. Larger spaces or serious floods require 70 pint or commercial 100+ pint units. Set the target humidity to 50%, which is low enough to prevent mold but high enough that the unit doesn’t run constantly and overheat. Empty the collection bucket every 6 to 12 hours, or connect a hose to continuous drainage if your model supports it.
Add high-velocity air movers (fans designed for drying, not regular box fans) aimed at wet walls, floors, and any remaining damp materials. Place one fan for every 10 to 15 feet of wet wall space. Angle them so air flows across surfaces, not directly at them. Direct airflow pushes moisture deeper into porous materials instead of evaporating it. Create cross-ventilation by opening windows on opposite sides of the basement if outdoor humidity is below 60%. If it’s muggy outside, keep windows closed and rely on dehumidifiers and air movers alone. Running a dehumidifier with windows open in humid weather is like air conditioning with the doors open. It doesn’t work. Basements in humid climates or during humid seasons sometimes need 24 to 48 hours longer to dry because you can’t use natural ventilation.
Monitoring Humidity Levels During Drying
Check humidity levels three times daily using a digital hygrometer. Place it at floor level near the wettest area. Your basement should drop below 60% relative humidity within the first 24 hours of active drying. If it doesn’t, you either have inadequate dehumidification for the space size, or hidden moisture is continuing to evaporate and reload the air. By day three, you should see readings consistently between 40 to 50%. If humidity stays above 55% after three full days of drying, something is still wet and you haven’t found it yet.
Use a moisture meter to check materials directly. Press the pins into drywall, wood framing, and subfloors. Wood should read below 16% moisture content before you consider it dry. Drywall should be below 1% (most meters show this as a low reading or “dry” indicator). Concrete takes longer and should drop below 4% before you seal or cover it. If you don’t own a moisture meter, they cost $25 to $60 and are essential for confirming drying progress. Guessing based on how something feels leads to premature repairs and trapped moisture.
Detecting and Accessing Hidden Moisture Behind Walls and Under Flooring
Water doesn’t just sit on surfaces. It wicks up drywall, soaks into insulation, and seeps under baseboards into wall cavities. A basement can look dry while framing and insulation hold enough moisture to grow mold for months. If floodwater reached higher than two inches, moisture is inside your walls.
Remove baseboards to check behind them. Look for dampness on the back of the trim and on the drywall edge. If the drywall feels soft or cool to the touch two feet above where water sat, it wicked moisture upward. Cut away the bottom two feet of drywall in affected areas. This exposes insulation and framing for inspection and allows air circulation into the wall cavity. If insulation is wet, pull it out immediately. Wet fiberglass insulation never dries properly and becomes a mold factory.
Check subfloors by pulling up a corner of carpet or a few floorboards. Plywood and OSB subfloors trap moisture between the surface flooring and the concrete slab below. If it feels damp or shows discoloration, the subfloor needs to dry completely before you reinstall flooring. This can take 5 to 10 days with proper air circulation underneath. Some restoration services drill small holes in subfloors and insert drying mats or tubes that blow air into the cavity. This speeds drying but requires equipment most homeowners don’t own.
Thermal imaging cameras detect temperature differences caused by moisture evaporation. Wet areas show up cooler than dry surroundings. Professional inspections using thermal imaging cost $200 to $400 but reveal hidden moisture in wall cavities, behind paneling, and under finished floors without demolition. If you’re dealing with a finished basement flood and you’re unsure whether moisture is trapped behind finished surfaces, thermal imaging is worth the cost. It prevents guessing and unnecessary demolition.
Common hidden moisture locations include wall cavities behind drywall or paneling, the space between subflooring and concrete slabs, inside built-in cabinets and storage units, rim joists where the foundation meets the wood framing, and behind staircase enclosures. Check all of these areas with a moisture meter or by removing access panels for visual inspection. Physical signs of trapped moisture include musty odors that don’t improve after surface drying, cool spots on walls when you press your hand against them, discoloration or yellowing on paint or drywall, and peeling paint or wallpaper near the floor.
Drying timelines vary, but most basements reach complete dryness in three to seven days with proper equipment and air circulation. Concrete basements dry faster than finished spaces with drywall and wood framing. Small floods (under two inches) dry quicker than deep standing water. Humid weather adds two to three days. Cold temperatures slow evaporation. If you’re running dehumidifiers and fans for five days and moisture meter readings aren’t dropping, you either have hidden moisture sources still evaporating, or water is still entering the space. Find and fix the problem before moving to repairs.
Removing and Disposing of Contaminated Basement Materials
Porous materials that absorbed floodwater turn into mold growth sites within 48 hours. Trying to save them doesn’t save money. It guarantees mold problems later and costs more to remediate than replacement would have cost upfront. Once water saturates porous materials, the clock is ticking.
Materials that typically cannot be salvaged after significant water exposure:
- Drywall that wicked water above two feet from the floor. Cut it away and replace it. The paper facing on drywall feeds mold, and once saturated, it never fully dries.
- Carpet padding (even if the carpet looks okay). Padding is foam or fiber that holds water like a sponge. It stays damp under the carpet and grows mold you won’t see until the smell becomes obvious.
- Wet insulation (fiberglass batts or cellulose). Insulation loses R-value when wet and traps moisture against framing. Pull it out, bag it, and replace it after everything dries.
- Particle board or MDF (medium-density fiberboard). Swells when wet and never returns to original shape or strength. Common in cheap furniture, shelving, and some subfloors.
- Upholstered furniture that sat in water. Fabric and foam cushions absorb water and bacteria. Even if you dry the surface, the interior stays damp and contaminated.
- Mattresses and box springs. Impossible to fully dry and disinfect. If floodwater reached them, they need to go.
- Paper products, books, documents. Can sometimes be frozen immediately to pause deterioration and professionally restored, but basement flood contamination usually makes this impractical.
The two-foot rule for drywall comes from how water wicks through paper and gypsum. If water sat at six inches but you see discoloration or softness 18 inches up the wall, moisture traveled. Cut drywall horizontally at least two feet above the highest point of visible water damage or discoloration. This ensures you’re removing all compromised material. Leaving damp drywall because it “doesn’t look that bad” leads to mold growth inside the wall cavity within a week.
Non-porous items like metal shelving, plastic storage bins, glass, ceramics, and sealed wood furniture can usually be saved if you clean and disinfect them thoroughly. Wash with hot soapy water first to remove dirt and debris, then disinfect with a bleach solution (1 cup bleach per gallon of water) or a commercial antimicrobial cleaner. Let items air-dry completely before returning them to the basement. Check for rust on metal items and warping on wood. Both indicate moisture damage that might compromise the item’s usability.
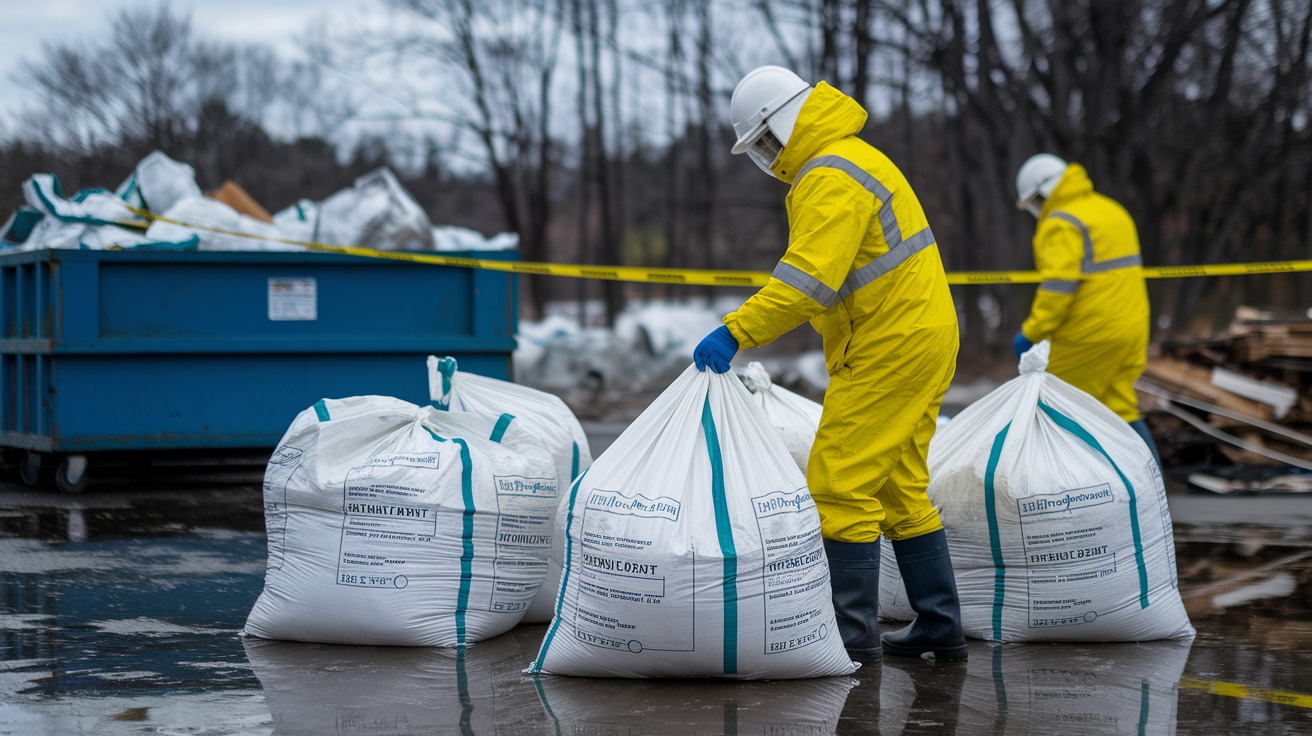
Local disposal requirements for flood-damaged materials vary. Some municipalities have special pickup schedules for disaster debris. Others require you to rent a dumpster or haul materials to a landfill yourself. Wet drywall is heavy and takes up significant space. A small 10×12 basement with two feet of drywall removed generates roughly 15 to 20 sheets of wet debris, which weighs 60 to 80 pounds per sheet. That’s 900 to 1600 pounds of material to dispose of. Check with your city or county waste management department before piling debris curbside. Contaminated materials like sewage-soaked drywall or moldy insulation sometimes require special handling and disposal at designated facilities. Bagging debris in heavy-duty contractor bags makes handling easier and prevents contamination spread during removal.
Disinfecting and Sanitizing Basement Surfaces After Flooding
Even after drying is complete, bacteria, viruses, and mold spores remain on every surface the floodwater touched. Skipping disinfection leaves biological contamination that causes health problems and odors, even if visible mold never appears.
Clean water floods (from broken pipes or rainwater alone) still pick up dirt, bacteria from basement dust, and organic material. Gray water and black water floods add sewage bacteria, chemicals, and pathogens. Disinfection after a clean water flood is important. After contaminated floodwater, it’s mandatory.
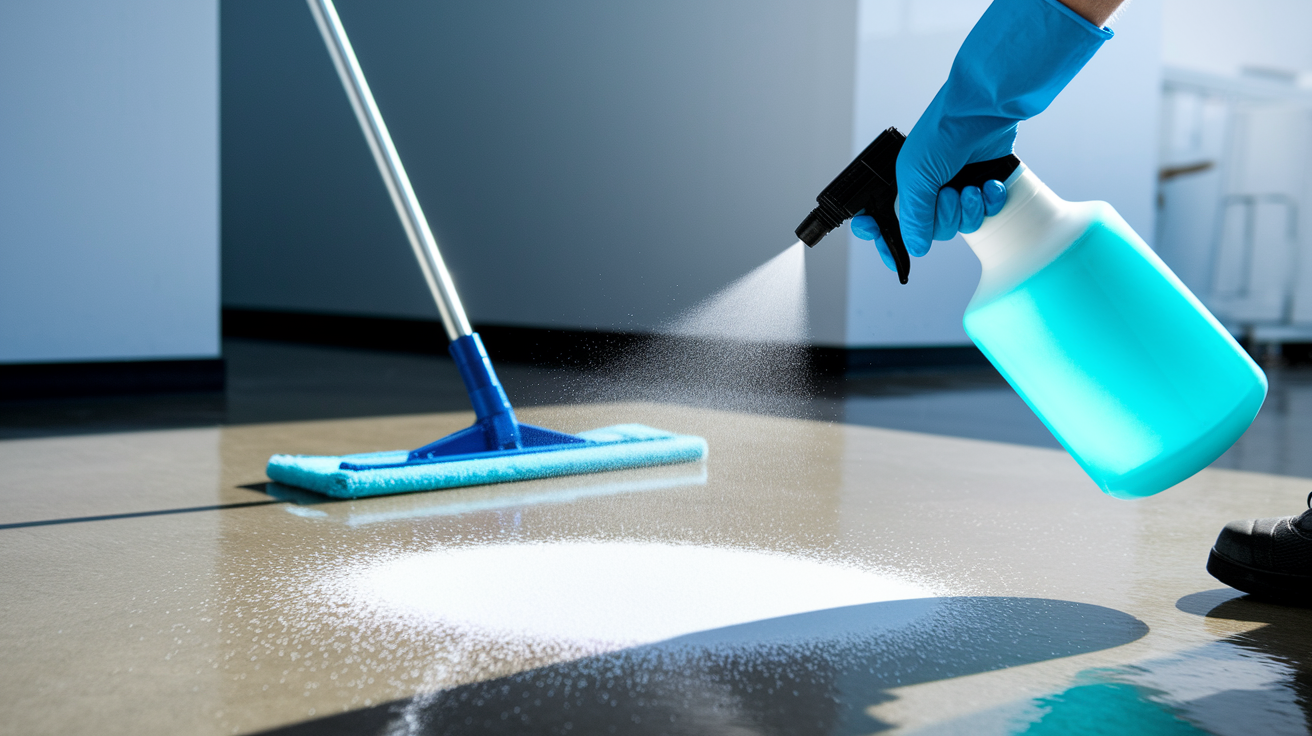
Mix fresh bleach solution daily because it loses potency within hours of mixing. Combine one cup of regular household bleach (5 to 6% sodium hypochlorite) with one gallon of cool water. Do not use hot water. It degrades the bleach. Work in small sections, applying solution with a mop, sponge, or pump sprayer. Let it sit for at least 10 minutes before rinsing or wiping. That contact time is necessary to kill bacteria and mold spores. Rinse with clean water after disinfection and allow surfaces to air-dry completely.
| Surface Type | Cleaning Solution | Application Method | Drying Time |
|---|---|---|---|
| Concrete floors | Bleach solution (1 cup per gallon) or TSP (trisodium phosphate) cleaner | Mop or scrub with stiff brush, let sit 10 minutes, rinse | 4 to 6 hours with fans, 12 to 24 hours naturally |
| Wood flooring (solid hardwood only, if salvageable) | Mild detergent followed by white vinegar solution (1 cup per gallon), avoid excess bleach which damages wood finish | Damp mop, do not saturate, wipe dry immediately | 2 to 4 hours, check for cupping or warping |
| Metal surfaces (shelving, appliances, ducts) | Bleach solution or quaternary ammonium disinfectant | Spray and wipe, or apply with cloth | 1 to 2 hours, dry thoroughly to prevent rust |
| Plastic and vinyl surfaces | Bleach solution or hydrogen peroxide-based cleaner | Spray, wipe after 10 minutes | 30 minutes to 1 hour |
| Painted walls (after drywall is removed and studs are exposed) | Bleach solution applied to framing and back of remaining drywall | Spray or wipe onto wood framing, let air-dry | 4 to 8 hours depending on humidity |
Antimicrobial treatments and mold-inhibiting coatings are optional but useful in basements with chronic moisture issues or after severe contamination. These products leave a residue that prevents mold growth for several months. Apply them after disinfection and drying, before any reconstruction begins. Spray or roll them onto exposed framing, concrete, and any surfaces that will be enclosed behind new drywall or flooring. Common products include concrobium mold control, mold-resistant primers, and encapsulation coatings. They cost $20 to $50 per gallon and cover roughly 200 to 400 square feet depending on surface porosity. If your basement has flooded before, or if humidity levels are difficult to control year-round, antimicrobial treatments add a layer of protection worth the cost.
Long-Term Humidity and Air Quality Control for Basement Mold Prevention
Preventing mold after the initial flood cleanup depends on controlling humidity permanently, not just until the basement dries. Mold doesn’t need standing water. It grows wherever humidity stays above 60% for extended periods, and basements naturally tend toward high humidity even without flooding.
Basements are below grade, surrounded by cool soil that causes condensation when warm humid air contacts cold foundation walls and pipes. Poor ventilation traps moisture. Concrete wicks groundwater. Unfinished basements with exposed concrete and minimal insulation see higher humidity than finished spaces, but finished basements face hidden moisture problems behind walls and under flooring. Both need active humidity management.
Use a moisture meter weekly for the first two months after a flood, then monthly after that. Place a hygrometer in your basement to monitor relative humidity continuously. Target 30 to 50% year-round. In summer, outdoor humidity often exceeds 70%, and basements without dehumidification will match or exceed that level. In winter, humidity drops, but condensation on cold pipes and walls creates localized moisture problems. A permanently installed hygrometer with memory functions helps you spot trends, like humidity spikes on humid days or after heavy rain, which signal inadequate dehumidification or water intrusion.
Maintain the 30 to 50% humidity range by running a dehumidifier continuously during humid months (typically late spring through early fall in most climates). Size the unit correctly. A 1,000 square foot basement needs at least a 50 pint capacity unit, and 70 pint models provide better performance in damp basements below grade. Undersized units run constantly without lowering humidity effectively. Set the dehumidifier to 50% and position it centrally with clearance on all sides for air intake and exhaust. Connect a drain hose to continuous drainage if possible. Emptying buckets daily is a hassle that leads to people turning the unit off, which defeats the purpose.
Permanent dehumidification strategies include installing a whole-home dehumidifier integrated with your HVAC system (costs $1,200 to $2,500 installed but handles the entire basement efficiently), using spray foam insulation on basement walls to prevent condensation by bringing wall surfaces closer to room temperature (R-10 to R-15 reduces cold surface condensation significantly), and sealing the concrete slab with vapor barrier paint or epoxy coating to reduce moisture wicking up from the ground below ($200 to $600 for DIY products covering 1,000 to 1,500 square feet).
Insulating cold water pipes with foam pipe insulation prevents condensation drip. A pipe that “sweats” in summer adds moisture to the air daily and creates wet spots on floors or walls below it. Foam insulation tubes cost $1 to $2 per six-foot section and solve the problem completely. Check pipes near the water heater, laundry connections, and main water supply lines.
Equipment and practices for effective long-term humidity control:
- Continuous dehumidifier operation during humid months. Set it and forget it. Turning it off for a few days allows humidity to climb and mold to start.
- Exhaust fans for laundry areas, vented to the outside, not just into the basement. Dryers especially add massive amounts of moisture if vented indoors.
- HEPA air scrubbers or purifiers capture airborne mold spores, dust, and allergens. Useful during the first few months post-flood while you’re monitoring for mold reappearance. Run continuously in basements with past mold problems.
- Temperature regulation. Keeping the basement at a stable 60 to 70 degrees reduces condensation. Unheated basements in winter see significant condensation when indoor air meets cold surfaces.
- Vapor barriers on concrete walls and floors. Plastic sheeting or sealant coatings prevent moisture from wicking through concrete from the soil outside.
- Insulating cold water pipes eliminates condensation drip.
- Limiting moisture sources. Don’t dry laundry on racks in the basement, store firewood outside, and avoid keeping damp items in enclosed spaces.
Seasonal humidity challenges require different approaches. In summer, outdoor air is humid and warm, so natural ventilation often makes humidity worse. Keep windows closed and rely on mechanical dehumidification. In winter, outdoor air is dry, but it’s also cold. Opening windows can lower humidity but also drops the temperature, which increases condensation on cold surfaces. The solution is mechanical ventilation (an HRV or ERV system) or periodic short window openings on dry winter days combined with heating to keep surfaces warm.
Finished basements with drywall, insulation, and flooring need more attention to hidden moisture. Moisture can accumulate in wall cavities or under flooring without visible signs until mold odor appears. Install a vapor barrier on concrete walls before framing and insulation. Use mold-resistant drywall (purple or green board) in basements prone to dampness. Check moisture levels in finished walls annually with a pin-type moisture meter. Unfinished basements allow easier monitoring because you can see and access all surfaces, but they also lose more heat and see more condensation on exposed concrete. Insulating concrete walls and sealing them with masonry waterproofer reduces condensation significantly.
When to Call Professional Mold Remediation Services

Many small basement floods can be handled DIY if you act fast and follow proper drying and disinfection protocols. But some situations are beyond consumer equipment and safe DIY work. Knowing the line between “this is hard work but manageable” and “this requires professionals” prevents health risks, inadequate cleanup, and expensive do-overs.
Seven scenarios that require professional restoration help:
-
Water depth exceeds six inches across most of the basement. At this depth, you’re dealing with hundreds or thousands of gallons. Consumer sump pumps and dehumidifiers won’t keep up. Professional extraction equipment removes water in hours instead of days.
-
Sewage backup or black water contamination. Sewage contains pathogens, viruses, and bacteria that pose serious health risks. Proper disinfection requires commercial-grade antimicrobial treatments and disposal protocols most homeowners don’t have access to. If toilets backed up into your basement or outdoor flooding brought in contaminated water, call a pro.
-
Flooding sat for longer than 48 hours before you started cleanup. If you came home from vacation to discover a flooded basement, or if water sat for days before you could address it, mold has already started growing. At that point, you’re doing mold remediation, not mold prevention. Remediation requires containment, negative air pressure, and HEPA filtration during demolition to prevent spore spread.
-
Large finished basement areas (over 500 square feet). The amount of demolition, drying equipment, and reconstruction involved in a large finished space often exceeds DIY capacity. Professionals have the equipment and crews to dry and rebuild efficiently.
-
Visible mold growth already present across more than a 10×10 foot area. Small mold spots can be cleaned DIY. Widespread growth indicates a larger moisture problem and requires containment and professional removal to prevent spores from spreading to other areas of your home during cleanup.
-
Compromised structural elements (sagging beams, cracked foundation, bowing walls). Structural damage requires engineering assessment and specialized repair. Attempting DIY fixes on load-bearing elements creates serious safety risks.
-
High-value finished spaces with custom features, built-ins, or expensive materials. If your basement has custom woodwork, expensive flooring, or built-in features you want to salvage, professionals have specialized drying and restoration techniques that maximize what can be saved.
Cost is a legitimate concern, but consider what you’re comparing. A DIY cleanup that misses hidden moisture and leads to mold remediation six months later costs more than hiring professionals upfront. Basic professional water extraction and drying for a small basement runs $1,000 to $2,500 depending on water depth and contamination level. Full mold remediation after failed DIY cleanup costs $3,000 to $10,000 or more. If you’re unsure whether you can handle the work, schedule an inspection. Many restoration companies offer free assessments and can provide a written scope of work and estimate. You can then decide whether to proceed DIY or hire out.
Professional services include industrial water extraction using truck-mounted pumps or high-capacity portable units (removes water 5 to 10 times faster than consumer equipment), thermal imaging to detect hidden moisture in walls and subfloors, commercial dehumidifiers and air movers sized for large spaces or severe saturation, antimicrobial treatments and mold-inhibiting coatings applied to all affected surfaces, complete documentation for insurance claims including moisture readings and photos, and full reconstruction services to return the basement to pre-flood condition. Professionals also handle disposal of contaminated materials according to local regulations, which is often complex for sewage-contaminated debris.
Insurance coverage varies significantly by policy. Standard homeowners insurance typically covers sudden water damage from burst pipes or appliance failures but excludes gradual seepage or flooding from external sources. Flood insurance is a separate policy required for coverage of external flooding (rising water, storm surge, heavy rain overwhelming drainage). If your basement flooded due to heavy rain and you don’t have flood insurance, you’re paying out of pocket. Document everything regardless of coverage, because insurance adjusters need detailed records to process claims. If you’re hiring professionals, get written estimates before work begins and keep receipts for all equipment, materials, and services. Claims can take weeks to process, and detailed documentation prevents disputes.
Waterproofing Strategies to Prevent Future Basement Flooding

Cleaning up after one flood is enough. You don’t want to do it again. Reactive cleanup should lead to proactive waterproofing that addresses why water entered your basement in the first place. Most basement flooding is preventable with the right combination of interior and exterior solutions.
Interior Waterproofing Solutions
Interior drainage systems collect water that seeps through foundation walls or rises through the floor and channel it to a sump pump before it floods the space. A perimeter drain system (sometimes called a French drain) involves cutting a channel around the inside edge of the basement floor, installing perforated pipe in a gravel bed, and connecting it to a sump basin. The concrete floor is then patched over the drain. When water enters through the foundation, it flows into the drain instead of pooling on the floor. Cost runs $3,000 to $7,000 for an average basement depending on size and local labor rates.
Sump pump installation or upgrade is critical if you don’t have one or if your existing pump failed during the flood. A quality primary sump pump costs $150 to $400, plus installation if you’re not comfortable doing electrical and plumbing work. Add a battery backup sump pump ($250 to $500) to handle power outages during storms. The backup runs on a marine battery and kicks in automatically when the primary pump loses power. Test your sump pump quarterly by pouring water into the basin until it activates. Pumps fail due to stuck switches, clogged discharge lines, or motor wear. Catching problems early prevents floods.
Vapor barriers on basement walls reduce moisture penetration. Install 6-mil polyethylene sheeting over concrete walls before framing and insulation. Overlap seams by 6 inches and seal with waterproof tape. This prevents moisture from wicking through the concrete and condensing inside wall cavities. If walls are already finished, vapor barrier paint or masonry waterproofer applied to exposed concrete in utility areas or crawl spaces provides some moisture blocking, though it’s less effective than full barrier sheeting.
Wall sealants and waterproof coatings applied to the interior side of foundation walls help resist minor seepage. Hydraulic cement fills active leaks and cracks. Crystalline waterproofing products penetrate concrete and create a moisture barrier that self-seals small cracks as they develop. These interior coatings work best for minor moisture problems, not for high water pressure situations. If you have significant hydrostatic pressure pushing water through foundation walls, exterior waterproofing is necessary.
Exterior Waterproofing and Foundation Protection
Exterior waterproofing addresses water before it reaches the foundation. It’s more expensive and disruptive than interior solutions because it requires excavating around the foundation perimeter, but it’s also more effective for severe or recurring flooding.
Foundation crack sealing involves injecting polyurethane or epoxy into cracks to create a waterproof barrier. Small cracks (under 1/8 inch) can be patched with hydraulic cement or crack sealant from the inside. Larger cracks, especially
Final Words
Speed is everything when water invades your basement.
Get the water out, dry every surface (including the hidden ones), and keep humidity between 30-50%. Those three actions are your defense against mold.
If you missed the 24-hour window, don’t panic. You can still prevent serious mold problems if you act now.
Use the right equipment, don’t skip the disinfection step, and watch your humidity meter for the next few weeks.
Learning how to prevent mold after basement flood damage comes down to this: remove moisture faster than mold can grow, then keep it from coming back.
You’ve got this.
FAQ
How do I prevent mold in my basement after flooding?
To prevent mold in your basement after flooding, you need to remove all standing water within 24 hours, dry the space completely using dehumidifiers and fans, maintain humidity below 50%, remove contaminated porous materials like wet drywall and carpet padding, and disinfect all hard surfaces with bleach solution.
How long does it take for mold to start after a flooded basement?
Mold starts growing in a flooded basement within 24 to 48 hours after water exposure. This tight window means you need to begin water extraction, drying, and contaminated material removal immediately to prevent spores from establishing colonies on wet surfaces and porous materials.
What do you spray after a flood to prevent mold?
After a flood, you spray hard surfaces with a bleach solution (1 cup bleach per gallon of water) or antimicrobial cleaners specifically designed for flood remediation. Apply the solution to concrete, metal, and painted surfaces after removing standing water and drying, allowing proper contact time before wiping.
How to sanitize a basement after a flood?
To sanitize a basement after a flood, first remove all standing water and dry surfaces completely. Then clean hard surfaces with bleach solution (1 cup per gallon of water), apply antimicrobial spray to treated areas, discard porous materials that absorbed water, and run HEPA filters to capture airborne contaminants.
Can I clean up a flooded basement myself or do I need professionals?
You can clean up a flooded basement yourself if water depth stayed under 6 inches, flooding lasted less than 48 hours, and the water was clean (not sewage). Call professionals for deeper flooding, sewage contamination, visible mold growth, or if water sat longer than two days.
What basement materials cannot be saved after flooding?
Materials that cannot be saved after basement flooding include carpet padding, wet insulation, drywall that wicked water above 2 feet, particle board, upholstered furniture, mattresses, and paper products. These porous materials trap moisture and become mold breeding grounds even after surface drying.
How long does it take to completely dry a flooded basement?
A flooded basement takes 3 to 7 days to dry completely when using dehumidifiers, fans, and proper ventilation. Drying time depends on water depth, humidity levels, basement size, and whether you’re drying hidden areas like wall cavities and subfloors, which require longer timeframes.
What humidity level prevents mold growth in basements?
The humidity level that prevents mold growth in basements is 30% to 50% relative humidity. Use a dehumidifier to maintain this range year-round, monitoring daily with a moisture meter during the first two weeks after flooding to ensure surfaces stay below mold-friendly moisture levels.
When should I remove drywall after basement flooding?
You should remove drywall after basement flooding if water wicked more than 2 feet up the wall, if it stayed wet longer than 48 hours, or if it feels soft or crumbles when pressed. Cut drywall at least 12 inches above the visible water line to ensure complete contamination removal.
How do I know if there’s hidden moisture behind basement walls?
You know there’s hidden moisture behind basement walls through musty odors, cool spots when touching walls, discoloration or bubbling paint, and moisture meter readings above 16% for wood framing. Use a moisture meter to check wall cavities, or hire professionals with thermal imaging cameras for thorough detection.
What’s the difference between clean water and sewage contamination in flooded basements?
Clean water flooding comes from burst pipes or rainwater and requires standard drying and disinfection. Sewage contamination (black water) contains bacteria and pathogens, requiring immediate professional remediation, disposal of all porous materials, and extensive disinfection with antimicrobial agents rather than DIY cleanup.
Do I need to seal my concrete basement floor after flooding?
You need to seal your concrete basement floor after flooding once it’s completely dry and disinfected. Concrete sealers create a moisture barrier that prevents future water absorption and makes cleanup easier, but applying sealer to damp concrete traps moisture underneath and creates mold conditions.