
You’ve seen paint peel after humidity, scraped it off, repainted, and watched it happen again six months later. That cycle stops when you treat the moisture problem, not just the peeling symptom. Humidity doesn’t just slow drying—it traps water vapor behind your paint, breaks the bond with the wall, and creates the exact conditions for mold and blistering. This guide walks you through controlling moisture sources, testing surfaces before you paint, choosing primers and paints that actually block water, and applying coats in conditions that let them cure properly.
Essential Steps to Stop Humidity-Driven Paint Failure
Preventing humidity-caused paint peeling isn’t rocket science, but it does require a system. You need moisture control, the right materials, and proper application. Miss one piece and you’re back to scraping again in six months.
Quick-start prevention checklist:
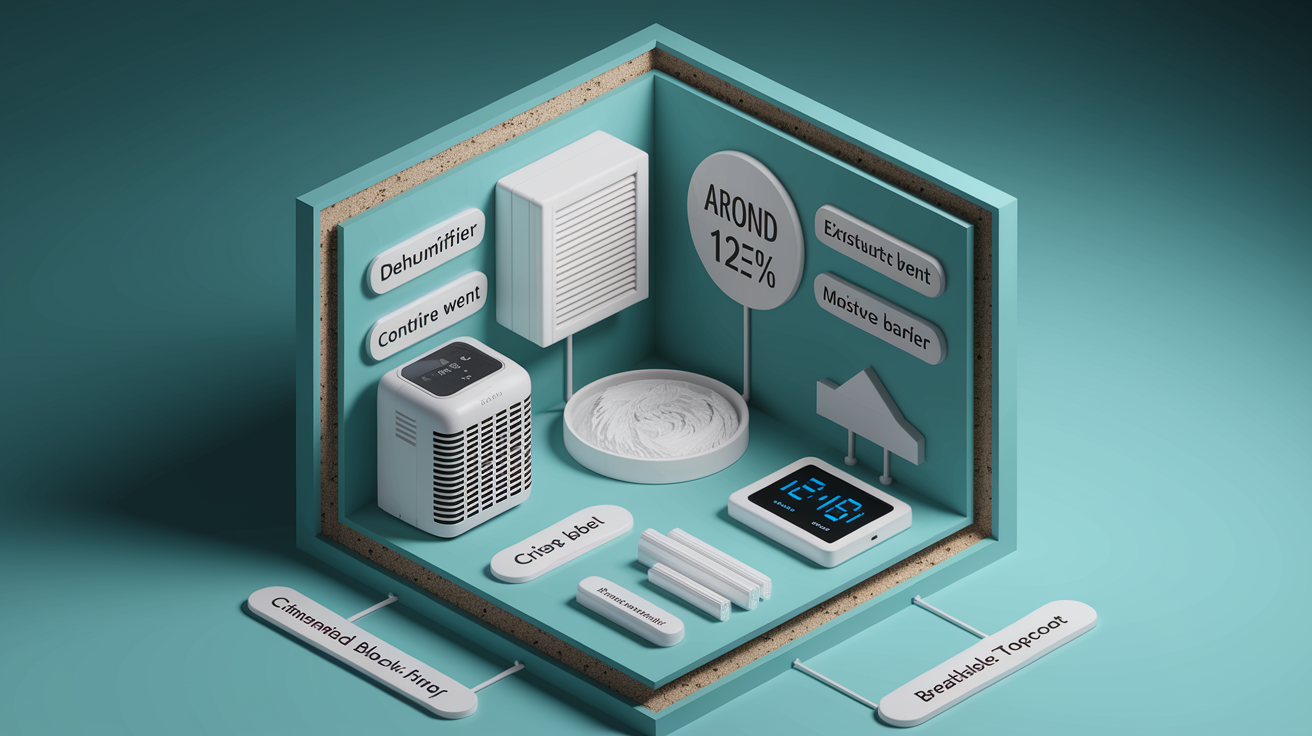
- Control indoor humidity to 40-60% using dehumidifiers and exhaust fans
- Remove all moisture sources (fix leaks, improve drainage, install ventilation)
- Test surfaces with moisture meter (must be below 15% before painting)
- Use moisture-blocking primers and mildew-resistant acrylic latex paint
- Apply multiple thin coats only when humidity is below 50% and temperature is 50-85°F
- Ensure complete drying time between coats (extend manufacturer recommendations in humid conditions)
Moisture collects behind paint layers and breaks the bond between paint and substrate. You get curling edges, bubbling blisters, flaking. Humidity slows paint drying and traps water vapor beneath the surface, creating pressure that pushes paint away from walls. The substrate itself reacts to trapped moisture. Wood absorbs water and swells, pushing paint off. Drywall traps moisture and promotes mildew growth that further degrades adhesion.
You can’t just brush better paint over a damp wall and hope it holds. The water will find its way through. Fix the cause first, then protect the surface with materials designed to handle moisture.
Identifying and Eliminating Moisture Sources
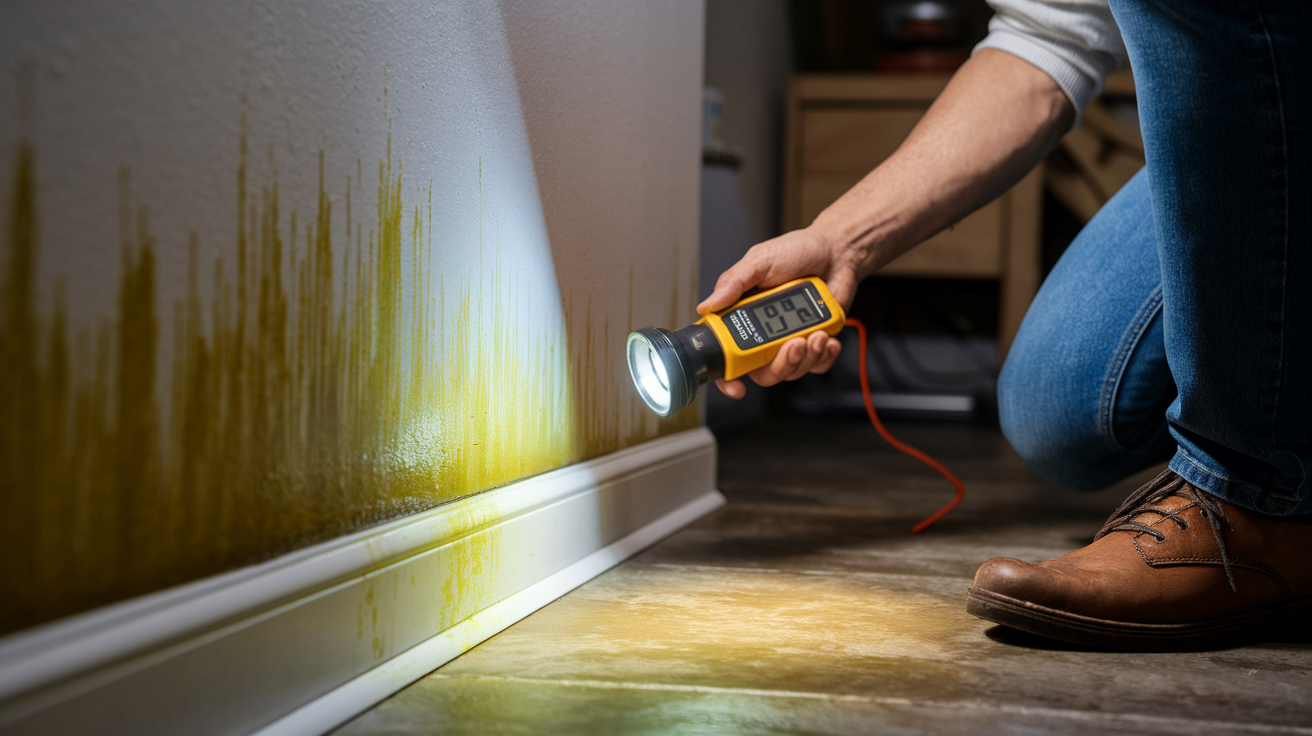
Prevention starts with finding where moisture originates. Early warning signs include bubbling along edges, peeling that gets worse over time, discoloration with yellowish or brownish stains, musty odors even after cleaning, and soft or spongy wall surfaces when you press them. Bathrooms face daily shower steam without adequate ventilation, creating a constant moisture load on ceilings and walls. Basements deal with groundwater seeping through foundation walls or leaky pipes hidden behind finished surfaces.
Painting over moisture sources without fixing them guarantees repeated failure. The new paint might look good for a few weeks, but trapped moisture will push through again.
Common moisture sources and solutions:
- Roof leaks: Inspect and repair flashing, shingles, and penetrations where pipes or vents pass through
- Gutter problems: Clean gutters twice yearly and direct downspouts 6+ feet from foundation
- Foundation drainage: Grade soil away with 6-inch drop over first 10 feet from house
- Plumbing leaks: Fix leaking pipes inside walls, ceilings, and under sinks before moisture spreads
- Basement groundwater: Install sump pumps, exterior drainage systems, or waterproof membranes on foundation walls
- Rising damp in masonry: Apply waterproof barriers to exterior foundation and improve exterior drainage
- Window/door gaps: Caulk all joints with exterior-grade polyurethane or silicone sealant
- Condensation on cold surfaces: Improve insulation to reduce temperature differences between wall surfaces and room air
- Bathroom/kitchen steam: Install properly sized exhaust fans (minimum 50 CFM for bathrooms, 100+ CFM for kitchens)
- Landscaping contact: Trim vegetation 12-18 inches from walls, keep mulch 6-8 inches below siding
- Poor attic ventilation: Add soffit and ridge vents to prevent condensation in roof spaces
- Exterior cracks: Seal all gaps where different materials meet, like brick-to-wood trim transitions
Moisture elimination must be completed and verified dry before any painting begins. Test with a moisture meter after repairs and wait until readings drop below 15 percent.
Testing Humidity Levels and Surface Moisture
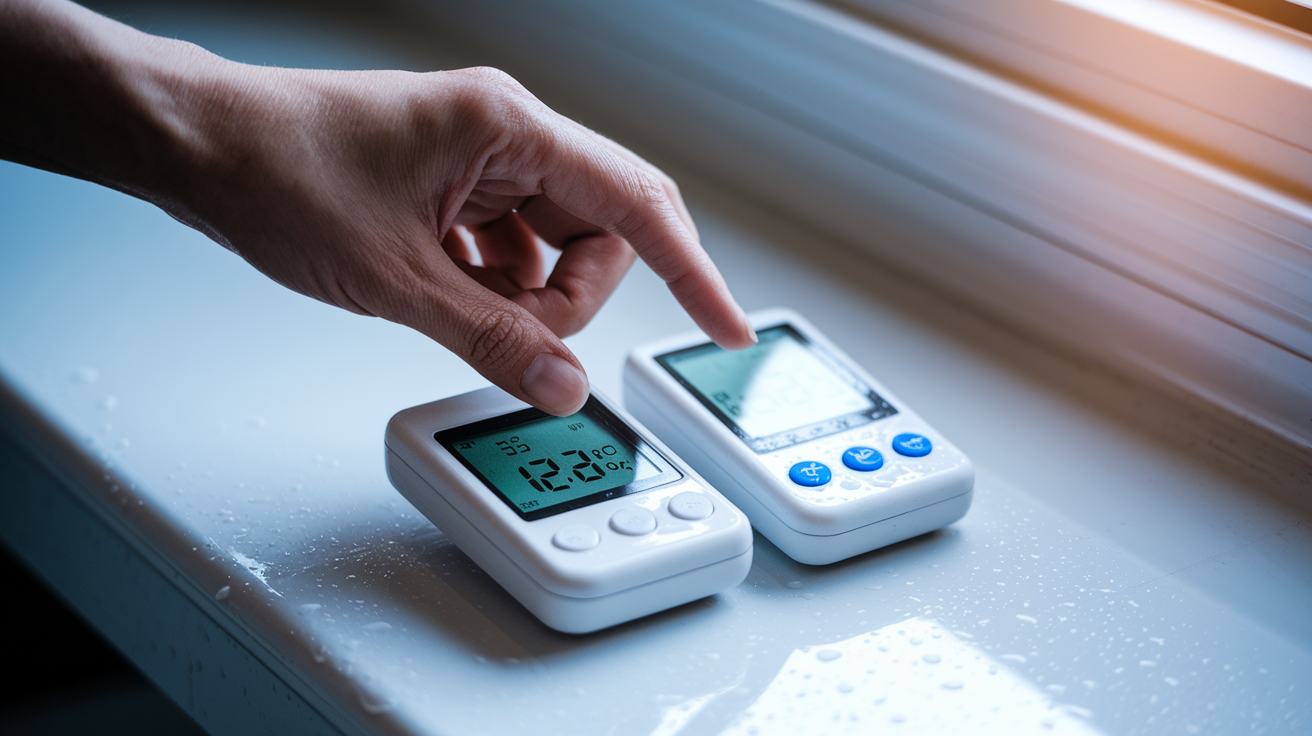
Measuring humidity before and during painting prevents failure you can’t see coming. A hygrometer tracks relative humidity in real time, showing you whether conditions are safe for painting or too risky. Place one in the room you’re working in and check readings throughout the day. Humidity swings between morning and evening, and what looks dry at noon might be damp at 7 a.m.
Moisture meters test substrate moisture content before you apply any paint. Press the pins into drywall or wood. If the reading shows above 15 percent, the surface still holds too much water for paint adhesion. Let it dry longer, run dehumidifiers, or find a hidden moisture source you missed.
Target humidity and temperature vary by location and season, but specific ranges prevent most problems.
| Location/Condition | Target Humidity Level | Optimal Temperature |
|---|---|---|
| Indoor painting conditions | 30-50% humidity | 50-85°F |
| High-moisture rooms (bathrooms/kitchens) | Below 60% humidity | 50-85°F |
| Exterior painting | Below 50% humidity (ideally below 70%) | 50-85°F |
| Long-term indoor maintenance | 40-60% humidity | Comfortable room temperature |
Complete Surface Preparation and Repair Process
Proper surface preparation is the foundation for preventing humidity-related paint failure, whether you’re preparing new surfaces or repairing damaged areas.
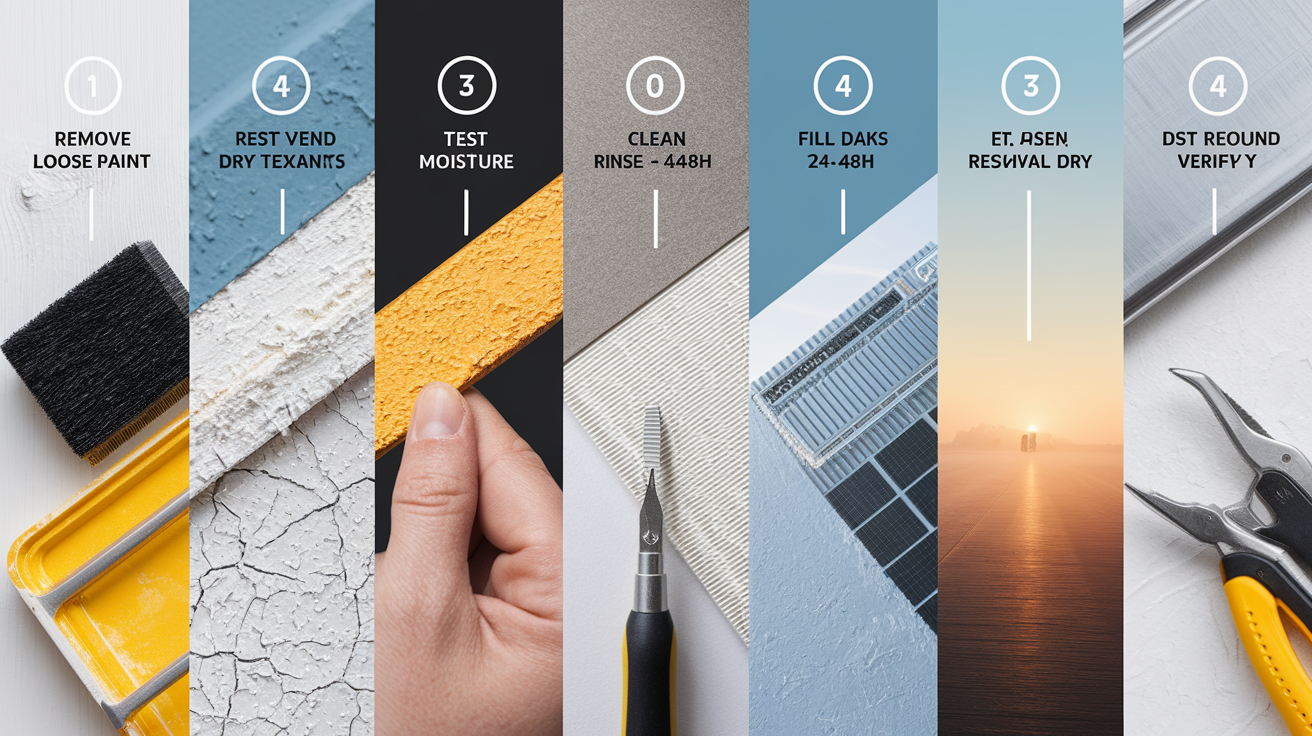
Complete surface preparation and repair sequence:
- Remove all loose, peeling, blistered, or flaking paint using a rigid scraper and putty knife until only firmly adhered paint remains
- Sand surfaces smooth with medium-grit sandpaper (80-120 grit), feathering edges of remaining paint to create seamless transitions
- Test substrate moisture content with a moisture meter. Must be below 15% before proceeding
- Clean entire area thoroughly with mild detergent or bleach solution (1:3 bleach to water ratio) to remove mildew, soap residue, grease, and contaminants
- Rinse completely with clean water and allow to dry for 24-48 hours minimum using fans and dehumidifiers
- Fill cracks, holes, and gaps with appropriate filler or caulk, let dry completely, then sand smooth
- Remove all dust with tack cloth or slightly damp microfiber rag
- Verify surface is completely dry to touch and moisture meter confirms below 15%
- Address any remaining moisture sources before proceeding to primer
Rushing preparation is the primary cause of repeat peeling problems. Surfaces must be completely dry, not just dry to the touch. Testing for lingering moisture after cleaning and drying prevents painting over hidden dampness that feels fine but still holds water deeper in the substrate. Run your hand across the wall. If it feels cool or slightly clammy compared to other walls, give it more drying time.
Extensive damage covering more than 30% of a wall may require complete surface stripping instead of spot repairs. Patching dozens of small areas takes longer and looks worse than stripping everything and starting fresh. For repair work, the underlying moisture source must be fixed or the problem will return within months.
Selecting Moisture-Resistant Primers, Paints, and Specialized Systems
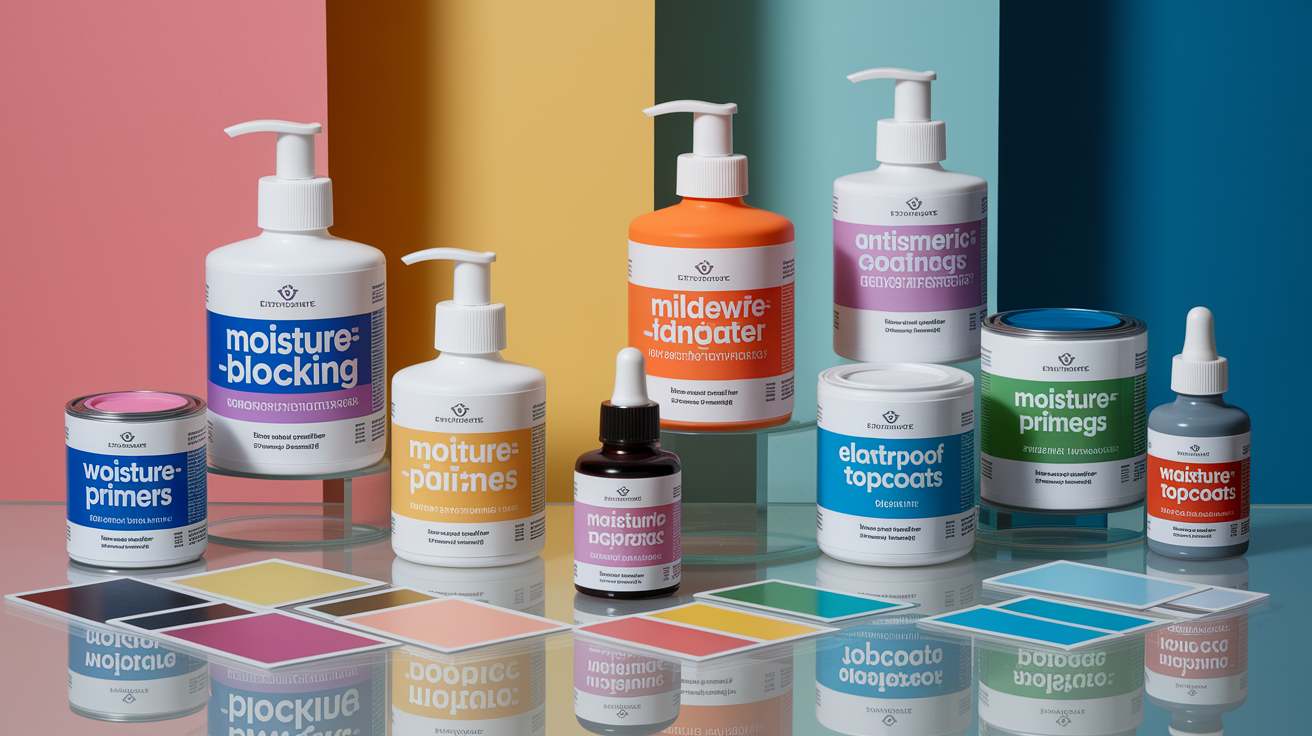
Moisture-blocking primers create the critical barrier between substrate and topcoat. They seal porous areas where water vapor tries to penetrate and improve paint adhesion by creating a uniform surface. Stain-blocking, moisture-resistant primers work on most substrates, including previously water-damaged drywall and wood trim. Anti-fungal primers containing mildewcides should be used in bathrooms, basements, and on previously mildewed surfaces where spores may still be present even after cleaning.
Primer application should follow manufacturer’s drying time recommendations plus additional time in humid conditions. If the label says “recoat after 4 hours,” wait 6-8 hours when humidity is above 50 percent. The primer needs to cure fully before you trap it under topcoat paint.
Moisture-resistant or mildew-resistant paint formulas are specifically designed for high-humidity areas and will say so on the label. Acrylic latex paints resist moisture better than oil-based paints and allow water vapor to escape instead of trapping it behind the paint film. This breathability prevents pressure buildup that causes blistering. Semi-gloss or satin sheens work best for bathrooms and kitchens because they repel moisture on contact and clean easily when soap scum or grease builds up.
Avoid standard interior paints in humid spaces. They lack the mildewcides and moisture resistance needed for long-term durability. Flat or matte finishes absorb moisture instead of shedding it. Oil-based paints trap moisture behind a hard, impermeable film that blisters when vapor tries to escape. Fast-drying formulas marketed for “quick recoats” often fail to cure properly in humidity, leaving a weak paint film that peels within months.
Coastal environments, tropical climates, and persistently high-humidity regions require advanced coating systems beyond standard paints. Elastomeric coatings designed for exterior masonry and stucco bridge small cracks, expand and contract with temperature changes, and allow vapor transmission while blocking liquid water. Breathable finishes allow water vapor to escape from inside the wall while blocking rain and moisture from penetrating inward. Waterproof silicone or acrylic topcoat sealers can be applied over paint in high-exposure areas like exterior doors and trim, though they require reapplication every 2-3 years as UV exposure and weathering degrade the protective layer.
| Product Type | Best Applications | Key Features |
|---|---|---|
| Moisture-blocking primer | All humid-area substrates before topcoat | Seals porous surfaces, prevents water vapor penetration |
| Mildew-resistant acrylic latex | Interior bathrooms/kitchens/basements | Contains fungicides, allows vapor escape, semi-gloss or satin sheen |
| Anti-fungal primer | Previously mildewed surfaces | Kills existing spores, prevents regrowth |
| Elastomeric coating | Exterior masonry/stucco in humid climates | Bridges cracks, breathable, flexible |
| Waterproof topcoat sealer | High-exposure exterior wood and trim | Water-shedding barrier, reapply every 2-3 years |
| Breathable masonry paint | Exterior brick/concrete in coastal areas | Blocks rain, releases interior vapor, prevents trapped moisture |
Proper Paint Application Methods for Humid Environments

Paint only when humidity is below 50 percent and temperature is between 50°F and 85°F. Check weather forecasts before starting. If rain or high humidity is predicted within 48 hours, wait. Starting on a dry day but finishing in humid conditions still causes problems.
Multiple thin coats work better than single heavy coats. Thick paint traps moisture underneath and fails to cure properly, leaving a soft, vulnerable film. Think peanut butter consistency when loading your roller or brush. You should see the previous surface slightly through the wet coat. That’s thin enough to cure properly.
Extended drying times become critical in high humidity. Expect several hours to a full day between coats. Always follow manufacturer recommendations plus additional time when humidity rises above 40 percent. If the label says “dry to touch in 2 hours, recoat after 4,” plan for 6-8 hours in humid conditions. Touch the surface lightly with a fingertip. If it feels cool or tacky, it’s still releasing moisture.
Use rollers for even coverage on large wall surfaces. Brushes work better for edges, corners, and trim where precision matters. For spray painting, use light coats with adjustable pressure settings and excellent ventilation. Only spray when humidity is below 50 percent. Spraying in high humidity causes overspray to dry slowly and settle as rough texture on walls. Avoid early morning or late evening application when dew point and condensation risks are highest.
Installing and Optimizing Ventilation Systems
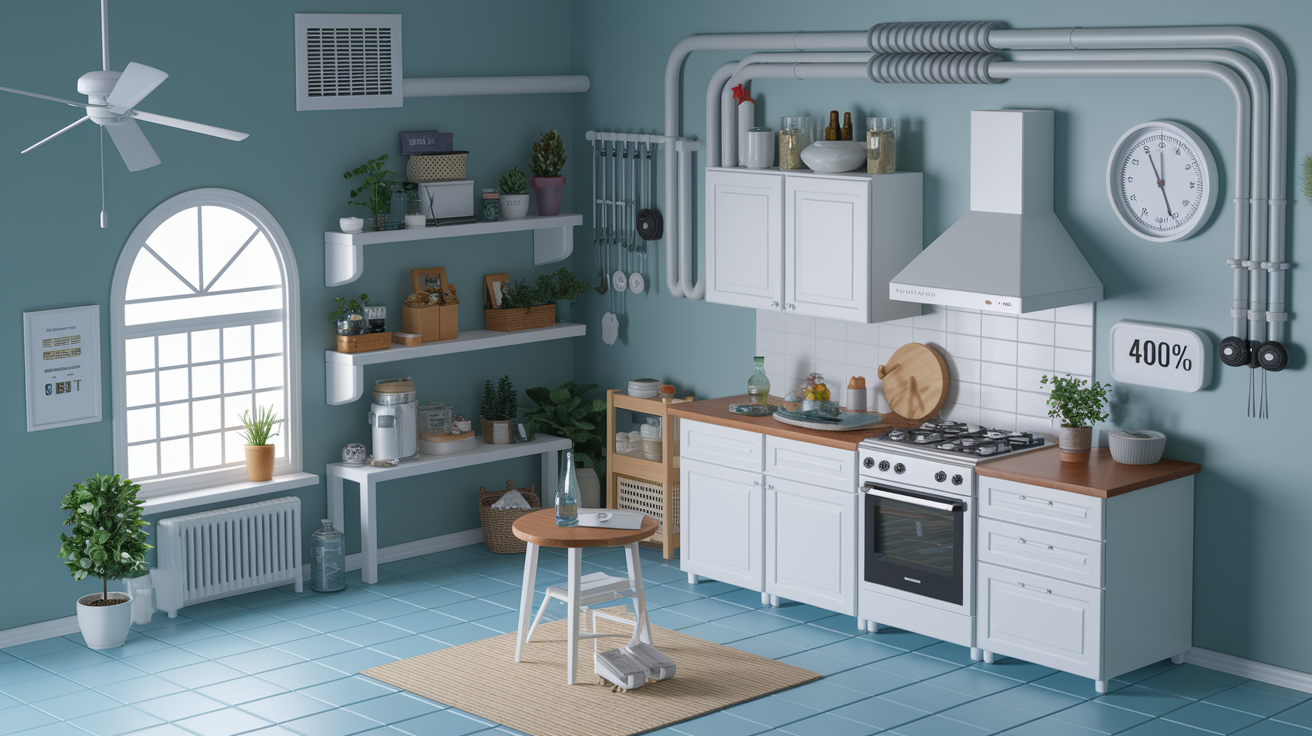
Mechanical ventilation removes moisture-laden air before it can condense on painted surfaces. Proper air circulation prevents humidity from concentrating in problem areas like bathrooms, kitchens, and basements where steam and cooking moisture accumulate daily. Ventilation improvements should be completed before repainting failed areas. Installing an exhaust fan after paint has already peeled won’t fix the damage, but it prevents the next round of problems.
Ongoing monitoring with a hygrometer allows early detection of humidity spikes before paint damage occurs. Place a hygrometer in each high-moisture room and check readings monthly. If humidity creeps above 60 percent regularly, increase ventilation or add dehumidification before walls start showing moisture stains.
Essential ventilation improvements and maintenance practices:
- Install exhaust fans in bathrooms rated for room size (minimum 50 CFM for standard bathrooms, 1 CFM per square foot for larger spaces)
- Run exhaust fans during showers and for 20-30 minutes afterward to remove steam completely
- Add kitchen range hoods vented to exterior (not recirculating types) and use during cooking, especially when boiling water
- Use portable dehumidifiers in basements and high-moisture rooms to maintain 40-60% humidity year-round
- Ensure HVAC systems circulate air throughout the home with proper return vents in humid areas
- Open windows when outdoor humidity is lower than indoor levels for natural ventilation and air exchange
- Avoid drying clothes indoors or use only properly vented dryers that exhaust moisture outside
- Track indoor humidity monthly with a hygrometer, maintaining 40-60% year-round
- Adjust dehumidifier settings seasonally as outdoor humidity changes between summer and winter
- Inspect painted surfaces every 3-4 months for early warning signs: bubbling, discoloration, peeling edges, or soft spots
Prevention requires ongoing vigilance. Seasonal humidity changes demand different strategies, with dehumidification critical in summer and preventing overly dry conditions in winter heating seasons.
Applying Moisture Barriers and Vapor Retarders

Moisture barriers and vapor retarders are physical layers that block water vapor migration through walls and substrates. They work differently than paint. Paint resists moisture at the surface. Barriers block it deeper in the wall assembly before it ever reaches the paint.
Barriers become necessary in basements with groundwater issues, exterior walls in coastal environments where salt air and high humidity are constant, crawl spaces with persistent dampness, and areas with previous efflorescence. Efflorescence looks like white salt deposits that push through paint and masonry. It’s a sign that water is moving through the wall, carrying dissolved minerals to the surface.
Interior vapor barrier installation involves applying polyethylene sheeting to the warm side of insulation before drywall goes up. This is mostly for new construction or major renovations where walls are opened. Seams must be overlapped and sealed with special tape or caulk. Gaps or tears let vapor through, making the barrier useless. If you’re doing this level of work, you’re probably already past DIY and into contractor territory.
Exterior waterproof membrane applications include liquid-applied coatings or sheet membranes on foundation walls, behind exterior siding, and in below-grade basement waterproofing systems. These block liquid water from seeping through foundation cracks while allowing trapped vapor to escape outward. Moisture barriers work with proper drainage and ventilation, not as standalone solutions. You can’t just slap a membrane on a wet wall and call it fixed. Fix the drainage, install the barrier, then add ventilation.
Professional assessment may be needed for severe foundation or groundwater problems. If water is actively seeping through foundation walls or pooling in crawl spaces, that’s beyond paint and ventilation fixes.
Preventing Mold and Mildew Growth on Painted Surfaces
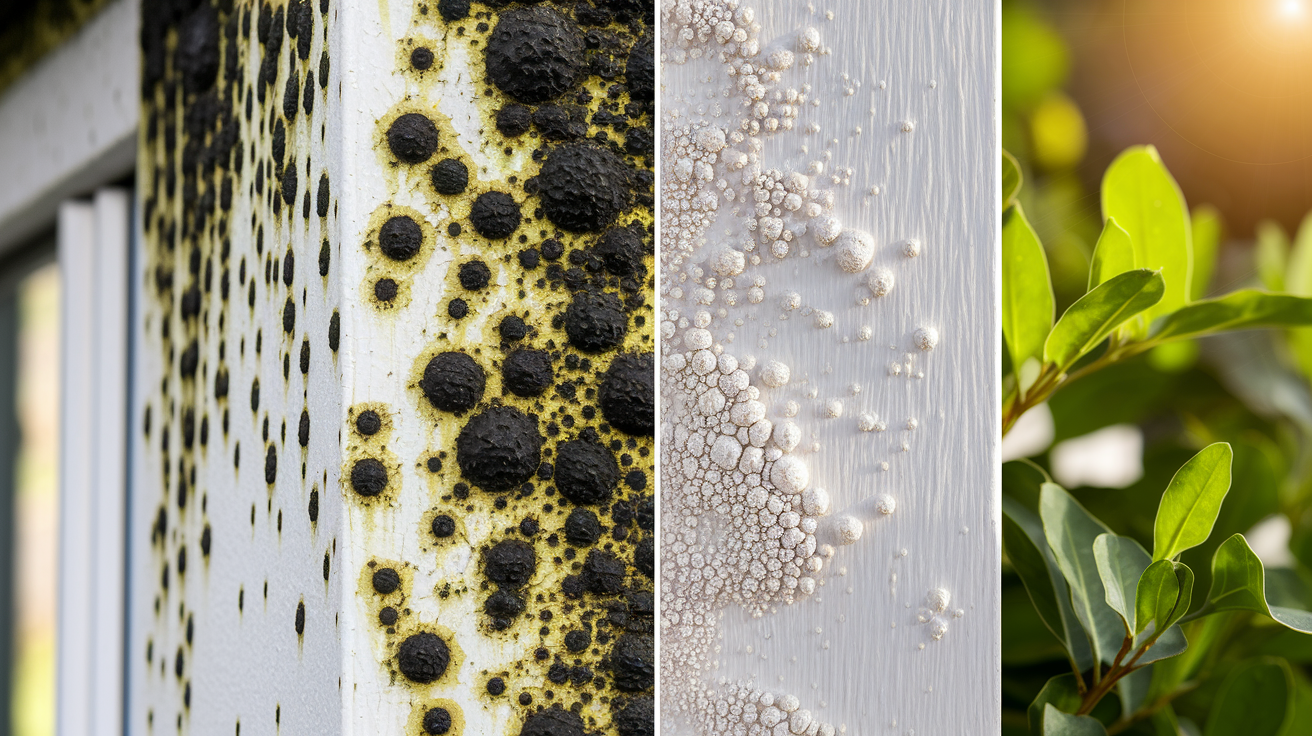
Humidity above 60 percent creates ideal conditions for mold and mildew growth on painted surfaces, causing black spots, musty odors, and paint degradation. Mold grows on the paint film itself, not just underneath. It feeds on dust, soap residue, and organic compounds in some paints. This means you can have clean walls that still grow mold if humidity stays high and air doesn’t circulate.
Mildew-resistant coatings contain fungicides that prevent growth, but they’re preventive, not curative. They stop new spores from taking hold. Existing growth must be killed first or it continues spreading under the new paint. You’ll see the dark stains bleeding through within weeks.
Mold and mildew prevention steps:
- Maintain indoor humidity below 60 percent (ideally 40-50%) using dehumidifiers and ventilation
- Clean affected areas with bleach solution (1 part bleach to 3 parts water) or commercial mildew remover
- Scrub with stiff brush, rinse thoroughly with clean water, and dry completely before painting
- Use TSP cleaner for heavy contamination to degrease and disinfect surfaces before rinsing
- Apply anti-fungal primer after cleaning to prevent regrowth on surfaces that had mold
- Select mildew-resistant paint formulas with fungicide additives for all coats in high-risk areas like showers and basement walls
Tools and Materials Needed for Humidity-Proof Painting
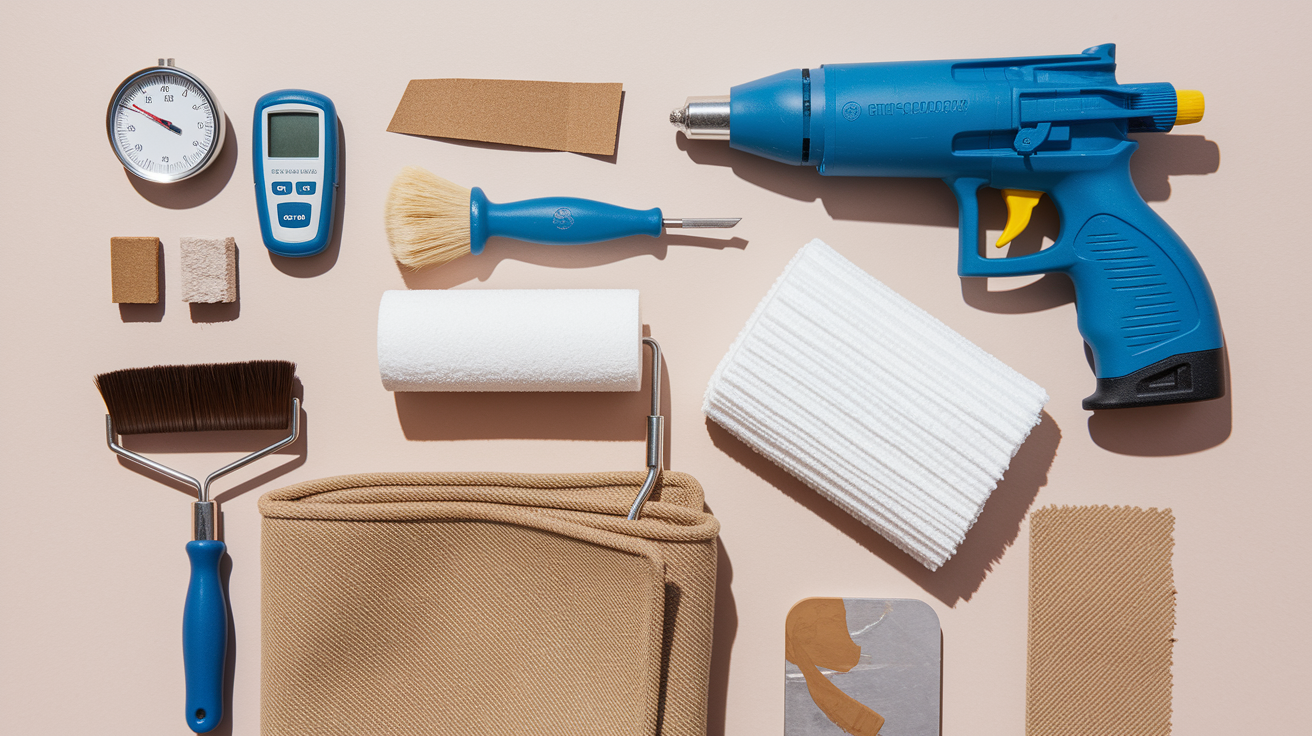
Having the right tools and materials before starting prevents mid-project delays and ensures proper execution.
Essential tools and materials:
- Hygrometer for measuring relative humidity levels in the room
- Moisture meter for testing substrate moisture content before painting
- Rigid paint scraper and putty knife for removing loose paint
- Medium-grit sandpaper (80-120 grit) and sanding block for smoothing surfaces
- Tack cloth or microfiber rags for dust removal after sanding
- Bleach or TSP cleaner for mold and surface cleaning
- Fans and/or portable dehumidifier for drying surfaces between steps
- Moisture-blocking primer designed for high-humidity areas
- Moisture-resistant or mildew-resistant paint (acrylic latex formula)
- Quality brushes and rollers (synthetic bristles for latex paint)
- Exterior-grade caulk (polyurethane or silicone for wet areas)
- Caulk gun and smoothing tool for sealing gaps
- Drop cloths and painter’s tape to protect floors and trim
- Respirator mask for mold cleaning and primer fumes
- Safety glasses and gloves for protection during prep work
Cost and Time Investment for Humidity Prevention
DIY materials cost less than professional services but require more time and careful execution. A moisture meter runs $20-50 for a basic pin-type model. Hygrometers cost $10-30. Portable dehumidifiers range from $150-300 depending on capacity. Moisture-blocking primer costs $40-60 per gallon, covering about 300-400 square feet. Moisture-resistant paint runs $45-70 per gallon. Exhaust fans with installation kits cost $80-200, though professional installation adds another $100-200 for electrical work.
Time requirements depend on damage extent and drying conditions. Surface preparation for an average bathroom takes 1-2 days of scraping, sanding, and cleaning. Drying time between steps adds 24-48 hours, longer in humid weather. Primer application and curing takes 1 day plus overnight drying at minimum. Paint application requires 2 coats over 2-3 days with extended drying between coats.
Professional assessment becomes cost-effective when dealing with extensive damage covering multiple rooms, severe mold contamination requiring containment and specialized cleaning, structural moisture issues like foundation leaks or roof damage, or recurring failures despite proper DIY attempts. If you’ve fixed the same spot twice and it keeps peeling, something bigger is wrong.
| Project Scope | DIY Cost Range | DIY Time Investment | Professional Cost Range |
|---|---|---|---|
| Small bathroom repair (50 sq ft) | $150-300 | 3-5 days total | $400-800 |
| Medium bedroom (300 sq ft) | $300-600 | 5-7 days total | $800-1,500 |
| Basement waterproofing + painting | $800-2,000 | 2-3 weeks | $3,000-6,000 |
| Whole-house moisture system | $1,500-4,000 | Varies | $5,000-12,000 |
When to Call a Professional for Humidity Paint Problems
While surface-level humidity issues can be DIY projects, underlying structural problems require professional diagnosis and repair. Professionals have moisture detection equipment that maps hidden leaks inside walls, knowledge of building science principles that explain why moisture moves through your specific wall assembly, and access to commercial-grade products unavailable to homeowners. Professional expertise creates long-lasting protection that eliminates repeated annual failures.
You can patch and paint a bathroom wall yourself. You can’t fix a foundation crack leaking groundwater into finished basement walls or diagnose a vapor barrier failure in exterior wall assemblies. That’s when professional help stops being optional.
Signs you need professional help:
- Paint failure recurring in same location despite proper DIY repair
- Visible water stains, bubbling drywall, or soft spots indicating active leaks
- Extensive mold growth covering more than 10 square feet or spreading rapidly
- Musty odors that persist after cleaning and painting
- Basement moisture issues with efflorescence (white mineral deposits pushing through walls)
- Foundation cracks allowing water infiltration during rain
- Signs of hydrostatic pressure, capillary action, or rising damp in masonry walls
- Building envelope failures around windows, doors, or roof penetrations
- Humidity levels that remain above 60 percent despite dehumidifier use and ventilation improvements
Final Words
Preventing paint peeling from humidity comes down to eliminating moisture sources, testing before you paint, and using the right products.
Fix leaks and ventilation first. Test with a moisture meter and hygrometer. Choose moisture-blocking primers and mildew-resistant acrylic latex paint. Apply thin coats only when conditions are right.
If you control humidity and prep correctly, your paint will stick. And it’ll stay stuck.
FAQ
How to fix peeling paint from humidity?
To fix peeling paint from humidity, first remove all loose paint by scraping and sanding, then ensure the surface is completely dry (below 15% moisture content). Apply moisture-blocking primer followed by mildew-resistant acrylic latex paint after eliminating the moisture source.
Does humidity peel paint?
High humidity peels paint by slowing the drying process and trapping water vapor beneath paint layers. This trapped moisture creates pressure that breaks the bond between paint and substrate, causing bubbling, blistering, and peeling as paint lifts away from walls.
How to get paint to dry in high humidity?
Paint dries in high humidity by using portable dehumidifiers to reduce room humidity below 50 percent and improving air circulation with fans. Apply only thin coats, extend drying time between coats beyond manufacturer recommendations, and avoid painting during early morning or evening when condensation forms.
Is October too late to paint outside?
October is too late to paint outside in most regions because temperatures drop below 50°F and humidity increases from morning dew. Paint only when daytime temperatures consistently stay between 50-85°F and humidity remains below 50 percent for proper curing.
What causes paint to bubble from moisture?
Paint bubbles from moisture when water vapor becomes trapped between the paint layer and substrate, creating pockets of pressure. As humidity accumulates behind the paint film, it breaks the adhesion bond and pushes the paint outward into blisters or bubbles.
How long should you wait to paint after moisture damage?
You should wait 24-48 hours minimum after moisture damage before painting, using fans and dehumidifiers to dry surfaces completely. Test with a moisture meter to confirm the substrate reads below 15 percent moisture content before applying primer or paint.
What type of paint prevents peeling in bathrooms?
Mildew-resistant acrylic latex paint in semi-gloss or satin sheen prevents peeling in bathrooms by resisting moisture absorption and allowing water vapor to escape. These formulas contain fungicides and create a moisture-shedding surface that cleans easily after steamy showers.
Can you paint over mildew-stained surfaces?
You cannot paint over mildew-stained surfaces without first killing the growth and cleaning the area. Scrub affected areas with a bleach solution (1 part bleach to 3 parts water), rinse thoroughly, dry completely, and apply anti-fungal primer before painting.
What humidity level is safe for indoor painting?
The safe humidity level for indoor painting is 30-50 percent relative humidity with temperatures between 50-85°F. Maintain these conditions during application and throughout the drying process using dehumidifiers and proper ventilation to prevent moisture-related paint failure.
How do you know if walls are too wet to paint?
Walls are too wet to paint when a moisture meter reads above 15 percent or surfaces feel damp or cool to touch. Look for visible water stains, musty odors, soft or spongy areas, and condensation that indicate moisture problems requiring correction before painting.