
Ever notice how gutters only leak during the heaviest rain, when you’re least interested in dealing with them? That’s because gutter joints fail slowly, then all at once. A hairline gap becomes a steady drip, then a pour that rots fascia boards and floods your foundation. Sealing gutter joints stops that cascade before it starts. This guide walks you through choosing the right sealant for your gutter material, prepping the surface so it actually sticks, and applying a bead that holds up through years of temperature swings and water flow.
Materials and Tools Needed for Gutter Joint Repairs

Get everything together before you climb up there. Running back to the hardware store mid-job turns a two-hour fix into an all-day thing, especially when you’re already on the ladder and realize you forgot the wire brush.
Materials:
- Gutter sealant (silicone, urethane, or butyl rubber types covered next)
- Mineral spirits or acetone cleaner (degreases metal and vinyl)
- Clean rags (old t-shirts work fine, just no lint)
- Chemical-resistant gloves (nitrile holds up better than thin latex)
Tools:
- Caulking gun (standard trigger style)
- Putty knife (2 to 3 inch width for scraping)
- Wire brush (stiff bristles for metal)
- Stable extension ladder (tall enough to work comfortably)
- Safety glasses (sealant drips hurt)
Set everything out at ground level first. Lay tools on a drop cloth, open the sealant tube, double-check the ladder’s footing. Gloves and safety glasses aren’t optional. Sealant on your hands feels nasty for hours, and acetone in your eyes wrecks your whole week.
Complete Sealing Process: Preparation Through Application
Sealing gutter joints stops water from leaking where sections connect. Joints leak because temperature changes loosen connections, debris works into gaps, and old sealant breaks down. Fix it now, prevent rot later.
Surface prep matters more than which brand you buy. Premium silicone on a dirty wet surface fails in months. Mid-grade sealant on properly cleaned dry metal lasts years.
Surface Preparation Steps:
-
Remove all loose debris and leaves from joint area. Use your hands first, then a small brush. Get inside the joint where water sits.
-
Scrape away old sealant completely with putty knife. Dig out every bit of the old bead. If it’s rubbery and pulls off in strips, good. If it’s cracked and brittle, scrape harder.
-
Scrub with wire brush to expose clean metal or vinyl surface. You want to see bare material, not oxidation or grime. Scrub multiple directions.
-
Wipe with mineral spirits or acetone to remove oils and residue. Soak the rag, wipe thoroughly, let the solvent evaporate. This removes invisible contamination that kills adhesion.
-
Allow complete drying for minimum 2 hours or until no moisture visible. Check the forecast before starting. Moisture during prep compromises bond strength. If there’s dew coming or it rained recently, wait another day.
Once the surface looks clean and feels completely dry, you’re ready.
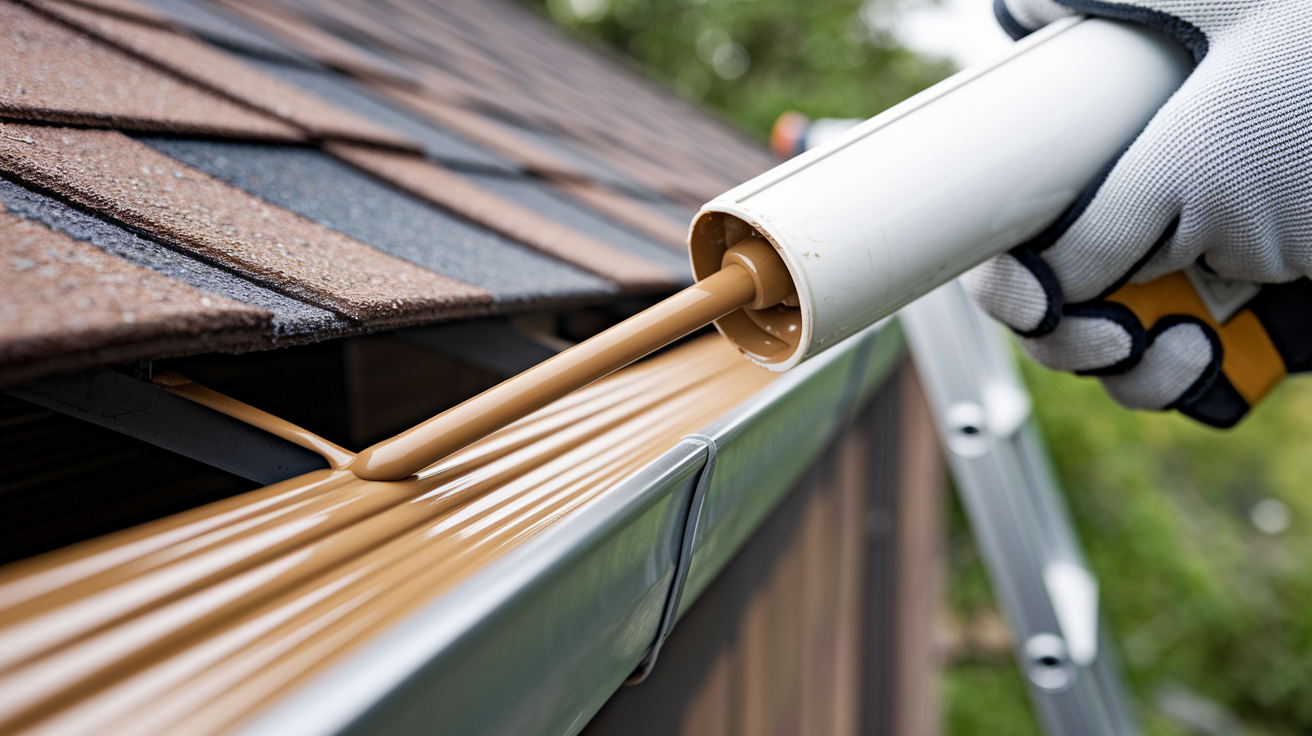
Professional Application Technique:
-
Cut sealant tube nozzle at 45 degree angle for optimal bead size. Start with a smaller cut. You can always trim more, but you can’t add nozzle back. Aim for about 1/4 inch opening.
-
Apply steady continuous bead along entire joint interior. Work from one end to the other without stopping. Keep the gun moving at constant speed while maintaining even trigger pressure.
-
Use consistent pressure on caulking gun trigger for even flow. Think smooth, not jerky. If you see gaps or lumps forming, your pressure’s inconsistent.
-
Smooth immediately with gloved finger in single continuous motion. Don’t go back and forth. One firm pass creates the watertight barrier. Your finger should have sealant on it afterward. That means you’re pressing hard enough.
-
Clamp or press joint sections together firmly until dry. If the joint’s separated slightly, push the sections together and hold for 30 seconds until the sealant grabs. For loose joints, consider a spring clamp.
-
Remove excess sealant before it skins over. Wipe away squeeze-out with a damp rag within the first few minutes. Once it skins (usually 10 to 15 minutes), you’re stuck with it.
For heavy leak situations, some manufacturers recommend applying sealant on both interior and exterior of the joint.
Drying time and curing time are different. The surface might feel dry in an hour, but that’s just skinning. Actual cure time, when the sealant reaches full bond strength and waterproofing, takes 24 to 48 hours for most products. Exposing an incomplete seal to water washes it out or prevents proper adhesion. Follow the manufacturer’s cure time exactly. If the tube says 48 hours, give it 48 hours.
Best Gutter Sealant Types and Material Selection

Not all sealants work the same in gutters. Temperature swings, constant water exposure, and UV radiation destroy products that work fine indoors.
Silicone-Based Sealants
Silicone’s the go-to for gutter joints because it moves with the metal. Gutters expand in summer heat and contract in winter cold, sometimes by a quarter inch or more across a 20-foot run. Rigid sealants crack under that stress. Silicone stays flexible across temperature extremes, from below freezing to 150°F in direct sun.
It also tolerates moisture during curing better than other types, though you should still aim for dry conditions. Once cured, it creates a true waterproof barrier rather than just filling a gap. That’s what gutters need. Protection from constant water flow, not just void filling.
Urethane and Butyl Rubber Options
Urethane sealants bond more aggressively to metal and vinyl than silicone does, and they handle UV exposure without breaking down. The trade-off is longer cure times, sometimes 72 hours instead of 24, and slightly less flexibility. For joints that don’t move much, like downspout connections, urethane’s adhesion strength makes sense.
Butyl rubber sealants deliver serious waterproofing and resist aging better than cheaper options. They stay sticky longer during application, which helps fill irregular gaps. But they don’t stretch and recover like silicone. If your gutters shift seasonally, butyl can pull away at the edges over time.
Gutter-Specific Versus General Caulks
Here’s the key difference. Sealant creates a barrier, caulk fills voids. Gutters need barrier protection because water constantly flows across the joints. General purpose acrylic latex caulk is cheaper and you can paint over it, but it’s designed for dry interior gaps. In moisture-exposed areas, it offers minimal benefit.
Acrylic caulk absorbs water, softens, and eventually washes away. That’s fine for filling nail holes in trim. It’s not fine for gutter joints. Gutter-specific sealants are formulated for water flow demands and weather exposure. They cost a few dollars more per tube, and they last years longer.
| Sealant Type | Best For | Flexibility | Cure Time |
|---|---|---|---|
| Silicone | All joints, high temperature variation | High | 24-48 hours |
| Urethane | Stable joints, UV-heavy areas | Medium | 48-72 hours |
| Butyl Rubber | Minimal-movement joints, waterproofing priority | Low | 24-48 hours |
| Gutter-Specific Caulk | General repairs, budget projects | Medium | 12-24 hours |
Material-Specific Sealing Techniques for Different Gutter Types
Different gutter materials need different prep approaches. What works on aluminum can damage vinyl or discolor copper.
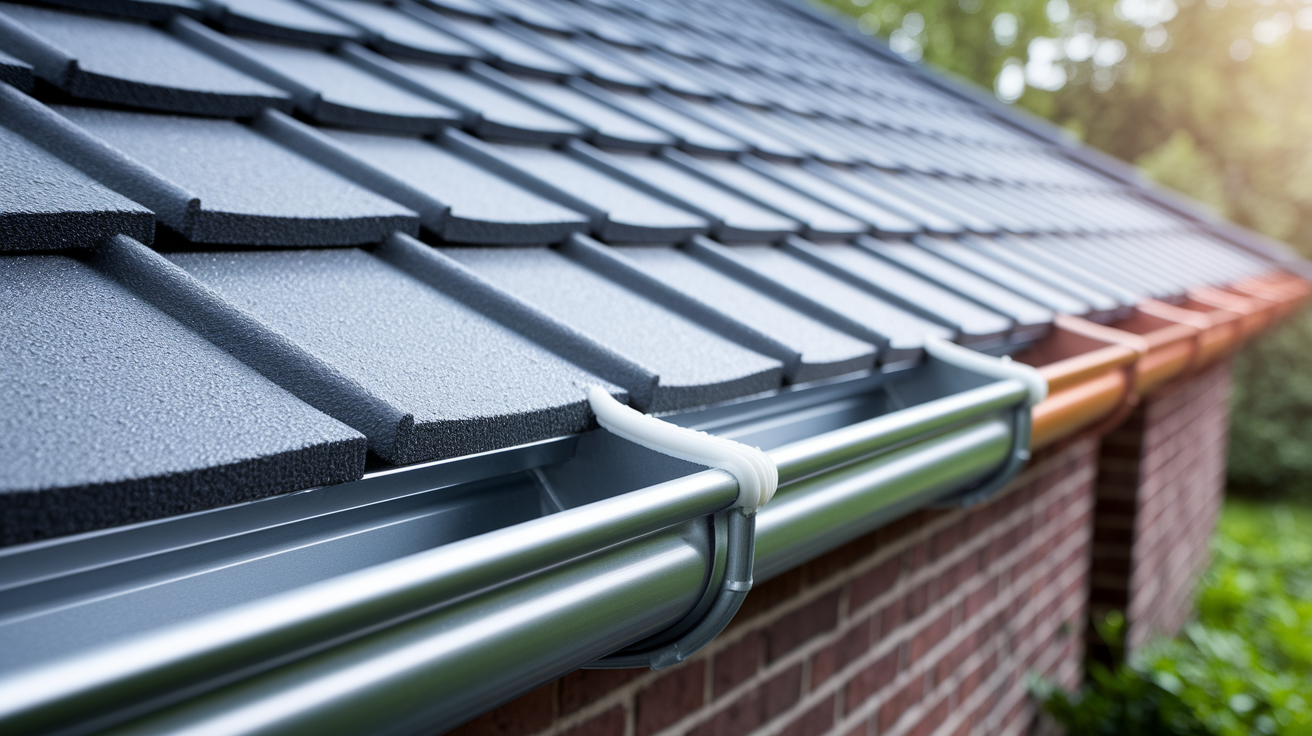
Aluminum Gutter Joints
Aluminum oxidizes into a white or gray powder that prevents sealant from sticking. After wire brushing, wipe with mineral spirits to remove the oxidation film. Don’t use harsh acids. They etch the surface and make future sealing harder.
Look for silicone sealants specifically labeled as safe for aluminum. Some formulations won’t discolor the finish, which matters if you have architectural grade gutters with a factory coating.
Vinyl Gutter Systems
Vinyl expands and contracts more than metal does. You need a sealant that stays flexible in both directions, not just one. Avoid acetone or harsh solvents during cleaning. They can cloud or craze vinyl surfaces.
Use mild soap and water for cleaning, then rinse thoroughly and dry completely. Silicone sealants designed for plastics bond without damaging the material. Check the tube label for vinyl compatibility before buying.
Galvanized Steel Joint Sealing
Rust is the enemy here. If you see active rust at the joint, wire brush it down to bare metal, then wipe with mineral spirits. For bare steel exposed by rust removal, apply a rust inhibiting primer first, let it dry per label instructions, then seal over it.
Moisture tolerant silicone works, but the primer step matters more on steel than on aluminum. Skip it, and rust blooms under your fresh sealant within a year.
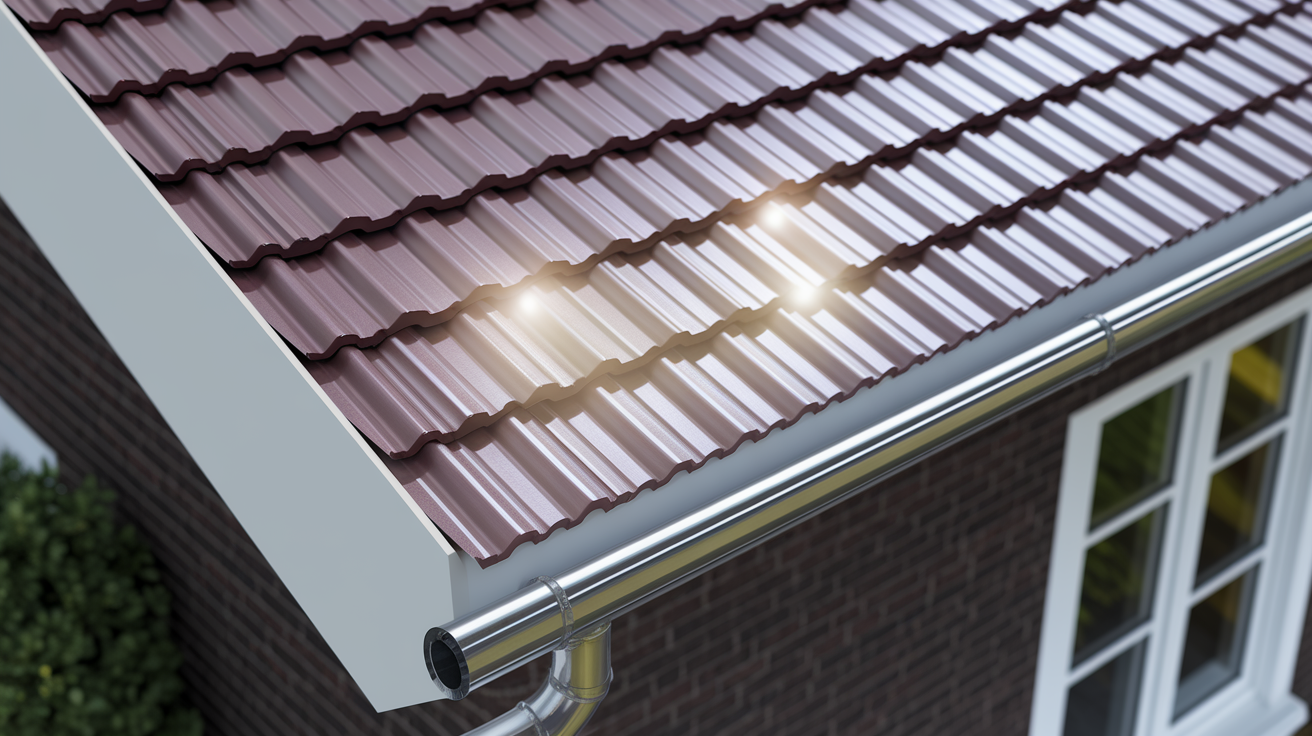
Copper Installation Considerations
Copper develops a protective patina over time. Some sealants contain chemicals that react with copper and leave permanent stains. Look for products specifically rated for copper or high-end metals.
Avoid abrasive cleaners that scratch the surface. Use a soft brush and mild detergent, rinse well, and dry completely. Specialty sealants for copper cost more, but they won’t ruin the appearance of a material that’s often chosen for its looks.
Always check the sealant tube label for a material compatibility list. If your gutter material isn’t listed, call the manufacturer’s tech support line or choose a different product.
Critical Joint Types and Common Leak Points
Joints are the weak spots in any gutter system. Water pressure, thermal stress, and debris accumulation all concentrate at connection points.
Each joint type fails in predictable ways. Miter joints at corners carry stress from two directions as gutters expand and contract. They’re also hard to clean, so debris sits in the angle and rusts the seam from the inside.
Common Joint Types and Their Vulnerabilities:
-
Miter joints at corners. Stress concentration points where two angled sections meet. These leak first because movement pulls in multiple directions at once.
-
Downspout connections. High water volume flows through here, especially during heavy rain. The connection piece often separates from the gutter bottom under pressure.
-
End caps. Thermal expansion pushes outward against end caps. The sealant around the cap’s perimeter cracks and peels, letting water seep behind it.
-
Lap seams between sections. Where one gutter section overlaps another in a straight run. The overlapping seal fails as metal shifts, and debris wedges into the gap.
-
Inside and outside corner pieces. These experience multi-directional stress from temperature changes and water flow redirecting at angles. Fasteners loosen over time, opening gaps.
When you’re up there fixing one leak, inspect all the joint types while the ladder’s in position. You’ll often find a second or third weak spot that hasn’t started dripping yet. Seal them all in one session. It saves you from setting up the ladder again next month when another joint fails.
Weather Timing and Temperature Requirements for Sealing

Sealant chemistry depends on temperature and moisture. Apply it in the wrong conditions, and it never cures properly.
Most sealants work best between 40°F and 90°F. Below 40°F, the material gets stiff and won’t flow smoothly from the tube. You’ll fight the caulking gun, and the bead comes out lumpy. Above 90°F, especially in direct sun, the surface skins over so fast you can’t smooth it before it hardens. You end up with a rough, uneven seal that looks bad and doesn’t bond as well.
Check the 48-hour forecast before starting. You need dry conditions from prep through full cure. Some products advertise “30 minute rain ready” times, which means light rain won’t wash the sealant away after that point. But rain ready doesn’t mean fully cured. Full cure, when the sealant reaches maximum bond strength and complete waterproofing, takes 24 to 48 hours. Expose it to heavy rain or standing water before then, and you’ll compromise the seal.
Seasonally, spring and fall offer the most reliable conditions. Temperatures stay moderate, and weather patterns are more predictable than summer thunderstorms or winter freezes. Avoid sealing in winter unless daytime temps stay above 40°F for at least three days straight. Summer works if you can do the job early morning before the sun hits the gutters, or on an overcast day. Always follow your specific product’s temperature range and timing specifications. They vary by formulation.
Common Gutter Joint Sealing Mistakes to Avoid

Most seal failures happen because of rushed prep or wrong materials, not because sealant doesn’t work.
Mistakes That Cause Seal Failures:
-
Skipping surface cleaning. Dirt, leaves, and old sealant residue physically block the new sealant from touching the gutter material. It adheres to the contamination layer, not the surface, and peels off in weeks.
-
Applying to wet surfaces. Even a thin moisture film compromises bond strength. The sealant never gets a solid grip, and water eventually works under it. Wait for complete dryness.
-
Using wrong sealant type like acrylic caulk. Acrylic caulk is cheap and paintable, which makes it tempting. But it’s designed for dry interior gaps. In constant moisture, it softens and washes away. Use moisture rated products.
-
Applying too thin a bead. A skinny bead might look neat, but it doesn’t provide enough material to bridge gaps or handle joint movement. Aim for 1/4 inch width minimum.
-
Not following cure times. The surface might feel dry in an hour, but that’s just skinning. Premature water exposure washes away uncured sealant or prevents it from bonding fully. Wait the full 24 to 48 hours.
-
Working in wrong weather. Temperature extremes affect curing chemistry. Too cold, and it never fully polymerizes. Too hot, and it skins before you can smooth it. Check the forecast.
-
Choosing temporary products like Flex Seal for permanent repairs. Quick fix spray sealants work in an emergency, but they’re not formulated for long-term gutter exposure. They break down within a year. Use proper gutter sealant for lasting repairs.
-
Ignoring material compatibility. Some sealants contain solvents that damage vinyl or chemicals that stain copper. Read the label, check compatibility, or risk ruining your gutters.
Proper technique takes an extra hour on the front end. That hour saves you from redoing the entire job in six months when the rushed repair fails.
Testing and Troubleshooting Sealed Gutter Joints
You won’t know if the seal works until you test it with water. Visual inspection only tells you what it looks like, not whether it’s actually waterproof.
Wait the full cure time before testing. Minimum 24 hours, 48 is better. Rushing this step can damage a seal that would have worked if you’d given it time.
Testing Steps:
-
Wait minimum 24 to 48 hours or manufacturer specified cure time. Mark your calendar. Don’t guess.
-
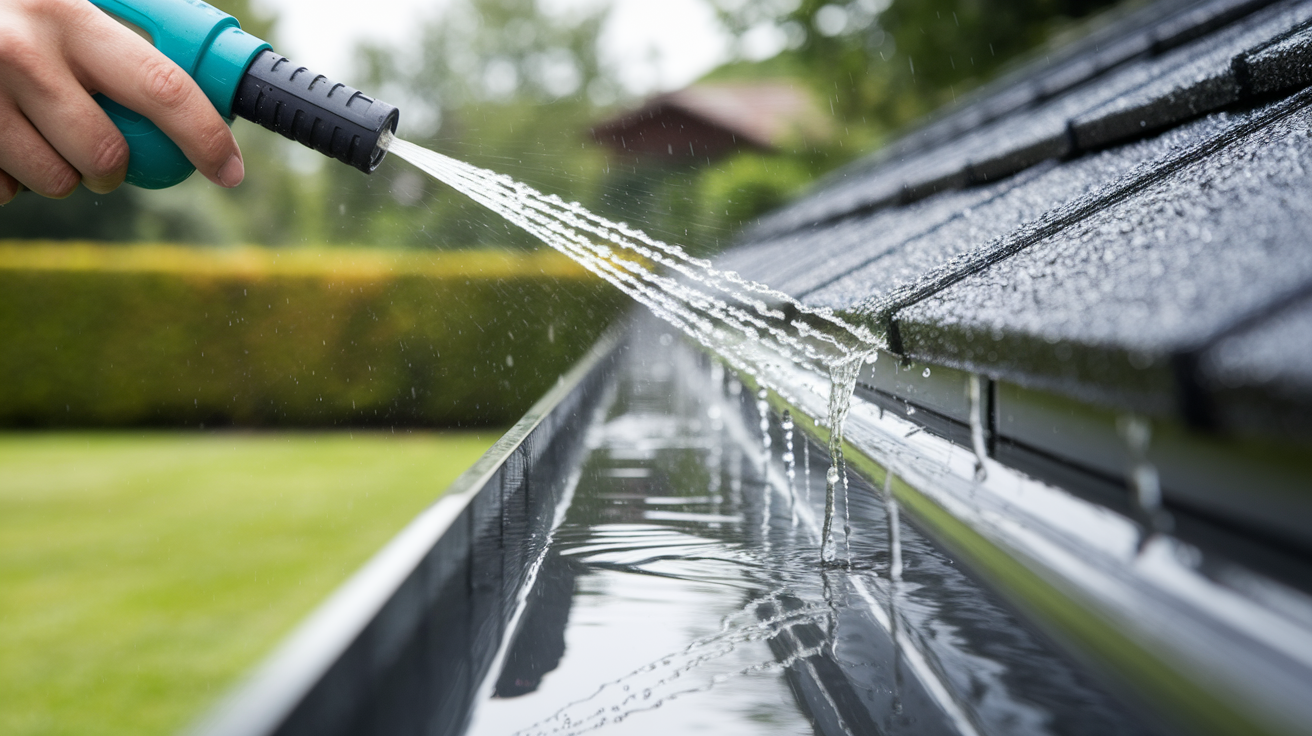
Use garden hose to simulate moderate rainfall. Set the nozzle to a steady stream, not full blast. You’re testing for normal rain, not hurricane conditions.
-
Start at highest point and work toward downspout. This mimics how water flows naturally. Fill the gutter section by section.
-
Watch for drips, seepage, or moisture at joint. Get close. Sometimes leaks appear as dampness rather than obvious drips. Check both the interior and exterior of the joint.
-
Mark any problem areas with tape for resealing. Bright colored painter’s tape works. You’ll forget the exact spot by the time you get your tools out.
Troubleshooting Solutions:
-
Pinhole leaks. Apply a second thin coat over the first after it’s fully cured. The pinhole usually means your first bead was too thin in one spot.
-
Edge seepage. The bead wasn’t wide enough. Clean the area, dry completely, then apply a wider bead that extends past the original seal.
-
Persistent leaks. There might be a crack or hole you didn’t see initially. Dry the area, inspect carefully, and patch with metal flashing or gutter repair tape before sealing over it.
-
Multiple joint failures. If several joints leak even after resealing, you might have a structural problem. Sagging gutters, loose fasteners, or sections that need replacement. Consider professional assessment at that point.
Document your repair date on your phone or calendar. When you inspect again in six months, you’ll know how long the seal has lasted and whether you need a different approach next time.
Cost Breakdown and Time Investment for DIY Joint Sealing

Sealing gutter joints is one of the most cost effective home repairs you can do yourself. The materials are cheap, the learning curve is short, and the savings compared to hiring out are substantial.
A basic sealant tube runs $6 to $12 at most hardware stores. Professional grade silicone or urethane costs $12 to $20. If you don’t already own a caulking gun, add $8 to $15 for a decent one. Throw in a putty knife, wire brush, and cleaner if you need those, and you’re looking at $25 to $50 total for an average home with a few problem joints.
Time investment depends on how many joints need work. A single miter joint or end cap takes about an hour from setup to cleanup, including proper prep. Multiple joints across the house can stretch to 3 or 4 hours of active work, plus cure time before testing. It’s not fast, but it’s straightforward.
| Item | Cost Range | Notes |
|---|---|---|
| Gutter sealant tube | $6-$20 | Higher end for professional-grade silicone or urethane |
| Caulking gun | $8-$15 | One-time purchase if you don’t own one |
| Cleaning supplies (brush, rags, solvent) | $5-$10 | Often have these already |
| DIY Total | $25-$50 | For average repair of 2-4 joints |
| Professional service | $150-$300 | Includes labor, materials, and often a service call minimum |
DIY makes sense when you’re dealing with simple joint leaks and the gutters themselves are in decent shape. A properly sealed joint lasts 5+ years, sometimes 10+ with good maintenance. That’s solid return on a $30 investment and a Saturday morning. But if you’re seeing extensive damage, large holes, sagging sections pulling away from the fascia, or gutters rusted through in multiple spots, sealing joints won’t fix the underlying problem. At that point, you need professional replacement, not sealant. Trying to patch your way through structural failure wastes money and time while water damage continues.
Long-Term Maintenance Schedule for Sealed Gutter Joints
A sealed joint doesn’t mean you’re done with gutter maintenance. Regular upkeep is what turns a 5 year repair into a 10+ year one.
The single biggest factor in joint longevity is keeping debris out. Leaves, twigs, and dirt trap moisture against the metal, accelerate rust, and work their way into sealed joints. Clean gutters twice yearly at minimum. Once in late spring after trees finish dropping seed pods and flowers, and again in late fall after leaves drop.
Seasonal Maintenance Tasks:
-
Spring inspection after snow and ice. Check for joints that separated during freeze thaw cycles, and look for ice damage to sealant.
-
Summer debris clearing. Remove any buildup from spring storms and pollen season before it hardens.
-
Fall pre-winter prep. This is the most important cleaning. Get every leaf and twig out before winter. Frozen debris expands and pushes joints apart.
-
Winter ice dam monitoring. If ice backs up into gutters, the weight can stress joints. Clear heavy snow loads from gutters when safe to do so.
Twice yearly cleaning prevents the debris buildup that speeds up joint deterioration. A gutter full of wet leaves creates a constant moisture environment that breaks down sealant and rusts metal. Clean gutters dry out between rains, giving everything a chance to breathe.
Joint Inspection Checklist (Twice Yearly):
-
Check joint areas for separation or gaps. Look for visible space between sections or where sealant has pulled away.
-
Look for rust or corrosion at seams. Orange or white powdery deposits mean water is getting through.
-
Test for water pooling or slow drainage. Standing water puts constant pressure on joints and indicates a slope problem.
-
Verify sealant hasn’t cracked or pulled away. Run your finger along sealed joints. They should feel smooth and continuous.
-
Clean out debris before it causes problems. Even a little buildup starts the damage process. Clear it now.
Regular maintenance connects directly to preventing water damage to your home’s exterior, foundation, and walls. Gutters exist to move water away from the structure. Leaking joints dump water right against siding and fascia boards, causing rot that costs thousands to repair. Fifteen minutes on a ladder twice a year beats a $5,000 wood replacement project.
When to Reseal Versus Replace Gutter Joints
Not every gutter problem can be fixed with a tube of sealant. Sometimes the joint itself is too far gone, or the surrounding gutter is compromised.
Sealant works when the structural components are still sound. You’re just restoring the waterproof barrier at the connection point. But if the metal is rusted through, the joint is separating because fasteners have failed, or the gutter is sagging away from the house, sealing won’t help. You’re trying to patch a bigger problem.
Good Candidates for Resealing:
-
Small cracks under 2 inches. These respond well to sealant. Clean, seal, done.
-
Minor joint separation with intact fasteners. If the joint has pulled apart slightly but the screws or rivets are still solid, sealant can bridge the gap.
-
Rust spots along seams. Surface rust cleaned down to bare metal, primed, and sealed will hold for years.
-
Preventive sealing of aging but sound joints. If joints are 10+ years old but not leaking yet, sealing them now prevents problems later.
-
End cap leaks with no structural damage. The cap is secure, the sealant just failed. Easy fix.
Replacement Required:
-
Large holes or gaping fissures. Holes bigger than a quarter can’t be reliably sealed. The structural integrity is gone.
-
Sagging or pulling away from fascia. This means the hanger system failed. Sealing the joints won’t stop the sagging or hold the gutter in place.
-
Fallen tree or impact damage. Bent, crushed, or torn sections need replacement. Sealant can’t restore shape or strength.
-
Corroded through metal sections. When the gutter itself has rusted through, not just the joint, it’s past repair. Replace the damaged run.
-
Multiple joint failures across entire run. If every joint in a 30 foot section is leaking, the gutters have reached end of life. Sealing might buy you a season, but replacement is the real solution.
When you’re uncertain, get a professional opinion before spending money on sealant. A $75 assessment visit might tell you that your $40 repair attempt won’t work, saving you wasted effort. And sometimes the smart move is strategic section replacement, cutting out and replacing a 10 foot damaged section, rather than trying to seal six failing joints that’ll just leak again next spring. Proper assessment prevents throwing good money after bad.
Safety Precautions for Gutter Joint Repair Work
Gutter work puts you on a ladder with chemicals in your hands, often leaning and reaching. That combination creates multiple hazard points.
Safety Guidelines for Gutter Work:
-
Secure ladder on level ground with spotter when possible. Soft or uneven ground lets the ladder sink or shift. Have someone at the base, or at minimum, tell someone you’re working on a ladder so they check on you.
-
Maintain three points of contact on ladder. Two hands and one foot, or two feet and one hand. Always. When you need both hands for work, hook your leg through a rung.
-
Wear chemical resistant gloves when handling sealants and cleaners. Nitrile gloves protect against both the sealant and the solvents. Thin latex rips and lets chemicals through.
-
Use safety glasses to protect from drips and splashes. Sealant and acetone drip when you’re working overhead. One drop in your eye means an ER visit.
-
Ensure adequate ventilation when using solvent based products. Work outside, but be aware of which way the wind is blowing. Don’t trap yourself downwind of acetone fumes.
-
Avoid working in wet or windy conditions that affect ladder stability. Wet ground, wet ladder feet, or wind gusts all increase fall risk. Wait for better conditions.
-
Keep tools secured to prevent drops onto people or property below. Use a tool belt or bucket hung from the ladder. Dropped tools break things and hurt people.
-
Consider eco friendly low VOC sealant options for reduced fume exposure. They cost slightly more but reduce headache risk and environmental impact.
Rushing compromises safety. Work methodically, take breaks when you feel tired, and never lean beyond safe reach from the ladder. If you can’t comfortably reach the joint, get down and move the ladder. A 30 second reposition is faster than a trip to urgent care. Some homeowners prefer hiring professionals specifically to avoid height related risks, and that’s a completely valid decision. There’s no prize for doing your own gutter work if you’re not comfortable with ladders.
Final Words
Sealing gutter joints correctly means getting the surface clean and dry, choosing the right sealant for your gutter material, and respecting cure times before testing.
Most leaks happen at corners, downspouts, and lap seams. Once you know how to seal gutter joints the right way, you can tackle each spot methodically.
Check your work with a hose after curing, mark any trouble areas, and reseal if needed.
Regular cleaning and seasonal inspections keep those seals working for years and protect your home from water damage down the line.
FAQ
What is the best way to seal gutter seams?
The best way to seal gutter seams is to clean the joint thoroughly with a wire brush, dry it completely, then apply a continuous bead of silicone or urethane sealant along the inside of the seam using a caulking gun and smooth it with a gloved finger.
Should gutter joints be sealed?
Gutter joints should be sealed because they are natural weak points where two sections meet and where leaks commonly develop from joint separation, thermal expansion, or debris accumulation that weakens the connection over time.
Can you caulk outside the seam of a gutter to prevent leaks?
You can caulk outside the seam of a gutter as a secondary measure for heavy-leak situations, but the primary seal should always be applied along the interior joint where water flows to create the most effective waterproof barrier.
Should gutters leak at seams?
Gutters should not leak at seams when properly installed and sealed. Seam leaks indicate weakened joints, failed sealant, debris buildup, or thermal stress that requires cleaning and resealing to prevent water damage to your home’s exterior and foundation.
How long does gutter sealant take to cure?
Gutter sealant typically takes 24 to 48 hours to fully cure and develop complete bond strength, though some products become rain-ready in 30 minutes. Always follow the manufacturer’s specific curing time before exposing the seal to water.
What type of sealant is best for aluminum gutters?
Silicone-based sealant is best for aluminum gutters because it provides excellent flexibility for temperature expansion and contraction, resists weather exposure, tolerates moisture during application, and won’t discolor most high-end metal finishes when properly formulated for metal.
Can I seal gutter joints in cold weather?
You can seal gutter joints in cold weather only if temperatures stay within the sealant’s specified range, typically 40-90°F. Extreme cold prevents proper curing and compromises bond strength, making spring and fall the optimal seasons for gutter sealing.
How do I know if my gutter seal failed?
Your gutter seal failed if you notice dripping or seepage at joints during rain, visible separation or gaps between gutter sections, water staining on fascia below the seam, or sealant that has cracked, hardened, or pulled away from the metal surface.
Is Flex Seal good for gutter joints?
Flex Seal works as a quick temporary fix for gutter joints in liquid or spray form but is not as durable as silicone or urethane sealants for long-term repairs. Use professional-grade gutter sealants for permanent solutions that last 5-10 years.
When should I replace gutters instead of sealing joints?
You should replace gutters instead of sealing joints when you have large holes or gaping fissures, sections sagging or pulling away from fascia, fallen tree or impact damage, corroded-through metal, or multiple joint failures across an entire gutter run.
How much does DIY gutter joint sealing cost?
DIY gutter joint sealing typically costs $25-50 for an average home including a quality sealant tube, caulking gun if needed, and cleaning supplies. This compares to $150-300 for professional service, making simple joint repairs excellent DIY savings opportunities.
Do I need to seal vinyl gutter joints differently than metal?
You need to seal vinyl gutter joints with flexible sealants that accommodate plastic expansion and contraction and avoid solvent-based cleaners that damage vinyl. Metal gutters tolerate stronger cleaners and different sealant formulations designed specifically for metal surfaces.