
Water damaged drywall takes 3 to 5 days to dry completely, but that’s only if you caught it fast and started drying with the right equipment within a few hours. Miss that window or skip the dehumidifier, and you’re looking at 7 to 10 days or worse, mold growth starting within 24 to 48 hours. This post walks through exactly what controls drying speed, which conditions add days to your timeline, when DIY drying works, and when you need to stop guessing and bring in equipment or a pro before salvageable drywall becomes a replacement project.
Drywall Drying Timeframes and Key Variables
Water damaged drywall usually takes 3 to 5 days to dry completely under normal conditions if you’ve got the right equipment running. That’s assuming moderate damage from something like a small leak or localized flooding that you caught within a few hours and actually dealt with using proper dehumidifiers and air circulation.
Severity changes everything. A little surface water you mopped up immediately dries way faster than water that soaked through the drywall face into the gypsum core and insulation behind. The longer water sits, the deeper it goes, and the longer it takes to get out.
Here’s how damage severity affects your timeline:
- Minor surface water (1 to 2 days): Overflowing sinks, small appliance leaks, condensation puddles hitting just the drywall surface with immediate cleanup and decent airflow
- Moderate damage from burst pipes (3 to 5 days): Water that penetrated into drywall and spread across floors, needs equipment like dehumidifiers and air movers
- Severe flooding (7+ days or longer): Storm damage, major plumbing failures, Category 2/3 water needing professional extraction, antimicrobial treatment, extended drying protocols
- With commercial dehumidifiers and air movers (2 to 3 days): Aggressive mechanical drying started within the first few hours cuts the timeline dramatically
- Without dehumidifiers (5 to 10+ days): Natural air drying or fan only methods leave hidden dampness that stretches timelines and creates mold risk
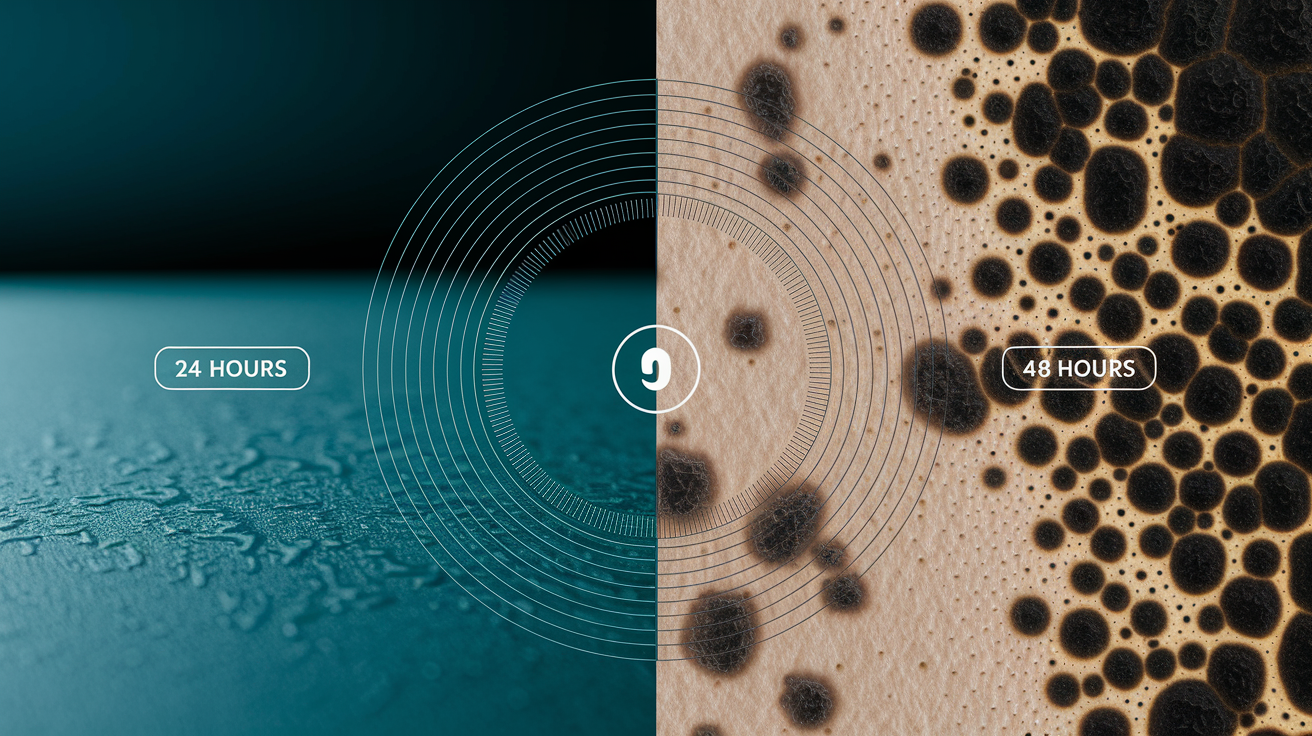
The 24 to 48 hour window after water exposure determines whether you’re dealing with a straightforward drying project or a mold problem. Mold spores start colonizing damp drywall surfaces within this window. Getting aggressive drying started within the first hour keeps you ahead of fungal growth, shortens equipment runtime, and prevents the structural weakening that comes from sitting in water too long. Every hour you wait adds moisture deeper into wall cavities and increases the chance you’ll be replacing drywall instead of saving it.
Critical Factors That Control Water Damage Drying Speed
Drying time varies because multiple environmental and structural factors either speed moisture removal or trap dampness for way longer than you’d expect. Understanding what controls evaporation rates helps you set realistic expectations and spot when conditions need more aggressive intervention.
These factors determine actual drying speed:
- Saturation level and water volume absorbed: Drywall soaked through both paper faces into the gypsum core takes 3 to 5 times longer to dry than surface dampness
- Ambient humidity and relative humidity levels: High outdoor humidity above 60% slows indoor drying because damp air can’t absorb additional moisture vapor
- Temperature and evaporation rates: Cooler temps below 60°F reduce evaporation speed, warmer air above 70°F speeds moisture release
- Ventilation and air circulation quality: Stagnant air creates moisture saturated zones, continuous fresh air exchange removes water vapor and maintains drying pressure
- Wall construction type: Walls with open stud bays on both sides dry faster due to airflow access, insulated cavity walls trap moisture and dry slowly
- Mechanical drying equipment presence: Commercial dehumidifiers and air movers create the vapor pressure differential needed for deep drying, natural methods rarely get there
- Seasonal considerations: Summer humidity in coastal regions extends timelines, winter heating creates dry indoor air that speeds drying but cold exterior walls create condensation
- Room size and airflow restrictions: Small enclosed bathrooms with one exterior wall dry slower than open concept living spaces with multiple air exchange points
These factors don’t work alone. High humidity combined with low temperature and poor ventilation creates worst case scenarios where drying extends beyond 10 days even with equipment. Picture a basement bathroom in August with 80% outdoor humidity, no windows, and a single dehumidifier fighting constant moisture input from humid outdoor air. Conversely, optimal conditions like low humidity, warm temperature, strong cross ventilation, and commercial equipment can get complete drying in 2 to 3 days. A wall in a climate controlled living room during winter heating season with professional air movers and a 200 pint dehumidifier dries way faster than the same damage in summer without equipment.
| Condition | Impact on Drying Time | Mitigation Strategy |
|---|---|---|
| High outdoor humidity (above 65%) | Adds 2 to 5 days | Close windows, rely entirely on dehumidifiers, don’t use outdoor air for ventilation |
| Low temperature below 60°F | Adds 1 to 3 days | Raise thermostat to 70 to 75°F, use space heaters in affected rooms to increase evaporation rate |
| Poor ventilation in small enclosed room | Adds 2 to 4 days | Position air movers to create circulation patterns, remove doors to improve air exchange with adjacent spaces |
| Summer heat with low humidity (below 40%) | Reduces time by 1 to 2 days | Open windows for natural ventilation, use fans to speed surface evaporation |
| Winter heating with dry indoor air | Optimal conditions | Maintain heating, monitor for condensation on cold exterior walls which may need targeted air mover placement |
Seasonal and room specific challenges need adapted strategies. Summer humidity in coastal and southern regions creates the hardest drying conditions because outdoor air makes indoor moisture problems worse instead of helping. Opening windows in July when outdoor humidity sits at 75% just pumps more moisture into your home, overwhelming dehumidifiers and extending drying by days. Winter in northern climates offers naturally dry heated indoor air that speeds drying, but cold exterior walls become condensation zones where moisture migrates and rewets drywall even as interior surfaces appear dry. Bathrooms and basements naturally hold higher humidity regardless of season due to limited ventilation and below grade locations, requiring extra dehumidifier runtime and air circulation. Large open spaces with multiple air exchange points dry faster than small enclosed areas where moisture gets trapped and saturates the air to the point where no additional evaporation can happen.
Understanding Water Categories and Drywall Saturation Levels

Not all water damage carries the same drying timeline or safety requirements. Water contamination level determines both how long drying takes and whether professional disinfection protocols become mandatory before you can safely restore the area.
The three water categories defined by IICRC standards separate damage by contamination risk:
| Water Category | Source Examples | Drying Considerations |
|---|---|---|
| Category 1 (Clean Water) | Supply line leaks, sink overflows, broken water heaters, rainwater before contacting building materials | Fastest drying possible with immediate response, no antimicrobial treatment required, salvageable with prompt action |
| Category 2 (Gray Water) | Washing machine overflow, dishwasher leaks, toilet overflow with urine only, aquarium spills | Requires disinfection protocols, moderate timeline extension due to cleaning requirements, professional assessment recommended |
| Category 3 (Black Water) | Sewage backup, flooding from rivers or streams, toilet overflow with feces, standing water with microbial growth | Professional remediation required, longest timeline due to antimicrobial treatment, often requires material removal rather than drying, PPE mandatory during all work |
Drywall’s porous structure makes it particularly vulnerable to water absorption and contamination. The gypsum core sandwiched between two layers of paper backing acts like a sponge through capillary action, pulling moisture upward and horizontally well beyond the visible water line. If you see water damage 2 feet up a wall, the gypsum inside may be damp 4 to 5 feet above the floor. This wicking effect means surface appearance misleads you about actual saturation extent. The paper facing makes things worse because it provides food for mold spores and holds moisture against the gypsum core even as outer surfaces begin drying.
Contaminated water extends timelines dramatically because safety protocols layer on top of drying requirements. Category 3 black water from sewage backup requires professional remediation with antimicrobial treatment, protective equipment, and often material removal rather than salvage attempts. Even Category 2 gray water needs disinfection steps that add 1 to 2 days to the process. You can’t just dry sewage contaminated drywall and move on. The porous structure absorbed pathogens deep into the gypsum core where surface cleaning can’t reach, and the paper backing can’t be adequately disinfected. Category 3 damage routinely requires cutting out and replacing affected drywall rather than trying to dry and save it, regardless of saturation level.
Essential Drying Equipment and Professional vs DIY Capabilities

Equipment capability determines whether you can successfully dry water damaged drywall or whether attempting DIY restoration wastes time while mold develops. The right tools make a 3 day project possible. Inadequate equipment turns the same damage into a 10 day mold incubator.
DIY drying works for minor, clean water damage caught immediately, within 1 to 2 hours, affecting limited drywall area of less than 10 square feet. Think of a small supply line drip under a sink that dampened the wall surface but hasn’t soaked through to the insulation. Outside that narrow window, equipment limitations and hidden moisture create failure points. For DIY home repair basics skill level assessment, consider your access to proper equipment and ability to monitor moisture levels continuously, not just your willingness to try.
Equipment options range from natural ventilation to commercial restoration gear:
- Commercial dehumidifiers (150 to 200+ pints per day capacity): Remove massive moisture volumes quickly, CFM ratings of 200 to 400+ move large air volumes through dehumidification cycle
- High velocity air movers vs household fans: Commercial air movers create focused high speed airflow that penetrates surfaces, household fans provide minimal air movement by comparison
- Residential dehumidifiers (30 to 50 pints per day): Handle small rooms and minor dampness but get overwhelmed by wall cavity moisture, inadequate for anything beyond surface water
- Box fans or portable air movers for circulation: Supplement primary equipment but can’t serve as sole drying method, useful for directing airflow patterns
- Natural ventilation methods: Opening windows works only when outdoor humidity is significantly lower than indoor levels, rarely the case during summer months
- Infrared cameras for hidden moisture detection: Identify cool spots indicating trapped water in cavities invisible to visual inspection
- Proper placement strategies: Position air movers to create overlapping airflow patterns hitting wet surfaces at angles, dehumidifiers should be centrally located with clear airflow paths
- Removing all wet contents immediately: Carpets, furniture, stored items absorb moisture and become secondary sources that extend drying time
- Renting commercial equipment if residential units prove inadequate: If moisture readings haven’t dropped after 24 hours of residential dehumidifier use, upgrade to commercial grade equipment immediately
Dehumidifiers remove moisture from air while fans only circulate it. That distinction matters because drying wet drywall requires pulling water vapor out of the air continuously to maintain the vapor pressure differential that forces moisture out of porous materials. Picture a soaked sponge in a humid room. A fan blowing across the sponge surface creates some evaporation, but the humid air quickly becomes saturated and evaporation stops. A dehumidifier pulls moisture out of that air, keeping it dry enough to continue accepting water vapor from the sponge. That’s the vapor pressure differential professionals talk about. Without continuous dehumidification, drying stalls regardless of how many fans you run.
Equipment capacity differences explain why DIY attempts often fail while professionals complete the same job in a fraction of the time. Residential dehumidifiers typically handle only 30 to 50 pints per day versus 150 to 200+ for commercial units. That’s three to six times more moisture removal capacity. Professional dehumidifiers move 200 to 400+ cubic feet of air per minute through the dehumidification cycle versus 10 to 50 for household units. Box fans provide 1,000 to 3,000 CFM of air movement, commercial air movers deliver 2,000 to 3,500 CFM in a focused high velocity stream rather than diffused circulation. The math matters when you’re racing the 24 to 48 hour mold growth window.
Natural ventilation depends entirely on favorable outdoor conditions rarely present when you need them. If indoor humidity sits at 70% after water damage and outdoor humidity is 65%, opening windows helps slightly. If outdoor humidity matches or exceeds indoor levels, which commonly happens during summer months in most regions, open windows worsen the problem by introducing additional moisture. Rental of commercial dehumidifiers and air movers runs $50 to $100 per day, and moderate damage requiring 4 to 5 days of equipment use quickly approaches $200 to $500. Not far from professional service costs when you factor in the learning curve, monitoring requirements, and mold risk if you get it wrong. Fans alone can’t remove moisture from air, making them insufficient as a sole drying method regardless of how many you deploy or how long you run them.
Step by Step Process for Drying Water Damaged Drywall
Proper drying follows a systematic approach that addresses safety, measures extent, removes moisture sources, deploys equipment strategically, and monitors progress continuously. Skipping steps or rushing through the process creates the hidden moisture problems that lead to mold growth weeks later. For broader water damage restoration context beyond drywall specific drying, understanding the overall recovery sequence helps maintain proper priorities.
Stopping the water source comes first. No amount of drying equipment overcomes an active leak. After source control, safety assessment determines whether electrical power must remain off in affected areas due to wet outlets or breaker concerns.
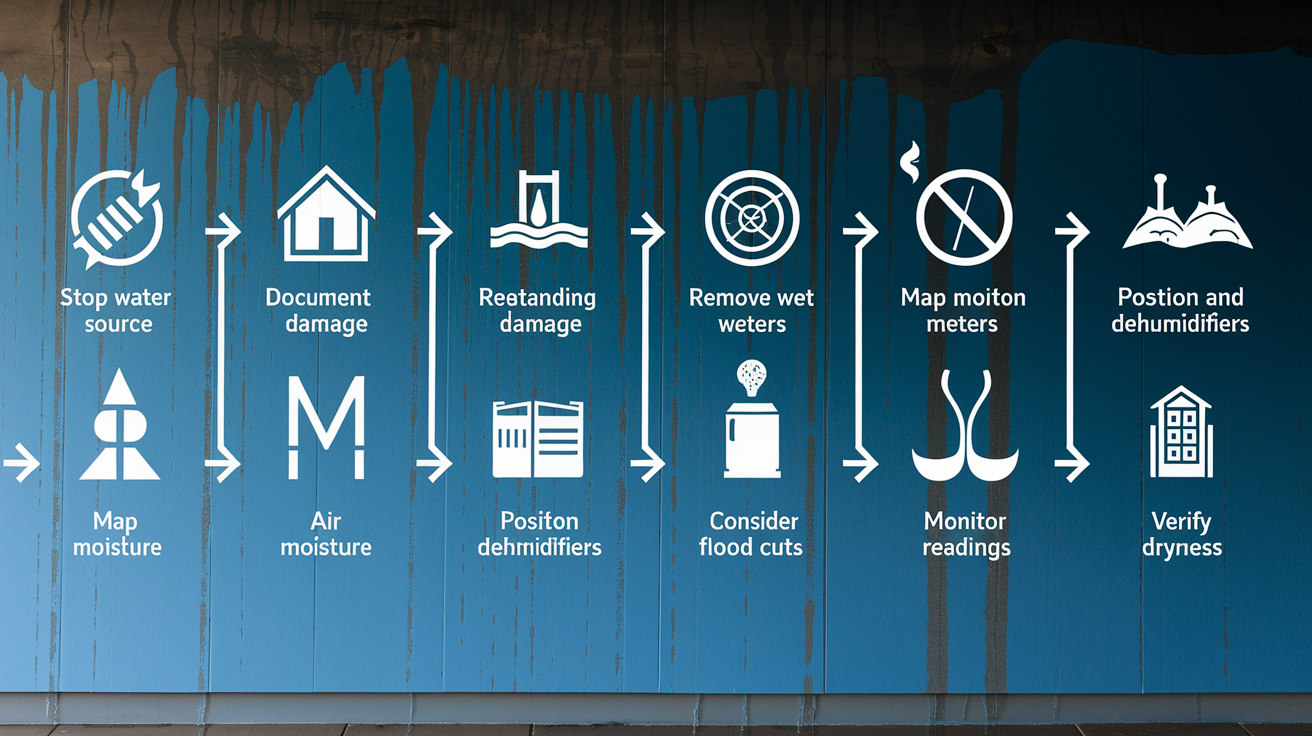
Follow these steps in order:
- Stop water source and shut off power to affected areas: Locate shutoff valve or breaker, confirm water flow has stopped, test outlets before touching anything electrical
- Document damage with photos for insurance: Photograph all visible water damage, wet materials, water source if identifiable, and room layout before moving anything
- Remove standing water with pumps or wet vacuums: Extract surface water first to prevent additional absorption, this speeds drying by several days
- Remove wet materials (carpet, baseboards, trim, damaged insulation): These act as moisture reservoirs that continuously rewet drywall, pull baseboards carefully to preserve for reinstallation if undamaged
- Use moisture meter to map all affected areas and establish baseline readings: Take readings at multiple heights on each affected wall section, including areas that appear dry, document readings with photos showing meter display and probe location
- Position air movers and dehumidifiers strategically: Aim air movers at wet wall surfaces at 45 degree angles, space air movers 10 to 15 feet apart, place dehumidifiers centrally with 3 feet of clearance on all sides
- Consider flood cuts or weep holes for trapped moisture in cavities: For severe saturation or insulated walls, 6 to 12 inch horizontal cuts at baseboard level allow airflow into cavities, weep holes (drill 1/2 inch holes every 16 inches) provide drainage and access for air movement
- Monitor moisture readings every 12 to 24 hours using pin type or pinless meters: Take readings at same locations each time to track drying progress, readings should drop steadily, increasing readings indicate ongoing moisture source
- Take readings behind baseboards and near water source to verify cavity drying: Remove outlet covers and test inside electrical boxes, check floor to wall junction, probe deeply into drywall at baseboard level
- Document readings for insurance and confirm moisture content reaches acceptable levels (12 to 17% depending on climate): Never stop equipment based on visual assessment, only meter readings confirm complete drying, drywall above 20% remains at mold risk
Moisture meters come in two types, both useful during drying operations. Pin type meters use two metal probes that penetrate the drywall surface to measure electrical resistance, which changes with moisture content. They provide precise readings at specific depths and locations but leave small holes. Pinless meters use electromagnetic sensors that scan an area without surface damage but read moisture in the first 3/4 inch of depth, potentially missing deeper saturation. Use pin type meters to verify drying progress at the gypsum core level behind the face paper. Take readings at multiple wall heights because moisture wicks upward through capillary action. Readings at baseboard level, mid wall, and 6 inches below ceiling reveal whether moisture is trapped or migrating. Walls may appear dry on the outside while gypsum core moisture content remains at 30% to 40%, double or triple the safe threshold. Surface dryness means nothing without meter confirmation.
At the 48 hour checkpoint, evaluate whether DIY drying is succeeding. If moisture readings haven’t dropped at least 30% to 50% from baseline, or walls remain above 20% moisture content after two days of continuous equipment operation, professional assessment becomes necessary. Stalled drying indicates inadequate equipment capacity, hidden moisture sources, or conditions like insulated cavities where DIY methods can’t achieve sufficient airflow.
Continuous monitoring prevents premature equipment shutdown, the most common cause of incomplete drying. Visual inspection and touch can’t detect moisture trapped in the gypsum core or wall cavities. Paper backing may feel dry while 1/4 inch deeper the gypsum remains saturated. Industry standards per IICRC guidelines require moisture content at or below baseline dry readings for your climate zone, typically 12% to 17% depending on regional humidity, before stopping dehumidification and air movement. Baseline dry readings mean testing undamaged drywall in your home to establish normal moisture content, then matching that level in affected areas. Stopping equipment when surfaces feel dry but meter readings show 20% to 25% moisture content guarantees mold growth within days.
Mold Growth Timelines and Prevention During Drying
Mold spores exist everywhere in normal indoor air, waiting for the conditions that trigger colonization. Water damaged drywall provides perfect conditions, and the timeline from exposure to active growth is shorter than most people realize.
Mold can begin growing within 24 to 48 hours of water exposure on damp drywall surfaces. That tight window explains why immediate action matters more than perfect technique. Adequate drying started within 2 to 3 hours beats ideal drying started 24 hours later. You’re racing biological processes, not pursuing restoration perfection.
Drywall is particularly vulnerable to rapid mold colonization for three reasons. First, the cellulose paper backing provides the food source mold needs. Those paper faces aren’t just covering material, they’re prepackaged nutrition for fungal growth. Second, porous gypsum retains moisture in contact with paper backing for extended periods, maintaining the dampness mold requires. Third, warm indoor temperatures between 65°F and 85°F speed spore germination and growth cycles. Your comfortable home environment is mold’s ideal growth chamber when moisture appears.
Health risks from mold exposure range from minor irritation to serious respiratory problems. Respiratory irritation including coughing, wheezing, and throat discomfort affects most people exposed to elevated mold levels. Allergic reactions like sneezing, runny nose, red eyes, and skin rashes appear in sensitive individuals within hours of exposure. Asthma triggers from mold spores cause attacks in people with existing asthma, and repeated exposure can worsen underlying conditions. Long term indoor air quality degradation occurs when mold colonies become established in walls, continuously releasing spores and volatile organic compounds that create persistent musty odors and low level health impacts.
Prevent mold through aggressive action within the critical window:
- Start drying within 1 hour of discovery: Every hour of delay allows moisture to penetrate deeper and increases mold risk exponentially
- Maintain aggressive dehumidification throughout process: Run dehumidifiers continuously, emptying tanks or connecting continuous drainage, don’t cycle equipment on and off
- Ensure proper ventilation to prevent stagnant humid air: Position air movers to create airflow patterns that prevent dead zones where moisture accumulates
- Inspect regularly for musty odors or visible discoloration: Musty smell indicates active mold growth even before visible colonies appear, black, green, or white spots signal established growth
- Apply antimicrobial treatments on contaminated water damage: Category 2 and 3 water requires disinfection to address bacterial and fungal contamination beyond just drying
- Never seal or paint over damp drywall: Paint or primer over wet drywall traps moisture, guarantees mold growth behind the finish, and leads to bubbling, peeling, and eventual removal
When mold remediation becomes necessary versus preventable depends on timing and visibility. If you catch damage within hours and start aggressive drying before the 24 hour mark, mold prevention remains achievable with proper equipment and monitoring. If 48 hours pass before drying begins, or visible mold colonies appear during drying, you’ve crossed into remediation territory where antimicrobial treatment and potentially material removal become necessary. Small isolated mold spots under 10 square feet might be cleaned with proper PPE and fungicide, but widespread growth or musty odors indicating hidden colonies require professional remediation that includes containment, air scrubbing, and material removal.
When to Repair Versus Replace Water Damaged Drywall
Salvaging water damaged drywall versus cutting it out and replacing it depends on contamination level, saturation duration, and visible structural compromise. Making the right call early prevents wasted effort on drywall that will ultimately require replacement anyway.
| Damage Indicator | Repair Possible | Replace Required |
|---|---|---|
| Minor surface wetting (less than 48 hours exposure) | Yes, if dried within 24 to 48 hours with no discoloration, sagging, or mold | No, unless Category 3 contamination involved |
| Moderate saturation (2 to 4 days of wetness) | Questionable, inspect closely for structural integrity loss and mold odor | Likely, especially if paper backing shows delamination or gypsum feels soft |
| Severe saturation (4+ days or complete soaking) | No, moisture duration guarantees structural compromise | Yes, remove and replace affected sections |
| Visible structural damage (sagging, crumbling, softness) | No, structural integrity lost | Yes, drywall can’t regain strength after severe saturation |
| Contamination type | Category 1 clean water only, if caught early | Category 2 gray water and Category 3 black water require removal in most cases |
Repairable scenarios require meeting multiple conditions simultaneously. Drywall dried within 48 hours, preferably 24 hours, shows no structural compromise when tested by pressing firmly on the surface. It should feel solid, not spongy or soft. No mold growth appears during or after drying, confirmed by both visual inspection and absence of musty odors. No permanent discoloration or staining remains after drying, yellowing or brown water marks indicate contamination or tannins that won’t disappear with repainting. No bubbling or paper delamination appears on either face, smooth intact paper backing allows proper paint adhesion and maintains strength. The drywall passes moisture meter testing at 12% to 17% moisture content matching surrounding undamaged areas.
Replacement triggers include any Category 3 black water exposure regardless of apparent damage level. Sewage contamination can’t be adequately cleaned from porous drywall. Sagging or soft texture when pressing on the wall indicates lost structural integrity, gypsum that turned to mush won’t regain strength even after drying. Visible mold growth beyond small isolated spots means extensive colonization, likely throughout the gypsum core where surface cleaning can’t reach. Persistent musty odors after complete drying suggest hidden mold colonies inside wall cavities or the gypsum core. Bubbling or delamination of paper backing creates adhesion problems for any finish and indicates the paper has separated from the gypsum core. Extensive discoloration that penetrates through paint into the paper backing won’t hide with new paint and may bleed through multiple finish coats.
Wallpapered drywall presents special challenges because wallpaper traps moisture between the paper layer and drywall face, dramatically extending drying time and creating ideal conditions for mold growth in that trapped moisture zone. In most cases, water damaged wallpapered walls require removing the wallpaper before drying is even possible, and the removal process often damages the drywall face paper enough to require skim coating or replacement anyway. The effort to salvage wallpapered drywall rarely succeeds.
Hidden Moisture Locations in Drywall and Wall Cavities
Water doesn’t stay where you first see it. Capillary action, gravity, and building material porosity move moisture throughout wall assemblies, often concentrating it in locations you won’t check without systematic inspection.
Capillary action in drywall works like wicking in a candle. The porous gypsum core and paper backing absorb water and pull it vertically and horizontally well beyond the source. If water contacts the wall 12 inches above the floor, capillary action wicks moisture upward to 3 or 4 feet above floor level inside the gypsum core while the outer surface appears dry. Water also travels horizontally along the length of a wall following the gypsum structure. That’s why professionals take moisture readings at multiple heights and along wall length rather than just at the visible damage location.
Hidden moisture concentrates in these overlooked locations:
- Behind baseboards and trim: Water runs down wall surfaces and collects at the floor to wall junction behind baseboards where it remains trapped without airflow
- Inside insulated wall cavities: Fiberglass or cellulose insulation absorbs and holds water like a sponge, continuously rewetting drywall even as surface drying progresses
- Underneath vinyl or tile flooring at wall bases: Water migrates under flooring edges and wicks up walls from below, creating a moisture source that defeats drying efforts
- Inside particle board cabinetry toe kicks: Kitchen and bathroom cabinets with particle board bases absorb water and swell, water trapped behind toe kick boards rewets adjacent walls
- Between drywall layers in double layer installations: Some walls use two layers of drywall for soundproofing or fire rating, water trapped between layers can’t dry without removing outer layer
- In ceiling drywall above visible wall damage: Water from roof leaks or second floor plumbing runs down inside walls then saturates ceiling drywall at top plate connections
- In electrical boxes and behind outlet covers: Water follows wiring paths and collects in electrical boxes, removing outlet covers allows inspection and airflow
- In attached closet walls: Water spreads from main room walls through shared studs into adjacent closet spaces where it goes unnoticed until mold appears
These locations matter because trapped moisture in cavities continues affecting drywall long after surface drying appears complete. Wet insulation acts as a moisture reservoir, slowly releasing dampness back into the gypsum core over days or weeks. A wall may test dry at the surface while fiberglass insulation inside the cavity holds moisture at saturation. That trapped moisture maintains elevated humidity inside the wall cavity, preventing the gypsum core from reaching truly dry conditions and creating perfect mold growth conditions.
Walls with open space on both sides, like non insulated interior partition walls, dry significantly faster than insulated exterior walls because air can access both drywall faces and evaporate moisture from both sides simultaneously. Insulated cavity walls present a much harder drying challenge. The insulation blocks airflow, prevents moisture from escaping the cavity through the inner drywall face, and holds moisture against the drywall backing for extended periods. In severe cases, insulation must be removed through flood cuts or the wall cavity must be opened to achieve proper drying.
Lack of airflow in enclosed zones creates ideal mold growth conditions even when moisture content wouldn’t support mold growth in well ventilated areas. Inside a wall cavity with no air movement, relative humidity hits 90% to 100% when wet insulation is present, and temperature remains in the ideal 65°F to 80°F range for fungal growth. Those conditions speed mold colonization, potentially producing visible growth within 24 to 48 hours. Missing these hidden wet areas is a common DIY mistake that leads to mold development and structural damage weeks or months after apparent drying completion when you discover stains, odors, or warped drywall from continued moisture exposure.
Professional Restoration and When to Call Experts
Professional restoration services shift from recommended to required based on contamination level, damage extent, structural risk, and DIY drying attempts that fail to make progress within the first 48 hours. Some situations never offered a realistic DIY path, others start as possible DIY projects but reveal complexity that demands professional equipment and expertise.
These situations require professional response rather than DIY attempts:
- Category 2 or 3 water contamination: Gray water from appliances or black water from sewage requires antimicrobial treatment protocols and PPE that homeowners shouldn’t attempt
- Water damage exceeding 10 to 15 square feet: Large affected areas overwhelm residential equipment capacity and require commercial dehumidifiers and multiple air movers
- Water penetration into wall cavities or insulation: Hidden moisture in cavities requires flood cuts, weep holes, and cavity drying techniques beyond typical DIY capability
- Ceiling water damage with sagging or staining: Ceiling drywall at risk of collapse creates safety hazards, professionals assess structural integrity and support sagging areas during drying
- Drywall remaining wet after 48 hours of DIY drying: If moisture readings show minimal progress after two days of continuous equipment operation, professional assessment identifies problems
- Visible mold growth or persistent musty odors: Active mold colonies require containment, air scrubbing, and often material removal with proper disposal
- Structural concerns including soft or sagging drywall: Compromised structural integrity requires evaluation of framing, insulation, and building envelope damage beyond drywall alone
- Situations requiring insurance claims with documentation: Professional restoration companies provide detailed documentation, moisture mapping, and photographic records that support insurance claims and satisfy adjuster requirements
Professional advantages extend beyond equipment size to include systematic protocols developed through thousands of restoration projects. IICRC certified technicians follow industry standards for moisture mapping, antimicrobial treatment, and drying verification that satisfy insurance requirements and building codes. Commercial equipment delivers 5 to 10 times the drying capacity of residential dehumidifiers, a single truck mounted desiccant dehumidifier can process the air volume of an entire floor while extracting 10+ pounds of water per hour. Thermal imaging and moisture mapping identify all affected areas in the first visit rather than discovering new wet zones days into DIY drying. Antimicrobial treatments prevent mold on Category 2 and 3 contaminated damage by applying EPA registered fungicides and disinfectants at proper concentrations and contact times. Proper documentation supports insurance claims with moisture readings, equipment logs, and photographic evidence at initial assessment, during drying, and at project completion.
Timing often justifies professional costs even when DIY seems technically possible. Professionals complete drying in 2 to 3 days that would require 7 to 10 days for homeowners using rental equipment. The difference comes from proper equipment placement, 24/7 monitoring with adjustment, commercial grade dehumidification capacity, and experience recognizing when flood cuts or cavity ventilation become necessary. Consider that commercial dehumidifier and air mover rental runs $50 to $100 per day, 7 days equals $350 to $700 in rental costs, plus your time monitoring equipment, adjusting placement, and worrying whether hidden moisture remains. Professional service for moderate damage often runs $1,500 to $3,000 complete, which includes equipment, labor, antimicrobial treatment, documentation, and guarantee of complete drying. The cost gap narrows considerably when factoring equipment rental duration, your time investment, and mold risk if DIY attempts fail.
Common Drying Mistakes That Extend Timeframes

Well intentioned DIY drying efforts often fail due to preventable mistakes that extend timelines, create mold risk, and sometimes result in having to remove drywall that could have been salvaged with proper technique from the start.
These errors sabotage drying efforts:
- Starting drying too late (waiting beyond 2 to 4 hours): Every hour of delay allows moisture to penetrate deeper into gypsum core and wicks to adjacent areas via capillary action
- Using only fans without dehumidification: Fans circulate air but can’t remove moisture from air, drying stalls when air becomes saturated regardless of fan quantity
- Stopping equipment too early based on surface dryness: Visual inspection and touch can’t detect moisture in gypsum core 1/4 inch behind face paper, premature shutdown guarantees mold growth
- Failing to remove baseboards and check cavities: Water collects behind baseboards and in wall cavities where it remains trapped, surface drying without cavity access leaves moisture reservoirs
- Inadequate moisture level monitoring throughout process: Taking one initial reading and one final reading misses drying progress problems, daily readings identify stalled drying before mold develops
- Poor equipment placement (too far from wet areas): Air movers positioned more than 8 to 10 feet from wet walls provide minimal surface evaporation, dehumidifiers blocked by
Final Words
Water-damaged drywall how long to dry depends on what you do in those first few hours.
Clean water caught early and dried aggressively? You’re looking at 2-3 days with proper equipment.
Wait too long, skip the dehumidifier, or miss hidden moisture behind baseboards? That same damage stretches to 7-10 days, with mold risk climbing the whole time.
The difference between a quick fix and a full tearout usually comes down to starting fast, using the right tools, and actually measuring moisture instead of guessing.
You’ve got this. Stop the water, get air moving, and check those readings every day until the meter says you’re done.
FAQ
How long should drywall dry after water damage?
Drywall typically needs 3 to 5 days to dry after water damage with proper equipment and ventilation. Minor surface water dries in 1 to 2 days, while severe flooding requires 7 or more days depending on saturation level and drying conditions.
How quickly can mold grow on wet drywall?
Mold can begin growing on wet drywall within 24 to 48 hours of water exposure. The paper backing on drywall provides a food source for mold spores, making aggressive drying within this critical window essential to prevent colonization and health risks.
Will a fan help drywall mud dry faster?
Fans help drywall mud dry faster by improving air circulation across the surface. However, fans alone cannot remove moisture from the air. For water-damaged drywall requiring deep drying, you need a dehumidifier alongside fans to create the vapor pressure differential that pulls trapped moisture out.
Is drywall ruined if it gets wet?
Drywall isn’t automatically ruined if it gets wet, but timing and contamination level determine salvageability. Clean water dried within 48 hours often allows repair, while Category 2 or 3 contaminated water, saturation lasting 4-plus days, or visible sagging and structural softness requires replacement.
What factors affect how long wet drywall takes to dry?
Wet drywall drying time depends on saturation level, ambient humidity, temperature, ventilation quality, wall construction type, equipment used, and seasonal conditions. High humidity with poor ventilation extends drying to 10-plus days, while optimal conditions with commercial equipment achieve complete drying in 2 to 3 days.
What equipment speeds up drywall drying after water damage?
Commercial dehumidifiers and high-velocity air movers significantly speed drywall drying by removing moisture from air and forcing walls to release hidden dampness. Professional units move 200 to 400-plus cubic feet per minute versus 10 to 50 for household fans, cutting drying time by half or more.
When should you replace water-damaged drywall instead of drying it?
You should replace water-damaged drywall when it shows sagging, crumbling, or soft texture indicating lost structural integrity, has visible mold growth, was exposed to Category 3 black water, or remained saturated for 4-plus days. Clean water dried within 48 hours can often be salvaged.
Where does hidden moisture hide in water-damaged walls?
Hidden moisture collects behind baseboards and trim, inside insulated wall cavities, underneath flooring at wall bases, in particle board cabinetry, between drywall layers, in ceiling drywall above visible damage, and inside electrical boxes. Capillary action pulls water well beyond visible water lines.
When do you need professional help for wet drywall?
You need professional help for wet drywall when damage exceeds 10 to 15 square feet, involves Category 2 or 3 contaminated water, penetrates wall cavities or insulation, shows ceiling sagging, remains wet after 48 hours of DIY drying, or requires insurance documentation.
What are common mistakes when drying water-damaged drywall?
Common drying mistakes include starting too late beyond 2 to 4 hours, using only fans without dehumidification, stopping equipment based on surface dryness, failing to check wall cavities behind baseboards, inadequate moisture monitoring, and sealing or painting over incompletely dried drywall.
How do you monitor drywall drying progress properly?
You monitor drywall drying progress by using moisture meters every 12 to 24 hours at multiple wall heights and depths, taking readings behind baseboards and near the water source. Moisture content must reach 12 to 17 percent per IICRC standards before stopping equipment.
What documentation do insurance companies require for water-damaged drywall?
Insurance companies require photos of all visible damage before mitigation, documentation of the water source, moisture meter readings showing saturation extent, receipts for emergency expenses, a written timeline of when damage occurred and mitigation started, and equipment placement photos.