
You’ve probably noticed that bright white bathroom caulk doesn’t stay white. Within months or years, it yellows, develops black spots, or picks up pink streaks that make your whole bathroom look grimy. The culprit isn’t always poor cleaning. Moisture, mold, mineral deposits, harsh cleaners, and plain aging all attack caulk in different ways. Each type of discoloration has a specific cause and needs a targeted fix. Understanding what’s actually happening helps you decide whether simple cleaning works or if you need to replace it entirely.
Primary Causes Behind Caulk Discoloration in Bathrooms
Bathroom caulk discolors for four main reasons: stuff growing on it, your bathroom environment working against it, chemical reactions you didn’t plan on, and just plain aging. The growing stuff includes mold and mildew that actually penetrate into porous caulk. Environmental factors are moisture, bad ventilation, and UV light breaking down the caulk polymers. Chemical reactions happen when cleaning products, soap scum, hard water, and mineral deposits interact with your caulk. And aging is just what it sounds like: caulk deteriorates over time, loses flexibility, develops tiny cracks that trap all kinds of nasty stuff.
What’s actually causing your caulk to look terrible:
- Mold and mildew from constant dampness
- Soap scum building up in layers
- Hard water mineral deposits (calcium and magnesium)
- Bacteria producing pink or orange stains
- UV light breaking down the polymer structure
- Harsh cleaning products causing oxidation
- Poor ventilation trapping humidity
- Aging as caulk loses flexibility over the years
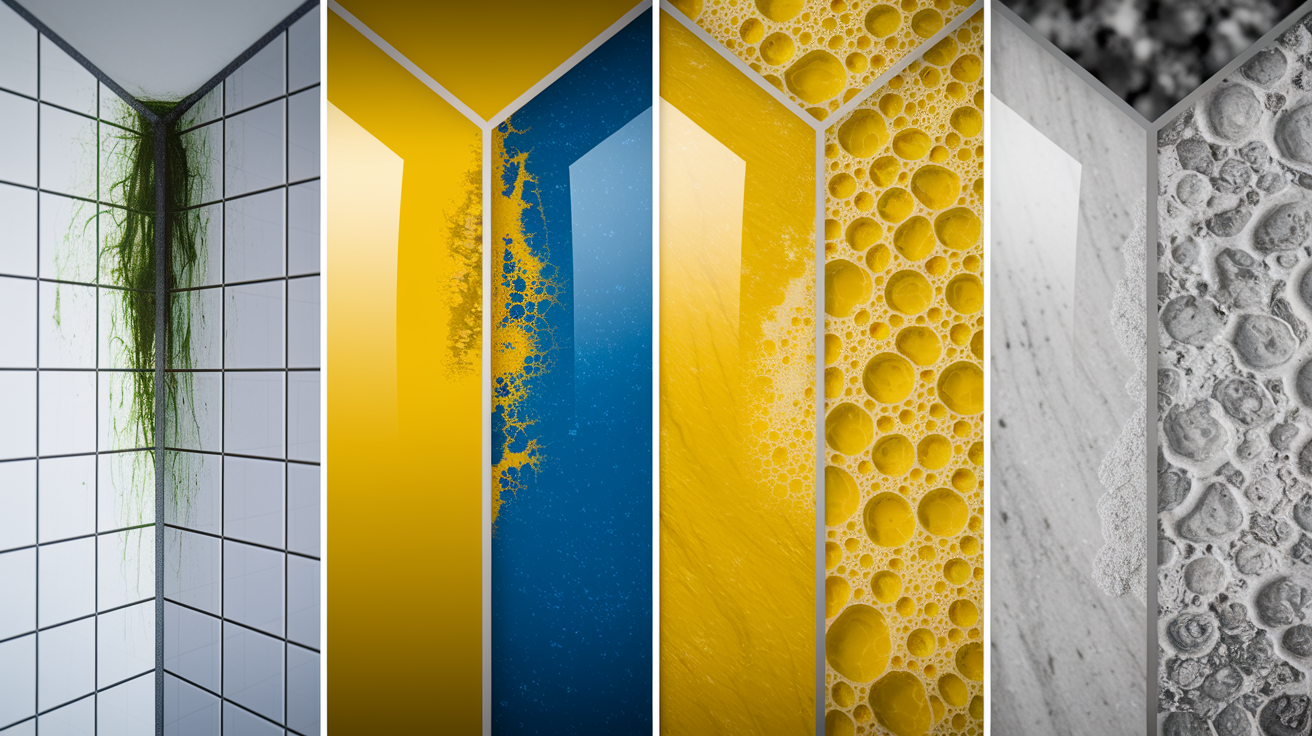
Each cause creates different patterns and needs different fixes. Mold usually shows up as black spots in corners. Mineral deposits look like white or yellow crusty buildup. UV damage creates uniform yellowing across sun exposed areas. Bacteria make pink or orange streaks. Understanding which one you’re dealing with determines whether simple cleaning will work or if you need to rip it out and start over. The sections below break down each cause, how to identify it, and what actually fixes it.
Identifying Discoloration Patterns on Bathroom Caulk
Color matters because different discolorations mean different problems that need specific solutions. Surface soap scum wipes away with basic cleaning. Deep mold that’s penetrated requires replacement. Knowing what you’re looking at saves time and prevents wasting effort on methods that won’t work for your specific issue.
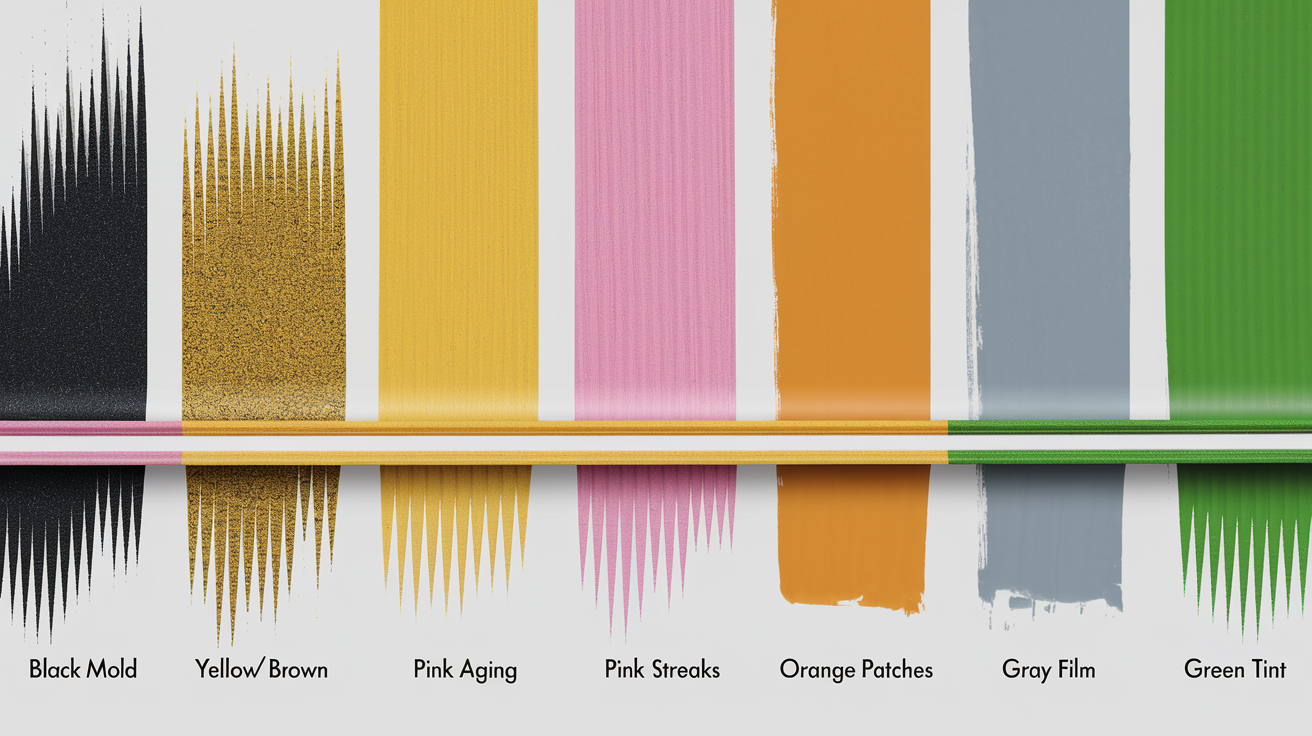
| Discoloration Color | Likely Cause | Treatment Difficulty |
|---|---|---|
| Black spots | Mold and mildew growth | Moderate to difficult; deep penetration requires replacement |
| Yellow or brown | Aging, mineral deposits, chemical reactions, UV exposure | Varies; surface stains clean easily, polymer degradation needs replacement |
| Pink streaks | Serratia marcescens bacteria | Easy; responds well to regular cleaning with disinfectants |
| Orange patches | Iron bacteria or iron-rich mineral deposits | Moderate; mineral removers work, iron bacteria may need replacement |
| Gray film | Dirt and soap scum buildup | Easy; surface cleaning removes it |
| Green tint | Algae growth in rare cases with constant moisture | Easy to moderate; responds to disinfecting cleaners |
Diagnostic tips help figure out your treatment path. First, run your finger across the discolored area. If color transfers to your finger or wipes away, it’s surface buildup that cleaning can handle. If nothing transfers and the color stays, it’s penetrated into the caulk material. Check texture changes by pressing gently. Healthy caulk feels firm and slightly rubbery. Degraded caulk feels chalky, crumbly, or sticky.
Look at location patterns. Discoloration concentrated in corners and grout lines typically means mold from trapped water. Uniform yellowing across all caulk, especially on sun exposed walls, points to UV degradation. Discoloration near the showerhead or tub spout suggests mineral deposits from hard water spray. Heavy staining at floor level where water pools indicates poor drainage combining with soap and dirt.
Environmental Factors That Accelerate Caulk Discoloration

Bathrooms create the perfect environment for rapid caulk degradation. Moisture, heat, humidity, and poor air circulation found in typical bathrooms accelerate every type of discoloration. A bathroom that stays damp between uses creates problems within months that might take years in drier environments.
Steam from hot showers saturates the air with moisture that condenses on caulk surfaces. This moisture doesn’t just sit on top. It penetrates porous areas and creates the dampness mold needs to grow. Heat makes it worse by making caulk materials more porous and reactive, allowing contaminants to penetrate faster.
Six environmental factors that speed up caulk discoloration:
-
Inadequate exhaust fan usage. Running the fan for only 5 minutes after showering doesn’t remove humidity. Moisture stays trapped in the bathroom for hours, keeping caulk constantly damp.
-
High humidity levels above 60%. When bathroom humidity stays elevated between uses, caulk never fully dries. This creates persistent dampness perfect for mold and bacterial growth.
-
Constant steam exposure from hot showers. Repeated cycles of hot steam followed by cooling create condensation that penetrates caulk materials and traps organic particles underneath.
-
Temperature fluctuations between shower use and cooling. Rapid temperature changes cause caulk to expand and contract, creating tiny cracks that trap moisture and contaminants inside.
-
Poor natural ventilation from lack of windows. Bathrooms without windows rely entirely on exhaust fans. When those fans don’t run long enough or don’t move enough air, moisture accumulates.
-
Water seepage behind caulk from gaps or cracks. Any separation between caulk and the wall or tub allows water to seep behind the seal. This trapped water creates mold growth underneath that shows as discoloration on the surface.
These environmental factors don’t work alone. They compound each other. Trapped moisture plus poor ventilation creates persistent dampness that accelerates mold growth, speeds mineral deposit formation as water evaporates repeatedly on the same spot, and increases the chemical degradation of caulk materials.
A bathroom with good exhaust fan usage might see first signs of yellowing after 3 to 4 years. The same bathroom without ventilation shows discoloration within 6 to 12 months. Regional climate impacts these timelines too. A coastal bathroom in Florida faces more aggressive discoloration than the same setup in Seattle.
Cleaning Products and Chemical Reactions Causing Caulk Discoloration
Daily bathroom products create chemical reactions with caulk materials that accelerate discoloration. These reactions happen gradually. Each shower, each cleaning session, each application of hair products adds another layer of chemical exposure. Over months and years, these exposures break down caulk polymers and create discolored surfaces.
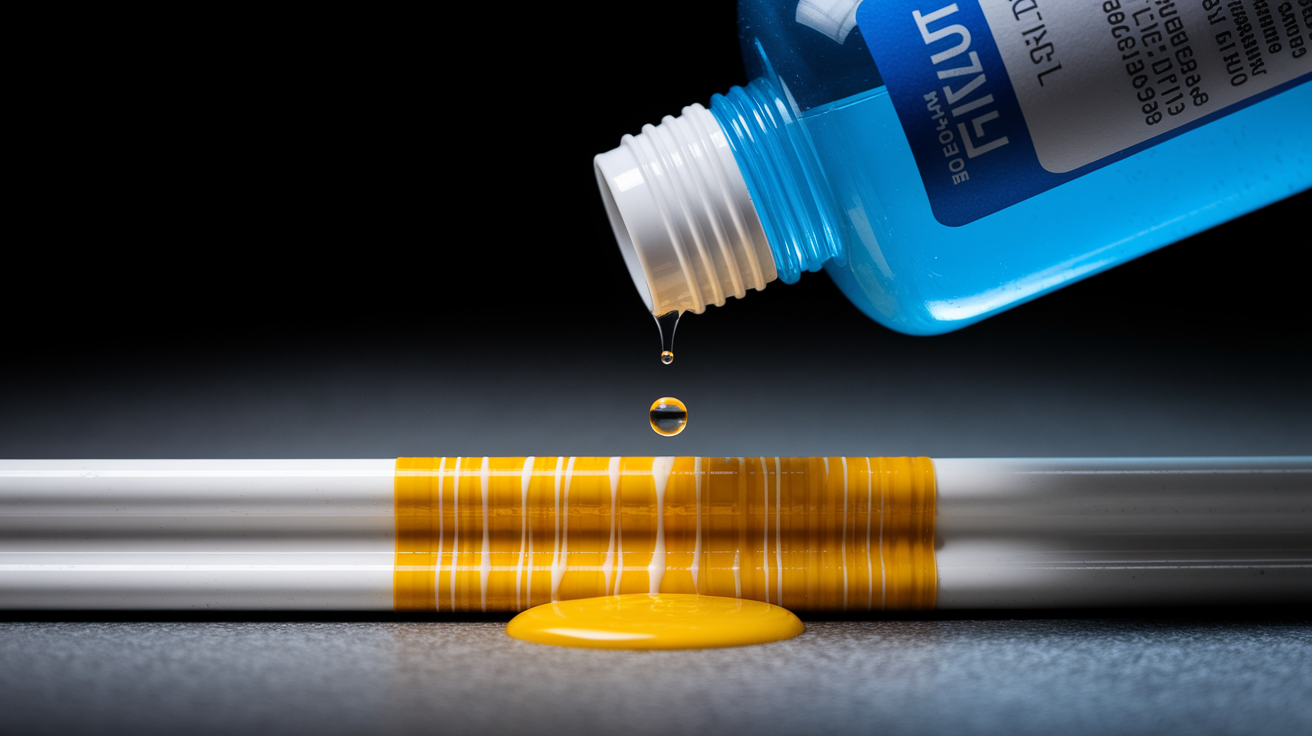
Bleach causes oxidation reactions that yellow silicone caulk and streak acrylic formulations. The chemical structure of bleach breaks down polymer chains in caulk materials, creating visible yellowing even when you’re trying to remove stains. Ammonia based cleaners (common in glass and multi-surface sprays) react with caulk similarly, degrading the material while appearing to clean it.
Abrasive cleaners like scouring powders scratch caulk surfaces, creating tiny grooves that trap dirt, soap residue, and mineral deposits. This turns smooth surfaces into stained, rough textures. Oily shampoos and conditioners leave residue films that build up over time, especially in shower corners where water flow is weakest. These oily layers trap moisture against the caulk surface and create perfect conditions for mold growth underneath.
Body wash and soap create scum layers when they interact with hard water minerals, forming insoluble deposits that stick to caulk and appear as gray or yellow brown films. Hard water interacting with soap accelerates deposit formation. The calcium and magnesium in hard water bind with soap molecules to create thick, stubborn scum that penetrates porous caulk surfaces. Cosmetic products including hairspray, lotions, and styling products create sticky films that attract dust and dirt, turning caulk from white to dingy gray.
The cumulative effect of daily product exposure creates a multi-layer problem. First, chemical cleaners weaken the caulk polymer structure through repeated oxidation. Then personal care products deposit residue layers on the weakened surface. These residue layers trap moisture against the caulk. The trapped moisture provides water and nutrients for bacterial and mold growth. The microbial growth then produces pigments and waste products that stain deeper into the already compromised caulk material.
This cycle accelerates over time because each layer of buildup makes the surface more porous and reactive. Caulk that might have stayed clean for years with gentle care shows discoloration within months when exposed to harsh chemicals and heavy product residue.
UV Exposure and Aging Effects on Bathroom Caulk
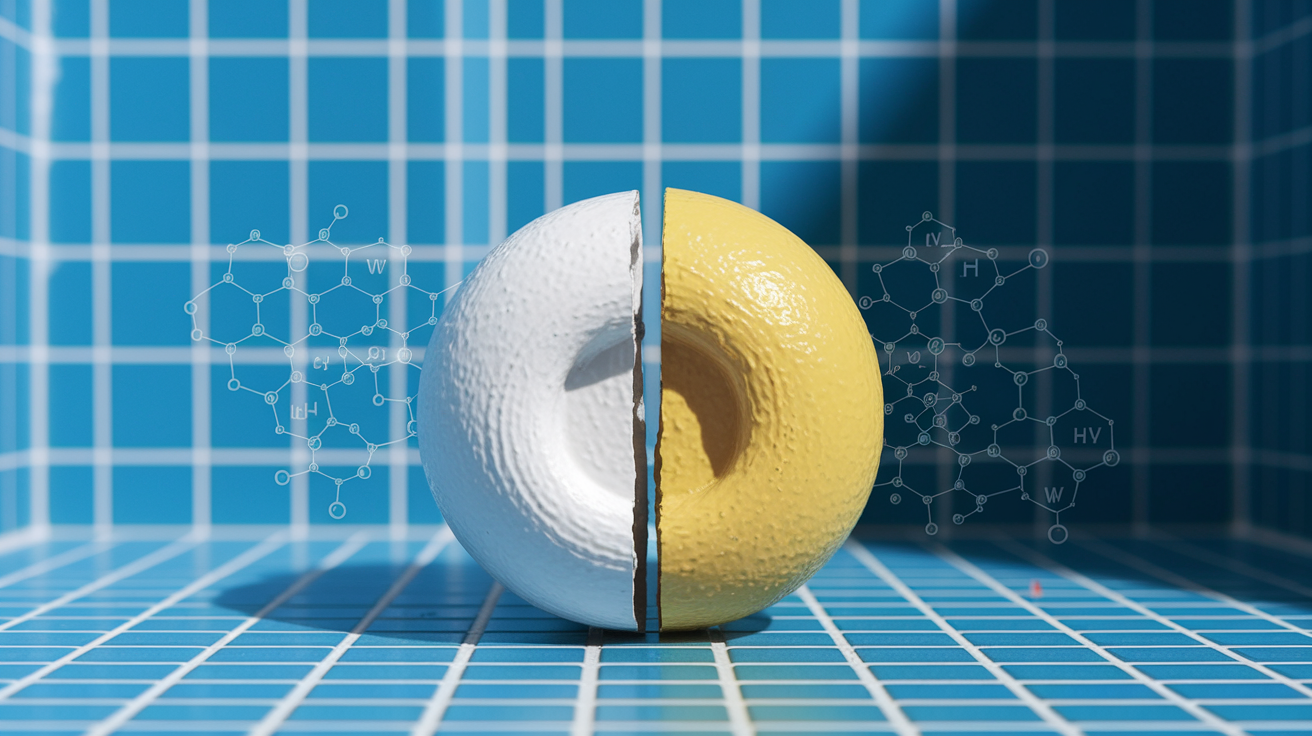
UV radiation causes caulk yellowing in 9 out of 10 cases according to adhesive manufacturers. Even indirect UV light from bathroom windows or overhead lighting breaks down silicone compounds over time, creating visible yellowing that starts subtle and progresses to severe discoloration.
The technical process works like this. Chromophores (light absorbing molecules) in caulk materials absorb UV radiation energy. This energy causes chromophores to form free radicals, which are unstable molecules with unpaired electrons. Free radicals react with oxygen molecules in the air to create peroxy radicals. These peroxy radicals attack and degrade the polymer structure of the caulk through a process called autocatalytic degradation. Each degradation reaction creates more free radicals, which create more peroxy radicals, which cause more polymer degradation. The process feeds itself and accelerates over time. As polymers break down, they change color from white or clear to yellow, then eventually to brown. The degraded polymer structure also becomes chalky and brittle.
Natural aging factors work alongside UV damage to compromise caulk integrity. Caulk typically maintains flexibility and adhesion for 5 to 10 years under normal conditions. As it ages, it loses plasticizers (chemicals that keep it flexible), causing it to become rigid and brittle. Brittle caulk develops tiny cracks, especially where it flexes during temperature changes or building movement. These tiny cracks allow water infiltration between the caulk and the substrate. Trapped water accelerates mold growth underneath, causing black discoloration that appears to come from inside the caulk.
The caulk also loses adhesion at edges, separating from tile or tub surfaces and creating gaps where water seeps behind. As aging progresses, texture changes become visible. Smooth caulk develops rough, chalky surfaces that trap dirt and feel gritty. The combination of texture degradation and color change creates caulk that looks dirty even immediately after cleaning.
UV exposure and aging often work together to create faster degradation. Bathrooms with windows facing south or west receive intense afternoon sun that hits the same caulk lines daily. This sun exposed caulk shows accelerated aging, developing yellowing, brittleness, and cracking years before shaded areas in the same bathroom. Even bathrooms without direct sunlight receive UV exposure from artificial lighting over years of use.
Installation Mistakes That Lead to Premature Caulk Discoloration
Application quality determines whether caulk lasts years or fails within months. Poor installation creates pathways for moisture infiltration, prevents proper adhesion, and establishes conditions for rapid mold growth. All problems that show up as discoloration patterns much faster than they should.
Common installation mistakes that cause rapid discoloration:
- Applying caulk to damp or wet surfaces. Moisture trapped between caulk and substrate prevents proper adhesion and creates immediate mold growth underneath that shows as black or yellow staining within weeks.
- Skipping surface cleaning to remove soap residue and oils. Contaminants prevent chemical bonding between caulk and substrate, causing gaps where water seeps through.
- Failing to remove old caulk completely. Leaving fragments or residue creates uneven surfaces and contamination that prevents new caulk from adhering properly.
- Applying caulk in cold temperatures below 40°F that prevent proper curing. Uncured caulk stays soft and porous, absorbing water and contaminants rapidly.
- Using wrong caulk type for specific substrate materials. Latex caulk on non-porous surfaces or silicone on materials that need paintable finishes leads to adhesion failure.
- Creating gaps or voids during application. Air pockets and thin spots allow water to penetrate behind the caulk line, trapping moisture that causes mold and mineral staining.
- Exposing fresh caulk to water before full cure time (typically 24 to 48 hours). Premature water exposure washes away uncured material and creates porosity that accelerates staining.
- Applying caulk too thin which reduces durability. Thin beads crack and separate faster, especially in high flex areas like tub edges and corner joints.
These mistakes create immediate vulnerability to moisture damage. When caulk is applied to wet surfaces or before old caulk is completely removed, water gets trapped between the new caulk and the wall or tub surface. This trapped water can’t escape and can’t dry. Within days, mold spores settle in this permanently damp environment and begin growing. The mold growth appears as black streaks or spots that seem to come from inside or underneath the caulk.
If you applied caulk in cold temperatures or didn’t wait for full curing before showering, the material stays partially uncured and porous. Porous caulk acts like a sponge, absorbing soap residue, mineral rich water, and dirt that create gray or yellow brown discoloration within the first month.
Adhesion failure from skipped surface prep or wrong caulk selection creates gaps that allow constant water seepage during every shower. These gaps trap water, soap, minerals, and organic matter that feed bacterial and mold growth, causing pink, orange, or black discoloration that gets worse after every shower. Problems from installation mistakes manifest as discoloration within months rather than the years properly installed caulk should last.
Effective Methods for Cleaning Discolored Bathroom Caulk

Cleaning works when discoloration sits on the caulk surface or hasn’t penetrated deep into the material. Surface soap scum, light mildew, and mineral deposits respond well to cleaning methods. Deep penetration from mold that has grown into porous caulk, UV degraded yellow polymers, or caulk that feels chalky and brittle needs replacement instead of cleaning. If you wipe the area and see color transfer to your cloth, cleaning has a good chance. If nothing transfers and the discoloration stays regardless of scrubbing, the damage is internal.
| Cleaning Method | Materials Needed | Best For | Application Time |
|---|---|---|---|
| Vinegar solution | Equal parts white vinegar and water, spray bottle, soft brush | Mild mildew and soap scum | 15-20 minutes contact, 5 minutes scrubbing |
| Baking soda paste | Baking soda, small amount water, old toothbrush | Stubborn surface stains | 30 minutes contact, 10 minutes scrubbing |
| Hydrogen peroxide | 3% hydrogen peroxide, spray bottle, soft cloth | Organic stains and light mold | 1 hour contact, 5 minutes wiping |
| Diluted bleach solution | Equal parts bleach and water, spray bottle, scrub brush | Severe yellowing and black mold | 2-3 hours contact, 10 minutes scrubbing |
| Commercial mold remover | Product-specific (follow label), brush, protective gear | Persistent growth and mixed stains | Varies by product, typically 15-60 minutes |
The step by step cleaning approach gives stains enough time to break down before you scrub. First, apply your chosen cleaning solution generously to cover all discolored areas. Spray solutions work well for large areas, paste works better for vertical surfaces where liquid runs off. Let the solution sit for the specified contact time. This waiting period lets the cleaner break down organic material, dissolve mineral deposits, or oxidize stains. Scrubbing too early just pushes surface dirt around without treating the underlying discoloration.
After contact time, scrub with a soft brush or old toothbrush using circular motions. Focus on corners and edges where discoloration tends to concentrate. For textured or damaged caulk surfaces, bristles need to reach into rough spots where stains hide. Rinse thoroughly with clean water to remove all cleaning solution residue. Leftover cleaner can cause new discoloration or react with caulk materials. Dry the area completely with a clean towel. Don’t just let it air dry, because that leaves minerals from tap water behind.
Safety precautions prevent chemical injuries and accidental reactions. Always wear gloves when handling any cleaning chemical, including vinegar and baking soda, because repeated exposure irritates skin. Ensure ventilation by running the exhaust fan and opening windows if possible, especially when using bleach or commercial products that produce fumes. Never mix bleach with ammonia (creates toxic chloramine gas) or with vinegar (reduces cleaning effectiveness and creates irritating fumes). Read product labels completely before mixing anything.
Test cleaning solutions on a small hidden area first, like behind the toilet or under the sink edge. Some older caulk formulations react badly to certain cleaners, causing worse discoloration or texture damage. If the test area shows problems after 15 minutes, don’t use that product on visible caulk lines.
Prevention Strategies to Stop Bathroom Caulk From Discoloring
Prevention is more cost effective than frequent replacement. A tube of caulk costs $8 to $15 plus several hours of work, or $100 to $300 for professional installation. Spending 5 to 10 minutes weekly on prevention extends caulk lifespan from 2 to 3 years to 5 to 7 years or longer, saving multiple replacement cycles.
Nine prevention strategies that reduce caulk discoloration:
-
Run exhaust fan during and 20 to 30 minutes after showers. This removes humidity before it settles on surfaces. Set a timer if you forget, because those extra 20 minutes matter more than the shower period itself.
-
Squeegee shower walls and tub after each use. Removing standing water prevents mineral deposits and eliminates moisture that feeds mold growth. Takes 30 seconds and removes 75% of water before it can cause problems.
-
Wipe down caulk lines weekly with dry cloth. A quick wipe removes soap residue and water droplets before they dry into deposits or create mildew. Do this during regular bathroom cleaning.
-
Select mold resistant silicone caulk with anti-microbial properties. These formulations resist biological growth significantly better than standard caulk. The upfront cost difference ($3 to $5 per tube) pays back in extended lifespan.
-
Avoid harsh chemical cleaners that react with caulk. Use mild dish soap, vinegar solutions, or dedicated gentle bathroom cleaners instead of bleach or ammonia based products that degrade caulk polymers.
-
Maintain consistent bathroom temperature to reduce condensation. Extreme temperature swings between shower use and cooling create condensation on walls and caulk. Leave heat on minimum settings in winter.
-
Address plumbing leaks promptly. A dripping faucet or leaking showerhead creates constant moisture exposure that overwhelms even the best caulk. Fix leaks within days, not months.
-
Apply caulk sealant or protective coating annually if product manufacturer recommends. Some premium silicone caulks benefit from reapplication of protective topcoats that refresh UV resistance and water repellency.
-
Keep windows open when weather permits for air circulation. Natural airflow removes humidity faster than exhaust fans alone. Even 10 minutes of open window ventilation after morning showers makes a difference.
Establishing a maintenance schedule turns prevention into routine rather than something you forget. Monthly visual inspections catch early discoloration signs when surface cleaning still works. Look for color changes, texture roughness, edge separation, or small spots of mildew. Quarterly deep cleaning of caulk lines removes accumulation before it becomes stubborn. Use baking soda paste or vinegar solution even when caulk looks clean, because prevention is easier than treatment.
Address small problems immediately when you spot them during monthly checks. A tiny corner of pink bacteria growth wipes away in 30 seconds now but spreads across entire caulk lines within weeks if ignored. Document your inspection dates and what you find to track which areas need more attention.
Consistent prevention reduces replacement frequency from every 2 to 3 years to every 5 to 7 years or longer. A bathroom with squeegee use, proper ventilation, and monthly attention keeps caulk looking new for 5+ years. The same bathroom without prevention shows yellowing, mildew, and texture degradation within 18 months. The time investment (about 5 minutes weekly plus 20 minutes quarterly) totals under 5 hours per year to extend caulk life by 3 to 4 years. That’s far less time than removal and replacement projects every other year.
Determining When Replacement Is Necessary and Complete Removal Process

Deciding between cleaning and replacement depends on whether the damage is reversible. Surface stains respond to cleaning methods. Structural damage, deep penetration, or material degradation requires removal and fresh application. Making the right call prevents wasted effort scrubbing caulk that’s already failed.
Signs You Need Replacement
Seven indicators that replacement is necessary instead of cleaning:
- Discoloration that doesn’t respond to cleaning attempts. If you’ve tried vinegar, baking soda, and even diluted bleach without improvement, the staining has penetrated into the caulk material where cleaning can’t reach.
- Visible cracks or gaps in caulk lines. Any separation between caulk and wall or tub, or cracks running through the caulk itself, means adhesion has failed and water is getting behind the seal.
- Peeling away from tile or tub surfaces. Edges that lift up or corners that separate indicate the caulk has lost its chemical bond with the substrate.
- Chalky or crumbly texture when touched. Degraded caulk that leaves powder on your finger or feels rough instead of smooth has broken down from UV damage or aging.
- Water seeping behind caulk causing damage. If you see water stains on walls below caulk lines, or notice soft drywall or damaged subflooring, the caulk is no longer waterproofing.
- Black mold that returns within days after cleaning. Mold growing inside the caulk material rather than on the surface keeps coming back because cleaning only removes surface growth.
- Caulk age exceeding 5 years regardless of appearance. Even good looking old caulk has lost flexibility and UV resistance that make it vulnerable to rapid failure.
Replacement timing considerations affect project success. Address problems immediately once you spot structural issues like cracks, gaps, or peeling, because every shower worsens water damage to substrates behind the caulk. Plan replacement during dry seasons or low humidity periods (typically spring or fall in most climates) for better curing conditions. Summer humidity slows curing and increases contamination risk from airborne mold spores. Winter cold prevents proper curing in unheated bathrooms.
Budget for professional help versus DIY based on your skill level and project scope. Simple tub edge caulking works well as DIY. Complex tile work with multiple corners, or situations where you need to match existing grout colors, often benefit from professional installation that costs $100 to $300 but guarantees proper adhesion and appearance.
Removal and Reapplication Steps
Project preparation and time requirements: plan for a half day project from removal through cleanup, plus 24 to 48 hours cure time before using the shower. You’ll need bathroom access restricted during this period.
Complete caulk replacement process in 10 steps:
-
Gather tools and materials. Caulk removal tool or sharp utility knife, plastic scraper, rubbing alcohol or acetone, clean lint free rags, new tube of mold resistant silicone caulk (buy extra if you’re new to this), caulk gun, painter’s tape, smoothing tool (or plan to use a wet finger), and gloves for chemical handling.
-
Remove old caulk by cutting along both edges. Run your removal tool or knife blade along the joint where caulk meets tile or tub on both sides. Cut through the entire depth of the caulk bead to break the seal.
-
Pull out the old caulk strip. Once cut on both sides, most caulk peels out in long strips. Pull steadily and evenly. Stubborn sections may need additional cutting.
-
Scrape remaining residue thoroughly. Use the plastic scraper to remove every bit of old caulk, mold, soap scum, and mineral deposits. The joint should be completely clean down to bare tile and tub surface. This step matters more than any other for good adhesion.
-
Clean surfaces with rubbing alcohol to remove all soap and oils. Wipe the joint area multiple times with alcohol dampened rags. Let the alcohol evaporate completely, which takes just a few minutes.
-
Let surfaces dry completely for 24+ hours. Moisture in the substrate prevents proper caulk adhesion. In humid climates or after cleaning with water based products, waiting 48 hours is better. Run exhaust fan and a small space heater nearby if needed to speed drying.
-
Apply masking tape along edges for clean lines. Tape both sides of the joint about 1/8 inch away from the edge. This creates a guide for your caulk bead and makes cleanup easier. Press tape down firmly so caulk doesn’t seep underneath.
-
Cut caulk tube nozzle at 45 degree angle. Cut the tip to create an opening slightly smaller than your joint width. You can always cut more off, but you can’t make the opening smaller. Load the tube into the caulk gun.
-
Apply steady bead along joint. Hold the gun at 45 degrees to the joint and pull it smoothly toward you while squeezing the trigger steadily. Maintain consistent pressure and speed to create an even bead. Fill the entire joint in one continuous motion when possible. For long runs, slightly overlap sections.
-
Smooth immediately with tool or wet finger. Within 2 to 3 minutes of application, run your smoothing tool or wet fingertip along the bead in one smooth motion. This pushes caulk into the joint and creates the finished profile. Dip your finger in soapy water if caulk is sticking. Remove masking tape immediately after smoothing, pulling at a 45 degree angle away from the fresh caulk. Let cure 24 to 48 hours (check tube label for exact time) before exposing to water.
Common application mistakes to avoid: applying too much pressure while smoothing pushes caulk out of the joint and creates voids. Use light, steady pressure instead. Working too slowly causes caulk to skin over before you smooth it, leaving rough texture and poor adhesion. Work in sections you can smooth within 2 minutes of application. Exposing to water before full cure washes away the surface layer and creates porosity that shows as immediate discoloration. Wait the full cure time even though caulk looks dry.
Substrate compatibility matters because some materials need special caulk formulations. Natural stone can stain from standard silicone (needs stone specific formulations). Acrylic tubs bond better with hybrid caulk than pure silicone. Metal fixtures may need caulk with corrosion inhibitors. Read product labels for substrate compatibility.
Estimated project costs: $15 to $40 for all materials including quality mold resistant caulk, tape, and tools if you don’t own them. Time investment runs 2 to 4 hours depending on bathroom size and complexity. Professional installation costs $100 to $300 depending on linear footage and regional labor rates but includes warranty and guaranteed results.
Material Selection Guide for Long-Lasting Bathroom Caulk

Material selection impacts how long caulk resists discoloration and maintains waterproof integrity. The difference between budget caulk failing in 18 months and premium formulation lasting 8 years comes down to polymer chemistry, additive packages, and manufacturing quality. Spending $5 to $10 more per tube avoids multiple replacement cycles over the same timeframe.
Silicone Caulk Performance
100% silicone caulk is the superior bathroom choice due to three key properties: completely waterproof (doesn’t absorb water like other materials), stays flexible through temperature changes and building movement (prevents cracking), and naturally resists mold growth better than organic based materials.
High quality silicone labeled specifically as “mold resistant,” “bathroom caulk,” or “kitchen and bath” includes additional anti-microbial additives that actively inhibit biological growth. These additives typically include fungicides like zinc pyrithione that prevent mold spores from colonizing the caulk surface. Premium silicone also contains UV resistant compounds that absorb or reflect UV radiation before it damages the polymer structure, significantly reducing yellowing in bathrooms with windows or strong artificial lighting.
The waterproof nature means trapped moisture doesn’t create the dampness that feeds mold and bacteria. Water beads on the surface and dries rather than soaking in. Flexibility prevents the tiny cracks that create water infiltration pathways in rigid materials.
Latex and Acrylic Caulk Vulnerabilities
Latex and acrylic caulks are more porous than silicone, meaning they contain microscopic spaces that absorb water like a sponge. Once water penetrates these porous structures, it stays trapped and creates permanent dampness inside the material. This dampness causes rapid mildew development that shows as black or gray green discoloration within weeks of installation.
The organic polymers in latex based formulations provide nutrients for mold growth, essentially feeding the organisms that discolor them. Water absorption also causes swelling and shrinking cycles as the caulk gets wet and dries repeatedly, leading to faster aging. Within 1 to 2 years, latex and acrylic caulk becomes brittle and develops surface cracks and edge separation. These cracks allow even more moisture infiltration, accelerating the yellowing and mold growth.
The discoloration from water damage in porous caulk can’t be cleaned because it exists throughout the material, not just on the surface. Acrylic formulations also react badly to bleach or strong bathroom cleaners, developing immediate yellowing and streaking from the chemical interaction.
Hybrid Caulk Formulations
Hybrid caulks combine silicone with acrylic or polyurethane to create materials with properties from both chemistries. Common hybrids include “siliconized acrylic” and “modified silicone” formulations. These combinations offer advantages: better flexibility than pure acrylic while maintaining paintability (important for trim work), improved waterproofing over standard latex while being easier to apply and clean up, and lower cost than premium 100% silicone while providing decent bathroom performance.
The paintability matters for visible caulk lines around baseboards or window trim where you want paint color to match walls. Pure silicone can’t be painted. However, cheaper hybrid versions still experience yellowing with prolonged water exposure because the acrylic component remains somewhat porous and reactive. The silicone content improves performance but doesn’t eliminate the vulnerabilities of the acrylic portion. Quality hybrids from reputable manufacturers balance the two chemistries better, but they still don’t match pure silicone for long term water resistance and mold prevention.
| Caulk Feature | Benefit | Look For On Label |
|---|---|---|
| 100% silicone formulation | Waterproof and flexible, won’t absorb moisture | “100% Silicone” or “Pure Silicone” |
| Mold and mildew resistant additives | Prevents biological growth that causes black discoloration | “Mold Resistant,” “Contains Mildewcide,” “Kitchen & Bath” |
| UV-resistant compounds | Reduces yellowing from sunlight and artificial light exposure | “UV Resistant,” “Won’t Yellow,” “Protects Against Sunlight” |
| Anti-microbial properties | Inhibits bacteria that cause pink and orange staining | “Antimicrobial Protection,” “Inhibits Bacteria Growth” |
| Fast cure time | Reduces contamination risk from airborne spores and dust | “Fast Cure,” “Ready in 24 Hours,” curing time stated on tube |
| Manufacturer warranty | Indicates quality control and product confidence | “Lifetime Warranty,” “10 Year Guarantee,” warranty terms on packaging |
Price versus performance comparison shows clear patterns. Budget caulk ($3 to $5 per tube) typically contains minimal or no mold resistant additives, uses standard silicone without UV protection, and lasts 1 to 2 years before showing discoloration and texture degradation. These work fine for low moisture areas like door trim but fail quickly in showers. Mid range products ($6 to $10 per tube) include mold resistant formulations with basic anti-microbial additives and offer 3 to 5
Final Words
Bathroom caulk discolors when mold, mildew, moisture, soap scum, UV light, harsh cleaners, and poor ventilation all combine in one small space.
What causes bathroom caulk to discolor boils down to environment and material quality—fix the conditions, choose better caulk, and clean regularly.
Most surface stains respond to vinegar or hydrogen peroxide. Deep yellowing or cracks mean replacement.
Run that exhaust fan. Squeegee after showers. Skip the bleach bombs. Your caulk will stay cleaner, longer, and you’ll spend less time scrubbing or re-caulking every couple years.
FAQ
How to fix discolored caulking?
To fix discolored caulking, start by identifying if the stain is surface-level or deeply penetrated. For surface stains, apply a vinegar solution or baking soda paste, let it sit 15-30 minutes, scrub with a soft brush, and rinse thoroughly. If discoloration doesn’t respond to cleaning, the caulk has degraded and needs complete removal and replacement with fresh mold-resistant silicone.
How to fix yellowing caulk?
Yellowing caulk can be fixed temporarily if the discoloration is only on the surface. Mix equal parts white vinegar and water, apply to the yellowed areas, let sit for several hours, then scrub and rinse. For stubborn yellowing, use a diluted bleach solution (equal parts bleach and water) with proper ventilation. If yellowing persists after cleaning, the caulk has undergone UV degradation and requires removal and replacement.
Can you reverse silicone yellowing?
You cannot reverse silicone yellowing caused by UV degradation or chemical breakdown. Yellowing from UV exposure involves polymer structure damage through chromophore formation and free radical reactions, which is permanent. Surface-level yellowing from soap scum or mineral deposits may clean off temporarily, but once the silicone itself has yellowed, complete removal and reapplication is the only solution.
How to whiten yellowing sealant?
To whiten yellowing sealant temporarily, try hydrogen peroxide for organic stains or a baking soda paste for surface discoloration. Apply the treatment, let sit 30 minutes to several hours, scrub gently, and rinse completely. If the sealant shows chalking, cracking, or the yellowing returns quickly, the material has aged beyond cleaning and needs replacement with fresh mold-resistant silicone caulk.