
You just watched a piece of paint curl away from your wall like old wallpaper. Here’s what’s going on: peeling happens when the bond between paint and surface breaks down, but the cause isn’t always obvious. Moisture trapped behind the coating, incompatible paint layers that never stuck together, dirty prep work, or just cheap paint will all create the same frustrating result. This guide walks you through what to look for, how to diagnose the real problem, and how to fix it so it doesn’t come back in six months.
Common Causes of Wall Paint Peeling: A Diagnostic Guide

Paint peeling happens when the bond between paint film and wall surface breaks down. If you see small blisters concentrated around bathroom fixtures and shower walls, moisture is likely the culprit. If paint edges curl away in large sheets, you’re dealing with incompatible paint layers that never bonded properly. If the surface shows uniform flaking across an entire wall, inadequate preparation left contaminants that blocked adhesion from day one.
| Peeling Pattern | Most Likely Cause | Common Locations |
|---|---|---|
| Small blisters (1-2 inches) | Moisture and high humidity | Bathrooms, basements, laundry rooms |
| Large bubbles with water stains | Water infiltration behind walls | Ceilings below bathrooms, exterior walls, near plumbing |
| Edge curling in sheets | Incompatible paint layers | Any surface with mixed oil-based and latex coatings |
| Uniform flaking across surface | Poor surface preparation | Kitchens, garages, areas with grease or dust |
| Chalking and fading | UV exposure and low-quality paint | South-facing exterior walls, trim, garage doors |
| Linear cracking patterns | Temperature stress and structural movement | Exterior corners, door frames, foundation-level walls |
Accurate diagnosis matters because different causes need completely different repair approaches. Applying fresh paint over moisture damage without fixing the leak just delays the problem by a few months. Using latex over oil-based paint without proper surface treatment will create the same curling edges again within weeks. You can’t address symptoms and expect different results.
Moisture and Water Damage Behind Paint Surfaces

Moisture pushes paint film away from the wall by building pressure in trapped vapor pockets. As water accumulates behind the coating, it swells the substrate and breaks the adhesive bond from the back side. Eventually the film lifts, blisters, and peels.
Water enters wall cavities through three main pathways. External leaks from damaged roofing, cracked foundations, or gaps around windows allow rain to seep into wall assemblies. Plumbing failures including leaking pipes, corroded fittings, failed toilet seals, and compromised waterproofing membranes introduce water directly into building cavities. Then there’s condensation. When warm, humid indoor air contacts cold surfaces, it creates dampness that enables mold and mildew growth that lifts paint.
High-risk areas for moisture-related peeling include bathrooms, especially around tubs and showers where steam creates constant humidity. Kitchens near sinks and dishwashers get hit with cooking steam and cleaning spray daily. Basements with poor drainage or inadequate vapor barriers in concrete trap moisture. Laundry rooms see dryer exhaust and washing machine leaks introduce moisture regularly. Exterior walls near ground level face soil contact and splash-back that drives water into foundations. And ceilings below bathrooms? Upper-floor plumbing leaks saturate drywall from above.
Vapor barriers control moisture by blocking water movement while allowing trapped humidity to escape. Paint needs to breathe on the interior side to release vapor that naturally migrates through walls, but seal tightly on the exterior side to block rain and groundwater. Vapor-permeable coatings on interior surfaces let moisture escape before it concentrates into blisters.
To spot hidden moisture, look for soft spots when pressing drywall. Water stains spreading beyond visible damage tell you there’s more going on. Musty odors near baseboards signal trapped dampness. Bubbling that returns after repair means you didn’t fix the source. A pin-style moisture meter reading above 16% in wood or 1% in drywall confirms the surface isn’t ready for paint. Cool basements, recent repairs, and shaded exterior walls retain dampness longer and need extra drying time or mechanical dehumidification before repainting.
Surface Preparation and Paint Compatibility Issues

Adhesion works through mechanical grip and chemical bonding. Paint needs microscopic tooth in the surface to lock into, plus a clean substrate for bonding agents to chemically anchor. Contaminated surfaces and incompatible paint layers both prevent this bonding from happening.
Mechanical adhesion fails when contaminants fill the surface texture that paint needs to grip. Grease from cooking creates a barrier film that repels water-based coatings. Dust settles into an invisible layer that crumbles under the weight of new paint. Mildew grows a biological film that lifts away from walls. Chalking from old paint leaves loose powder that can’t support fresh coatings. Glossy finishes? They create a slick surface with zero mechanical grip. It’s like trying to stick tape to glass.
Proper surface preparation for reliable adhesion starts with removing all loose, flaking, or bubbling paint with a scraper. Work outward from damaged areas until you reach firmly attached coating. Clean walls with a degreasing solution like TSP substitute, scrubbing especially hard around switch plates, cabinet areas, and anywhere hands touch regularly. Rinse thoroughly with clean water and allow complete drying. Check with a moisture meter in questionable areas.
Sand glossy surfaces with 120-grit paper to create texture for the next coat to grip, then vacuum and wipe with a damp cloth. Allow at least 24 hours of drying time after washing before priming or painting. Longer in humid conditions or on absorbent surfaces.
Drywall problems start during initial construction or repairs. Incomplete joint compound leaves ridges and divots that show through paint and create weak adhesion zones. Unsealed seam tape edges lift over time, creating lines that telegraph through coatings. Patching holes with spackle alone, without setting compound and tape for larger repairs, leaves soft spots that flex and crack the paint film. Always apply at least two coats of joint compound, sand smooth, and prime before painting repaired drywall.
Latex paint applied directly over old oil-based coatings causes adhesive failure within weeks to months. The water-based binder can’t chemically bond to the cured oil film underneath. Edges curl away in sheets, often starting near corners and spreading inward.
Want to test for oil-based paint? Score a small X through the coating, press duct tape over it firmly, then pull fast. If the paint lifts off in chunks, it’s latex and compatible with more latex. If nothing comes off, you’re dealing with oil-based paint and need bonding primer before applying latex topcoats.
Primer serves five functions that prevent peeling. It seals porous surfaces so the topcoat binder doesn’t get pulled into the substrate and thin out. It blocks stains from water damage, smoke, or previous colors from bleeding through fresh coats. It improves adhesion by providing a chemically compatible surface for the finish coat. It equalizes absorption across patched areas and old paint so the topcoat dries evenly. And it bridges incompatible layers, letting you safely put latex over oil when you can’t strip everything down to bare substrate.
| Surface Contaminant | Why It Causes Failure | Removal Method |
|---|---|---|
| Grease and cooking oils | Creates water-repellent barrier that blocks bonding | TSP substitute or degreaser, scrub with abrasive pad, rinse thoroughly |
| Dust and construction debris | Forms loose layer that crumbles under paint weight | Vacuum with brush attachment, wipe with damp cloth, allow drying |
| Mildew and mold | Biological film lifts away from wall, releases enzymes that break down paint | Bleach solution (1:3 ratio) or mildewcide cleaner, scrub, rinse, dry completely |
| Chalking from old paint | Loose powder provides no structural support for fresh coats | Stiff brush or pressure washer, prime with high-build bonding primer |
| Glossy or semi-gloss finish | Smooth surface provides no mechanical tooth for adhesion | Sand with 120-grit paper, wipe clean, apply bonding primer before topcoat |
Low-Quality Paint Products and Material Defects

Paint quality depends on the ratio of binder to pigment and the grade of raw materials. Binder holds everything together and sticks to the wall. Pigment provides color and opacity. Cheap paint uses less binder and more filler, creating a weak film that deteriorates fast.
Budget paint products look acceptable going on but fail within 6 to 18 months. The thin binder layer can’t withstand normal wear, humidity cycles, or UV exposure. Pigment density sits so low that the coating chalks and fades even indoors. The film cracks from normal thermal expansion because there’s not enough elastic binder to flex with the substrate. What looked like savings at purchase ends up costing more when you’re repainting every couple years instead of every 8 to 10.
Quality indicators in paint products include binder concentration above 40% by volume. That creates a strong, flexible film that resists cracking and peeling under stress. Pigment density should be sufficient to cover in two coats without thin spots or streaking, typically measured as hiding power in square feet per gallon. UV inhibitors prevent sunlight from breaking down the binder chemistry and making the coating brittle. Mildewcide additives in bathroom and kitchen formulas prevent fungal growth from lifting the film. And manufacturer warranties of 10+ years signal confidence in product durability, while 1 to 2 year warranties indicate budget-grade materials.
Paint expires and degrades in storage. Freezing breaks the emulsion in latex paint, causing permanent separation that looks like cottage cheese. Heat accelerates binder breakdown and evaporates solvents, making the paint thick and gummy. Time allows pigments to settle into hard chunks that won’t remix properly. If the can lid has bulged, the contents smell sour or chemical, or you see solid clumps after stirring for several minutes, the paint has gone bad. Applying expired paint leads to poor adhesion, uneven texture, and accelerated peeling because the chemical balance is permanently off.
Environmental and Temperature Factors in Paint Peeling
Paint application works best between 50°F and 85°F with humidity below 70%. Outside this range, curing chemistry goes wrong and adhesion suffers. Cold slows water evaporation and binder fusion, leaving a weak film. Heat rushes drying before the coating can properly grip and level.
Thermal expansion and contraction cycles stress exterior coatings daily. Wood siding swells when damp, then shrinks as sun dries it out. Metal surfaces expand significantly in direct sun, then contract overnight. Vinyl and composite materials flex with temperature more than the paint film can stretch. South-facing walls experience the most extreme swings, sometimes seeing a 50°F temperature difference between morning shade and afternoon sun. Over time, this constant movement cracks the paint and breaks adhesion at edges and seams.
UV radiation degrades paint through photochemical breakdown. Sunlight energy splits molecular bonds in the binder, turning flexible polymer into brittle powder over 3 to 7 years depending on coating quality. The surface chalks first, then hairline cracks form, eventually widening into flakes and sheets. Dark colors absorb more heat and UV energy, accelerating the process. Unshaded trim fails before wall sections. Horizontal surfaces degrade faster than vertical ones.
High-risk exterior areas for environmental damage? South-facing walls receiving maximum daily sun exposure and heat buildup. Metal surfaces including railings, trim, and garage doors that conduct heat and expand dramatically. Dark colors, especially reds and browns, that absorb heat and intensify UV damage. Unshaded trim and fascia facing direct sun all day with no cooling periods. Garage doors and entry doors that cycle through extreme temperature swings with seasonal heating and cooling. And coastal exposures where salt spray adds chemical stress on top of UV and moisture challenges.
High humidity during application creates blisters in bathrooms and basements. When you paint over a damp surface or in muggy conditions, water gets trapped under the film as it forms. Normal wear eventually breaks these vapor pockets open into flakes. Steam from showers and cooking drives repeated condensation cycles that swell and break the paint film from behind.
The only fix is better ventilation through exhaust fans, dehumidifiers, or opening windows during and after painting. Wait for relative humidity below 60% before starting, and keep air moving with fans until the paint fully cures, usually 7 to 14 days depending on thickness.
Substrate and Structural Issues Causing Paint Failure

The substrate is the material underneath paint. Drywall, plaster, concrete, wood, or metal. If the substrate fails, paint fails with it no matter how perfectly you applied it.
Drywall issues create weak spots that show up as peeling months later. Improper taping during construction leaves ridges that flex and crack. Unfilled fastener holes create dimples that concentrate stress and eventually pop through. Paper delamination from water damage leaves fuzzy, loose fibers that can’t hold paint. Any moisture exposure that makes drywall soft or crumbly means the paper facing has separated from the gypsum core and the whole section needs replacement, not just patching.
Masonry and concrete bring specific problems that ruin paint from below. Efflorescence shows up as white, powdery salt deposits that push through paint and lift it off. These salts migrate from inside the concrete as moisture evaporates, and they’ll keep coming back until you seal the wall with a vapor barrier or let it fully cure. Fresh concrete stays alkaline for months, burning through standard paint. Porosity varies across the same wall, creating areas that absorb paint at different rates and lead to uneven adhesion. New concrete needs at least 30 days of curing before painting, and even then requires an alkaline-resistant primer.
Plaster deterioration happens in older homes as the material ages and loses integrity. The surface powders when you rub it, leaving white dust on your hand. Cracks form from building settlement and humidity cycles. The bond between plaster and lath backing weakens over decades. You can feel soft or hollow spots by pressing firmly across the wall. Paint can’t bond to powder or loose plaster. You need to seal it with a penetrating primer or remove loose sections and patch properly before repainting.
Structural movement from foundation settling, framing expansion, or seismic activity creates stress cracks that break through paint. These cracks usually run diagonally from corners of doors and windows where stress concentrates. They reappear in the same location even after patching because the building is still moving. Hairline cracks under 1/8 inch wide might be dormant settlement, but anything actively widening or showing displacement needs structural assessment before cosmetic repair. Paint will always fail over active cracks because it can’t flex enough to bridge a moving gap.
Application Errors and Timing Mistakes

Following manufacturer specifications prevents most application failures. Paint cans list temperature ranges, humidity limits, recoat times, coverage rates, and number of coats for a reason. Skipping these guidelines saves time up front but leads to peeling down the road.
Application errors turn good paint into failed coating. Excessive thickness per coat, trying to cover in one pass instead of two thin ones, creates a heavy film that doesn’t cure properly and sags. Insufficient drying time between layers traps solvents and moisture, weakening the bond between coats. Painting in extreme temperatures, below 50°F or above 90°F, prevents proper curing chemistry. Too many accumulated layers over years, sometimes 8 or 10 coats thick, create weight stress that pulls the whole stack away from the substrate.
Proper application practices for lasting results start with applying thin coats that spread evenly without drips or sags, using the coverage rate listed on the can as your guide. Around 350 to 400 square feet per gallon. Follow manufacturer-specified recoat windows, typically 2 to 4 hours for fast-drying latex but check the label because some formulas need longer. Work within temperature and humidity requirements printed on the label, and stop if conditions change mid-project. Maintain adequate ventilation during drying with fans or open windows, especially in bathrooms and basements where humidity naturally runs high.
The difference between dry to touch and fully cured determines when painted surfaces can handle normal use. Dry to touch happens in 1 to 4 hours depending on temperature and humidity. The surface feels dry but the film is still soft. Light recoat time comes next at 2 to 8 hours, when you can add another layer without lifting the previous one. Full cure takes 7 to 30 days as solvents finish evaporating and the binder reaches maximum hardness. Rushing this process by scrubbing, placing furniture against walls, or hanging heavy items causes delamination because the film hasn’t developed full strength yet.
Preventing Paint Peeling Through Proper Techniques
Prevention costs less than repair because you catch problems before they spread. A peeling patch on one wall usually signals conditions that will affect adjacent areas within months. Fixing root causes now prevents the whole room from failing.
Comprehensive preparation steps for durable results? Address moisture sources first by fixing roof leaks, repairing plumbing, improving drainage around foundations, and installing or repairing bathroom exhaust fans. Clean surfaces thoroughly with degreaser in kitchens, mildewcide in bathrooms, and TSP substitute on smoky or dirty walls, then rinse and allow drying. Repair substrate damage including loose drywall tape, crumbling plaster, water-damaged sections, and filling cracks wider than hairline size.
Apply appropriate primer after confirming the surface is dry with a moisture meter reading below 16% in wood or 1% in drywall. Choose compatible paint by checking whether the existing coating is oil or latex and selecting the right primer for compatibility. Control environmental conditions during application by working in temperatures between 50 to 85°F with humidity below 70% and adequate ventilation. Allow full curing before normal use by keeping traffic light for at least 7 days and avoiding scrubbing or impacts for 30 days.
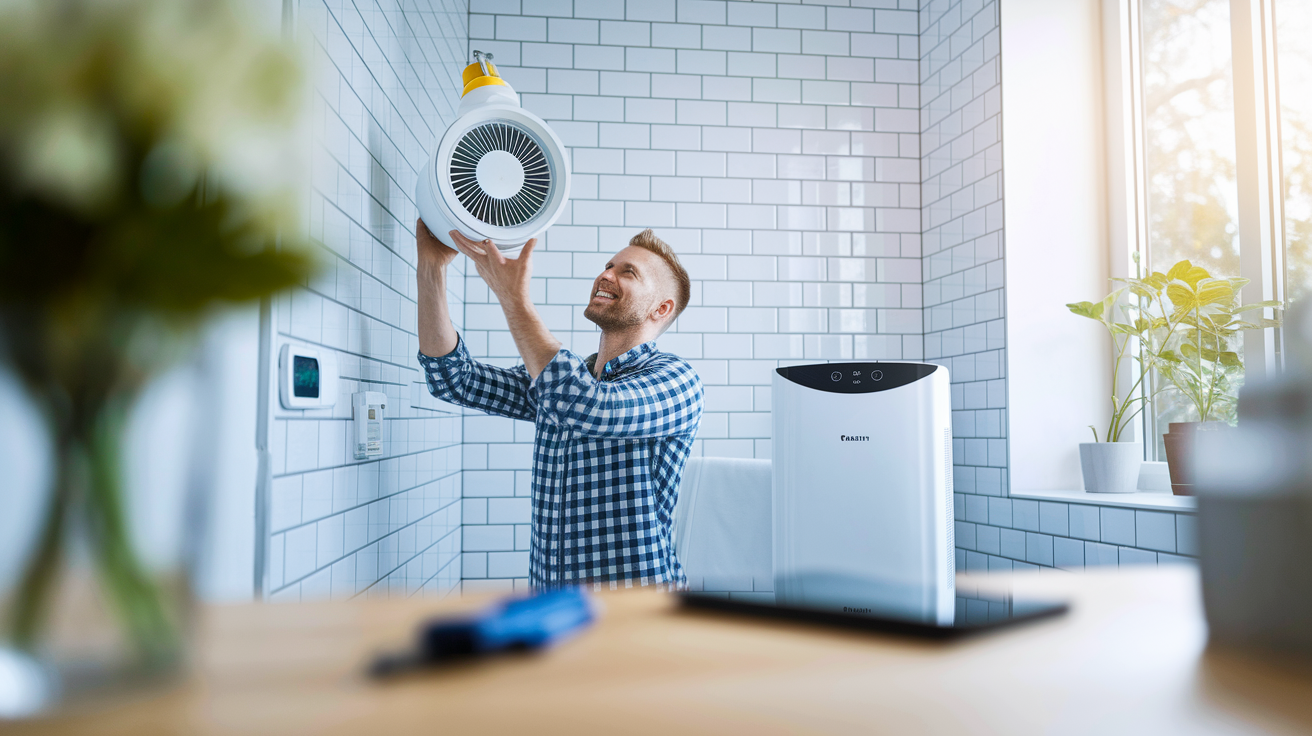
Moisture control techniques prevent the most common cause of peeling. Bathroom exhaust fans should run during showers and for 20 minutes after, with ducting that vents outside rather than into the attic. Dehumidifiers in basements maintain relative humidity between 30 to 50% and prevent condensation cycles that breed mold. Proper grading around foundations slopes away from walls at 1 inch per foot for at least 6 feet. Gutter maintenance includes cleaning twice yearly, checking for leaks at seams, and ensuring downspouts direct water at least 6 feet from the foundation. For more complete guidance on moisture prevention, check out how to prevent water damage.
Primer selection matches surface type and conditions. Stain-blocking primer seals water stains, smoke damage, and knot bleeding on raw wood. Bonding primer creates adhesion over glossy surfaces and previous oil-based paint when you want to switch to latex. Masonry primer handles alkalinity in concrete and seals efflorescence. Mold-resistant primer contains biocides for bathrooms and basements. Raw drywall primer, sometimes called PVA primer, seals the paper facing and prevents overabsorption of the finish coat.
Application best practices for each coat include applying thin, even coats that cover approximately the square footage listed on the can, usually 350 to 400 square feet per gallon. Wait for the manufacturer-specified recoat time between layers, checking the label because it varies from 2 to 8 hours. Work within the temperature and humidity windows printed on the can, typically 50 to 85°F and below 70% humidity. Provide adequate ventilation with open windows or fans during application and drying to remove moisture and fumes.
Maintenance routines extend paint life and catch small problems before they spread. Annual inspections check for cracking, bubbling, or edge lifting around windows, doors, and moisture-prone areas. Prompt repair of small failures means scraping and touching up a 6-inch spot instead of repainting an entire wall 2 years later. Cleaning schedules remove grease buildup in kitchens, soap scum in bathrooms, and dirt in high-traffic areas before contaminants weaken adhesion.
Repairing Peeling Paint: Step-by-Step Process

Successful repair requires addressing root causes before cosmetic work. If you skip the moisture fix or surface prep, the new paint will fail in the same pattern within months. Think of it like putting a bandage on without cleaning the wound.
Complete repair process from diagnosis through final coat starts with identifying and fixing moisture sources including plumbing leaks, roof damage, poor drainage, or ventilation problems before touching paint. Remove all loose paint by scraping outward from damaged areas until you reach edges that won’t lift when you press hard with a putty knife. Clean the surface thoroughly to remove grease, soap scum, mildew, or chalking using appropriate cleaners for the contaminant type.
Sand edges smooth where old paint meets bare substrate, feathering the transition so you can’t feel a ridge when you run your hand across it. Fill cracks and holes with patching compound, applying in thin layers if the damage is deep, and sand smooth when fully dry. Apply stain-blocking primer over water stains, knots, or areas with residual discoloration to prevent bleed-through.
Apply bonding primer on areas where paint compatibility is questionable, including glossy surfaces and places where latex will cover oil-based coatings. Apply first topcoat in a thin, even layer once all primers have dried to recoat time, usually 2 to 4 hours. Allow proper drying between coats, checking the paint can for specific recoat windows that range from 2 to 8 hours depending on formula. Apply final coat for uniform color and full coverage, then keep the area lightly used for 7 days and fully protected from scrubbing for 30 days.
| Tool/Material | Purpose | Approximate Cost |
|---|---|---|
| Putty knife set (1″, 3″, 6″) | Scraping loose paint and applying filler | $8-15 |
| Paint scrapers (pull-type and 5-in-1) | Removing thick or stubborn peeling sections | $12-20 |
| Sandpaper assortment (80, 120, 220 grit) | Smoothing edges, deglossing, final surface prep | $10-15 |
| Patching compound and joint tape | Filling cracks, holes, and damaged drywall areas | $8-18 |
| Bonding primer (quart to gallon) | Creating adhesion on problem surfaces | $15-45 |
| Stain blocker (quart) | Sealing water marks and preventing bleed-through | $12-20 |
| Quality topcoat paint (gallon) | Finish coating matched to room conditions | $35-60 |
| Drop cloths and painter’s tape | Protecting floors, trim, and adjacent surfaces | $15-25 |
Safety equipment prevents health problems from paint dust and chemical exposure. A respirator with P100 filters blocks fine particles including lead dust in pre-1978 homes. Safety goggles keep dust and scraping debris out of eyes during removal. Nitrile gloves protect skin from solvents in primers and cleaners. Ventilation through open windows and fans moves fumes outside and brings in fresh air. Before addressing a deeper repair after water damage, review water damage restoration steps for comprehensive moisture elimination.
Lead paint precautions apply to any home built before 1978. The paint itself isn’t dangerous until you disturb it through scraping, sanding, or demolition. Work wet by misting surfaces before scraping to keep dust from going airborne. Seal the work area with plastic sheeting taped at doorways. Use a HEPA vacuum to clean up dust and debris daily. Dispose of waste according to local regulations. Many areas require special handling of lead-contaminated materials. If peeling is widespread in an older home, consider professional lead-safe renovation by certified contractors.
Quality checks after each coat prevent defects from hiding under the next layer. Look at the surface under angled light to spot thin areas, drips, or texture problems. Feel for rough spots, ridges, or loose edges that need attention before topcoating. Check coverage near previous peeling areas since those spots often absorb more and need extra coats. Painted rooms typically need 24 hours before resuming light use, 7 days before hanging things or moving furniture back, and 30 days before scrubbing or heavy cleaning.
When to Call a Professional for Paint Peeling Issues

Professional diagnosis saves money when you’re dealing with complex or recurring problems. An experienced contractor can spot underlying issues that DIYers miss, like hidden moisture patterns or substrate failures that need structural repair before cosmetic work.
Situations requiring professional help rather than DIY repair include widespread peeling across multiple rooms or exterior elevations. That suggests systemic moisture problems, foundation issues, or original construction defects. Suspected lead paint in pre-1978 homes requires certified lead-safe contractors with EPA-approved training, containment methods, and disposal procedures. Active mold growth behind paint indicates moisture levels and contamination severity that need testing, containment, and possible remediation.
Ongoing water leaks of unknown origin may involve plumbing in walls, slab leaks, or roof damage that requires diagnostic tools like thermal cameras. Foundation cracks or structural movement creating recurring damage needs engineering assessment before cosmetic repair. Asbestos-containing materials in popcorn ceilings, textured walls, or old plaster require certified abatement contractors and specialized disposal. Extensive exterior peeling on historic homes may involve lead paint, original substrate problems, and historic preservation requirements. And peeling that returns within 6 months of proper repair? That signals conditions you haven’t identified, like vapor drive from unconditioned spaces or chemical incompatibilities.
Professional services provide diagnostic tools and expertise beyond consumer level. Moisture mapping with thermal imaging cameras reveals dampness patterns invisible to the eye. Moisture meters with deep probes measure water content inside wall cavities without destructive investigation. Lead testing with XRF analyzers identifies hazardous coatings without lab delays. Mold testing determines species and concentration levels for proper remediation scope. Structural assessment from engineers provides load calculations and repair specifications for cracked foundations or failing framing.
Professional repair costs more up front but often includes warranties that DIY work can’t match. Many painting contractors offer 5-year warranties on prep and application, while specialty services like mold remediation and waterproofing may carry 10+ year guarantees. These warranties cover recurring failures from the same cause, giving you recourse if problems return. They also transfer to new homeowners during sale, adding value. Calculate the cost of doing a repair twice against paying more once for guaranteed results, especially when dealing with expensive spaces like bathrooms or problematic exteriors.
Final Words
Moisture damage, poor prep, and incompatible paint layers explain what causes paint to peel off walls in most homes. When you spot blisters, edge curling, or uniform flaking, you’re looking at fixable problems with clear repair paths.
Address the root cause first. Stop the leak, clean the surface, or swap out that incompatible coating.
With the right primer, proper drying time, and decent ventilation, your repaired walls can outlast the original job. And if moisture keeps coming back or you’re dealing with lead paint, calling a pro is the faster, safer move.
FAQ
How do you fix paint peeling off a wall?
To fix paint peeling off a wall, you start by removing all loose paint, cleaning the surface thoroughly, sanding edges smooth, filling any holes or cracks, applying bonding primer, then repainting with compatible topcoat. Address moisture sources first or the peeling will return.
How do you prevent wall paint from peeling?
You prevent wall paint from peeling by controlling moisture sources, cleaning and priming surfaces properly before painting, using compatible paint systems, applying thin coats with adequate drying time between layers, and maintaining good ventilation in high-humidity areas.
Does peeling paint mean damp?
Peeling paint often means damp conditions are present, especially when you see blistering in bathrooms or basements, but it can also result from poor surface prep, incompatible paint layers, or low-quality materials applied in proper conditions.
Can you paint over paint that’s peeling?
You cannot paint over paint that’s peeling without proper prep. You must remove all loose material, sand edges smooth, prime bare spots, and fix underlying moisture or adhesion problems first, or the new paint will fail within weeks.
What causes small blisters in bathroom paint?
Small blisters in bathroom paint are caused by moisture and high humidity pushing through the paint film from behind. Poor ventilation traps steam against walls, and water vapor builds up between the substrate and paint layer.
How do you know if old paint is oil-based or latex?
You know if old paint is oil-based or latex by rubbing a small area with denatured alcohol on a rag. Latex paint softens and comes off on the rag, while oil-based paint stays intact and shows no color transfer.
What is bonding primer and when do you need it?
Bonding primer is a high-adhesion coating that sticks to difficult surfaces like glossy paint, tile, or metal and creates a strong foundation for topcoats. You need it when painting over slick surfaces or repairing areas with previous adhesion failures.
How long should primer dry before painting over it?
Primer should dry according to manufacturer specifications, typically 1-3 hours before recoating in ideal conditions, but humidity and temperature affect this. Full cure takes 24 hours, though most primers accept topcoat sooner if surface is dry to touch.
What’s the difference between paint being dry and fully cured?
Paint being dry means the surface feels solid and won’t transfer when touched, usually within hours, while fully cured means the paint has reached maximum hardness and durability, which takes 2-4 weeks depending on product and conditions.
Can you fix peeling paint without removing all of it?
You can fix peeling paint without removing all of it only if surrounding areas are firmly bonded, edges are feathered smooth with sanding, and you address the root cause. Loose or poorly adhered paint nearby will continue spreading.
What moisture level is safe for painting walls?
A moisture level safe for painting walls is below 12-15 percent for wood and below 4 percent for drywall and plaster, measured with a moisture meter. Higher readings mean trapped water will push new paint off within months.
Should you use primer on previously painted walls?
You should use primer on previously painted walls when covering stains, patching repairs, painting over dark colors, switching from oil to latex paint, or dealing with chalky or glossy surfaces that need better adhesion.
How many coats of paint prevent peeling?
The number of coats of paint doesn’t prevent peeling on its own. Proper surface prep, compatible primer, and two thin topcoats with adequate drying time matter more than total layer count, since excessive thickness can cause weight stress.
What type of paint works best in high-moisture areas?
Paint that works best in high-moisture areas is semi-gloss or satin-finish latex with mildew-resistant additives. These formulations resist moisture penetration better than flat paints and clean easier, making them ideal for bathrooms, kitchens, and laundry rooms.
Can temperature cause exterior paint to peel?
Temperature can cause exterior paint to peel through expansion and contraction cycles that stress the paint film. South-facing walls, dark colors, and metal surfaces experience the most thermal movement, with UV exposure hardening and brittling the coating over time.