
You walk down your basement stairs, hear water sloshing, and freeze. Everything you’ve stored down there, the washer and dryer, the finished rec room, all of it’s underwater. Your brain splits between “fix this now” and “what do I even do first?” Here’s the truth: the first hour after a flood is the most dangerous, and rushing in without a plan can get you electrocuted or injured. This guide walks you through immediate safety checks, water removal, drying timelines, and what’s worth saving so you can stabilize the damage without making it worse.
Immediate Safety Steps and Entry Precautions After Basement Floods
The first hour after you discover flooding is when things can go seriously wrong. Electrocution, structural collapse, contaminated water. Speed doesn’t matter if you’re doing the wrong things.
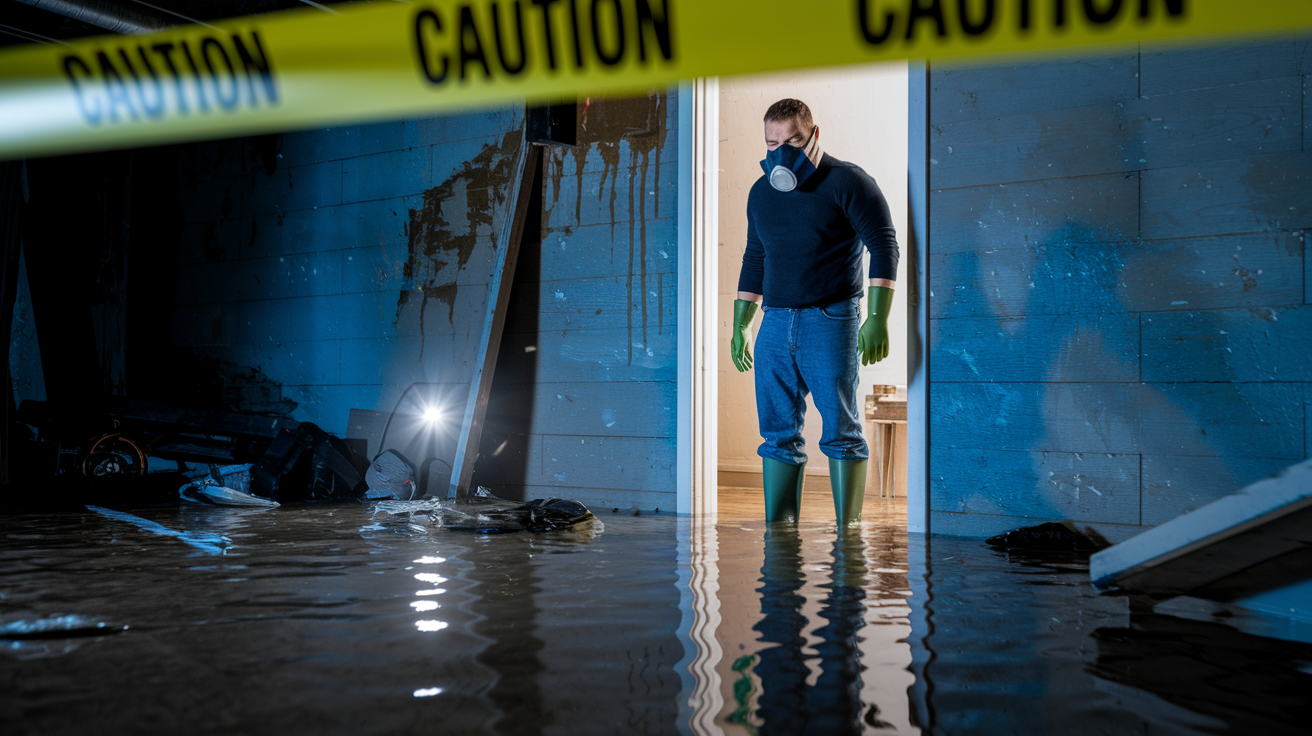
Stop at the doorway. Don’t go in yet. Look at everything you can see from there. How deep is the water? What’s floating around? Are there cracks in the walls or ceiling you didn’t notice before?
Shut off the electricity at the main breaker if you can reach it without going into the flooded area. If the breaker box is in the basement or underwater, call an electrician right now and leave the power alone.
Turn off the gas at the meter if you can get to it safely and you actually know how to do it. If you’re not sure, call the gas company instead.
Contact your insurance company immediately. Report the damage, confirm what your coverage actually includes, find out your deductible, and ask what kind of documentation they need.
Look at the water itself. Is it discolored? Does it smell like sewage? Can you see waste material? Any of those signs mean sewer backup, and that water is dangerous. You need professional help.
Check for structural problems from where you’re standing. Sagging ceiling tiles, walls that look like they’re bowing out, new cracks in the foundation, support posts that aren’t sitting straight anymore.
If you see contamination or structural damage, get out and call professionals. Don’t go in.
Put on the right gear before you enter. Rubber boots that come up past your knees, waterproof gloves that go past your wrists, a mask rated for mold spores. If the water’s over 12 inches, you need chest waders.
Figure out where the water’s coming from if you can do it safely. Shut off the main water valve for burst pipes, check if the sump pump’s working, or just wait for the storm to stop.
Go in slowly. Test the floor with each step. You can’t see what’s underwater. Hidden obstacles, weakened flooring, floor drains you forgot about.
Don’t touch anything electrical. Not outlets, not switches, not appliances. Even with the main power off, wet electronics can still shock you. Leave everything where it is to dry out, then get an electrician’s opinion.
Start documenting right away with your phone. Photos and video from different angles, shots of the water line on the walls, the overall condition before you move anything.
Taking these steps in order protects you and protects your insurance claim. The urge to rush in and start pumping water out makes sense, but a few minutes spent on safety can prevent injuries that take months to recover from.
Documenting Basement Flood Damage for Insurance Claims

Start documenting the second you can safely get into the basement, even before you remove standing water. Most policies require you to report within 24 hours, and how well you document everything directly affects how fast your claim processes and how much you get paid.
Call your flood insurance provider within the first 24 hours to report what happened. When you’re on the phone, confirm your coverage limits, verify your deductible, ask what specific documentation they want, and get a claim number. Ask if they have a list of recommended mitigation vendors or restoration contractors.
What you need to document:
Take wide shots showing the full extent of flooding from multiple spots in the doorway. Get close-up photos of every damaged item, every structural element, every wall section with visible water lines. Record video walkthroughs where you describe out loud what you’re seeing and how deep the water was when you found it. Write down every damaged item with its approximate age, what you paid for it originally, and what condition it was in before the flood. Keep receipts for emergency repairs, equipment rentals, cleaning supplies. Mark the high water line on the walls with tape or marker and photograph it with a measuring tape so there’s scale. Date and time stamp everything or write down when you recorded it.
Insurance adjusters usually schedule inspections within 3 to 7 days of your initial report. They need to see actual damage before you remove water if possible, though most understand you have to extract water for emergencies. The adjuster will look at structural damage, evaluate your belongings, verify where the flood came from, and figure out what’s covered. The full claim process typically takes 30 to 60 days for simple cases, longer if there are coverage disputes or if repairs uncover hidden damage. Good documentation from day one prevents arguments about what was actually damaged versus what was already in rough shape.
Removing Standing Water From Your Flooded Basement

How you remove water depends entirely on how much there is and how deep it goes. Check and clear all floor drains before you start extraction because a clogged drain forces you to pump water that could just drain naturally.
| Water Depth | Recommended Equipment | Estimated Time |
|---|---|---|
| Under 1 inch | Wet/dry vacuum, mop and bucket, thick towels | 2-4 hours for typical basement |
| 1-6 inches | Wet/dry vacuum (12+ gallon capacity), squeegee, floor drain clearing | 4-8 hours with one person |
| 6-18 inches | Portable sump pump or pool pump with discharge hose, wet/dry vacuum for corners | 6-12 hours depending on pump capacity |
| 18 inches to 2 feet | Submersible sump pump (1/3 HP minimum), garden hose or discharge pipe to exterior | 8-16 hours for removal, additional time for residual water |
| Over 2 feet | Professional extraction service with truck-mounted pumps, or multiple submersible pumps | 4-8 hours professionally, 24+ hours DIY |
For shallow flooding under 6 inches, start with a squeegee to push water toward the floor drains. Work in sections, pushing from the farthest corner toward the drain. It’s like moving snow off a driveway. Overlap each pass slightly and keep consistent pressure. Follow up with a wet/dry vacuum to get what the squeegee missed.
For deeper water, rent a submersible pump from a tool rental place if you don’t have one. A 1/3 horsepower pump moves about 30 gallons per minute, which is 1,800 gallons per hour. A typical basement with 18 inches of standing water holds somewhere between 3,000 to 5,000 gallons depending on square footage and what’s in the way. Put the pump in the deepest spot, run the discharge hose outside and away from your foundation, and let it work. Check every 30 minutes to make sure the hose didn’t kink and the pump didn’t clog.
Get family or friends to help with water removal. Multiple people running wet/dry vacuums at the same time can cut extraction time in half. After the pump or vacuum gets the bulk water out, finish with sponges and thick rags to soak up what’s left in corners, around posts, along wall edges. You’re trying to get to bare, damp concrete, not perfectly dry.
Drying and Ventilating Your Basement After Water Removal
The 24 to 48 hour window after flooding is when mold starts setting up colonies on wet surfaces, so aggressive drying is your top priority once the standing water’s gone. Anything you want to salvage has to be dried completely within 48 hours or it becomes a mold factory.
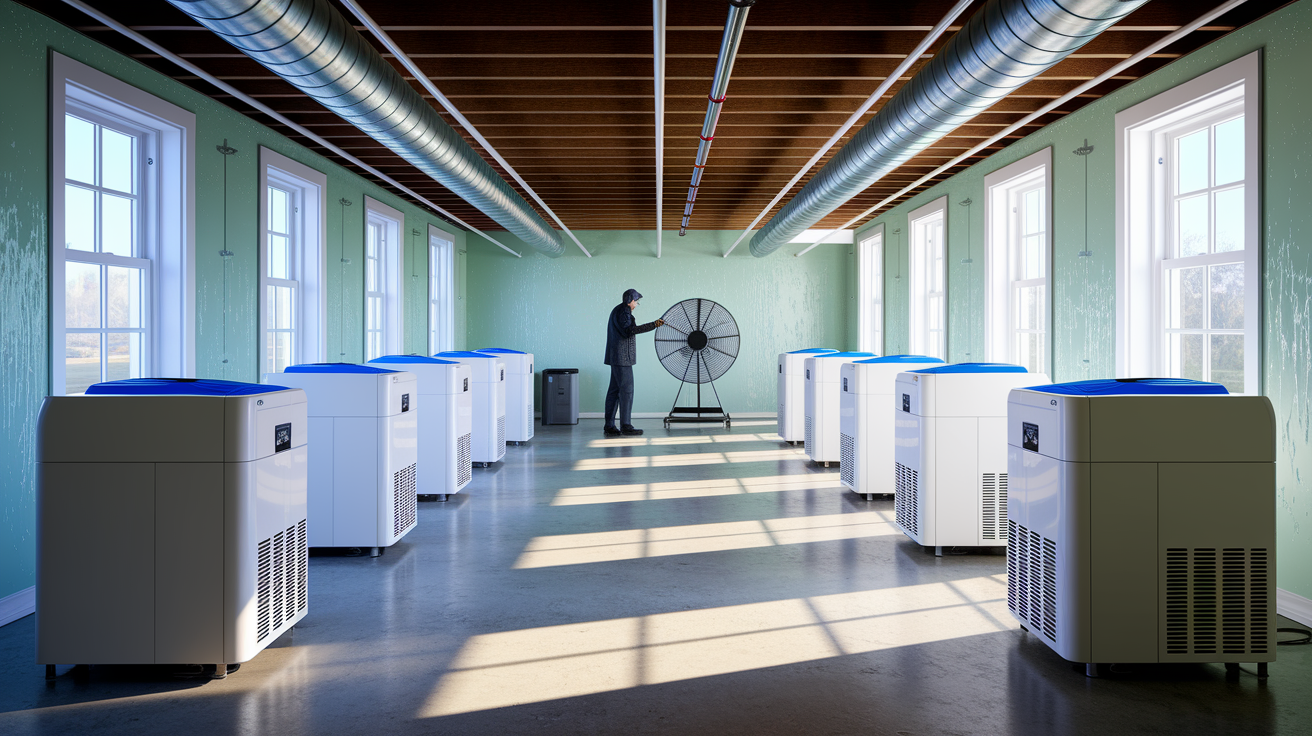
Open every window and door in the basement even if it seems wrong because the outdoor air is humid. Air movement matters more than humidity levels in the first 72 hours. Stagnant humid air grows mold faster than moving humid air. Put box fans in corners pointing toward open doors and windows to create cross-ventilation. At least one fan every 10 feet of floor space. Aim some at the walls to dry vertical surfaces. Aim others across the floor. If you’ve got ceiling fans, run them on the highest setting.
Rent commercial dehumidifiers from home improvement stores or equipment rental places. A residential dehumidifier rated for 50 pints per day can’t keep up with flood conditions. Commercial units remove 150 to 200 pints daily. Run them continuously and empty collection buckets every 4 to 6 hours, or connect a garden hose to the continuous drain port if it has one. Try to get humidity levels below 50 percent within the first week.
Visible moisture on concrete floors usually disappears within 7 to 10 days after moderate flooding if you keep constant airflow and dehumidification going. Severe flooding with water over 12 inches deep can take two weeks before surfaces look dry. Moisture trapped inside walls, behind drywall, in insulation, or inside HVAC ductwork takes way longer to evaporate, often 14 to 21 days. You can’t see this hidden moisture, which is why repairs should wait. A moisture meter pressed against drywall and studs tells you the actual dryness level. Readings below 15 percent mean dry wood that’s safe for repairs. Readings above 20 percent mean you need more drying time.
Sorting Damaged Items and Salvaging Belongings After Basement Flooding

The 48-hour rule applies to your stuff just as strictly as it applies to structural elements. If something can’t be thoroughly dried within two days of touching floodwater, throw it out regardless of how much it cost or what it means to you.
Move items you want to save to well-ventilated outdoor areas where air moves freely. A covered porch works better than a closed garage. Separate items by what they’re made of so wet items don’t re-soak things that are drying. Cardboard boxes fall apart when wet and turn into bacterial breeding grounds, so everything stored in cardboard has to go even if the contents look dry. The cardboard itself contaminates whatever it touches.
Remove all carpeting immediately, even if water depth was minimal. Wet carpet keeps the subfloor and padding underneath continuously damp, which guarantees mold growth within the floor structure. Pull carpet back from tack strips and drag it outside for inspection. Wall-to-wall carpeting soaked by flooding rarely survives even with professional cleaning. Talk to a carpet cleaning contractor or restoration specialist if the carpet was expensive or less than three years old, but expect them to recommend replacement in most cases. Small area rugs can sometimes be saved if dried within 24 hours and professionally cleaned.
What you can probably save:
Electronics like TVs, stereos, computers, appliances. Never touch while wet. Let them dry completely in place for 7+ days, then have an electrician test before plugging in. Success rate under 20 percent for submerged items.
Wood furniture. Solid hardwood can often be saved. Plywood falls apart. Particle board swells permanently. Move outside immediately and allow 10 to 14 days drying time before refinishing.
Upholstered furniture like sofas, chairs, mattresses. Throw out anything with cushions or padding. Foam and fabric can’t be dried or disinfected properly after flood contact.
Books, papers, photographs. Freeze immediately if salvage matters, then talk to a document restoration specialist. DIY salvage success rate under 30 percent.
Carpeting and rugs. Remove within 24 hours. Wall-to-wall is usually unsalvageable. Small rugs under 4×6 feet can sometimes be professionally cleaned if dried within 48 hours.
Metal items like tools, shelving, filing cabinets. Usually salvageable with thorough cleaning and rust treatment. Dry completely before storing to prevent oxidation.
Plastic storage containers and bins. Salvageable after washing with disinfectant. Throw out lids that trap moisture when closed.
Appliances like washers, dryers, water heaters, furnaces. Need professional inspection before use. Electrical components and gas valves fail after water exposure even if they look dry externally.
Cleaning and Disinfecting Surfaces in Your Flooded Basement

Cleaning only starts after drying is mostly complete, usually 7 to 10 days after water removal when moisture meters confirm surfaces read below 18 percent. Trying to clean wet surfaces spreads contamination and traps moisture behind sealants.
How to disinfect properly:
Sweep or vacuum all loose dirt, dried mud, and debris from floors and walls using a shop vacuum with a HEPA filter if you’ve got one.
Wash all hard surfaces that touched floodwater with hot water and household detergent or all-purpose cleaner. Scrub with a stiff brush to remove sediment that’s worked into concrete pores or drywall texture.
Rinse with clean water to get soap residue off, which can trap moisture and prevent disinfectant contact.
Mix disinfecting solution using 1 cup of household bleach per gallon of water. Wear rubber gloves and eye protection. Open windows for ventilation.
Apply bleach solution to all surfaces using a mop, sponge, or pump sprayer. Keep surfaces visibly wet for 10 minutes to get proper disinfection. Reapply if surfaces dry before 10 minutes pass.
After disinfection dries completely, surfaces exposed to contaminated water benefit from antimicrobial spray. Antimicrobial treatments are different from disinfectants because they create a protective barrier that stops future mold growth rather than just killing what’s already there. These products are available at home improvement stores in the cleaning or restoration sections. Follow manufacturer application instructions, which usually involve spraying affected areas and letting them air dry without rinsing.
Contaminated water from sewer backups or water that sat for a long time needs more aggressive treatment. If water looked brown, gray, or black, or if there was sewage smell, double the bleach concentration to 2 cups per gallon. Consider hiring professional remediation services for category 3 contamination because pathogens in sewage-contaminated water create serious health risks that household cleaning can’t properly address.
Inspecting for Structural Damage and Mold Growth
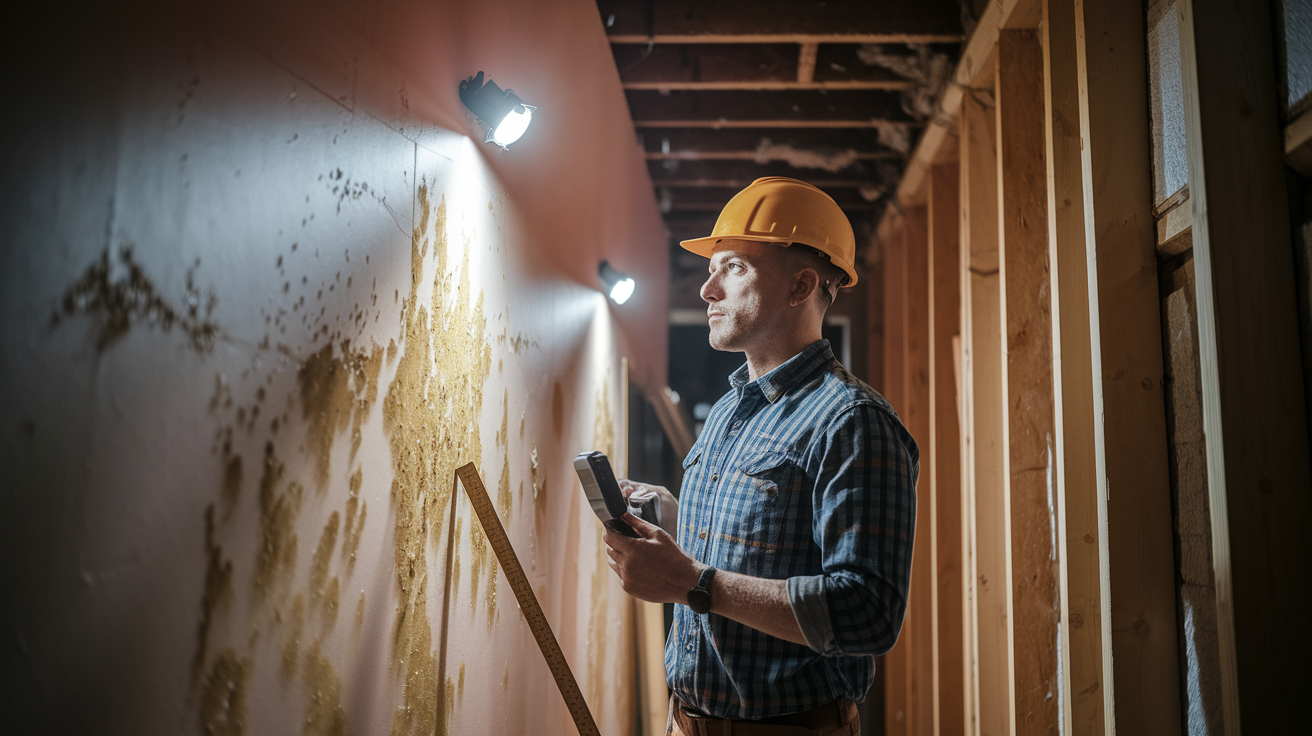
Drywall damage shows up as discoloration even after drying, soft spots that compress when you press them, visible warping or buckling along seams, or surfaces that crumble when touched. Check the bottom 2 feet of all wall sections that touched water. Probe with a screwdriver to test firmness. Drywall that absorbed floodwater loses structural integrity and has to be removed even if it looks okay on the surface. Cut drywall horizontally at least 12 inches above the highest water line to make sure you get all the contaminated material.
Insulation inspection requires removing drywall to see what’s behind it. Fiberglass batt insulation compressed by water never fully expands or gets its R-value back after drying. It also traps moisture against studs and causes wood rot. Remove all wet insulation from wall cavities and replace it with new material after studs dry completely. Spray foam insulation absorbs less but still needs inspection for gaps where water pooled. Basement rim joist areas where floor joists meet foundation walls are especially vulnerable to trapped moisture.
Mold looks like black, green, gray, or white fuzzy patches on surfaces, or dark staining on drywall, wood, or concrete. Check inside wall cavities after removing damaged drywall. Look behind the washer and dryer hookups. Inspect HVAC ductwork from vent openings using a flashlight. Sniff for musty odors that mean hidden mold growth even when you can’t see visible colonies. Mold starts growing within 24 to 48 hours of water exposure, so if more than two days passed before drying began, assume mold’s there and inspect accordingly.
Foundation crack assessment determines whether cracks are actual structural problems or normal settling. Hairline cracks under 1/16 inch wide are typical in concrete foundations and rarely mean problems. Cracks wider than 1/4 inch, cracks that run diagonally, or cracks where one side is offset higher than the other suggest structural movement that needs professional foundation evaluation. Horizontal cracks in block foundations or cracks that leak water during rain mean exterior waterproofing failure. Mark crack locations with tape and photograph them with a ruler for scale. Monitor over several weeks to see if they get wider.
Repairing Basement Walls, Floors, and Systems After Flooding

Repairs only begin after moisture meter readings confirm complete dryness, usually 14 to 21 days after water removal for moderate flooding. Starting repairs too early traps moisture and guarantees future problems.
| Repair Task | Priority Level | Typical Timeline |
|---|---|---|
| Electrical system inspection and testing | Critical, First | Day 1 after drying confirmed |
| Drywall removal and replacement | High, Second | Days 2-5 after electrical clearance |
| Insulation replacement in wall cavities | High, Third | Days 3-6, after drywall removal |
| Flooring removal and subflooring inspection | Medium, Fourth | Days 5-10, depends on flooring type |
| HVAC ductwork cleaning and system testing | Medium, Fifth | Days 7-14, schedule professional service |
| Plumbing inspection and drain testing | Medium, Sixth | Days 7-14, test before wall closure |
| Appliance safety evaluation and replacement | Low, Seventh | Days 14-21, after utilities confirmed safe |
Hire a licensed electrician to inspect all outlets, switches, junction boxes, and circuit breaker panels that were underwater or touched by water. The electrician will test for short circuits, verify ground connections, check for corrosion on wire terminals, and confirm that GFCI outlets work properly. Electrical components can look dry on the outside while keeping moisture inside connection boxes. Don’t restore power to basement circuits until electrical inspection confirms safety. Cost usually runs $150 to $400 for standard inspection, more if repairs or replacements are needed.
HVAC systems need professional inspection after flooding no matter how deep the water was. Supply and return ductwork in basements collects moisture that breeds mold inside the ducts, then spreads spores throughout your home every time the system runs. Schedule duct cleaning with a certified HVAC contractor who uses cameras to inspect internal duct conditions. Furnaces and air handlers with electronic controls that touched water usually need replacement of control boards and limit switches. Gas furnaces need combustion testing to verify safe operation. Electric furnaces need heating element inspection for shorts. Water heaters submerged above the thermostat level should be replaced as a safety precaution because flooded electrical controls are fire hazards.
Appliance safety evaluation depends on how deep the water was and what kind of appliance. Washers and dryers with water above the control panel level rarely make economic sense to repair because labor costs exceed replacement costs for base models. Refrigerators and freezers that kept running through flooding may survive if only the lower 6 inches got wet. Unplug them for 72 hours of drying time, then have an appliance repair tech test compressor and electrical components before reconnecting. Sump pumps that were operating during flooding need impeller inspection and bearing checks because debris causes early failure even if the pump kept running.
When to Call Professional Restoration Services for Basement Floods

Floodwater gets classified in three contamination categories that determine whether DIY cleanup is appropriate. Category 1 is clean water from broken supply pipes or water heater leaks. Category 2 is gray water with mild contamination from washing machines, dishwashers, or sump pump failures. Category 3 is black water contaminated with sewage, outside storm water containing organic matter, or any water that sat stagnant for over 48 hours. Category 2 and Category 3 floods need professional remediation because contamination creates health risks that household cleaning can’t properly address.
Professional restoration companies provide services beyond water extraction. They use industrial air movers and commercial dehumidifiers that complete drying in half the time of rental equipment. They have thermal imaging cameras to find hidden moisture inside walls and ceilings. They perform mold testing and remediation following IIBRC standards. They coordinate with insurance companies and provide documentation that adjusters require. They understand building codes for structural repairs and pull permits when required.
When you need to call professionals:
Water depth over 18 inches, which overwhelms consumer-grade pumps and creates safety hazards.
Any visible sewage contamination, shown by black or brown water, waste material, or sewage odor.
Visible mold growth covering more than 10 square feet of surface area.
Flooding that keeps happening despite previous waterproofing attempts, suggesting complex drainage or structural issues.
Unknown flood source that needs investigation to prevent it happening again.
Structural damage including sagging ceilings, bowed walls, foundation cracks wider than 1/4 inch, or floor settling.
Electrical damage affecting the main service panel or needing extensive rewiring.
Time constraints preventing you from putting in 40+ hours to cleanup over a two-week period.
Health conditions making exposure to mold spores, contaminated water, or physical labor medically inadvisable.
Ask your insurance company for a list of recommended flood mitigation vendors before hiring contractors on your own. Insurers maintain relationships with restoration companies familiar with claim requirements and documentation standards. Using an insurer-recommended vendor doesn’t force you to accept their pricing, but it usually speeds up claim approval because adjusters trust their damage assessments. Get written estimates from at least two companies before approving work. Legitimate restoration contractors provide free inspections and written scopes of work before starting repairs.
Preventing Future Basement Flooding and Water Damage

Prevention strategies have to address the specific cause you identified during cleanup or flooding will just happen again regardless of how much money you spend on generic waterproofing.
| Flood Cause | Prevention Solution | Estimated Cost Range |
|---|---|---|
| Heavy rain overwhelming drainage systems | Install French drain around foundation perimeter with sump pump, extend downspouts 10+ feet from house, regrade yard slope away from foundation | $3,000-$8,000 for complete system |
| Sump pump failure or power outage | Install battery backup sump pump system, add water-powered backup pump, replace pump every 7 years regardless of condition | $400-$1,200 for backup systems |
| Foundation cracks allowing water seepage | Inject polyurethane or epoxy into cracks from interior, excavate and seal foundation exterior with waterproof membrane | $300-$800 per crack interior, $5,000-$15,000 exterior |
| Sewer or septic backup through floor drains | Install backwater prevention valve in main sewer line, add check valves on individual floor drains | $1,000-$3,000 professionally installed |
| Poor yard grading directing water toward house | Regrade yard to create 6-inch drop over 10-foot distance from foundation, install swales to redirect surface water | $1,500-$5,000 depending on yard size |
| Failed interior or exterior waterproofing | Install interior drainage system with sump pump, apply waterproof coating to walls, install exterior drainage board and membrane | $4,000-$12,000 interior, $8,000-$20,000 exterior |
Sump pump installation and maintenance prevents most basement flooding in areas with high water tables or heavy seasonal rainfall. Primary sump pumps should have 1/3 horsepower motors minimum and turn on automatically via float switch. Install the pump in a basin at the lowest point of your basement floor. Test monthly by pouring water into the basin until the pump turns on. Replace the pump every 7 to 10 years even if it looks functional because internal components wear out and fail without warning. Add a battery backup system that turns on if the primary pump fails or power goes out during storms. Battery backups run for 5 to 7 hours on a full charge, enough time to prevent flooding during typical power outages.
Exterior drainage improvements address water before it reaches your foundation. Clean gutters quarterly and extend downspouts at least 10 feet from your house using solid extensions, not perforated drain pipes that leak water near the foundation. Check yard grading with a 10-foot board and level. The ground should slope away from your foundation with a 6-inch drop over the first 10 feet. If grading slopes toward the house, hire a landscaping contractor to regrade with clean fill dirt. Install a French drain system around the foundation perimeter if grading alone doesn’t solve water problems. French drains consist of perforated pipe buried in gravel-filled trenches that collect water and send it to a sump basin or to daylight away from the house.
Foundation waterproofing options depend on whether water comes in through cracks, porous concrete, or hydrostatic pressure. Interior waterproofing sealants applied to walls work for minor dampness but fail against active water pressure. Inject polyurethane or epoxy into visible cracks from the inside to create flexible watertight seals. Exterior waterproofing provides the most reliable protection but requires excavating around your foundation to expose exterior walls. Contractors apply rubberized waterproof membrane to the foundation surface, install drainage board to channel water downward, and backfill with gravel for improved drainage. Exterior waterproofing costs way more than interior solutions but prevents water from entering the foundation rather than managing it after entry.
Schedule regular maintenance to keep prevention systems working. Test sump pumps monthly by pouring water into the basin. Clean sump pits annually to remove sediment buildup. Inspect foundation cracks twice yearly and seal new cracks immediately before they expand. Clean gutters and downspouts four times per year, more often if you have trees near the house. Check backwater valves annually and clear any debris blocking the flapper. Have a plumber camera-inspect your main sewer line every 5 years to catch tree root intrusion or pipe deterioration before they cause backups. After your first flood, consider hiring a basement waterproofing company for a professional assessment of weak points even if you don’t immediately do what they recommend.
Final Words
Knowing what to do after basement floods means putting safety first, acting fast within that critical 24-48 hour window, and working through each phase systematically.
Shut off power, document everything, remove water, dry thoroughly, disinfect, inspect for hidden damage, and repair only after complete drying.
Some situations need professional help, especially contaminated water or structural concerns.
Once you’re through the worst of it, focus on prevention so you don’t end up doing this twice.
You’ve got this.
FAQ
What to do immediately after a basement flood?
Immediately after a basement flood, you should stop at the basement doorway without entering, shut off electricity at the main breaker if accessible outside the flooded area, turn off the gas line at the meter if safe to do so, and contact your insurance company to report the damage before taking any other actions.
How do I prevent mold after a basement flood?
You prevent mold after a basement flood by removing standing water within the first 24 hours, opening all windows and doors for maximum ventilation, positioning multiple fans throughout the space for continuous air circulation, running dehumidifiers to reduce humidity levels, and discarding any items that remain wet after 48 hours.
How long to dry out a basement after a flood?
A basement takes at least one week to dry out after moderate flooding for visible moisture to disappear, but hidden moisture trapped behind walls or inside air ducts typically requires two weeks or more to fully evaporate, depending on ventilation, equipment used, and severity of the flood.
How do you unflood a basement?
You unflood a basement by first clearing floor drains of any clogs, then using equipment matched to water depth: wet-dry vacuums or mops for shallow water under one inch, portable sump pumps or pool pumps for water one to two feet deep, and professional extraction services for depths exceeding two feet.
What safety equipment do I need before entering a flooded basement?
You need rubber boots that reach at least knee-high, waterproof gloves, a protective mask or respirator, and hip or chest waders if the standing water exceeds one foot in depth to safely enter a flooded basement after shutting off all electricity and gas.
Can I save furniture and belongings after a basement flood?
You can save furniture and belongings after a basement flood if they can be thoroughly dried within 48 hours and were not exposed to contaminated water. Hard surfaces like metal and plastic salvage well, solid wood furniture may be saved with proper drying, but upholstered items and cardboard boxes typically must be discarded due to bacterial growth risks.
When should I call a professional for basement flood cleanup?
You should call a professional for basement flood cleanup when water depth exceeds two feet, you see visible mold growth, the water appears contaminated from sewage backup, structural damage like bowed walls or sagging ceilings is present, or electrical systems were submerged and you’re uncertain about safe power disconnection.
How do I know if my basement has structural damage after flooding?
You know your basement has structural damage after flooding if you observe sagging ceilings, bowed or tilted walls, new or widened foundation cracks, tilted support posts, warped flooring, or doors and windows that no longer close properly, all of which require immediate professional inspection before entering the space.
What cleaning solution kills mold after a basement flood?
A cleaning solution of one cup household bleach mixed with one gallon of water kills mold after a basement flood when applied to all surfaces that contacted floodwater, but surfaces must be cleaned with household cleaners first to remove dirt residue before disinfecting, and the area must be well-ventilated during application.
Should I replace wet insulation after a basement flood?
You should replace wet insulation after a basement flood rather than attempting to dry it because insulation loses its thermal properties when saturated, traps moisture that promotes hidden mold growth behind walls, and cannot be effectively dried even with professional equipment, making replacement the only safe option.
How often should I test my sump pump to prevent basement flooding?
You should test your sump pump every three to four months by pouring several gallons of water into the sump pit to verify the float switch activates properly and the pump removes water efficiently, and consider installing a battery backup system for power outage protection.
What causes basements to flood repeatedly?
Basements flood repeatedly due to unresolved root causes including inadequate exterior drainage allowing rainwater to pool near the foundation, failed or undersized sump pump systems, unsealed foundation cracks providing water entry points, poor lot grading that slopes toward the house, or overwhelmed municipal sewer systems during heavy rain events.