
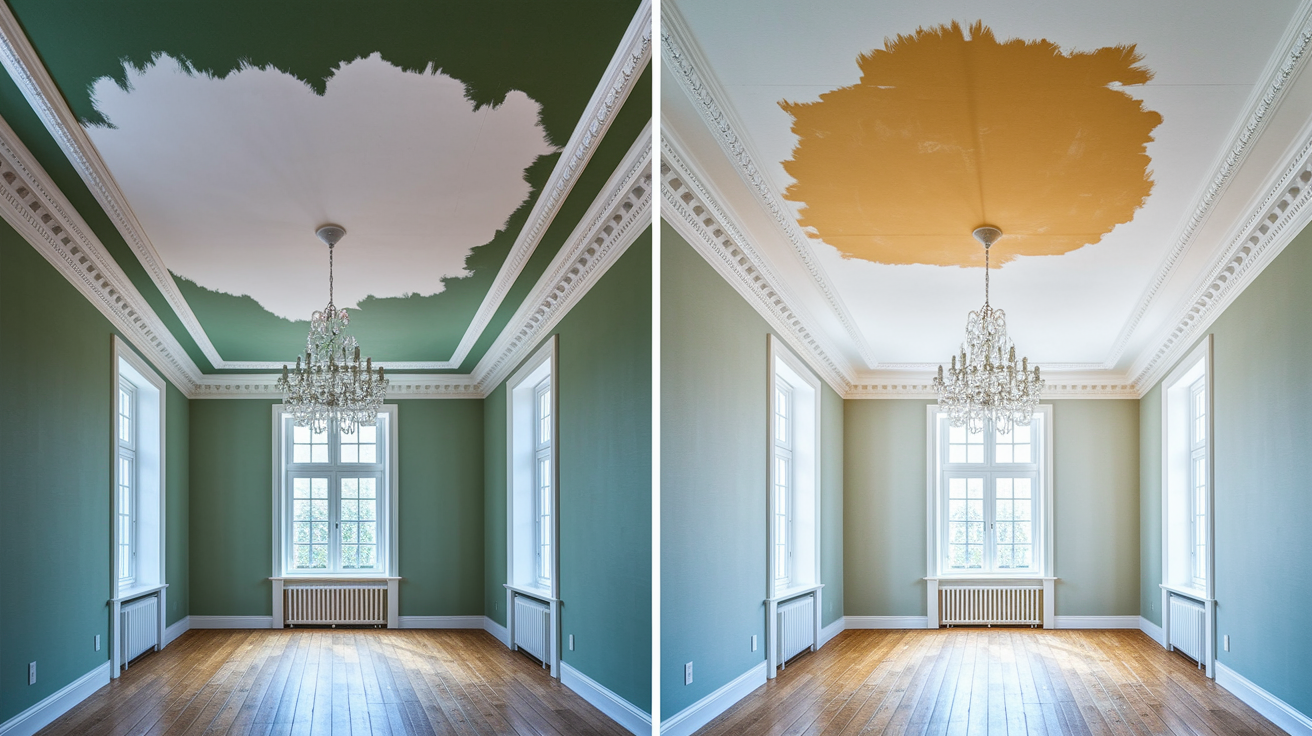
You can’t just paint over a water stain and hope it disappears. Try it and you’ll watch that yellow-brown ghost bleed right through your fresh coat within 24 hours. The fix isn’t about covering the stain. It’s about stopping the water, drying everything completely, killing what’s growing, sealing what bled through, and then painting. Skip one step and you’re back where you started, staring at the same ugly mark and wondering why nothing worked.
How to Remove Water Stains From Drywall Successfully
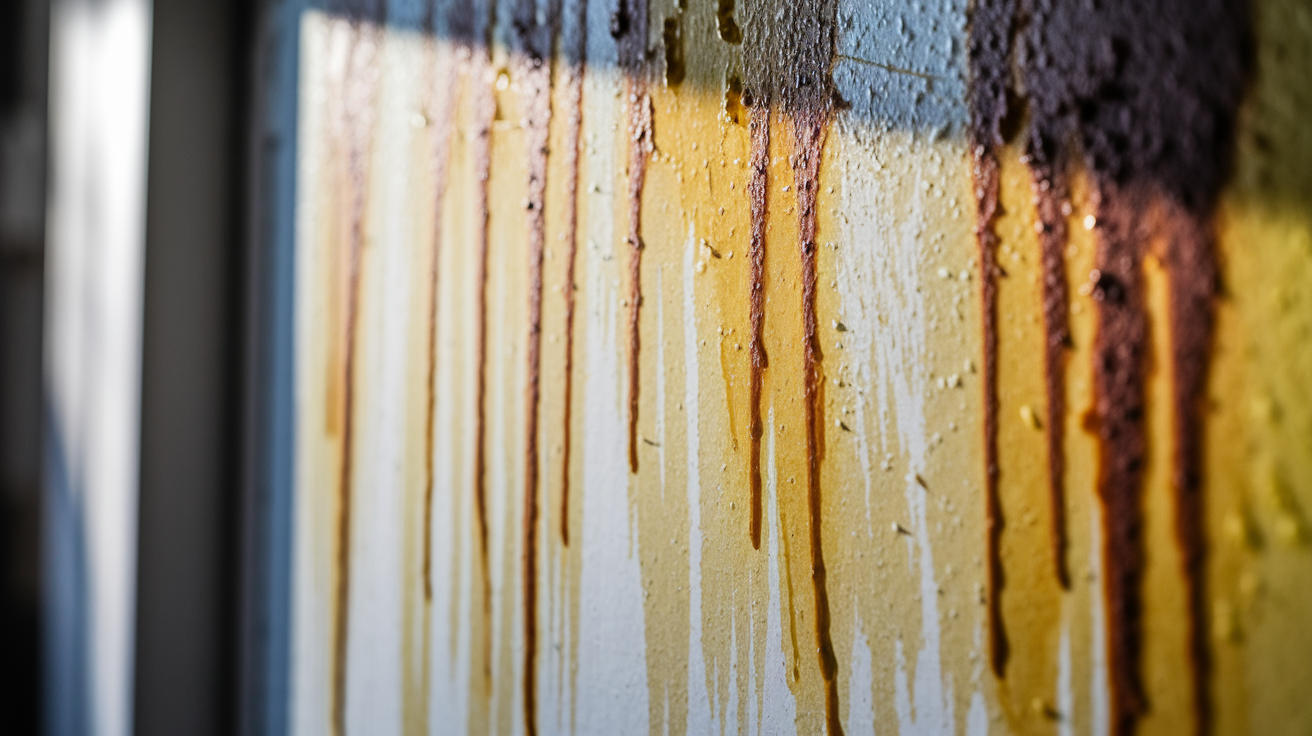
Water stains on drywall show up as yellowish-brown or rust-colored marks where moisture has seeped in. They’re not just ugly. They’re warning signs of active or past leaks.
The fix comes down to this: stop the water source, let everything dry completely, clean with bleach solution, seal with stain-blocking primer, and repaint. Miss any of these steps and the stain either comes back or bleeds right through your new paint.
Here’s the full process:
-
Locate and repair water source. Check roof, plumbing, HVAC condensation lines, and ice dam areas. No cosmetic fix works if water is still getting in.
-
Dry area completely (24 to 48 hours minimum). Use fans, dehumidifiers, or natural ventilation. Touch test the drywall. If it feels cool or damp, keep drying.
-
Clean with bleach solution (15 minute dwell time). Mix equal parts bleach and water or 1 cup bleach per gallon of warm water. Apply, wait 15 minutes, rinse, and dry again.
-
Apply stain-blocking primer (oil-based or shellac). Products like Kilz seal tannic acids and iron deposits that cause rust-colored bleed-through. Let dry per label instructions.
-
Repaint surface with matching paint. Use acrylic or water-based interior paint. Apply thin, even coats. A second coat usually gets you a clean match.
Skipping the water source repair is the number one mistake. You can clean and paint a water stain ten times, but if the roof still leaks or the bathroom vent dumps moisture into the wall, the stain will keep coming back. Same goes for drying. If you prime over damp drywall, you’re trapping moisture that will grow mold, cause the primer to peel, and ruin the finish. Give it time. Drywall that’s been soaked can take 48 to 72 hours to dry fully, especially if it’s inside a wall cavity or on a ceiling where air doesn’t circulate as well.
Tools and Supplies Needed for Water Stain Removal
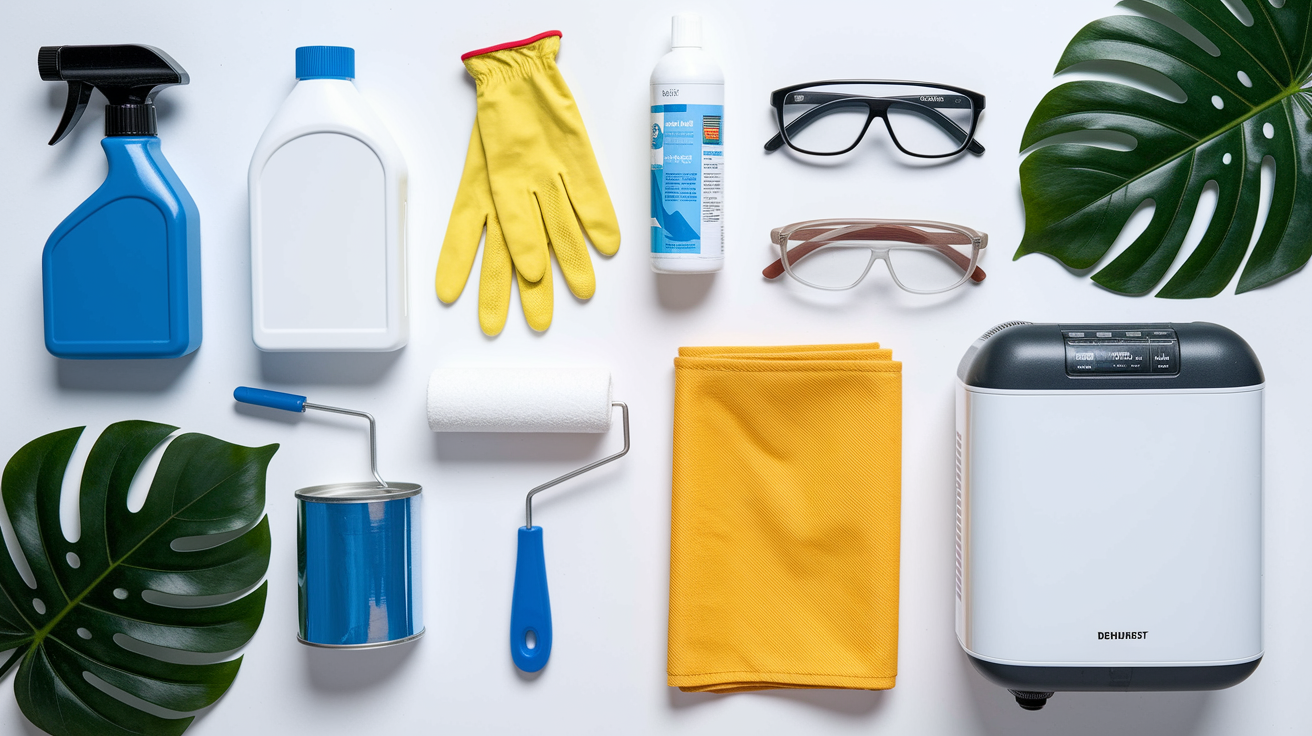
Get everything ready before you start. Running to the store mid-project with wet bleach solution on your walls isn’t fun, and it wastes drying time.
| Project Phase | Item | Purpose |
|---|---|---|
| Cleaning | Spray bottle or sponge | Applying bleach solution evenly to stained areas |
| Cleaning | Household bleach (1 quart for typical stain) | Removing mildew and surface discoloration |
| Drying | Box fan or dehumidifier | Accelerating drying and preventing mold growth |
| Priming | Oil-based or shellac-based primer (1 quart covers ~100 sq ft) | Sealing stains and preventing bleed-through |
| Painting | Acrylic or water-based interior paint (matching existing color) | Restoring finish and blending repaired area |
| Protection | Drop cloth or plastic sheeting | Protecting floors and furniture from drips |
| Safety | Rubber gloves and safety glasses | Protecting skin and eyes from bleach and primer fumes |
| Application | Paint roller or brush (4-inch roller works well for small areas) | Applying primer and paint smoothly |
Most of these supplies are available at Home Depot, Lowe’s, or any hardware store. For a typical single-stain repair, expect to spend $30 to $60 total, depending on whether you already have basics like gloves and drop cloths. If you’re dealing with multiple rooms or larger areas, buying a gallon of primer instead of a quart brings the per-stain cost down. Keep leftover primer sealed tight. It stores well and you’ll probably need it again.
For a full breakdown of water damage assessment and additional repair supplies for structural issues, check out the Water Damage Repair Guide.
Identifying the Source of Water Damage Before Stain Removal
Removing the stain without stopping the water is like mopping the floor while the sink overflows. The stain will come back, usually worse, and you’ll waste time, materials, and money on a repair that never had a chance. Finding and fixing the source has to come first.
Here are the most common water intrusion sources that create drywall stains:
- Roof leaks. Missing shingles, damaged flashing around chimneys or vents, or worn-out sealant around roof penetrations.
- Plumbing failures. Leaking supply lines, dripping drain pipes, toilet wax ring failure, or slow leaks behind washing machine hoses.
- HVAC condensation. Clogged condensate drain lines, disconnected drains, or air handlers sweating in hot, humid attics.
- Ice dams. Snow melt refreezing at roof edges, forcing water under shingles and into attic spaces during winter.
- Driving rain. Wind-driven rain entering through gaps in siding, window flashing, or poorly sealed exterior wall penetrations.
- Poor ventilation. Bathroom or kitchen moisture condensing on cold surfaces in walls or ceilings when exhaust fans are missing or not used.
Start by looking at the stain’s location. Ceiling stains usually point to roof leaks or upstairs plumbing. Wall stains near windows suggest exterior water intrusion or condensation. Stains near bathrooms or kitchens often trace back to plumbing or humidity. Run water in sinks and showers while someone watches from below or in the adjacent room. Check your attic after heavy rain. Look for water trails, dark streaks on rafters, or damp insulation. If the source isn’t obvious and the stain keeps growing, call a plumber or roofer to do a pressure test or thermal imaging scan.
Assessing Water Stain Damage Severity on Drywall
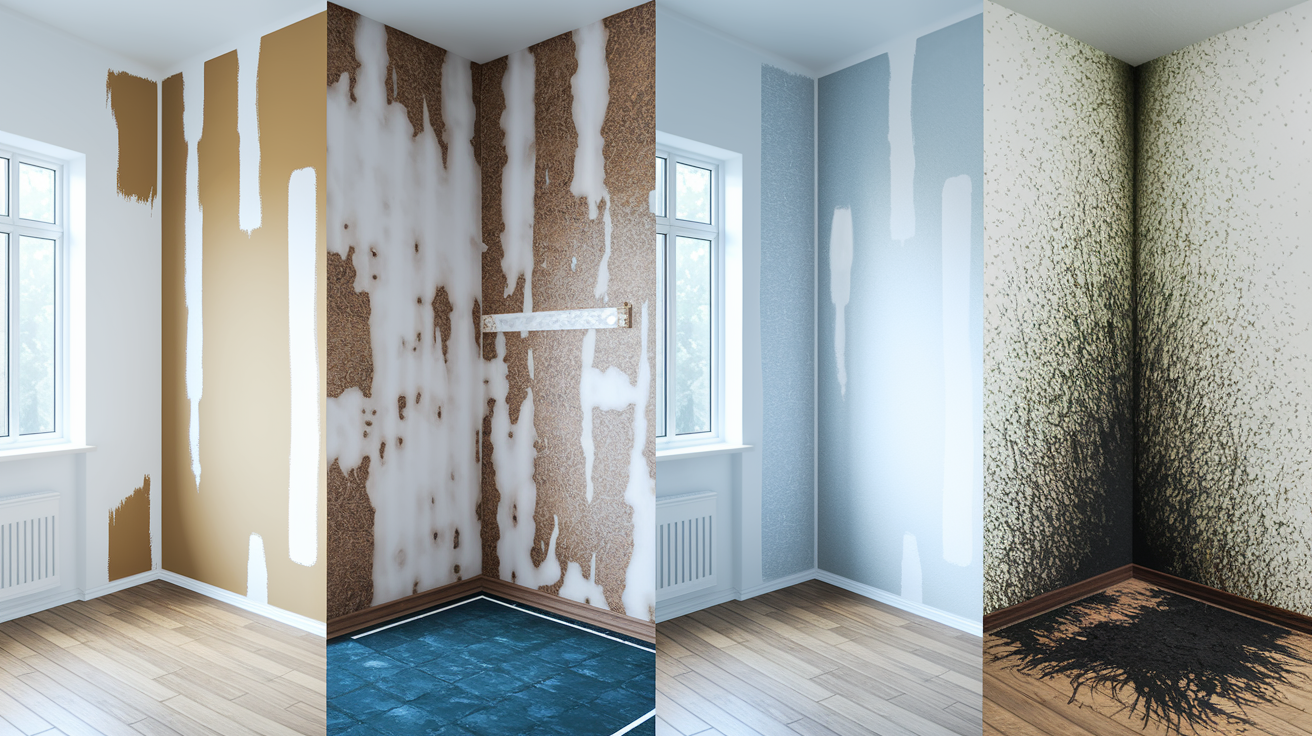
Not every water stain needs the same fix. Some are surface-level discoloration that cleans up with bleach and primer. Others mean the drywall is structurally compromised and needs to be cut out.
| Damage Type | Visual Signs | Required Action |
|---|---|---|
| Minor surface stain | Light yellow or brown discoloration, firm drywall, no texture change | Clean, prime, and repaint only |
| Moderate stain with minor softening | Darker stains, slight give when pressed, paint may be bubbling | Clean, prime, repaint. Monitor for recurring moisture. |
| Severe saturation damage | Soft or spongy drywall, visible sagging, crumbling edges when touched | Cut out and replace damaged section before cleaning and painting |
| Active mold growth | Black, green, or fuzzy patches, musty odor, stain spreading | Address moisture source immediately. Clean with mold-killing solution or replace if growth is deep. |
| Peeling paint or wallpaper | Paint lifting at edges, wallpaper bubbling or detaching | Remove loose material, dry thoroughly, assess drywall integrity, then proceed with cleaning and priming |
Press gently on the stained area with your fingertips. Healthy drywall feels solid and resists pressure. If it feels soft, spongy, or if your finger leaves an indentation, the gypsum core has absorbed too much water and lost its strength. At that point, cleaning won’t help. You need to cut out the damaged section and patch in new drywall.
Watch for early mold signs like a musty smell, dark spots that aren’t rust-colored, or fuzzy growth on the surface. Mold loves damp drywall. If you see it, you’ve got active moisture. Fix the source, dry everything completely, and treat the area with a bleach solution (1 part bleach to 10 parts water) or a commercial mold cleaner. If mold covers more than a few square feet or goes deep into the wall, that’s a job for a remediation company. Mold can grow behind drywall where you can’t see it, and cutting into a moldy wall without containment spreads spores through your house.
Drying Water-Damaged Drywall Completely
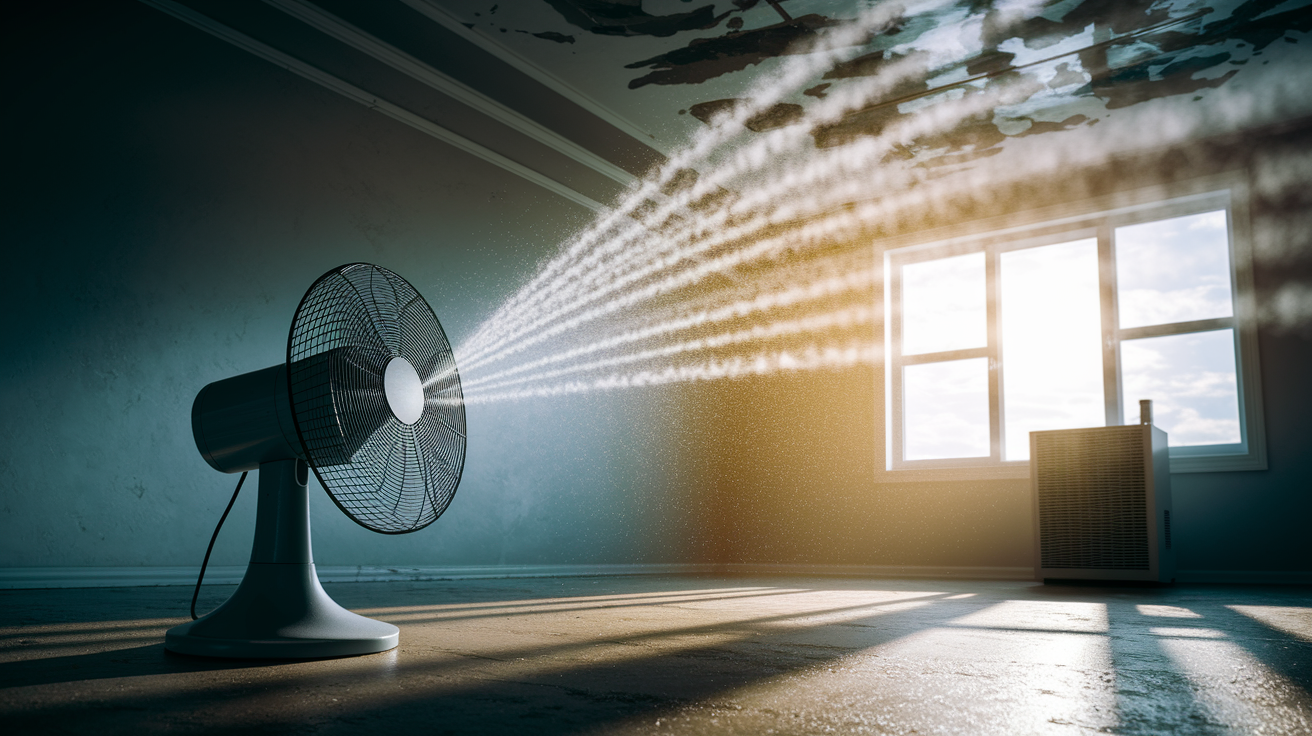
Wet drywall is a mold factory. You’ve got about 24 to 48 hours after water intrusion before mold starts growing, and once it takes hold, you’re dealing with a health hazard on top of a stain problem.
Drywall is basically gypsum sandwiched between paper. The gypsum holds water like a sponge, and the paper feeds mold. If you try to clean or paint before it’s fully dry, you seal moisture inside, which guarantees mold growth and causes the primer or paint to peel or bubble within weeks. That’s why drying comes before everything else.
Start with ventilation. Open windows if weather allows. Run bathroom or kitchen exhaust fans if the damage is nearby. Get air moving across the wet area. Stagnant air slows evaporation.
Use these drying and mold prevention methods to speed things up:
- Box fans. Aim directly at the stained area from 3 to 4 feet away. Run continuously for 24 to 48 hours.
- Dehumidifiers. Pull moisture out of the air in enclosed spaces. Keep room humidity below 60% to stop mold growth.
- Natural ventilation. Open windows on opposite sides of the room to create cross-ventilation if outdoor humidity is lower than indoors.
- Heat sources. Space heaters (keep 3 feet from walls) raise air temperature, which helps evaporation. Don’t use in rooms with active leaks or near anything flammable.
- Moisture meters. Inexpensive pin-type meters (under $30) tell you exact moisture content. Drywall should read below 1% before you proceed.
- Continuous air circulation. Keep fans running even after the surface feels dry. Moisture trapped inside the drywall takes longer to escape.
- Immediate bleach treatment. If you suspect mold may already be starting, spray a light bleach solution (1:10 ratio) after the initial drying period to kill spores before they spread.
Test for dryness by touching the stained area. If it feels cool to the touch, there’s still moisture evaporating. Dry drywall feels room temperature. If you have a moisture meter, anything above 1% means keep drying. Typical drying time for a moderately wet area is 24 to 48 hours with good airflow. Heavily saturated drywall, especially on ceilings where water pools, can take 72 hours or more. If you’re seeing new dark spots, smelling mustiness, or noticing the stain spreading during drying, you likely have mold starting. At that point, switch from drying mode to mold remediation, which may mean cutting out and replacing the affected section rather than trying to save it.
Cleaning Solutions for Water Stain Removal
Cleaning removes mildew, surface mold, and discoloration so your primer has a clean surface to bond to. If you skip this step, organic material left on the drywall can keep growing under the primer and paint.
Before you clean, remove any loose or peeling paint with a putty knife or scraper. Wipe down the area with a dry cloth to get rid of dust and debris. If the stained area has rough edges or raised paint ridges, hit it lightly with 120-grit sandpaper to smooth things out. You’re not sanding the whole wall, just feathering the damaged spot so the primer lays flat.
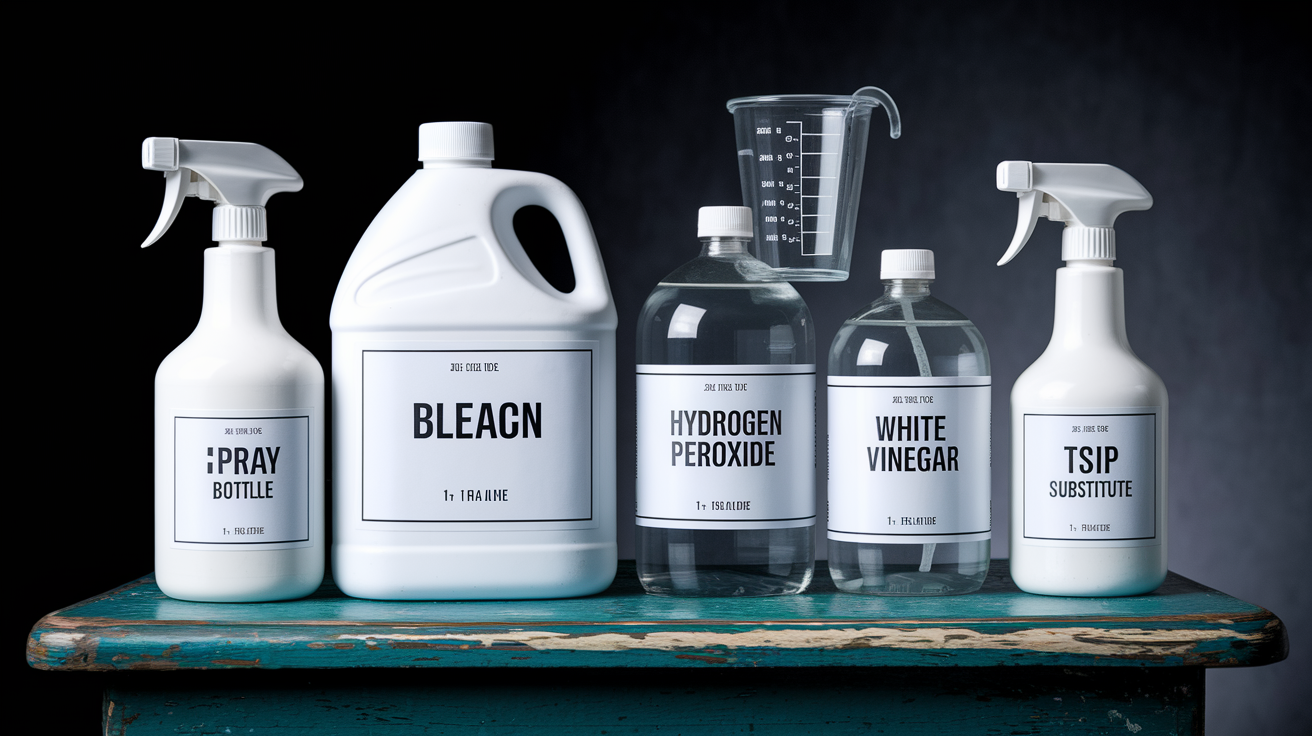
Here are five cleaning solutions with exact measurements and when to use each:
- Bleach solution (1:1 ratio). Mix 1 cup bleach with 1 cup water. Use for heavy mildew stains or when you see dark spots. Apply, wait 15 minutes, rinse with clean water, dry completely.
- Bleach solution (1 cup per gallon). Mix 1 cup bleach into 1 gallon warm water. This is a lighter version for general cleaning when mildew isn’t visible but you want to disinfect before priming.
- Hydrogen peroxide (3% straight or diluted 1:1). Use undiluted 3% hydrogen peroxide for light stains or dilute 1:1 with water for larger areas. Less harsh than bleach, good for people sensitive to chlorine fumes.
- White vinegar solution (1:1 with water). Mix equal parts white vinegar and water. Works on light stains and mineral deposits. Not as strong as bleach but safer around kids and pets.
- TSP substitute (per label instructions). Use trisodium phosphate substitute for greasy or heavily soiled areas, especially in kitchens. Follow dilution on the package. Rinse thoroughly after.
Pour your chosen solution into a spray bottle or bowl. If you’re using a spray bottle, mist the stained area until it’s wet but not dripping. If you’re using a sponge, dip it in the solution, wring it out so it’s damp (not soaked), and wipe the stain in a circular motion. For bleach-based solutions, let it sit for 15 minutes. This dwell time kills mildew and breaks down organic stains. Don’t scrub hard. Drywall paper tears easily when wet.
After the dwell time, rinse the area with a clean damp sponge or cloth and plain water. Wipe away all cleaning solution residue. Let the area dry completely again. This can take a few hours. Once dry, wipe it down one more time with a dry cloth to remove any dust. The surface should be clean, dry, and smooth before you open the primer. If dust or grit is left on the drywall, primer won’t stick properly, and you’ll see texture problems or peeling later.
Safety Precautions for Drywall Stain Removal Work
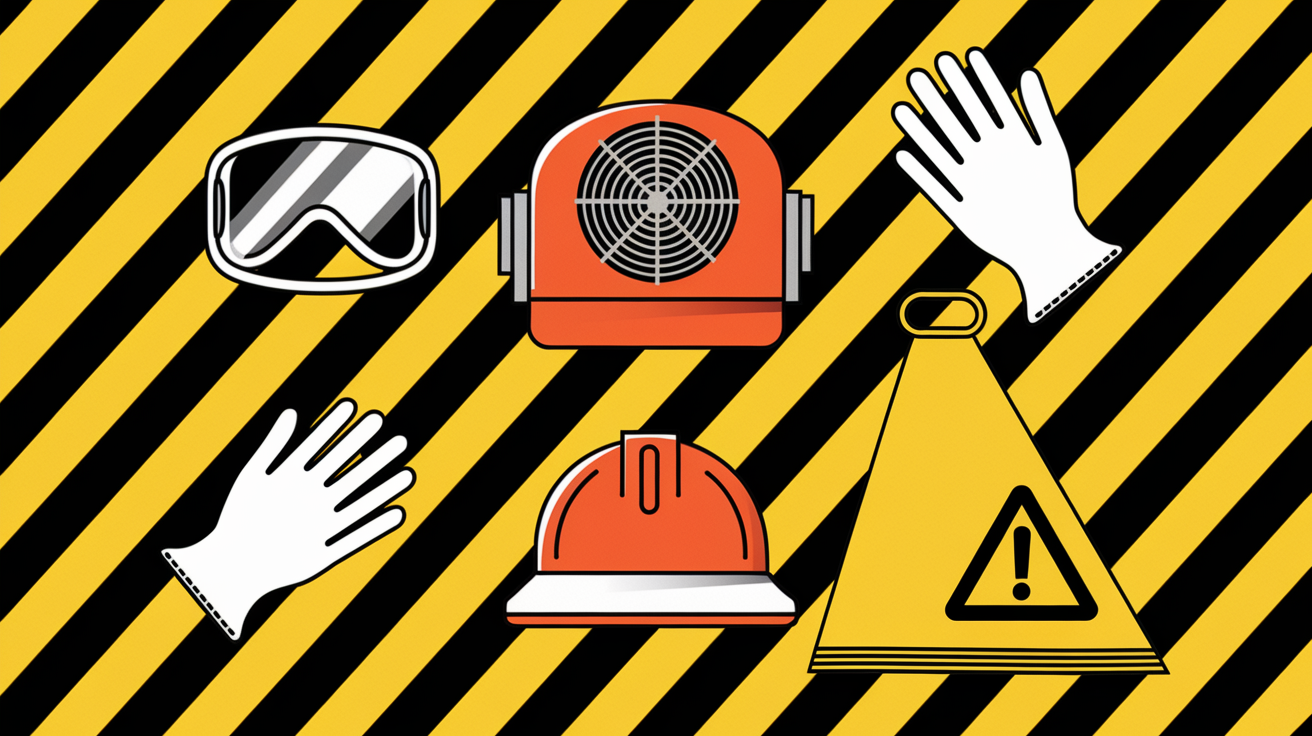
Bleach, primer fumes, and dust from sanding all pose risks if you’re not careful. Most of these injuries are preventable with basic gear and common sense.
Bleach can burn your skin and eyes, and the fumes irritate your lungs. Oil-based primers release volatile organic compounds (VOCs) that cause headaches, dizziness, and nausea in poorly ventilated spaces. Even water-based products off-gas to some degree.
Use these six safety measures every time:
- Rubber gloves. Household cleaning gloves work fine. Keep bleach and primer off your hands.
- Eye protection. Safety glasses or goggles. Bleach splashes happen, especially when you’re working overhead on a ceiling.
- Ventilation requirements. Open windows. Run exhaust fans. Get fresh air moving through the room continuously. If you start feeling lightheaded, step outside.
- Drop cloths. Cover floors and furniture within 5 feet of the work area. Bleach stains carpet and fabric permanently. Primer drips don’t come out easily either.
- Pet and child restrictions. Keep them out of the room while you’re applying chemicals and for at least 2 hours after. Pets will walk through wet primer and track it everywhere.
- Chemical handling. Never mix bleach with ammonia or vinegar. Bleach plus ammonia creates toxic chloramine gas. Pour carefully. Recap containers immediately after use.
Set up your workspace before you start. Move furniture to the center of the room or out completely. Tape plastic sheeting or drop cloths to baseboards with painter’s tape if you’re worried about spills. Open windows on opposite sides of the room if possible to create airflow. If it’s winter and you can’t open windows, use a box fan in a doorway pointing out of the room to pull fumes away. Keep a damp rag nearby for quick cleanup of drips. Store bleach and primer in their original containers with lids tight. Don’t leave open containers sitting around where they can spill or where curious kids might get into them.
Applying Stain-Blocking Primer to Water-Stained Drywall
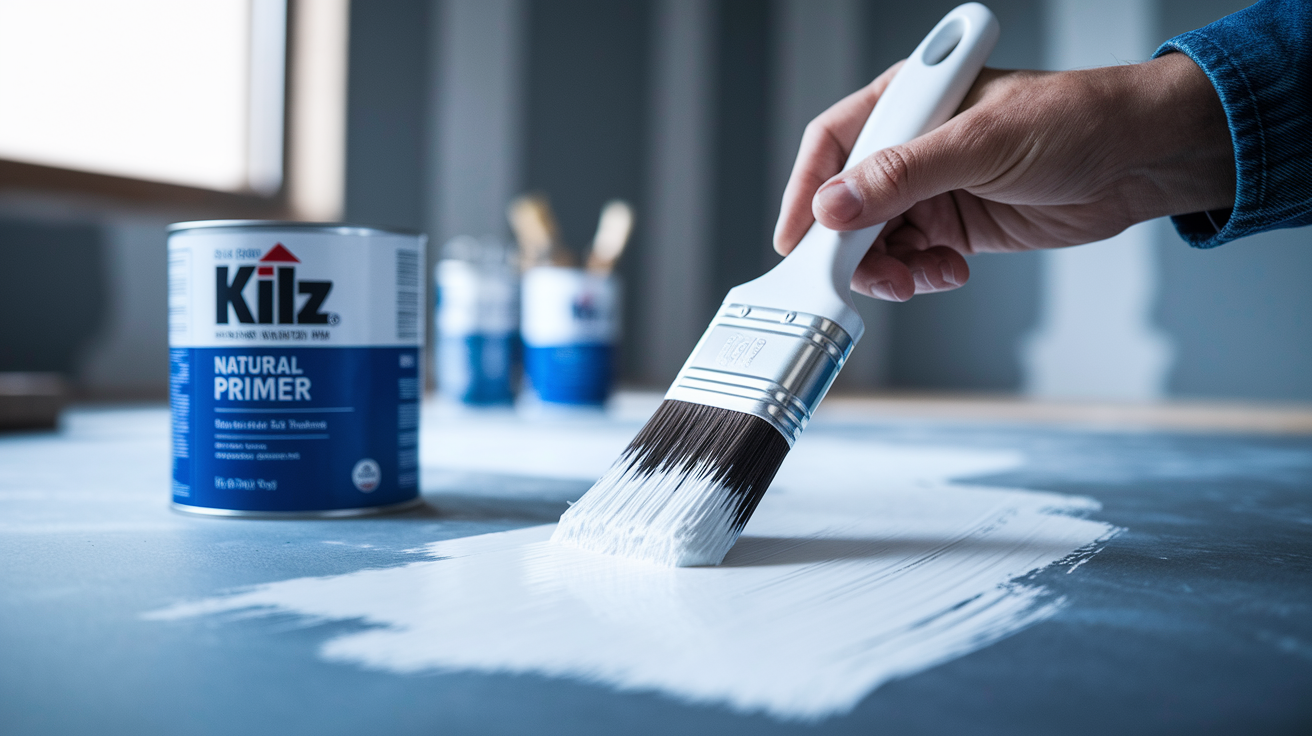
Stain-blocking primer is what makes or breaks this repair. Regular paint won’t stop tannic acids from wood or iron compounds in water from bleeding through. You’ll get a clean-looking patch for a week or two, and then the rust-colored stain will slowly reappear right through your new paint.
Water stains contain water-soluble compounds like tannic acids leached from roof sheathing or iron deposits from old pipes. These compounds dissolve in the moisture of latex paint and migrate to the surface as the paint dries, which is why the stain comes back. Stain-blocking primers create a sealed barrier that these compounds can’t penetrate. Once you’ve locked them in, they stay locked in.
Choosing the Right Primer Type
Oil-based primers like Zinsser Cover Stain seal almost anything. They’re thick, they smell strong, and they take 1 to 2 hours to dry. Cleanup requires mineral spirits or paint thinner. They work great for heavy stains, especially if you’ve got rust or tannic bleed-through.
Shellac-based primers like Kilz Original dry faster (around 45 minutes) and block stains even better than oil-based products. They also smell intense and require denatured alcohol for cleanup. Shellac primers are the go-to for severe water stains, smoke damage, or anything that’s bled through multiple coats of paint before.
For moisture-prone areas like bathrooms, basements, or poorly ventilated rooms, look for primers labeled “mold-resistant.” These have additives that inhibit mold growth on the primer film. They won’t stop mold if the drywall stays wet, but they add a layer of protection in high-humidity spaces.
Stir the primer thoroughly before you start. Pour some into a paint tray if you’re using a roller, or work straight from the can if you’re brushing a small area. Use a 4-inch foam roller for ceiling stains or areas larger than 1 square foot. Use a 2-inch angled brush for small spots or edges.
Apply the primer in a thin, even coat. Don’t overload the roller or brush. Too much primer runs and drips. Roll or brush in one direction first, then cross it with strokes at a 90-degree angle to fill in any thin spots. Feather the edges where the primer meets the surrounding unpainted surface so you don’t end up with a visible ridge.
Let the first coat dry per the label instructions, usually 45 minutes to 2 hours. Check the stained area. If you can still see the rust color or yellow tint through the primer, apply a second coat. Severe stains often need two coats of primer for full coverage. Once the stain is completely sealed and you can’t see any discoloration through the primer, you’re ready to paint. If you skip the second primer coat when it’s needed, the stain will ghost through the topcoat within days or weeks.
Repainting Water-Stained Drywall Areas
Now that the stain is sealed, you’re basically doing a standard paint touch-up. The challenge here is matching the existing finish so the patched area disappears into the rest of the wall or ceiling.
If you saved paint from the original job, great. If not, take a paint chip from an inconspicuous spot (inside a closet, behind a door) to a paint store and have them color-match it. Most big-box stores can scan a chip and mix a match. Flat and matte finishes are the most forgiving for patches because they don’t reflect light and highlight edges. Glossy or semi-gloss finishes show every imperfection and are harder to blend.
Here’s how to apply the topcoat:
-
First coat application. Pour paint into a tray. Load your roller or brush lightly. Roll on a thin, even coat, slightly overlapping the primer edges onto the surrounding surface. Don’t try to cover perfectly with one coat. Thin coats look better than thick ones.
-
Drying period. Let the first coat dry completely, usually 2 to 4 hours for latex paint. Check the can. High humidity or cold temperatures slow drying. Don’t rush this. Applying a second coat over tacky paint causes texture problems.
-
Second coat if needed. If the first coat looks patchy or you can see the primer color through it, apply a second coat the same way. Most patches need two coats for full hide and color match.
-
Edge blending technique. Feather the paint edges where your patch meets the original surface. Roll or brush outward from the center of the patch with very light pressure and less paint on your tool. This creates a gradual transition instead of a visible line.
If your walls have texture like orange peel or knockdown, you’ll need to replicate that before painting. Light orange peel texture can be mimicked by thinning joint compound slightly and rolling it on with a foam roller, then letting it dry. Knockdown texture requires spraying or splattering joint compound and then lightly flattening the peaks with a trowel before it sets fully. Texture matching is tricky. Practice on cardboard first.
Latex paint dries to the touch in 1 to 2 hours but takes 24 hours to fully cure and harden. Don’t wash the area or press on it until it’s fully cured. If you’re painting a ceiling, watch for drips while you work and smooth them out immediately with a dry roller or brush.
Patching and Replacing Damaged Drywall From Water Exposure
When drywall is soft, sagging, or crumbling at the edges, cleaning and painting won’t save it. The gypsum core has lost its integrity, and you need to cut out the damaged section and patch in new material.
Cutting Out Damaged Sections
Start by marking the area you need to remove. Use a pencil and straightedge to draw a square or rectangle around the damage. Extend your cut lines at least 2 inches beyond the stained or soft area so you’re cutting into solid, dry drywall. If possible, make your cuts land on the center of wall studs or ceiling joists. This gives you a nailing surface for the new piece.
Use a drywall saw or utility knife to score the cut lines. With a drywall saw, push the tip through the drywall to start your cut, then saw along the lines. With a utility knife, score the line repeatedly until you cut through. Peel away the damaged section. Pull out any loose insulation inside the wall cavity. Check for additional hidden damage like wet studs, mold on the framing, or soaked insulation. If framing is wet, dry it completely with fans before you patch. If there’s mold on wood framing, treat it with a mold-killing solution or replace the affected framing if it’s extensive.
Bag the damaged drywall and throw it out. Don’t leave it sitting around. Moldy drywall releases spores.
Installing New Drywall Pieces
Cut a new piece of drywall to fit the hole. Measure carefully. Drywall patches should fit snug but not require forcing. Test-fit the patch before you secure it.
If your cut doesn’t land on studs or joists, you need backing. Cut strips of 1×3 lumber slightly longer than the hole width. Slip them behind the drywall on the left and right sides of the hole. Hold them in place and drive drywall screws through the existing drywall into the backing strips. Now you’ve got something solid to screw the patch into.
Position the patch in the hole. Drive 1¼-inch drywall screws through the patch into the studs, joists, or backing strips every 6 to 8 inches. Sink the screws just below the surface so the heads create a slight dimple, but don’t break the paper. Screws that stick up will show through the paint. Screws that break through the paper won’t hold.
Check that the patch is flush with the surrounding surface. If it sticks out or sits recessed, pull it and add or remove backing material as needed. A patch that’s not flush is almost impossible to hide later.
Now you’re taping and mudding. Apply mesh or paper drywall tape over all the seams where the patch meets the existing drywall. Cover the tape with a thin layer of joint compound using a 6-inch drywall knife. Feather the edges out 6 to 8 inches beyond the tape. Let it dry overnight.
Sand the first coat lightly with 120-grit sandpaper. Apply a second coat of joint compound with an 8-inch knife, spreading wider than the first coat to further feather the edges. Let it dry and sand again. A third coat with a 10-inch knife and light sanding usually gets you a smooth, invisible transition.
Once sanding is done, wipe the area with a damp cloth to remove all dust. Prime the patch with stain-blocking primer, then paint to match the surrounding surface.
Cost Estimates for DIY Water Stain Removal Projects
Material costs vary depending on the size of the damage and how much replacement you’re doing. Here’s what to expect for typical scenarios.
| Repair Type | Materials Cost | Time Required |
|---|---|---|
| Small surface stain (under 1 sq ft, cleaning and painting only) | $15–$30 (bleach, primer, paint) | 3–5 hours (including drying time) |
| Medium stain (1–4 sq ft, cleaning, priming, multiple coats) | $30–$60 (cleaning supplies, quart of primer and paint, tools) | 1–2 days (including overnight drying) |
| Large stain or light structural damage (4–10 sq ft, minor drywall patching) | $60–$120 (drywall patch, joint compound, tape, primer, paint, tools) | 2–3 days (cutting, patching, multiple mud/sand cycles) |
| Full drywall panel replacement (4×8 sheet, severe damage) | $80–$150 (drywall sheet, screws, compound, tape, primer, paint, disposal) | 3–4 days (cutting, installation, taping, mudding, sanding, priming, painting) |
These numbers assume you already own basic tools like a utility knife, trowel or putty knife, paint roller, and sandpaper. If you’re starting from scratch, add $30 to $50 for tools. Renting a drywall lift for ceiling repairs costs about $30 per day if you need one.
Professional contractors charge $75 to $150 per hour for water damage repair, or $200 to $600 for a typical stain removal and patching job depending on damage extent and regional labor rates. Full drywall replacement in a water-damaged room can run $1,000 to $3,000 or more. DIY makes sense when the damage is localized, access is straightforward, and you’re comfortable working on ladders or scaffolding. Professionals become cost-effective when you’re dealing with large areas (multiple walls or a whole ceiling), mold remediation, or structural concerns that need expert assessment. If insurance is covering the damage, get estimates from licensed contractors since most insurers require professional work for claims.
Common Mistakes to Avoid When Removing Water Stains
These errors are why water stains come back or why repairs look worse than the original damage. Most of them come down to skipping steps or rushing the process.
People fail at water stain removal because they treat it like a quick cosmetic fix instead of a layered repair that addresses both the source and the surface.
Here are seven mistakes that guarantee redo work:
-
Painting over wet drywall. Trapping moisture causes mold, peeling paint, and recurring stains within weeks. Always dry completely first. If it feels cool or damp, it’s not ready.
-
Skipping primer. Going straight to paint over a water stain means the stain will bleed through, usually within days. Use stain-blocking primer every time. No exceptions.
-
Not fixing leak source. Covering a stain while water is still getting in means you’ll be repairing the same spot over and over. Find and stop the leak before you touch the stain.
-
Rushing drying process. Turning off fans after 12 hours because the surface looks dry leaves moisture trapped inside the drywall. Wait the full 24 to 48 hours and test before proceeding.
-
Using wrong primer type. Standard latex primer won’t block water stains. You need oil-based or shellac-based stain blockers. Using the wrong product wastes time and materials.
-
Inadequate surface prep. Leaving dust, loose paint, or mildew residue on the surface before priming causes adhesion failure. Clean and sand first.
-
Insufficient ventilation. Working with bleach or oil-based primer in a closed room causes headaches, nausea, and dizziness. Open windows and run fans. Breathe fresh air.
A water stain repair done right takes 2 to 3 days minimum when you factor in leak repair, drying, cleaning, priming, and painting. People who try to finish in a few hours skip critical steps. You’re better off doing it slowly and correctly once than fast and wrong three times. Let each layer dry completely. Test that the leak is fixed before you close up walls or repaint. Patience is the difference between a repair that lasts and one that fails.
When to Call a Professional for Water Damage Repair
Some water damage situations are beyond DIY scope, either because they’re too big, too dangerous, or require specialized equipment you don’t own and shouldn’t rent.
Knowing when to stop and call a pro saves you from making expensive mistakes, getting hurt, or creating bigger problems than you started with.
Call professionals in these six scenarios:
-
Extensive water damage. If water has affected multiple rooms, entire ceilings, or large sections of walls, the volume of work and drying equipment needed (industrial dehumidifiers, air movers) exceeds DIY capability.
-
Structural concerns. Sagging ceilings, bowing walls, or damage to load-bearing walls requires an engineer’s assessment and potentially major framing repairs. Don’t guess on structural integrity.
-
Mold contamination. Mold growth covering more than 10 square feet, or any amount of black mold (Stachybotrys), needs professional remediation with containment barriers, negative air machines, and proper disposal methods.
-
Asbestos presence. Homes built before 1980 may have asbestos in drywall joint compound, ceiling texture, or insulation. If you’re cutting into walls or ceilings in an older home and suspect asbestos, stop. Hire a certified abatement contractor.
-
Electrical or plumbing complexity. Water damage near electrical panels, inside walls with wiring, or around plumbing systems creates shock and flood risks. If you need to cut near pipes or wires, get a licensed plumber or electrician involved.
-
Ceiling height safety. Working on cathedral ceilings, two-story foyers, or anywhere that requires scaffolding or extension ladders above 10 feet is dangerous without proper equipment and training. Falls cause serious injuries.
Professional water damage restoration services start with assessment. They use moisture meters and thermal imaging to find hidden water intrusion. They set up drying equipment and monitor moisture levels daily until everything’s dry. They handle mold remediation with containment, HEPA filtration, and antimicrobial treatments. They document the process for insurance claims. They replace damaged drywall, prime, and paint to match existing finishes.
You can learn more about professional intervention and assessment at Professional Water Damage Restoration Services.
Expect to pay $500 to $2,000 for professional stain removal and repair for a single room with minor damage, or $3,000 to $10,000+ for whole-home water damage with drying, mold remediation, and reconstruction. It’s expensive, but professionals carry liability insurance, provide warranties, and have the tools to handle situations that would overwhelm or endanger a homeowner. If you’re in over your head, spending money on proper help is cheaper than redoing failed DIY work or dealing with long-term mold and structural problems.
Preventing Future Water Stains on Drywall Surfaces
Stopping water stains before they start is a lot less work than repairing them after the fact. Most prevention comes down to routine maintenance and catching small problems before they turn into big ones.
Final Words
Drywall water stain removal starts with fixing the leak, drying everything completely, and cleaning with bleach solution before you prime and paint.
Skip the source repair and you’re just covering up a problem that’ll come back worse.
Take your time with the drying phase. Rushing into primer when moisture’s still trapped invites mold and recurring stains.
Use a real stain-blocking primer like Kilz. Regular paint won’t seal water stains no matter how many coats you pile on.
If the drywall feels soft or you see mold spreading, cut it out and replace it. Some damage you can’t paint over.
With the right sequence and a little patience, you’ll get clean walls that actually stay that way.
FAQ
How do you get water stains out of drywall?
To get water stains out of drywall, first fix the leak source, let the area dry completely for 24-48 hours, clean with a bleach solution (equal parts bleach and water), apply oil-based stain-blocking primer, and repaint with matching paint in two coats if needed.
Are water stains permanent on walls?
Water stains are not permanent on walls if treated properly. After the water source is fixed and the area dries completely, cleaning with bleach solution and applying stain-blocking primer before repainting will eliminate the discoloration and prevent bleed-through.
What to do after a water stain on the ceiling?
After discovering a water stain on the ceiling, locate and repair the leak source immediately, allow the area to dry for 24-48 hours using fans or dehumidifiers, clean the stain with bleach solution, seal with stain-blocking primer, and repaint with matching ceiling paint.
Can I paint over water stained drywall?
You cannot paint directly over water-stained drywall successfully. The stain will bleed through regular paint. First ensure the area is completely dry, apply oil-based or shellac-based stain-blocking primer like Kilz to seal the stain, then repaint with your finish coat.
When should you replace water-damaged drywall instead of cleaning it?
You should replace water-damaged drywall when you notice sagging sections, soft or crumbling spots when pressed gently, visible mold growth with fuzzy texture, or areas where paint and paper are peeling away, as these indicate structural damage beyond surface staining.
How long does drywall need to dry before removing water stains?
Drywall needs to dry for a minimum of 24-48 hours before removing water stains, though severe saturation may require 72 hours or longer. Use fans, dehumidifiers, and natural ventilation to speed drying, and test with a moisture meter or touch before proceeding.
What type of primer prevents water stains from bleeding through paint?
Oil-based or shellac-based stain-blocking primers prevent water stains from bleeding through paint. These primers seal tannins, iron deposits, and other water-soluble compounds that cause yellowish-brown discoloration. Brands like Kilz offer effective mold-resistant formulas for moisture-prone areas.
How do you find the source of a water leak causing ceiling stains?
To find the source of a water leak causing ceiling stains, inspect directly above the stain for roof damage, check plumbing fixtures and supply lines, examine HVAC condensation drains, look for ice dam evidence in winter, and trace water paths along rafters or pipes.